Cross Account Access Implementation
The ADOC platform supports cross-account access in cloud based file systems, allowing a principal in one account to access resources in a second account. This feature enhances flexibility and access control within the platform, implemented for GCP and AWS.
AWS S3
Before adding an AWS S3 data source in ADOC, if you manage user credentials and S3 buckets in separate AWS accounts, you'll need to grant specific permissions to allow access to the corresponding S3 buckets. This enables us to provide access to those buckets from the ADOC platform. This process is known as Cross Account Access.
Amazon Cross Account Setup
To setup an Amazon Cross Account Access between AWS Account A consisting of user credentials and S3 bucket in AWS Account B, perform the following:
- Create a bucket policy on the AWS account B with following contents:
{ "Version": "2012-10-17", "Statement": [ { "Effect": "Allow", "Principal": { "AWS": "arn:aws:iam::<ID of account A>:user/<IAM user in account A>" }, "Action": [ "s3:GetObject", "s3:ListBucket" ], "Resource": [ "arn:aws:s3:::<bucket in account B>/*", "arn:aws:s3:::<bucket in account B>" ] } ]}- Create an inline IAM policy and attach it to the IAM user in account A.
{ "Version": "2012-10-17", "Statement": [ { "Effect": "Allow", "Action": [ "s3:GetObject", "s3:ListBucket" ], "Resource": [ "arn:aws:s3:::<bucket in account B>", "arn:aws:s3:::<bucket in account B>/*" ] } ]}On completion of the above steps, user in account A must be able to run a Data Quality profile on an asset in account B S3 bucket.
To integrate AWS S3 with ADOC, see AWS S3.
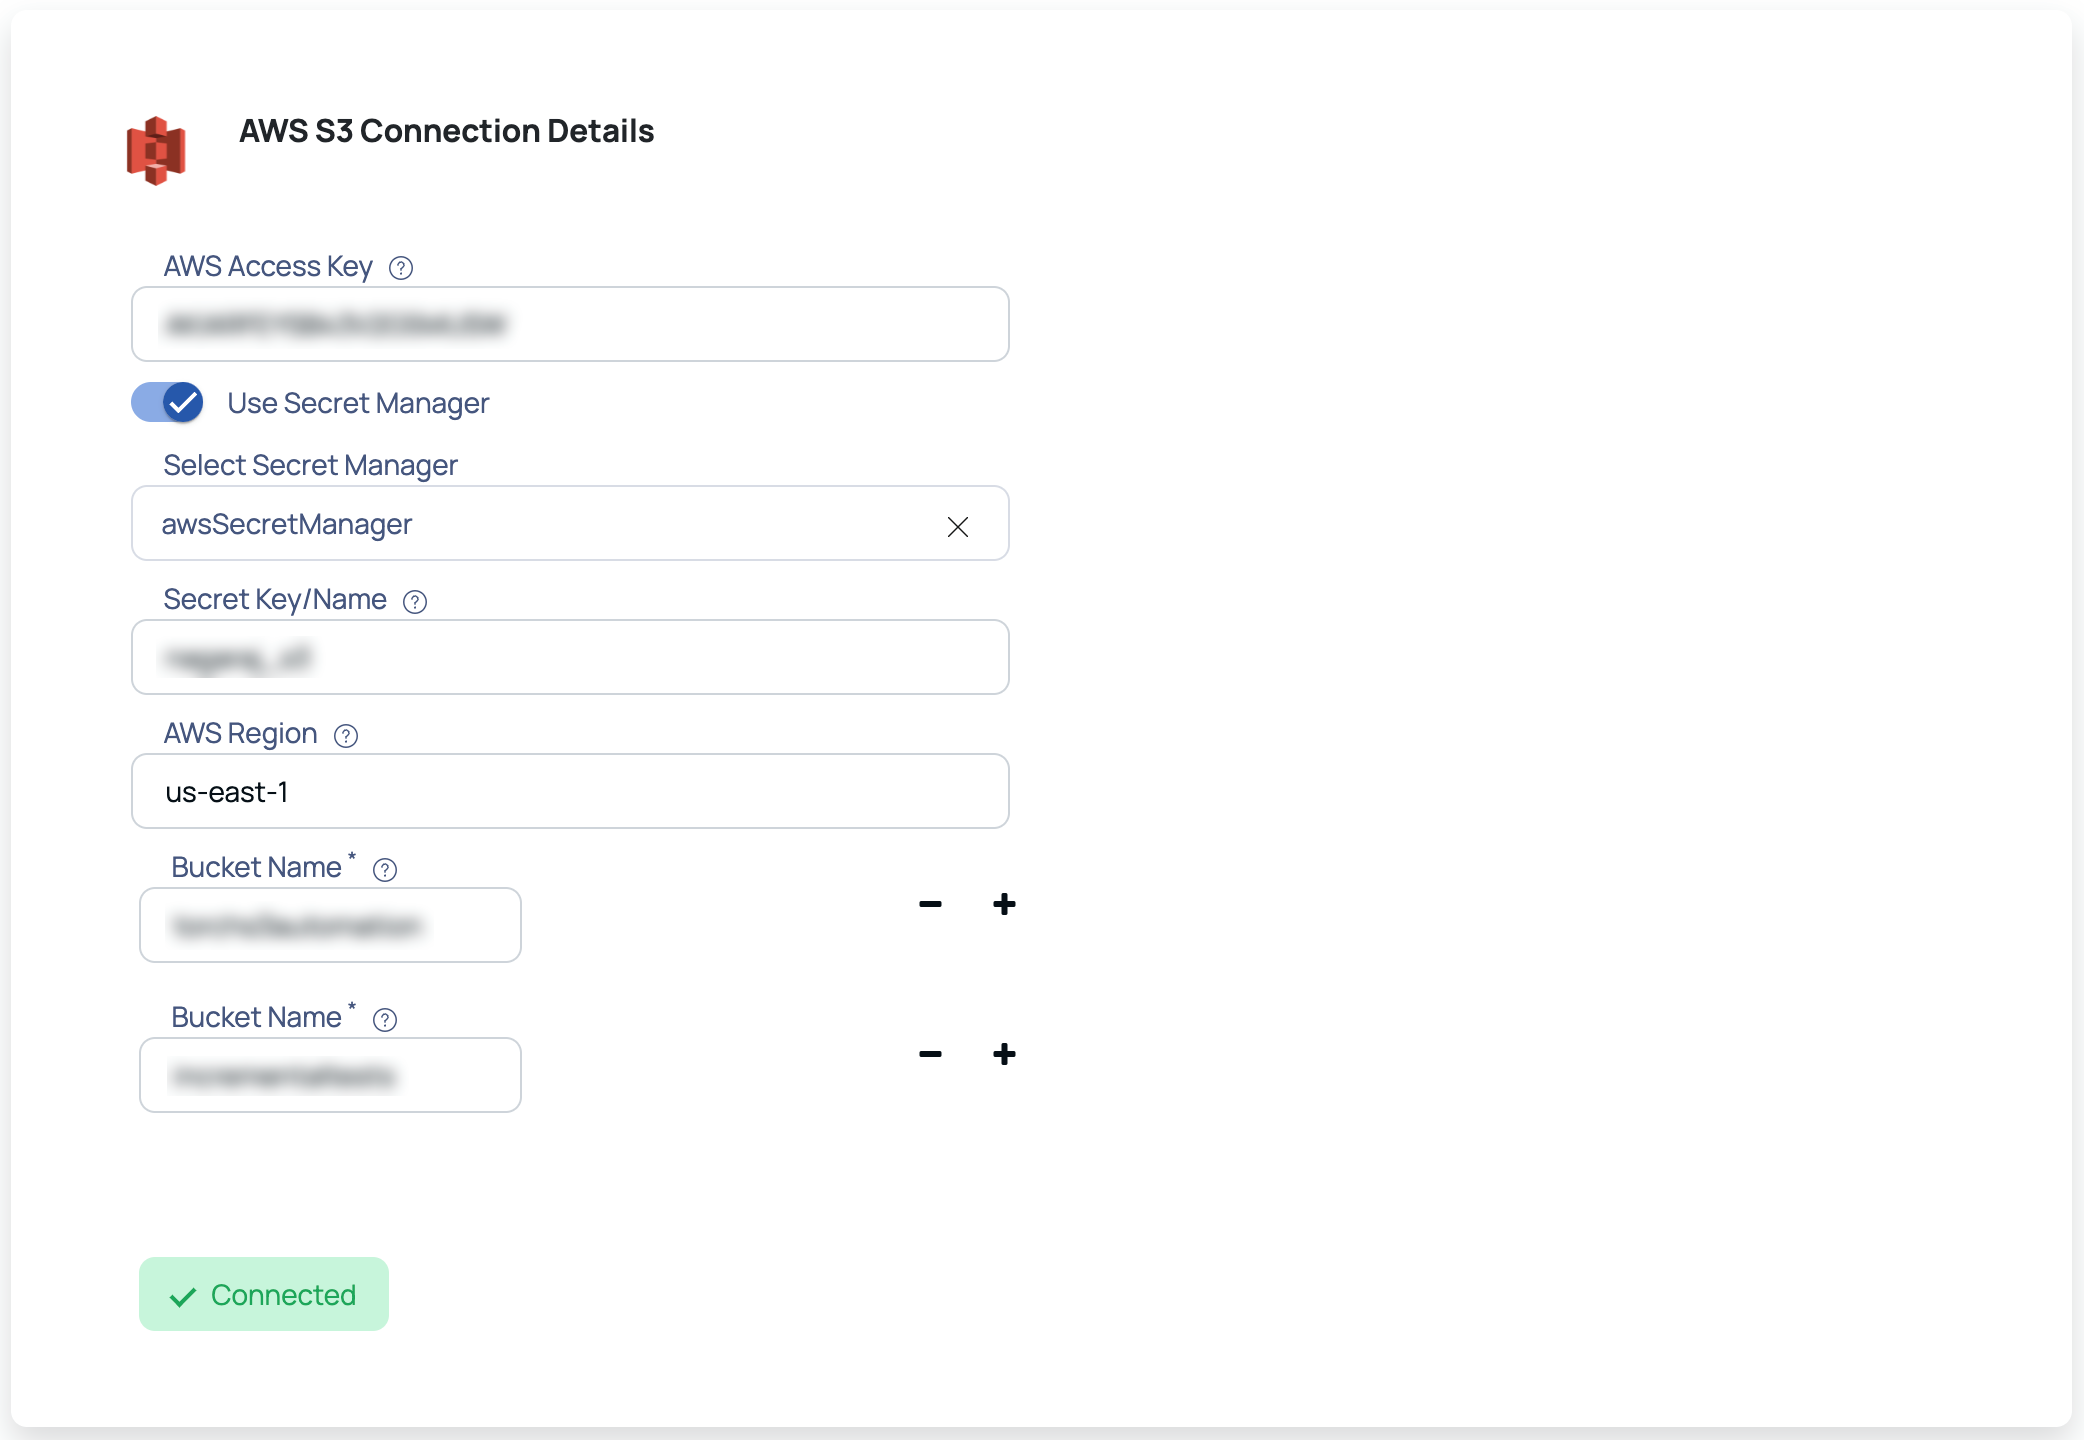
AWS S3 Connection Details page
- Enter your AWS access key in the AWS Access Key field.
- Enter your AWS secret key in the AWS Secret Key field or toggle Use Secret Manager option and provide the required details. For more details on how to view AWS access key and Secret key, refer to this AWS document.
- Enter the region in which your AWS account exists, in the AWS Region field. For more details on how to view your AWS region, refer to this AWS document.
- Enter the S3 bucket name for which you have provided cross-account access permissions. For more information, see AWS Cross Account Access Implementation. To add more buckets, click the
icon.
If the bucket does not have the required permissions, an error message is displayed on testing the connection.
- Click Test Connection.
If your credentials are valid, you receive a Connected message, else you get an error message to validate the AWS credentials entered.

Utilize AWS Secret Manager
To enable access to secrets stored in AWS Secrets Manager for a user who needs to retrieve secret values, follow these steps:
- Create a custom IAM policy with the following permissions:
{ "Version": "2012-10-17", "Statement": [ { "Effect": "Allow", "Action": "secretsmanager:GetSecretValue", "Resource": "arn:aws:secretsmanager:ap-south-1:079776845623:secret:souravsecret-w4JFog" } ]}- Attach this custom IAM policy to a custom role.
- Assign the custom role to the user who needs access to read the secret value from AWS Secrets Manager.
By providing these permissions, the user will only have access to read the secret value and use it in the application. Note that the assumed scenario is that the user credentials used to retrieve the secret are different from the user actually intended to read the data. Additionally, it is assumed that the user who will read the secret values resides in the same AWS account where the secret is located. If the secret is in a different account, please refer to the AWS documentation for granting permissions in a cross-account environment.
GCS
In a cross-account setup, user credentials are stored in a separate Google Cloud project or subscription from the actual data. In such cases, it is crucial to determine how to grant the user access to a specific bucket within the Google Cloud Storage environment.
GCS Cross Project Setup
To setup a Google Cross project file system access, perform the following:
- Create a user in Project A [service account] and assign a role as an IAM user in this Project.
- In Project B, include the service account user from Project A as an IAM member, assigning any dummy role.
- Create a custom role on the desired bucket with the following permissions:
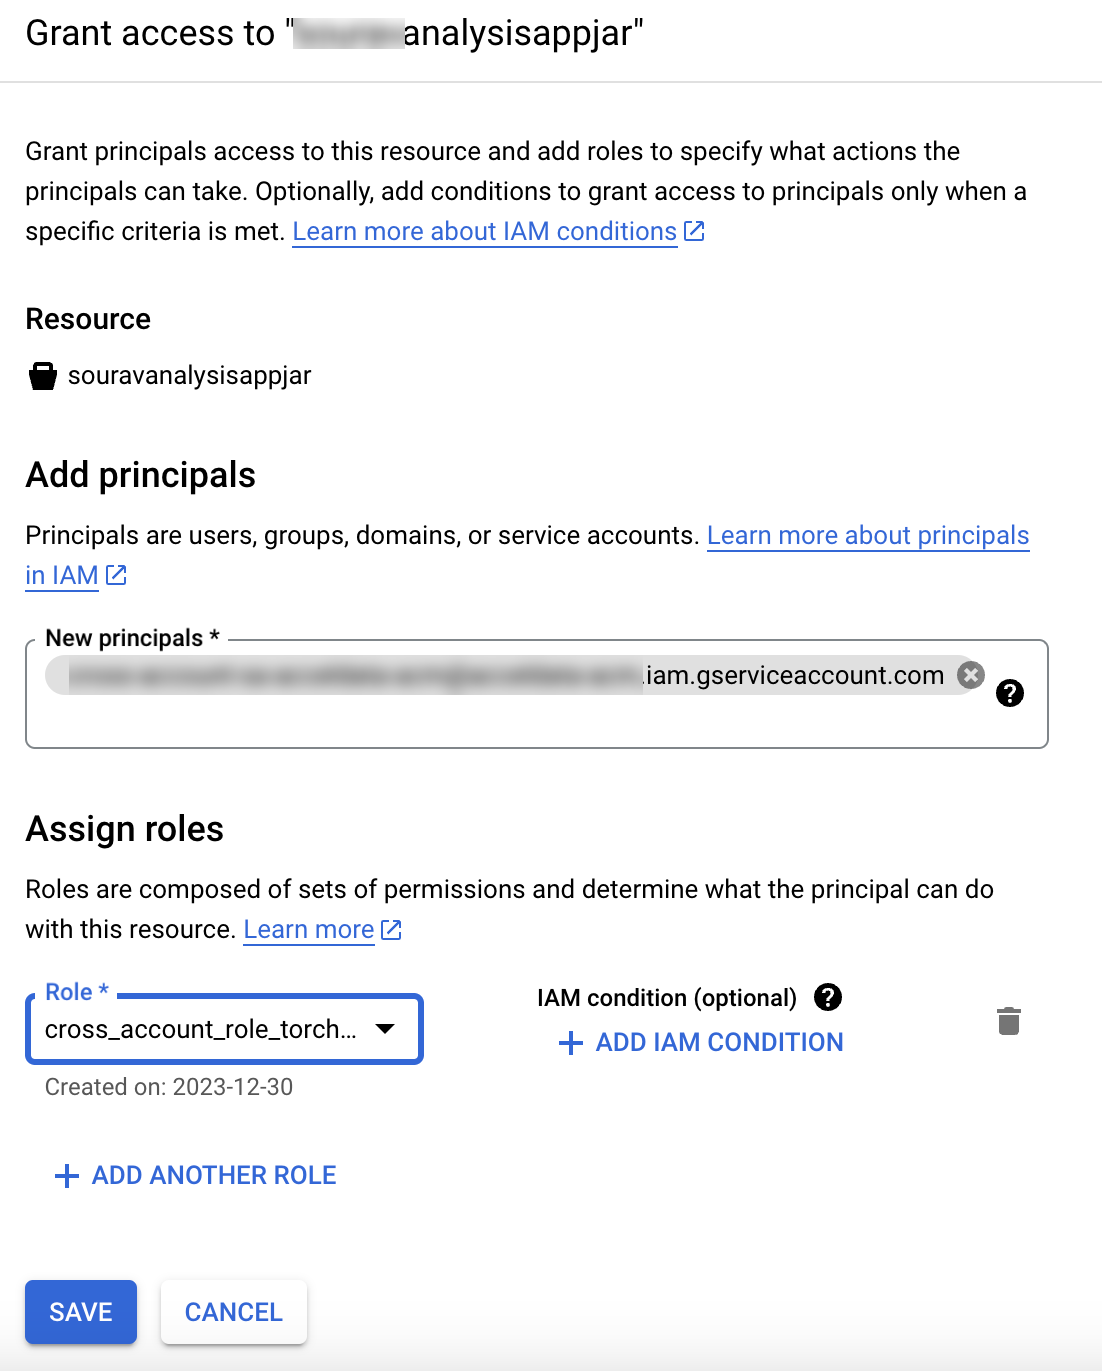
storage.buckets.getstorage.objects.getstorage.objects.list- On the Bucket Edit Access page, specify the principal and role to associate with this resource [as illustrated below]. Once configured, the user will be able to access the bucket according to the permissions granted.

To integrate GCS with ADOC, see Google | Cloud Storage.
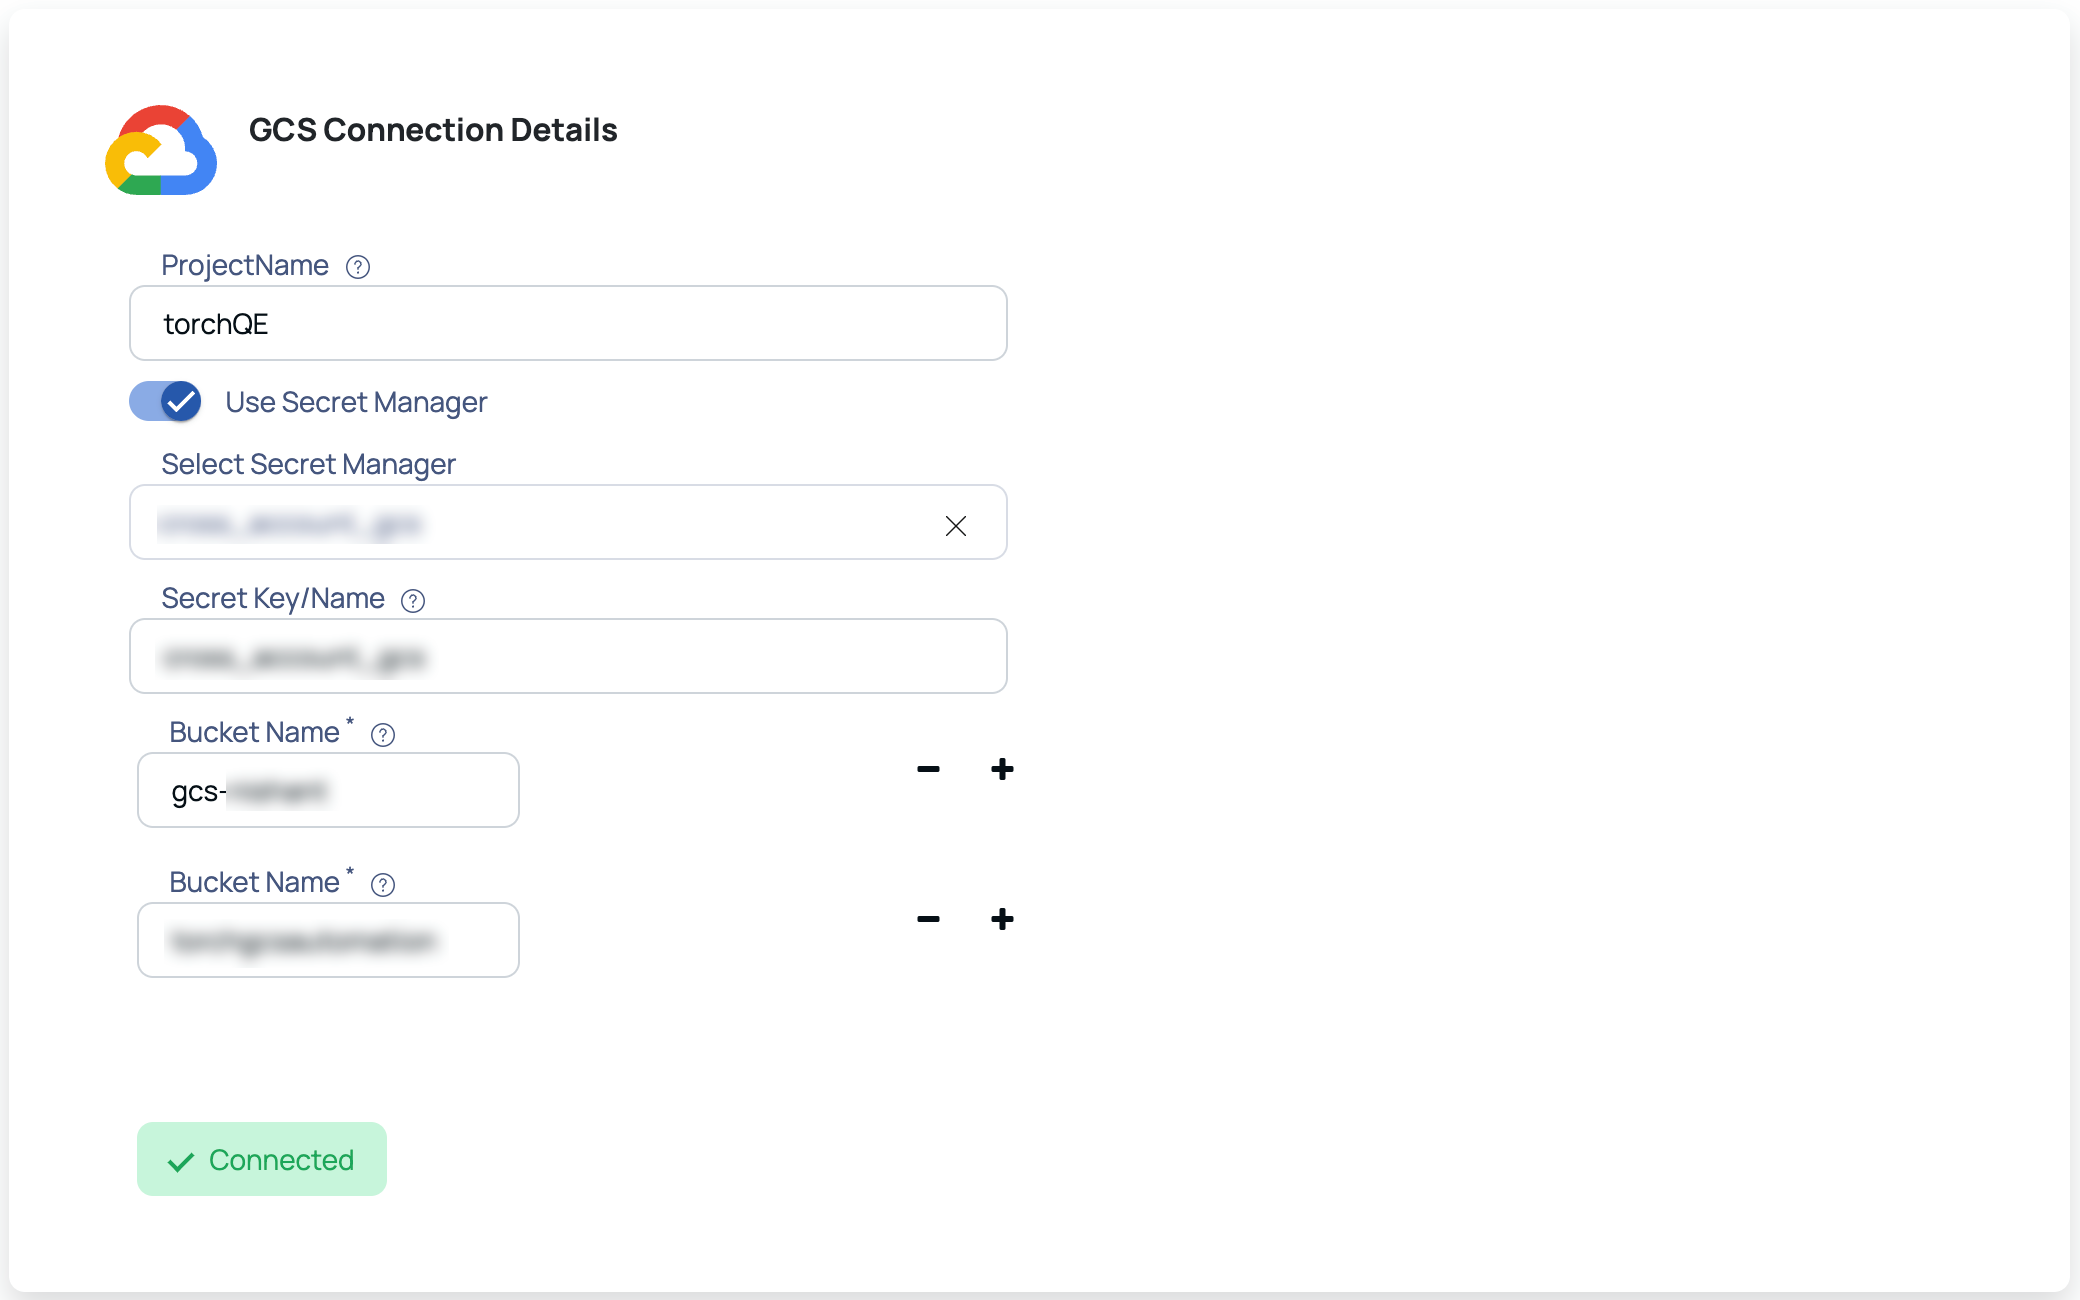
GCS Connection Details page
- Upload the GCS credentials file of your GCS account if you do not want to continue with a secret manager.
- Enter the project name.
- (Optional) Toggle the Use Secret Manager option to enable access to your GCS account, and input the required information in the following fields:
Select Secret Manager and Secret Key/Name stored inside the selected Secret Manager to retrieve the Google credentials file ID.
- Enter the bucket name for which you have provided cross-account access permissions. For more information, see GCS Cross Account Access Implementation. To add more buckets, click the
icon.
If the bucket does not have the required permissions, an error message is displayed on testing the connection.
- Click Test Connection.
If your credentials are valid, you receive a Connected message. If you get an error message, validate the GCS credentials file, secret manager credentials, or bucket name entered.

Utilize Google Secret Manger
To utilize the Google Secret Manager for accessing stored secrets in the same project as the user, follow these steps:
- Create a custom role with the following permissions:
secretmanager.secrets.getsecretmanager.versions.accesssecretmanager.versions.get- Attach this custom role to the service user whose credentials will be used to read the secret value from the Google Secret Manager.