Introduction
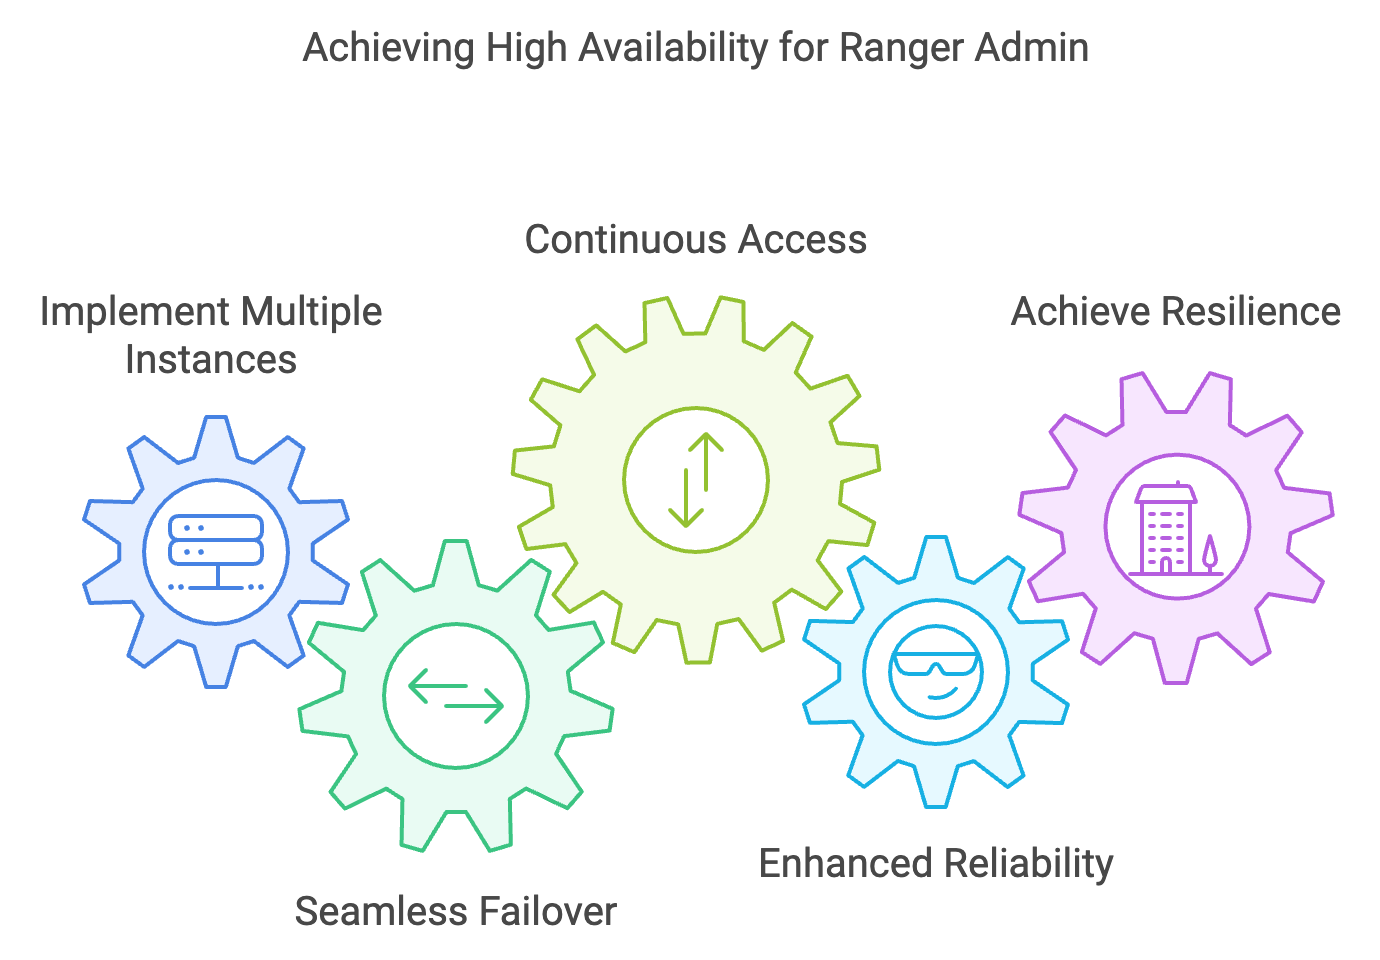
Apache Ranger provides a centralized security framework for managing access control policies across Hadoop components. Configuring Ranger Admin in High Availability (HA) mode ensures continuous availability and reliability of security services. This document outlines the steps to configure Ranger Admin HA, including integration with Kerberos authentication, using either MIT KDC or Active Directory, and SSL-enabled load balancers.
Prerequisites
Ambari-Managed Cluster: An operational Ambari-managed Hadoop cluster.
Multiple Ranger Admin Hosts: At least two hosts to run Ranger Admin instances for HA.
Load Balancer: A configured load balancer to distribute traffic between Ranger Admin instances.
Administrative Access: Ability to log in to Ambari and cluster nodes with sufficient privileges to add service.
Database Privileges: Ensure that the new Ranger Admin host has the necessary database access by granting privileges using the following command:
Mysql/MariaDB > GRANT ALL PRIVILEGES ON <DATABASE_NAME>.* TO '<USERNAME>'@'<NEW_HOSTNAME>' IDENTIFIED BY '<PASSWORD>' WITH GRANT OPTION;
For Kerberos Environment:
Either an MIT KDC or an Active Directory server acting as the KDC.
Administrative access to the KDC server.
Admin credentials to add Ranger service to the cluster.
Active Directory (AD) Environment:
Access to an AD server.
Administrative privileges for creating service accounts in AD.
Admin credentials to add Ranger service to the cluster.
SSL Certificates (for SSL setup):
SSL certificates are installed on the load balancer.
Access to truststore files for Ranger Usersync and plugins.
Set up Non-Kerberos Ranger HA
Set Up the Load Balancer:
Configure your load balancer to distribute incoming requests to the Ranger Admin hosts.
Ensure the load balancer's URL and port are accessible from your network.
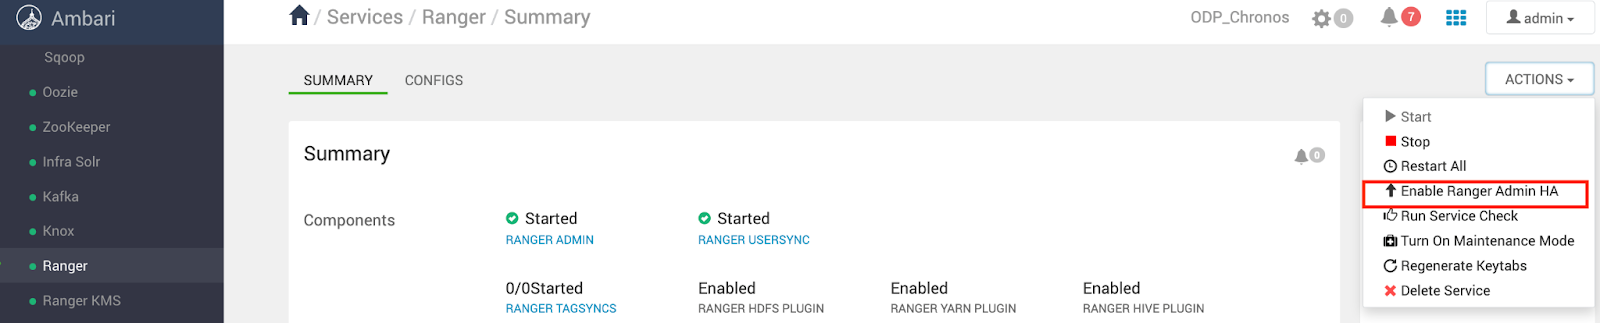
Enable Ranger Admin HA in Ambari:
Log in to the Ambari dashboard.
Navigate to Services > Ranger.
Click on Service Actions > Enable Ranger Admin HA to start the HA Wizard.
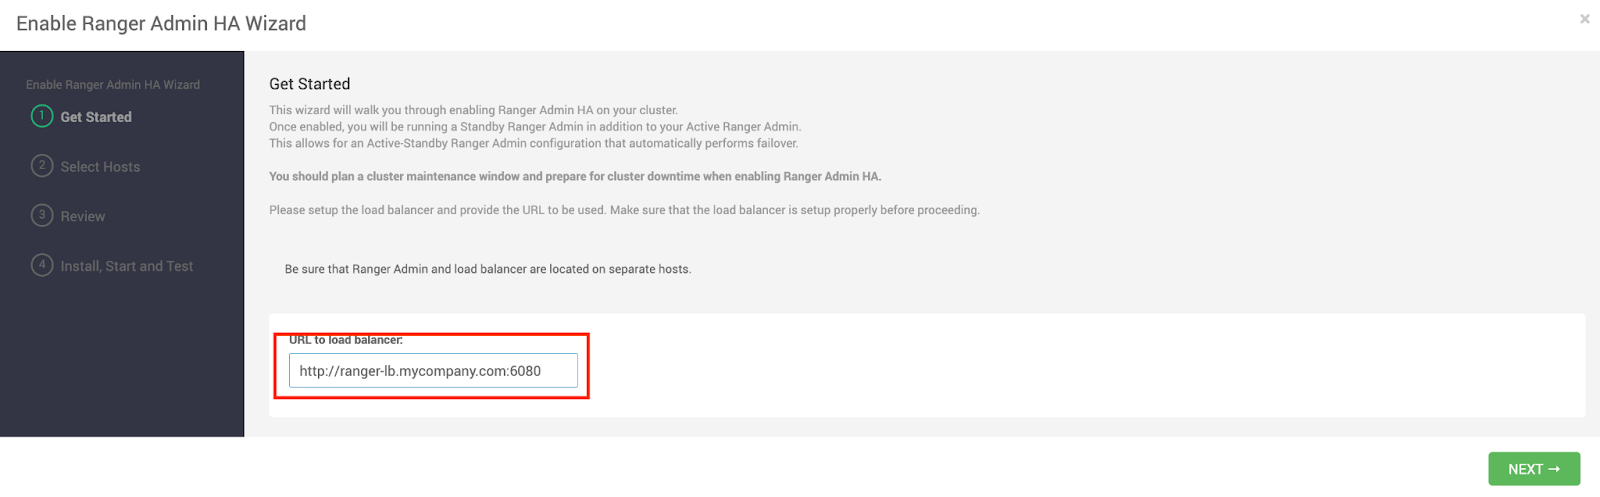
Configure the Load Balancer URL:
Enter the load balancer's URL and port (e.g., http://ranger-lb.mycompany.com:6080) on the Get Started page. If SSL is enabled on the load balancer, it uses the HTTPS protocol and specifies the appropriate port.
Click Next.
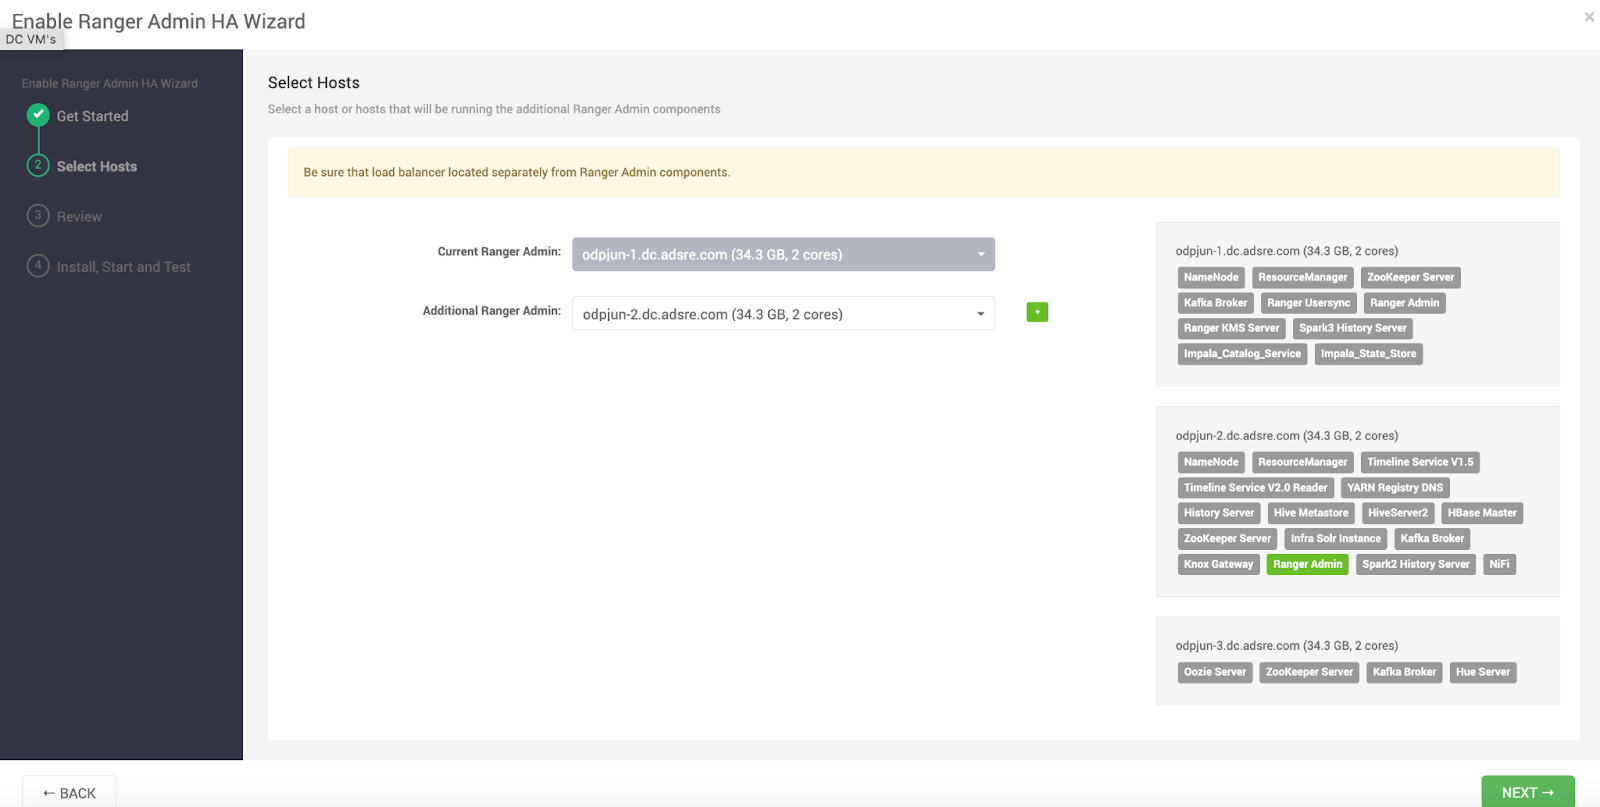
Assign Hosts:
Verify the hosts assigned for Ranger Admin instances on the Select the Hosts page.
Click Next.
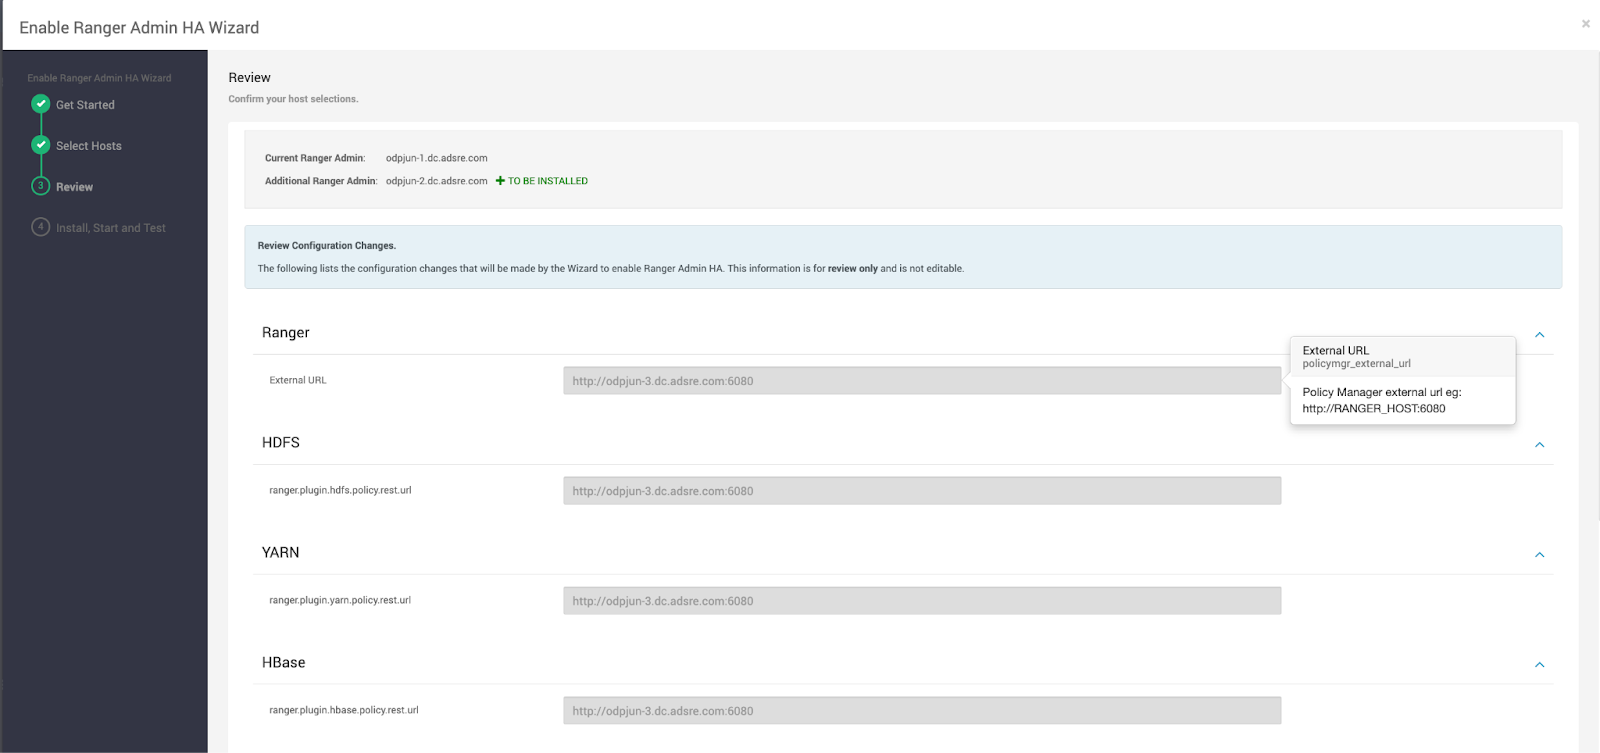
Review the Configuration:
Check all settings and configurations on the Review page.
Click Next.
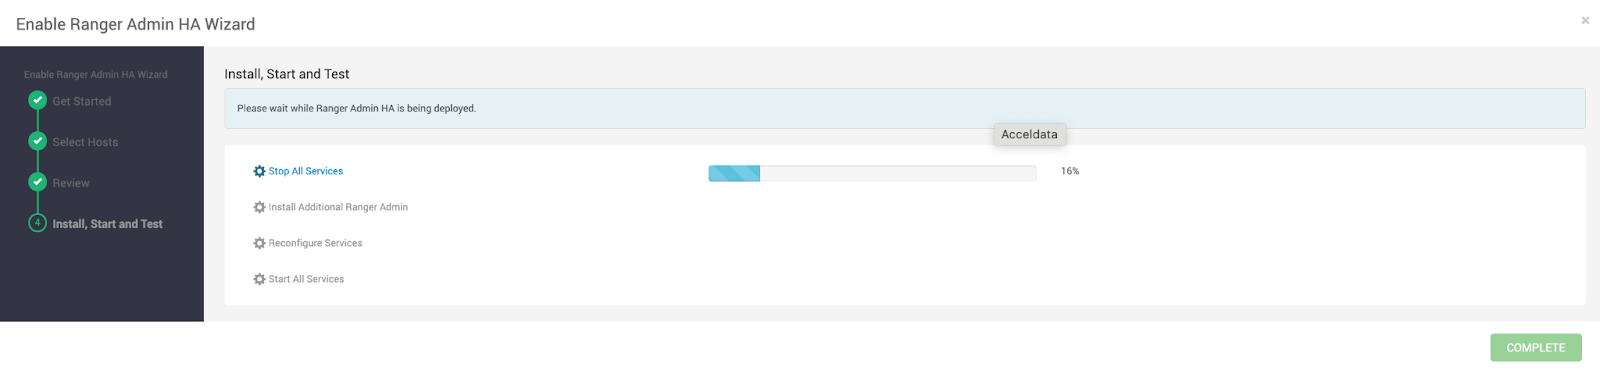
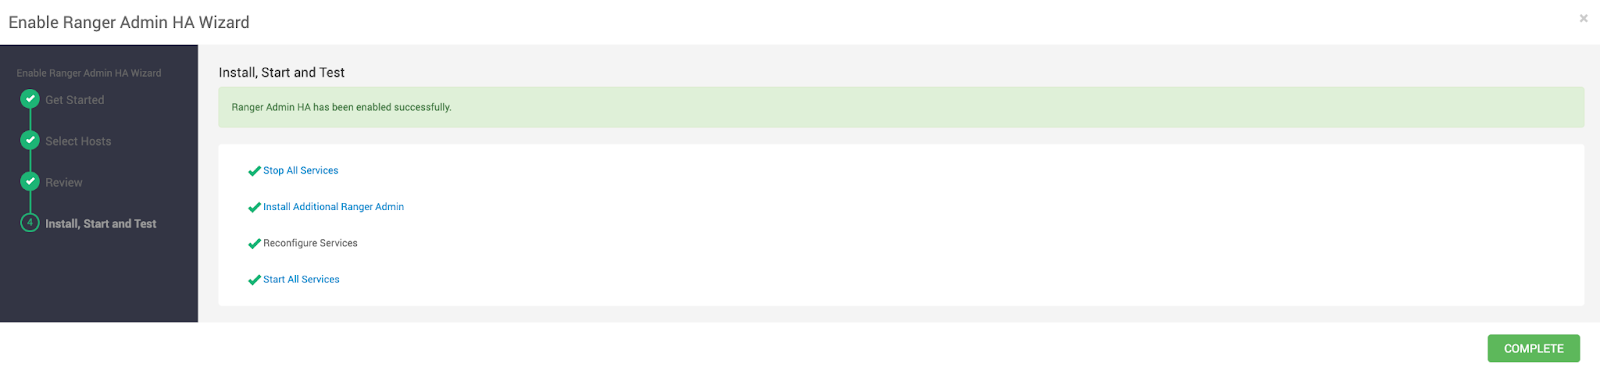
Install, Start, and Test:
Wait for Ambari to complete the setup on the Install, Start, and Test page.
Click Complete when finished.
Restart the Required Services: Navigate to the Ranger Summary page and click Actions > Restart All Required to restart services.
Test the HA Configuration
Stop one of the Ranger Admin services via Ranger > Service Actions > Stop on one Ranger host.
Access the Ranger Admin UI via the load balancer URL to confirm functionality.
Set up Kerberos Ranger HA
Set up MIT KDC
Follow these steps if your Kerberos environment uses MIT KDC.
Create Load Balancer HTTP Principal
Connect to the KDC Server:
Open a terminal and SSH into your KDC server.
Open the Kerberos admin interface using
kadmin.local.
Add HTTP Principal for Load Balancer: Manually create the principal for the load balancer.
Generate Keytabs for Load Balancer and Ranger Admin Nodes.
2.1 Generate Keytab for Load Balancer
2.2 Verify Existing Keytabs for Ranger Admin Nodes
Ambari typically handles the creation of Ranger Admin node keytabs. Ensure that these keytabs are available.
The default keytab is /etc/security/keytabs/rangeradmin.service.keytab.
Log in to ranger admin Node 1:
klist -kt /etc/security/keytabs/spnego.service.keytabLog in to ranger admin Node 2:
klist -kt /etc/security/keytabs/spnego.service.keytab
Merge Keytabs Using rkt and wkt.
Merge Keytabs into a Common Ranger HA Keytab:
Login to Node: Access the Linux node.
Verify ktutil: Ensure the ktutil command is available (which ktutil).
Gather Keytabs: Copy these files to one location:
/etc/security/keytabs/spnego.ranger-admin1.keytab
/etc/security/keytabs/spnego.ranger-admin2.keytab
/etc/security/keytabs/loadbalancer.keytab
Use the following commands to read each keytab and merge them into a unified keytab file.
For reference:
b. Set Permissions on the Merged Keytab: Secure the merged keytab file.
Distribute the Ranger HA Keytab File to All Nodes: Copy the unified
ranger.ha.keytabfile to both Ranger Admin nodes to ensure that each node has access to the keytab.
This ensures that the keytab file is present on both Ranger Admin nodes, allowing Ambari to correctly reference it during the configuration process.
Update Ranger Configuration in Ambari
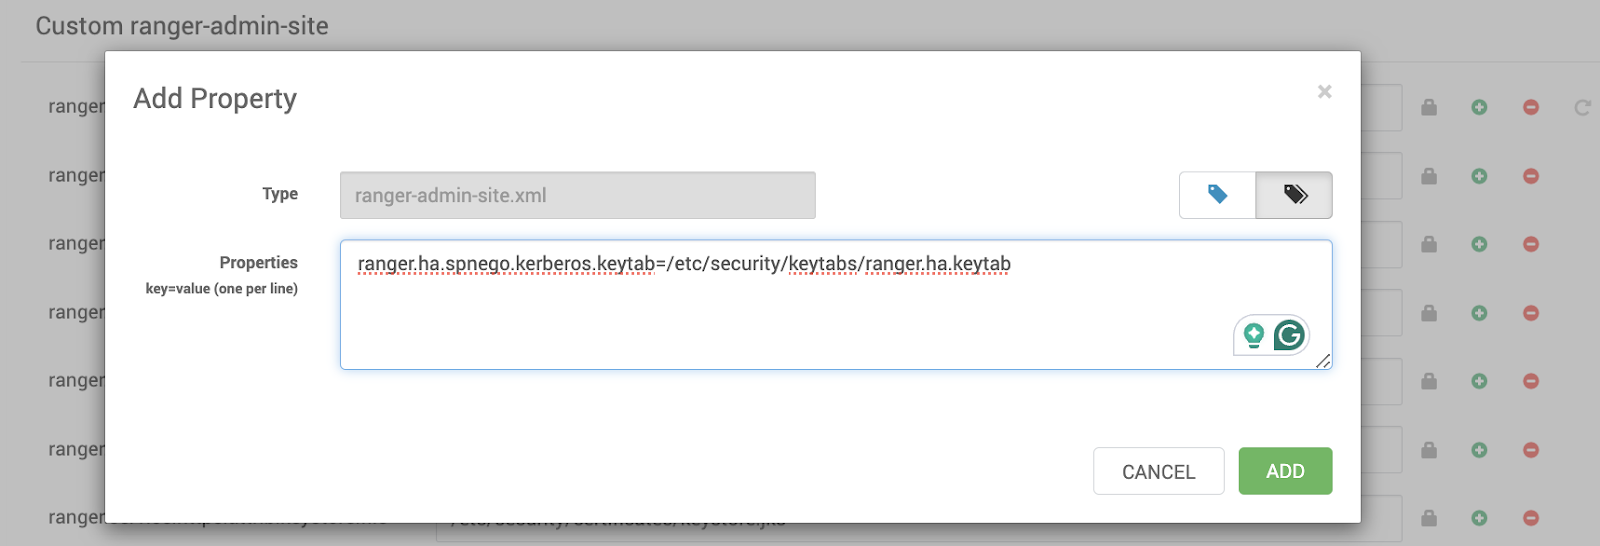
Configure Ranger HA Keytab in Ambari:
Log in to the Ambari web UI.
Open Ambari UI > Configs > Advanced > Custom ranger-admin-site.Update Keytab Path.
Set the following property:
b. Restart the Ranger Service: Restart the Ranger service to apply the new configuration.

Set up Active Directory KDC
Follow these steps if you are using Active Directory as the KDC.
Create Load Balancer HTTP Principal in AD.
Create SPN for Load Balancer: Open a command prompt on the AD Domain Controller and run:
Generate Keytab for Load Balancer Using ktpass.
Generate the Keytab File for the Load Balancer:
Merge Keytabs Using rkt and wkt
Merge Keytabs into a Common Ranger HA Keytab:
Log in to Node: Access the Linux node**.**
Verify ktutil : Ensure the ktutil command is available (which ktutil).
Gather Keytabs: Copy these files to one location:
/etc/security/keytabs/spnego.ranger-admin1.keytab
/etc/security/keytabs/spnego.ranger-admin2.keytab
/etc/security/keytabs/loadbalancer.keytab
Use the following commands to read each keytab and merge them into a unified keytab file:
b. Distribute the Ranger HA Keytab File to All Nodes: Copy the unified ranger.ha.keytab file to both Ranger Admin nodes to ensure that each node has access to the keytab:
This ensures that the keytab file is present on both Ranger Admin nodes, allowing Ambari to reference it correctly during the configuration process.
c. Set Permissions on the Merged Keytab: Secure the merged keytab file:
Update Ranger Configuration in Ambari.
Configure Ranger HA Keytab in Ambari:
Navigate: Open Ambari UI > Configs > Advanced > Custom ranger-admin-site.
Update Keytab Path: Set the following property.

b. Restart the Ranger Service: Restart the Ranger service to apply the changes.

Set Up Load Balancer SSL
Configure Usersync with SSL
Import the Load Balancer Certificate into the Usersync Truststore: Use the following command to import the certificate:
Restart the Ranger Usersync: Restart the Usersync service to recognize the updated truststore.
Configure HDFS Plugin with SSL
Import Load Balancer Certificate into HDFS Plugin Truststore: Run the import command for the HDFS plugin truststore:
Restart the HDFS Service: Restart the HDFS service to load the new truststore.
Follow similar steps for other services for which the Ranger Plugin is enabled.
Verification
Access the Ranger Admin UI via Load Balancer
Verify that the Ranger Admin login page is accessible without SSL errors.
Check the Ranger Plugins Status
Confirm that plugins report status with HTTP Response Code 200.
Test HA Functionality
Stop one Ranger Admin instance and check failover via the load balancer.
Set Up HAProxy (Load Balancer) for Ranger High Availability (HA)
The steps in this topic guide you to set up HAProxy on a Rocky Linux 8 node to achieve Ranger High Availability (HA). The documentation covers both Non-SSL and SSL configurations, suitable for public-facing customer documentation.
Prerequisites
Before proceeding with the HAProxy setup for Ranger HA, ensure the following prerequisites are met:
Ranger Admin URLs: Two Ranger Admin service URLs (e.g., http://ranger1.mycompany.com:6080 and http://ranger2.mycompany.com:6080).
Administrative Access: Root or sudo access.
SSL Certificates (for SSL setup):
A valid SSL certificate and corresponding private key.
Alternatively, access to a Certificate Authority (CA) to generate certificates.
Set Up HAProxy for Ranger HA (Non-SSL)
This section guides you through setting up HAProxy without SSL to load balance between two Ranger Admin instances.
Install HAProxy
Install HAProxy.
b. Verify the Installation.
You can see the HAProxy version information.
Configure HAProxy
Backup Default Configuration:
cp /etc/haproxy/haproxy.cfg /etc/haproxy/haproxy.cfg.bak:> /etc/haproxy/haproxy.cfg.Edit HAProxy Configuration: Open the HAProxy configuration file using your preferred text editor:
vi /etc/haproxy/haproxy.cfg.Add the Ranger HA Configuration: Replace the existing content with the following configuration or append the Ranger HA configuration to the file:
Update both Ranger Admin host name correctly.
Configuration Breakdown:
Global Section:
pidfile /var/run/haproxy.pid: Specifies the file where HAProxy writes its process ID.maxconn 4000: Sets the maximum number of concurrent connections HAProxy will handle.user haproxy & group haproxy: Defines the user and group under which HAProxy will run.daemon: Runs HAProxy as a background process.stats socket /run/haproxy/admin.sock mode 660 level admin: Enables a Unix socket for HAProxy statistics and management with specified permissions.stats timeout 30s: Sets the timeout for the stats socket.
Defaults Section:
mode http: Sets the default mode to HTTP.log global: Inherits logging settings from the global section.option httplog: Enables HTTP logging.option dontlognull: Prevents logging of connections with no data.option forwardfor except 127.0.0.0/8: Adds the X-Forwarded-For header to requests, except from localhost.option redispatch: Enables redispatching of requests to other servers if a server becomes unavailable.retries 3: Specifies the number of retry attempts for failed connections.timeout settings: Define various timeout values to ensure HAProxy doesn't hang indefinitely.maxconn 3000: Sets the maximum number of concurrent connections per frontend/backend.errorfile directives: Specify custom error pages for different HTTP error codes.Frontend ( ranger_frontend ):
bind *:80: Listens on port 80 for incoming HTTP requests.default_backend ranger_backend: Routes traffic to the ranger_backend.
Backend ( ranger_backend ):
balance roundrobin: Distributes requests evenly between Ranger instances.cookie SERVERID insert indirect nocache: Enables cookie-based session stickiness. This ensures that once a client is directed to a specific backend server, subsequent requests from the same client are directed to the same server.server ranger1 and server ranger2: Defines the two Ranger Admin servers with their respective hostnames and ports.
Save and Exit: Press Esc, then type :wq and press Enter to save and exit the editor.
Adjust Firewall Settings (Optional)
Allow HTTP Traffic or Disable Firewall.
b. Verify Firewall Rules
c. Ensure that http is listed under services.
Enable and the Start the HAProxy Service
Enable HAProxy to Start on Boot: systemctl enable haproxy
Start the HAProxy Service: systemctl start haproxy
Check HAProxy Status: sudo systemctl status haproxy
The service must be active and running.
Verify the HAProxy Configuration
Access Ranger via HAProxy:
Open a web browser and navigate to: http://<HAProxy_Server_IP_or_Domain>.
You must be redirected to one of the Ranger Admin instances.
Test Failover
Stop one Ranger Admin service and ensure that HAProxy redirects traffic to the remaining active instance.
Restart the stopped Ranger Admin service and verify that load balancing resumes normally.
Set Up HAProxy for Ranger HA (SSL)
This section guides you through setting up HAProxy with SSL to load balance between two Ranger Admin instances securely.
Install HAProxy
If you still need to install HAProxy, follow Step 1: Install HAProxy in the Non-SSL section.
1. Using Self-Signed Certificates
Self-signed certificates are certificates signed by the entity creating them rather than a trusted Certificate Authority (CA). While they are not trusted by default in browsers and other clients, they are suitable for internal use within a controlled environment.
A. Generate a Self-Signed Certificate:
Create a Directory for SSL Certificates.
Generate the Certificate and Private Key
Replace odpjun-3.dc.adsre.com with your actual domain name.
Parameters Explained:
-x509: Outputs a self-signed certificate instead of a certificate request.
-nodes: Skips the option to secure the private key with a passphrase.
-days 365: Sets the certificate validity period to 365 days.
-newkey rsa:2048: Generates a new RSA key of 2048 bits.
-keyout: Specifies the output file for the private key.
-out: Specifies the output file for the certificate.
-subj: Provides the certificate subject details to avoid interactive prompts.
Combine the Certificate and Private Key into a PEM File: HAProxy requires a combined PEM file containing both the certificate and the private key.
Set Proper Permissions
B. Configure HAProxy to Use the Self-Signed Certificate.
Edit HAProxy Configuration: Open the HAProxy configuration file.
Update the SSL Frontend Section: Ensure your frontend section for SSL looks as below.
Reload HAProxy to Apply Changes.
C. Trusting the Self-Signed Certificate
Since the self-signed certificates are not trusted by default, you need to manually trust them on any client machines accessing the service.
Export the Certificate
Update the CA Certificates.
Import the Certificate on Client Machines.
Windows: Import the certificate into the Trusted Root Certification Authorities store.
macOS: Import the certificate into the Keychain and set it to always trust.
Linux: Place the certificate in /usr/local/share/ca-certificates/ and run sudo update-ca-trust.
2. Setting Up an Internal Certificate Authority (CA)
Creating an internal CA allows you to issue certificates that can be trusted within your organization. This approach is more scalable and manageable compared to self-signed certificates, especially when dealing with multiple services.
2.1 Create an Internal CA
Generate the CA Private Key
Create the CA Certificate
2.2 Issue Server Certificates Using the Internal CA
Generate a Private Key for HAProxy
Create a Certificate Signing Request (CSR)
Sign the CSR with the Internal CA
Combine the Certificate and Private Key into a PEM File
Set Proper Permissions
2.3 Configure HAProxy to Use the Issued Certificate
Follow the same steps as in the Self-Signed Certificates section to configure HAProxy.
2.4 Distribute the Internal CA Certificate to Clients
For clients to trust the certificates signed by your internal CA, distribute the internal_ca.pem certificate and install it in their trusted certificate stores.
Using a Private CA with Trusted Certificates
If you have an existing private CA within your organization (e.g., Active Directory Certificate Services, HashiCorp Vault), you can leverage it to issue certificates for HAProxy.
3.1 Obtain Certificates from the Private CA
Generate a CSR
Submit the CSR to Your Private CA: This process varies depending on your CA solution. Typically, it involves submitting the CSR via a web interface or using a CA client.
Receive the Signed Certificate: Once approved, download the signed certificate from your CA.
Combine Certificate and Private Key:
Set Proper Permissions:
3.2 Configure HAProxy
Follow the same configuration steps as in the Self-Signed Certificates section to set up HAProxy with the issued certificate.
3.3 Distribute the CA Certificate
Ensure that all client machines have the private CA's root certificate installed in their trusted certificate stores to avoid SSL warnings.
Configure HAProxy with SSL
Backup the Existing Configuration
Edit the HAProxy Configuration: Open the HAProxy configuration file.
Add the Ranger HA SSL Configuration: Replace the existing content or append the following SSL-specific configuration.
Configuration Breakdown:
frontend ( ranger_frontend_ssl ):
*bind :443 ssl crt /etc/haproxy/ssl/haproxy.pem: Listens on port 443 with SSL enabled using the specified PEM file.
backend (ranger_backend ) : Same as the non-SSL configuration.
Save and Exit: Press Esc, type :wq, and press Enter to save and exit.
Adjust Firewall Settings
Allow HTTPS Traffic
Verify Firewall Rules
Ensure that
httpsis listed under services.
Enable and Start HAProxy Service
Enable HAProxy to Start on Boot
Start HAProxy Service
Check HAProxy Status
The service must be active and running.
Configuring HAProxy Logging
Create a configuration file for HAProxy logging in rsyslog:
Restart rsyslog:
Verify Logging: Verify logs in tail -f /var/log/haproxy.log.
Verify HAProxy SSL Configuration
Access Ranger via HAProxy with SSL
Open a web browser and navigate to https:/<HAProxy_Server_IP_or_Domain>.
You must see a secure connection (HTTPS) and be redirected to one of the Ranger Admin instances.
Test the SSL Certificate
Browser Verification: Ensure the browser indicates a secure connection without certificate warnings.
Command-Line Verification: Review the certificate details to confirm correct setup.
Test Failover
Stop one Ranger Admin service and ensure HAProxy redirects traffic to the remaining active instance over HTTPS.
Restart the stopped Ranger Admin service and verify load balancing resumes normally.