Follow the below steps to upgrade the Ambari server.
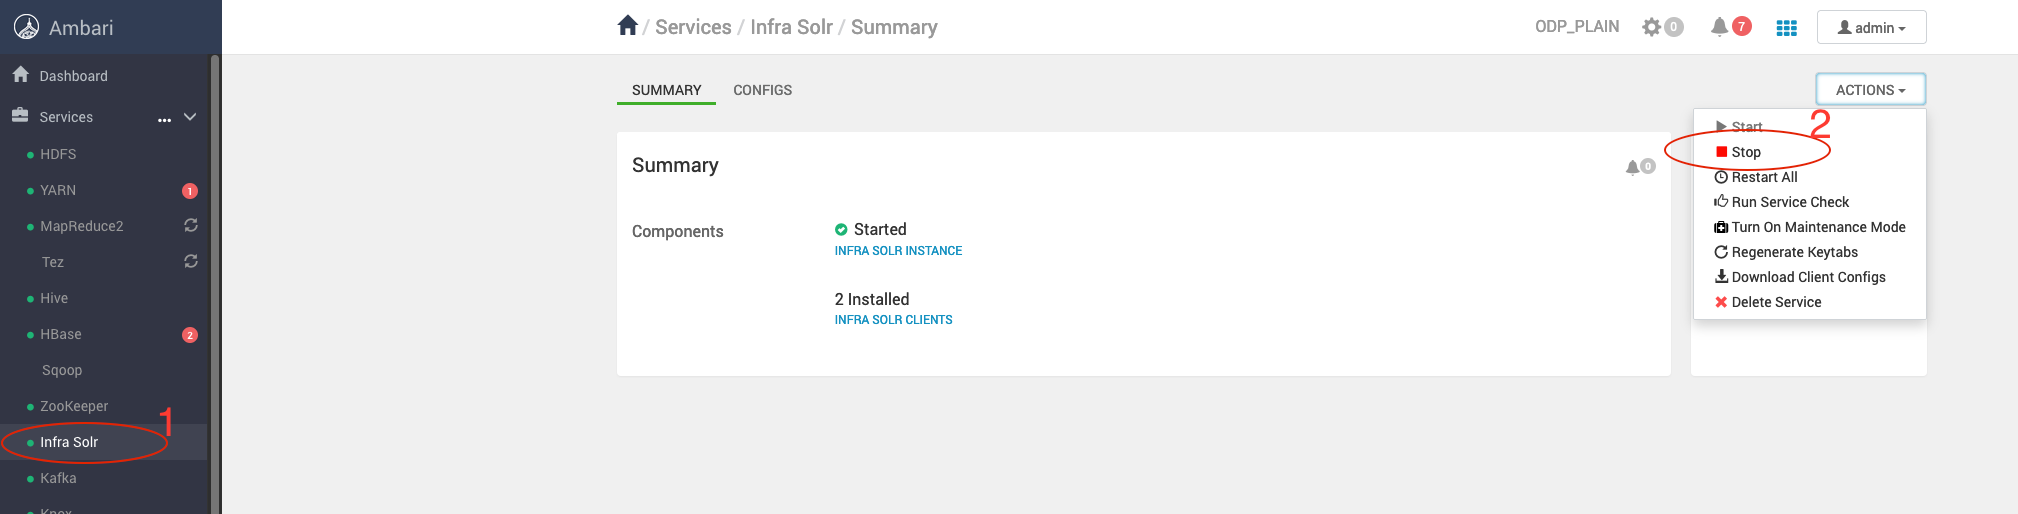
Stop Infra-solr Service
Stop the Infra-solr Service from Ambari-UI.
Stop Ambari Server and Agents
Stop Ambari Server
Take the backup of ambari-server configs.
/etc/ambari-serfver/conf/
Stop Agents
Stop Ambari-agent on every cluster nodes.
Back up Ambari Database
Take the Ambari-server backend database backup from the server host.
DB Backup Commands
The upgraded version Ambari-2.7.8.2-2 supports only Python 2. Please ensure Python 2 is installed and configured on all cluster nodes before proceeding with the upgrade.
Verify the Python Version
Response: Python 2.7.x.
Add Ambari Repo on Cluster Nodes
Back up the Old Ambari Repository
Retrieve the latest Ambari repository details from Accessing Acceldata Repositories and add it to all cluster nodes.
List the existing Ambari packages
On RHEL
On Ubuntu
Example Output (if the current Ambari version is 2.7.6.0-1):
Remove the Existing Ambari Packages
From the Ambari Server node, remove the installed packages before upgrading:
On RHEL
On Ubuntu
Note
Adjust the package names based on the installed versions on each node.
You can verify installed packages before removal using:
On RHEL
On Ubuntu
Make sure the Amabri packages are not installed.
Install Ambari packages
Install the latest Ambari-server only on ambari-server node.
Server Node
For RHEL
For Ubuntu
Ambari Server Configuration Files Restore
Restore the configuration files backed up at step4 (Backup Taken in step 4).
Restore ambari.properties File
When prompted, enter 'y' to confirm.
Restore passwd.dat File
Ambari Server Schema Upgrade
Before upgrading, ensure a database backup has been taken (as mentioned in Step 6).
Run the Ambari Server upgrade command:
Response when prompted:
After the successful completion, you must see the following message.
Start Ambari-server
Once started, verify that the Ambari UI is accessible using the same URL as before.
Verify Ambari Version
Verify the upgraded Ambari version in admin->about on top right corner in Ambari UI.
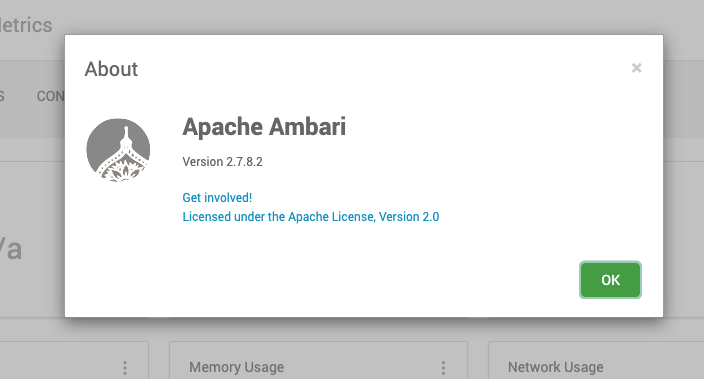
The Ambari version is upgraded successfully.