Profiling large assets or data sets instantaneously can be time-consuming. Data Source Auto Profiling allows the user to schedule profiling. This saves a lot of time. Once a data source is configured for auto profiling, you will always be able to view the most recently updated data in the asset details window.
Add Configuration
To configure a cron based profiling job for a data source, follow the given procedure.
- Click Settings from the drop-down list of the
More menu. - Click Auto Profile from the left menu bar. The Data Source Auto Profiling window is displayed.
- Click Add Configuration. The Create Auto Profile Config wizard is displayed.
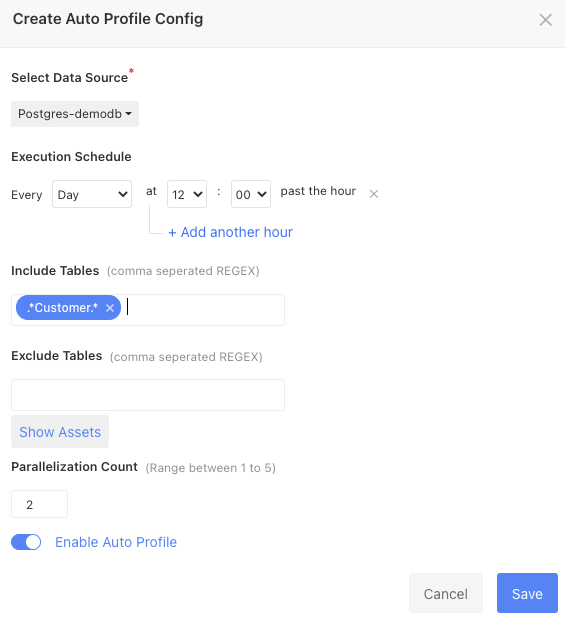
- Fill in the following properties
| Field Name | Description |
|---|---|
| Select Data Source | From the drop-down list, select a data source to configure and start auto profiling. |
| Execution Schedule | Select one of the following time tags: Minute, Hour, Day, Week, Month, and Year. |
| Include Tables | Write a comma separated regex query to include the tables that need to be auto profiled. |
| Exclude Tables | Write a comma separated regex query to exclude the tables from being auto profiled. |
| Show Assets | On including or excluding tables, click show assets to view the assets that belong to the tables. |
| Parallelization Count | Parallelization count allows you to select number of tables that can be auto profiled simultaneously. |
- Click the
icon to enable or disable the configuration. - Click the Save button.
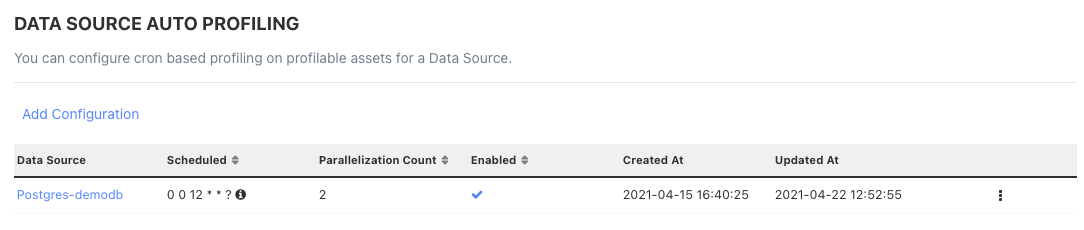
View Configurations
Once a data source is configured, it is displayed in a table along with the following properties:
| Column Name | Description |
|---|---|
| Data Source | Name of the data source that was configured. |
| Scheduled | Time that was scheduled for the cron job. |
| Parallelization Count | Number of tables selected for parallelization. |
| Enabled | |
| Created At | Date and time at which the configuration happened. |
| Updated At | Date and time at which the configuration was last updated. |
Delete Configurations
To delete a configuration, follow the given procedure:
- Click the
icon. - Click Delete. A confirmation dialog box is displayed.
- Click Ok.

Edit Configurations
To edit a configuration, follow the given procedure:
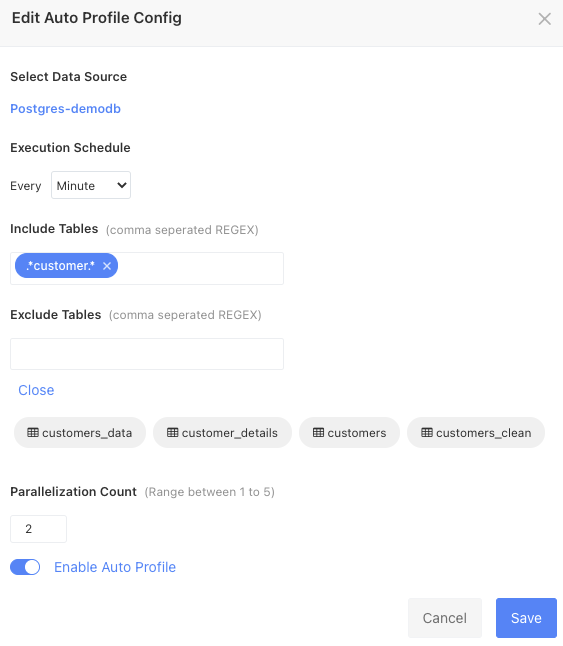
- Click the name of a data source from the data source auto profile configuration window or click the
icon and select Edit. - The Edit Auto Profile Config wizard is displayed.
- Make your changes to the configuration.
- Click Save.
Was this page helpful?