Apache | Hive
Hive is an open-source data warehouse system. Hive uses a SQL-like language called HiveQL (HQL) for querying and manipulating data stored in its data warehouse. It supports various data formats such as CSV, JSON, and Parquet. For data saved in your Oracle data source, Acceldata Data Observability Cloud (ADOC) provides data reliability.
To add Hive as a data source in ADOC, you must first create or use an existing data plane. Once Hive has been added as a data source, you may view the specifics of your assets in the Hive database under ADOC's Data Reliability tab.
Add as Data Source
To add Hive as a Data source:
- Navigate and select the Register icon from the left pane.
- In the Data Source tab click on the Add Data Source button.
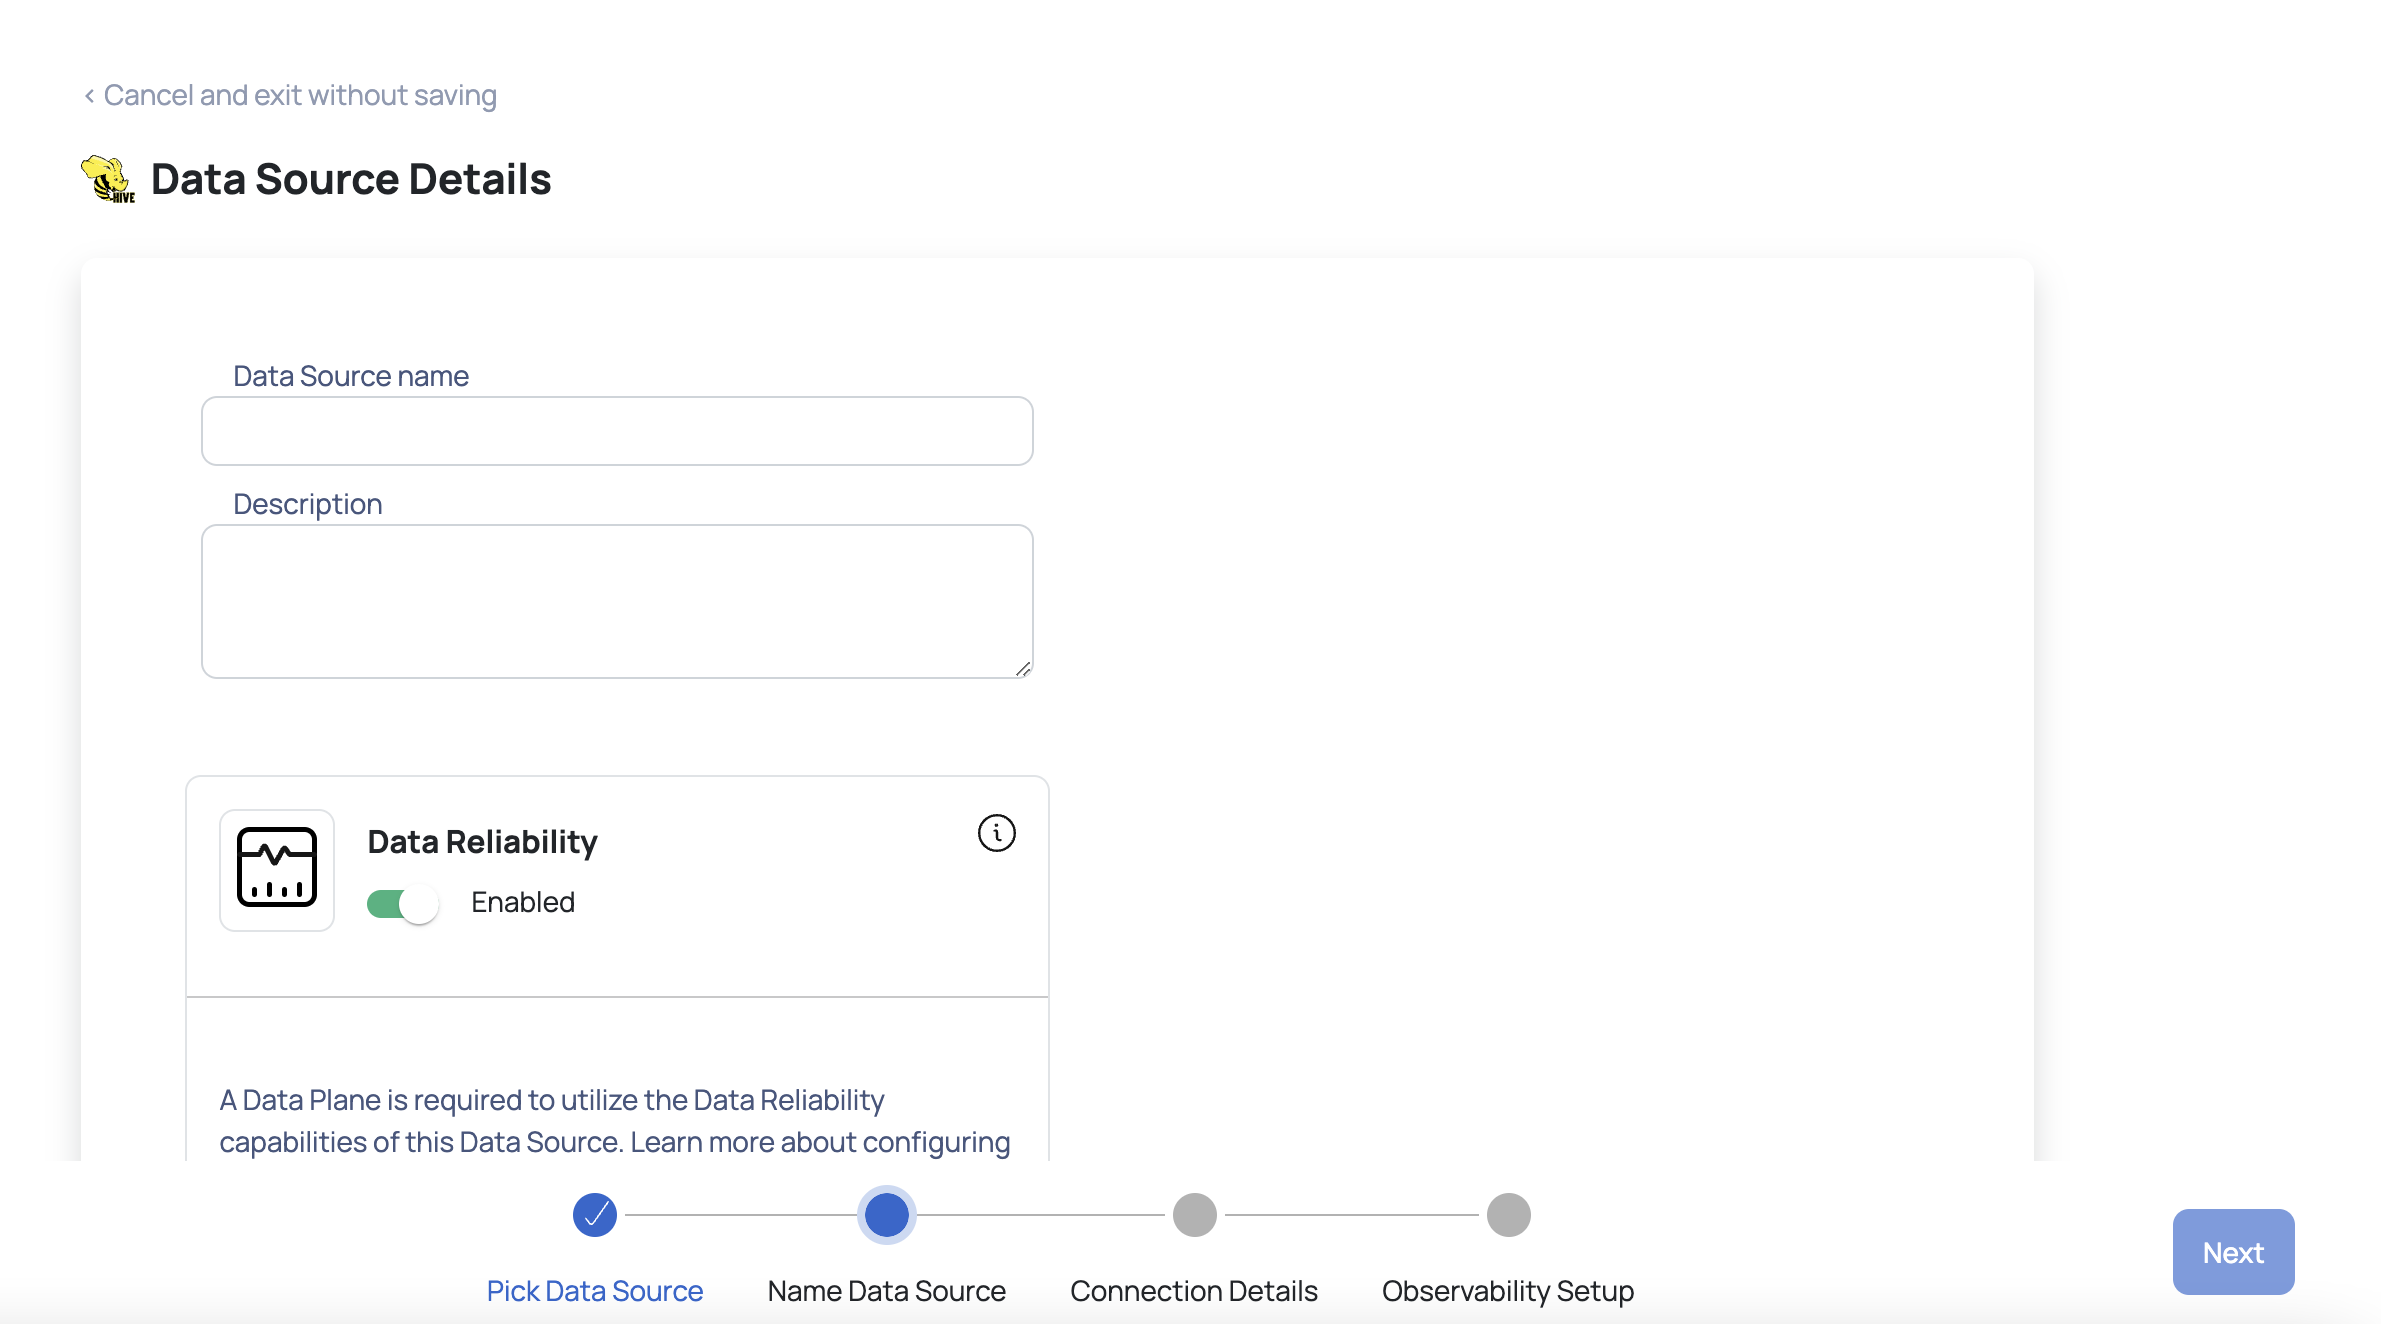
- Choose the Hive Data Source. The Hive Data Source Details page is displayed.
- Enter the required Hive connection details:
- Enter a name for the data source in the Data Source name field.
- (Optional) Enter a description for the Data Source in the Description field.
- Enable the Data Reliability capability by switching on the toggle switch.
- Select a Data Plane from the Select Dataplane drop-down menu.
To learn more about Data Plane setup, see Installing Dataplane - Managed ADOC document.
You must either create a Data Plane or use and existing Data Plane to enable the Data Reliability capability.
- Click Next. The Hive Connection Details page is displayed.
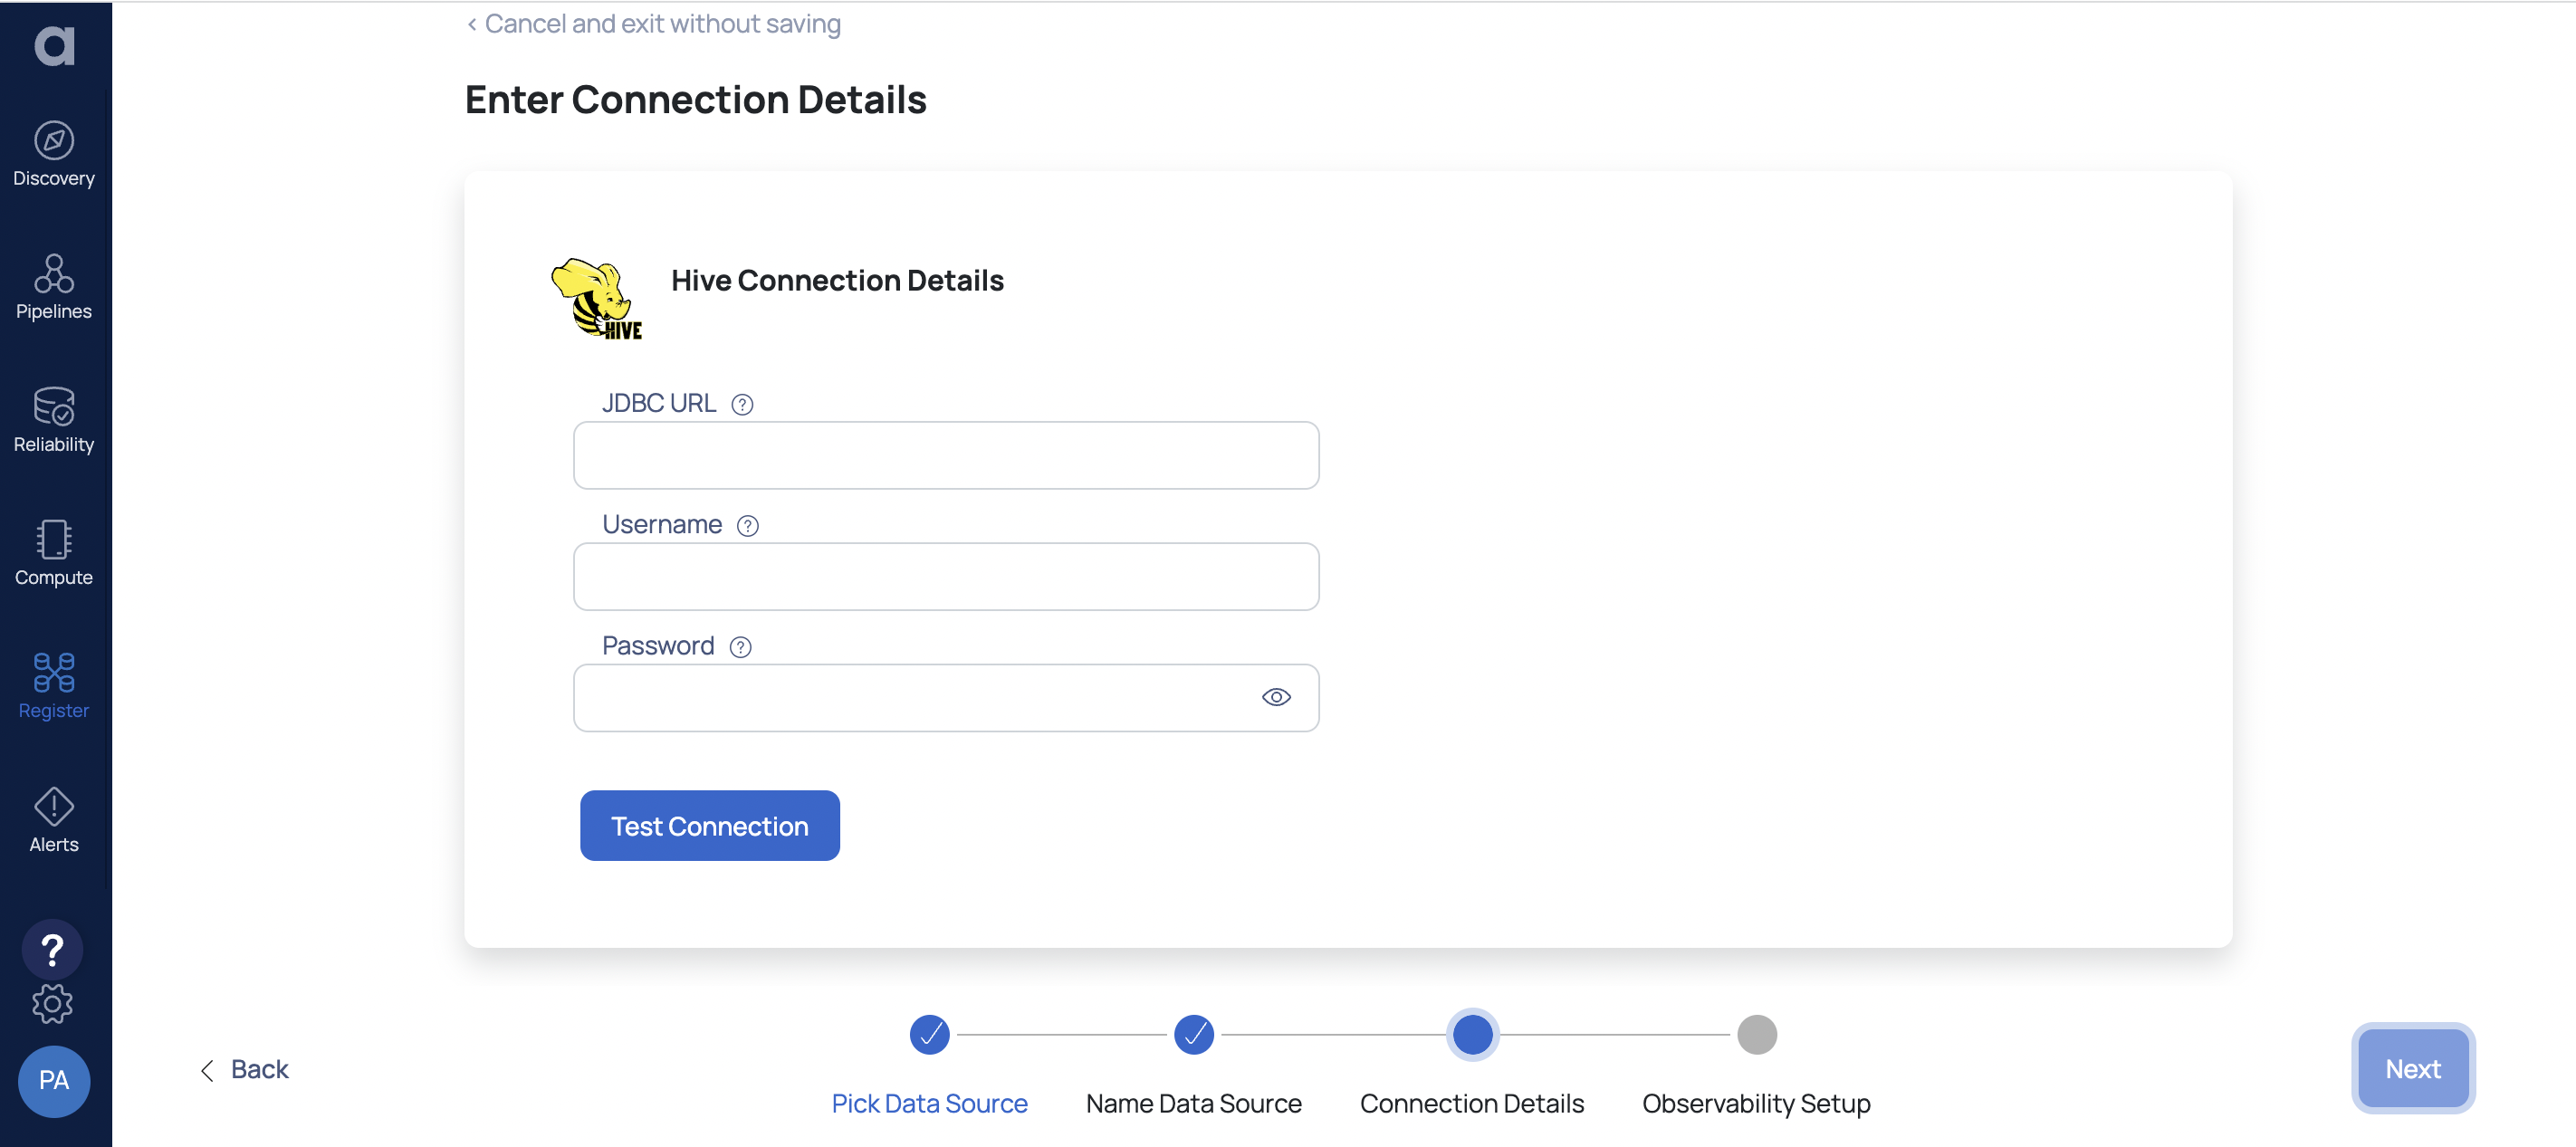
Enter the required Hive connection details:
- Enter the Hive URL in the JDBC URL field.
- Enter your Hive username in the Username field.
- Enter the Hive password in the Password field.
Click on the Test Connection button. If your credentials are correct, you receive a Connected message. If you get an error message, double-check the Hive credentials you entered.

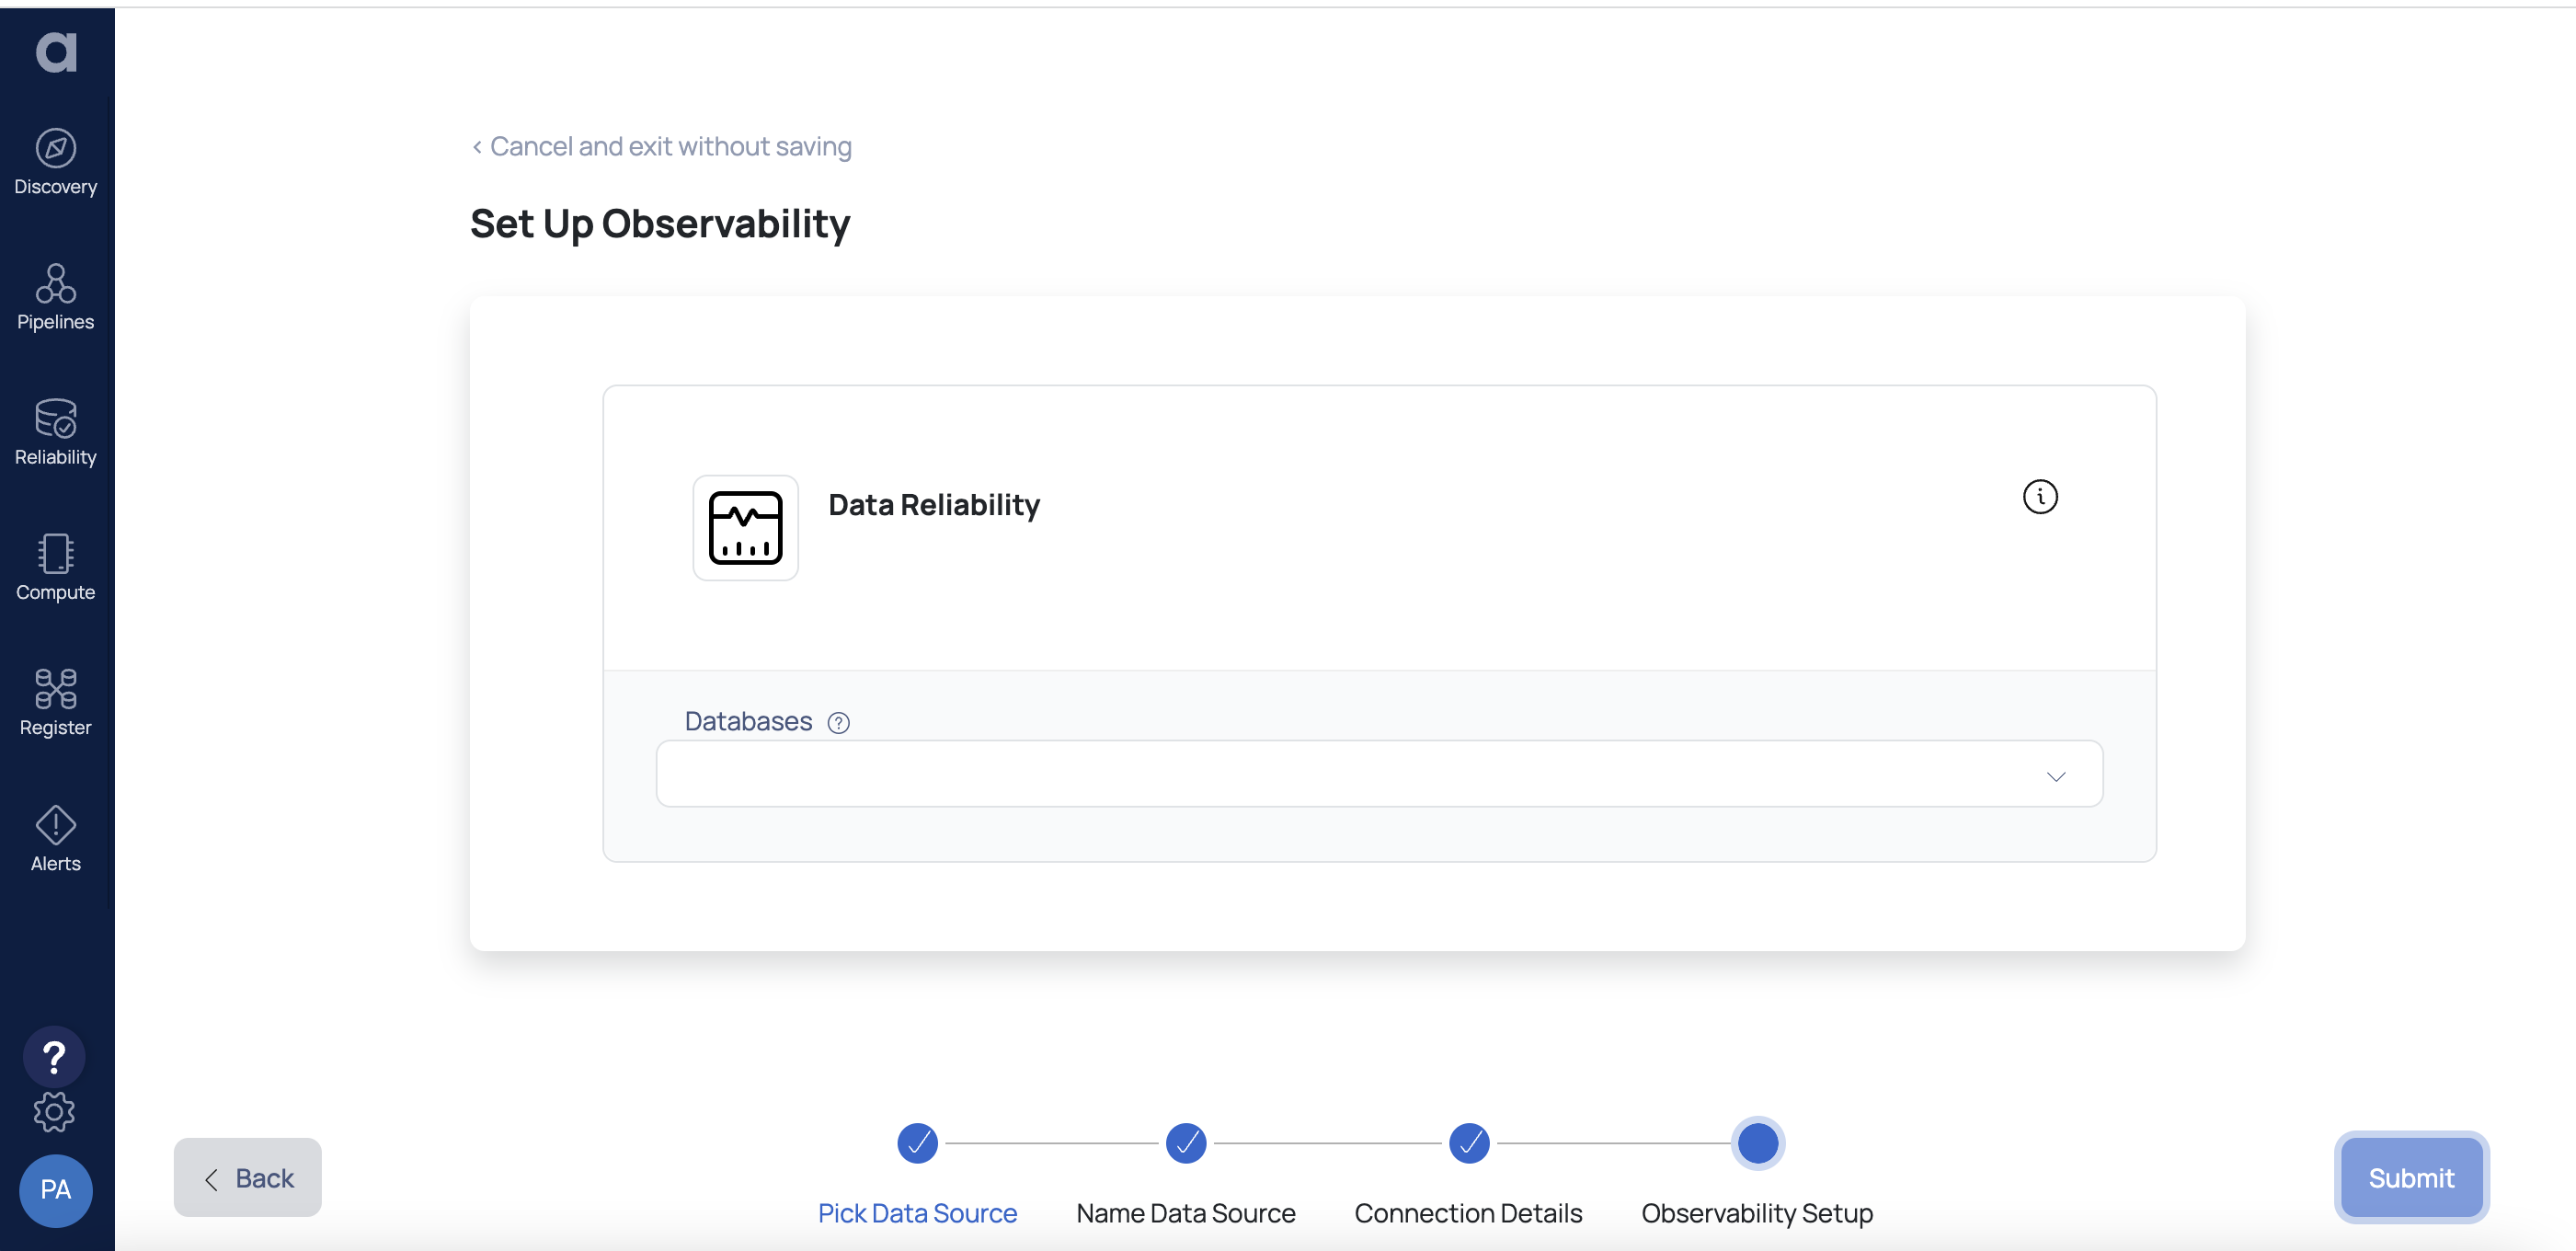
- Click Next. The Set Up Observability page is displayed.
- Provide the name of the Hive databases to be monitored by ADOC. To add multiple databases, click +.
- Click Submit.
Hive is now added as a Data Source. You can choose to monitor your Hive account now or later.
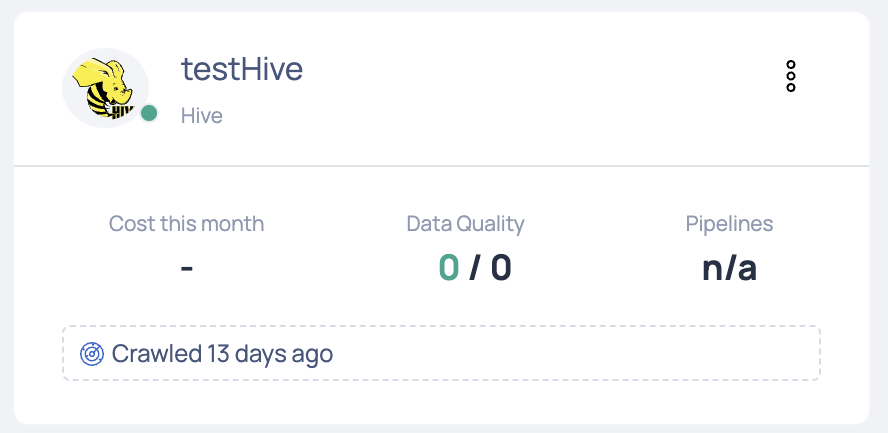
A new Hive card is added to the data sources page. This card displays the overall cost for the current month, the crawler status, and other Hive data source statistics.
You can navigate to the Managing Data Sources page to view the options available after adding the Data Source.
Control Plane Concurrent Connections and Queueing Mechanism
The ADOC Control Plane (CP) now supports a queueing mechanism for managing concurrent connections at the data source level. This feature is aimed at controlling and optimizing the execution of jobs, thereby preventing overload on customer databases and improving system performance and reliability. This guide provides an overview of how concurrent job execution is managed and queued, as well as details on the configuration process for manual and scheduled executions.
Key Features
- Concurrency Control at Datasource Level: Define the maximum number of concurrent jobs allowed for a specific data source.
- Queueing Mechanism for Jobs: Introduce a queueing mechanism to manage jobs that exceed the configured concurrency limit, ensuring smooth execution without overloading the database.
- Support for Multiple Job Types: Currently supports data quality, reconciliation, and profiling jobs.
- Flexibility in Slot Allocation: Users can set the number of available slots as per their performance needs.

Concurrency Control and Queueing Mechanism
Why Concurrency Control is Needed?
Previously, no concurrency control existed to manage numerous jobs on the Control Plane. This meant that users may submit a huge number of jobs at once, potentially overflowing their database and causing performance issues or even system breakdowns. The new concurrency management technique ensures that only a fixed number of jobs can run concurrently, with additional jobs queued.
The concurrency control and queueing mechanism has been implemented for SAP Hana data sources. The new feature allows users to set the maximum number of concurrent jobs for a particular data source. If the number of jobs triggered exceeds the defined limit, the remaining jobs are queued until a slot becomes available.
How the Mechanism Works
- Job Slots: Users can define the number of slots available for concurrent job execution for a given data source. For example, if a data source is configured with a maximum of 5 concurrent jobs, only five jobs will run simultaneously.
- Queueing Mechanism: If more than five jobs are triggered, the excess jobs are moved to a queue and marked as "waiting." As soon as a running job completes, a slot is freed, and a job from the queue is picked for execution.
- Slot Monitoring: A background service continuously monitors the availability of job slots, checking every minute to see if a queued job can be started.
Configuration
Setting Concurrent Job Limits
When configuring a new data source or editing an existing one, users have the option to enable job concurrency control. By default, this setting is disabled, but it can be enabled, and users can set the Maximum Slots to define how many jobs can run concurrently.
Steps to Configure Job Concurrency:
- Navigate to the data source configuration page.
- Enable Job Concurrency Control by toggling the setting.
- Enter the number of slots (e.g., 1, 5, 10) that should be available for concurrent job execution.
- Save the configuration.
- Slot Setting: Suppose a user sets the Maximum Slots to 1 for a particular data source.
- Job Submission: The user then triggers three profiling jobs simultaneously.
- Queueing: Only one job will start immediately. The remaining two jobs are queued, and their status is shown as waiting.
- Slot Release: Once the first job completes, a slot is released, and the next job in the queue is started.
Benefits
- Prevents Overload: By limiting the number of concurrent jobs, the feature helps prevent overloading of customer databases, thus maintaining performance and avoiding potential crashes.
- Flexible Configuration: Users can adjust the number of concurrent slots based on their performance needs, giving them control over the workload being processed.
- Scalable: While this feature is currently implemented for SAP Hana data sources, it can be extended to other data sources such as Snowflake with minimal changes.
The queueing method for concurrent connections at the data source level is critical for maintaining system stability and optimal performance when dealing with multiple task executions. By restricting the amount of concurrent jobs and implementing a queueing system, the Control Plane may effectively manage workloads without overflowing the database.
Same Cluster MapR HDFS vs Hive Reconciliation
The ADOC V2.12.1, introduced the capability to reconcile data between MapR Hadoop Distributed File System (HDFS) and Hive within the same cluster. This feature ensures consistency and integrity of data across these two critical components of the MapR ecosystem.
Reconciliation Process
1. Data Synchronization:
Objective: To maintain data consistency between MapR HDFS and Hive.
Method: ADOC performs periodic scans to compare data stored in MapR HDFS with the metadata in Hive. This process identifies discrepancies between the file system and the Hive tables.
2. Discrepancy Resolution:
Approach: When inconsistencies are detected, ADOC initiates a resolution process. This might involve updating Hive metadata to reflect the current state of the data in MapR HDFS or vice versa.
Automation: The reconciliation process is largely automated, with ADOC handling most discrepancies. However, certain complex cases might require manual intervention.
3. Reporting and Alerts:
Notifications: ADOC provides alerts and detailed reports about discrepancies and the actions taken to resolve them.
Dashboard: A dedicated section in the ADOC dashboard displays the reconciliation status, highlighting any ongoing or resolved issues.
| Reconciliation Considerations | Description |
|---|---|
| Data Volume and Frequency | High data volumes and frequent updates in either MapR HDFS or Hive can impact the reconciliation process. It's important to schedule scans considering the workload to optimize performance. |
| Schema Changes | Any schema changes in Hive tables should be monitored closely as they can lead to inconsistencies with the data stored in MapR HDFS. |
| Permissions and Security | Ensure proper permissions are set up in both MapR HDFS and Hive to allow ADOC to access and modify data and metadata as required. |
| Error Handling | Implement robust error handling mechanisms to address any issues that might arise during the reconciliation process. |