Import Policies
ADOC allows you to import and export policies. You can import policies from multiple tenants. You cannot import policies from your own tenant. You can import files with ZIP and GZ file extensions as policies.
To view the Import Policies table, go to the Data Reliability section from the main left menu, select Manage Policies, and then click on Import Policies.
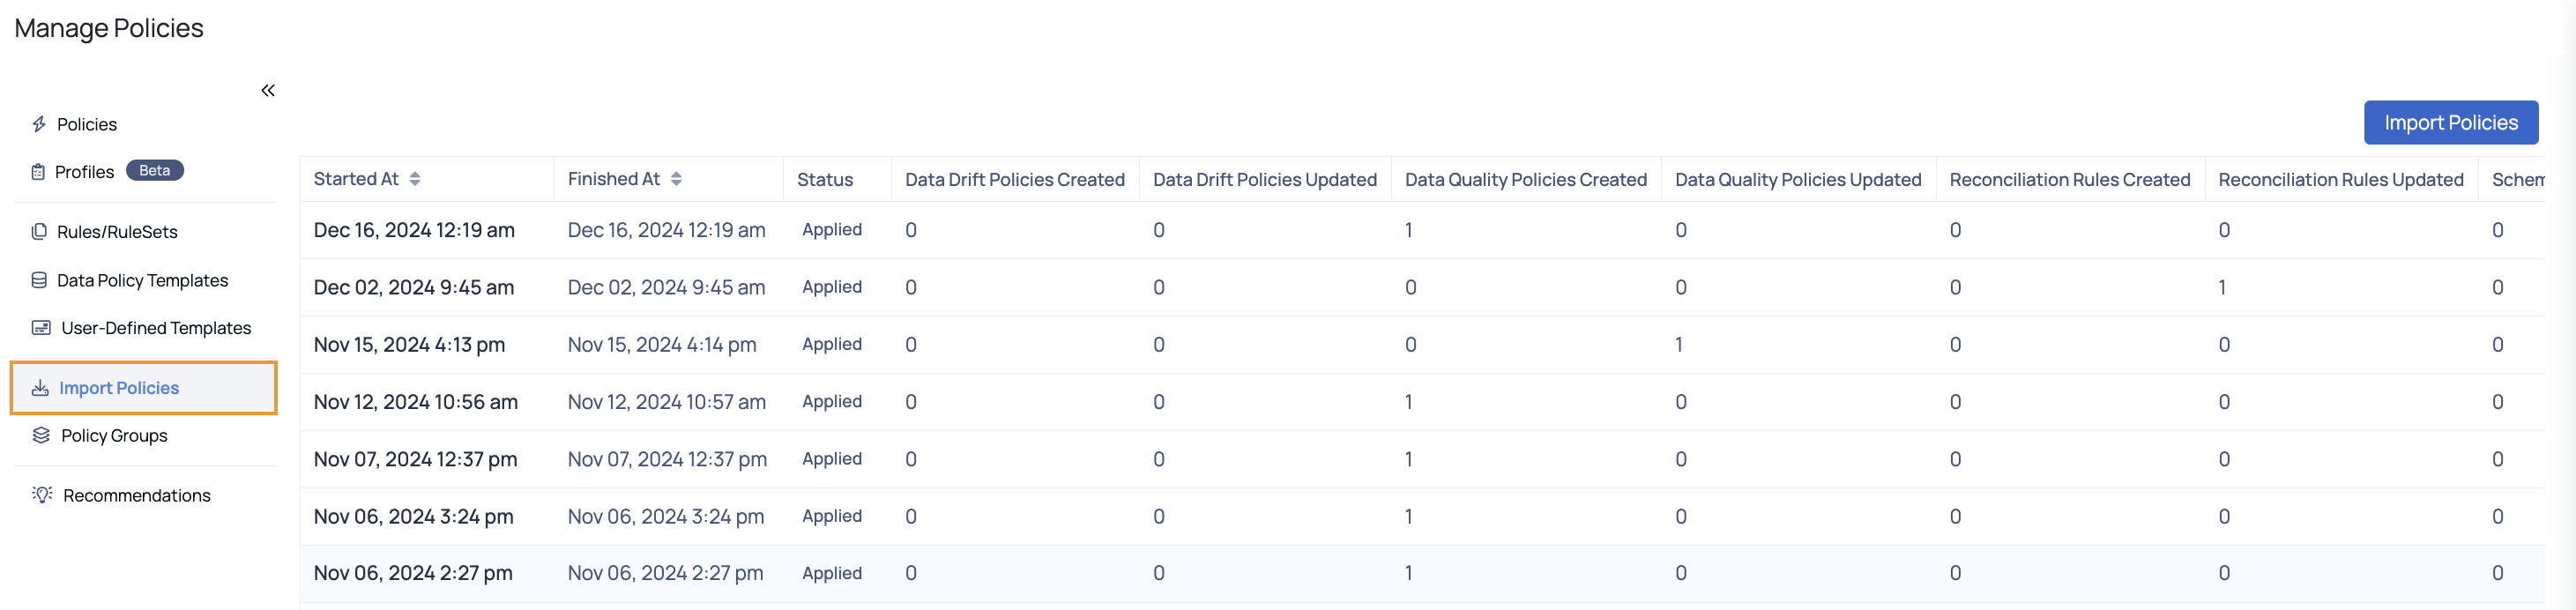
Import Policies Table
How to Import Policies?
To import policies, perform the following steps:
- Click the Import Policies button from the top right of the Import Policies list table. The Import Policies pop-up displayed.
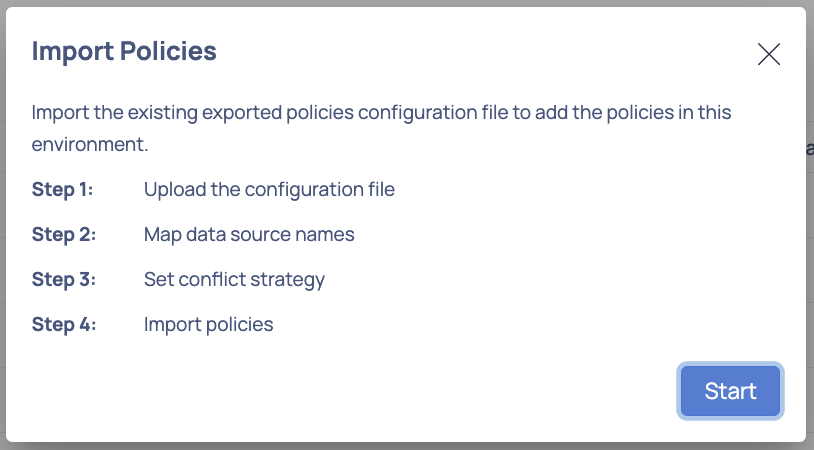
- Read the steps provided on the pop-up and click Start.
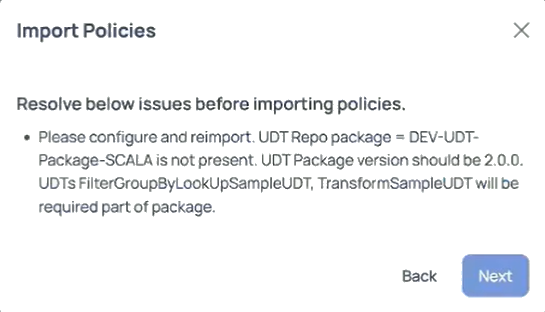
There are pre-import checks.
If you encounter the following error when attempting to import a UDT CI/CD file, you must first preconfigure the UDT repo with the correct package, package version, and UDTs before attempting to import the file again.
- Drag and drop your configuration file or click browse to select the file from your system and click Upload and then Finish.
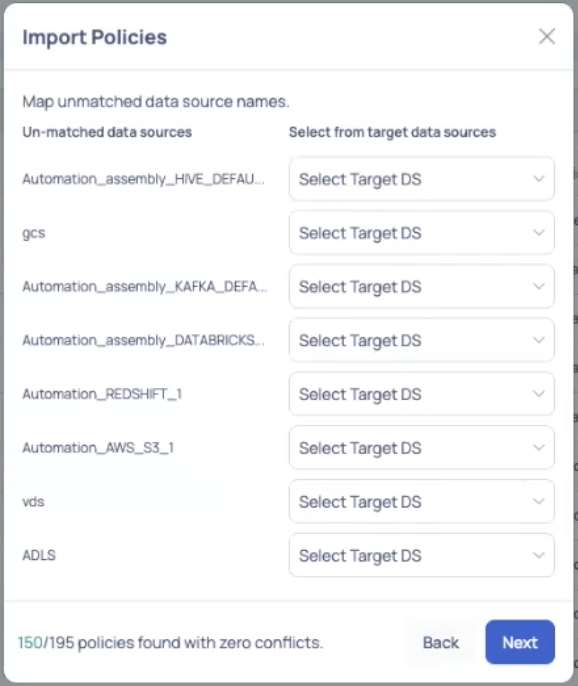
If no matching data sources or policies with the same name exist, the policies are implemented automatically; otherwise, follow the steps to match the data sources or override the policies with the same name.
- If there are any unmatched data sources in the uploaded zip file, you must match them from the target data sources provided on the right and then click Next.
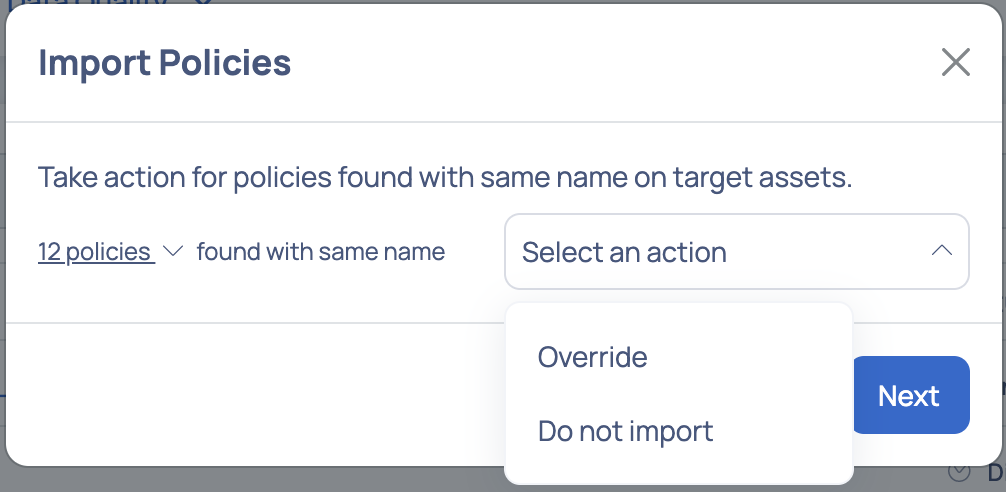
- If there are policies with the same name, you must take action on them by either selecting the Override option or Do not import option from the Select an action drop-down list and click Next to successfully import the policies.
User can also export or import the Profile Anomaly and Data Cadence policies, just like any other policies.
On completion of the above steps, jobs are successfully submitted for applying the policies.
However, updates to RBAC, policy creation permissions are now controlled at the domain level. If you as a user do not have the required domain-level permissions, the imported policies may be created but remain inaccessible to you.
When importing policies, policies may be created even if the importing user does not have explicit permissions to create policies on certain assets. However, these policies will not be visible to the user unless they have the necessary permissions.
Understanding the Imported Policies Table
The Imported Polices table, provides the following details of policies that have been imported:
| Column Name | Description |
|---|---|
| Started At | Displays the start date and time of when the policy was imported. |
| Finished At | Displays the completion date and time of the import. |
| Status | Displays the status of the import. Example: Applied, Errored, Aborted |
| Data Drift Policies Created | Displays the number of Data Drift policies created from the imported policy. |
| Data Drift Policies Updated | Displays the number of Data Drift policies that were updated. |
| Data Quality Policies Created | Displays the number of Data Quality policies created from the imported policy. |
| Data Quality Policies Updated | Displays the number of Data Quality policies that were updated. |
The table includes the count of all types of policies created and updated including SQL Views and Visual Views.
If the status of an imported policy is errored, the details of the error can be viewed by clicking the > right angle icon.

How to Export Policies?
To export policies, navigate to the Manage Policies page and click the Policies tab. A table with the list of policies created is displayed.
Users can export policies using any filter desired. If no filters are selected, all current policies are exported.
To export a policy, perform the following steps:
- From the Filter panel, select all of the necessary filters.
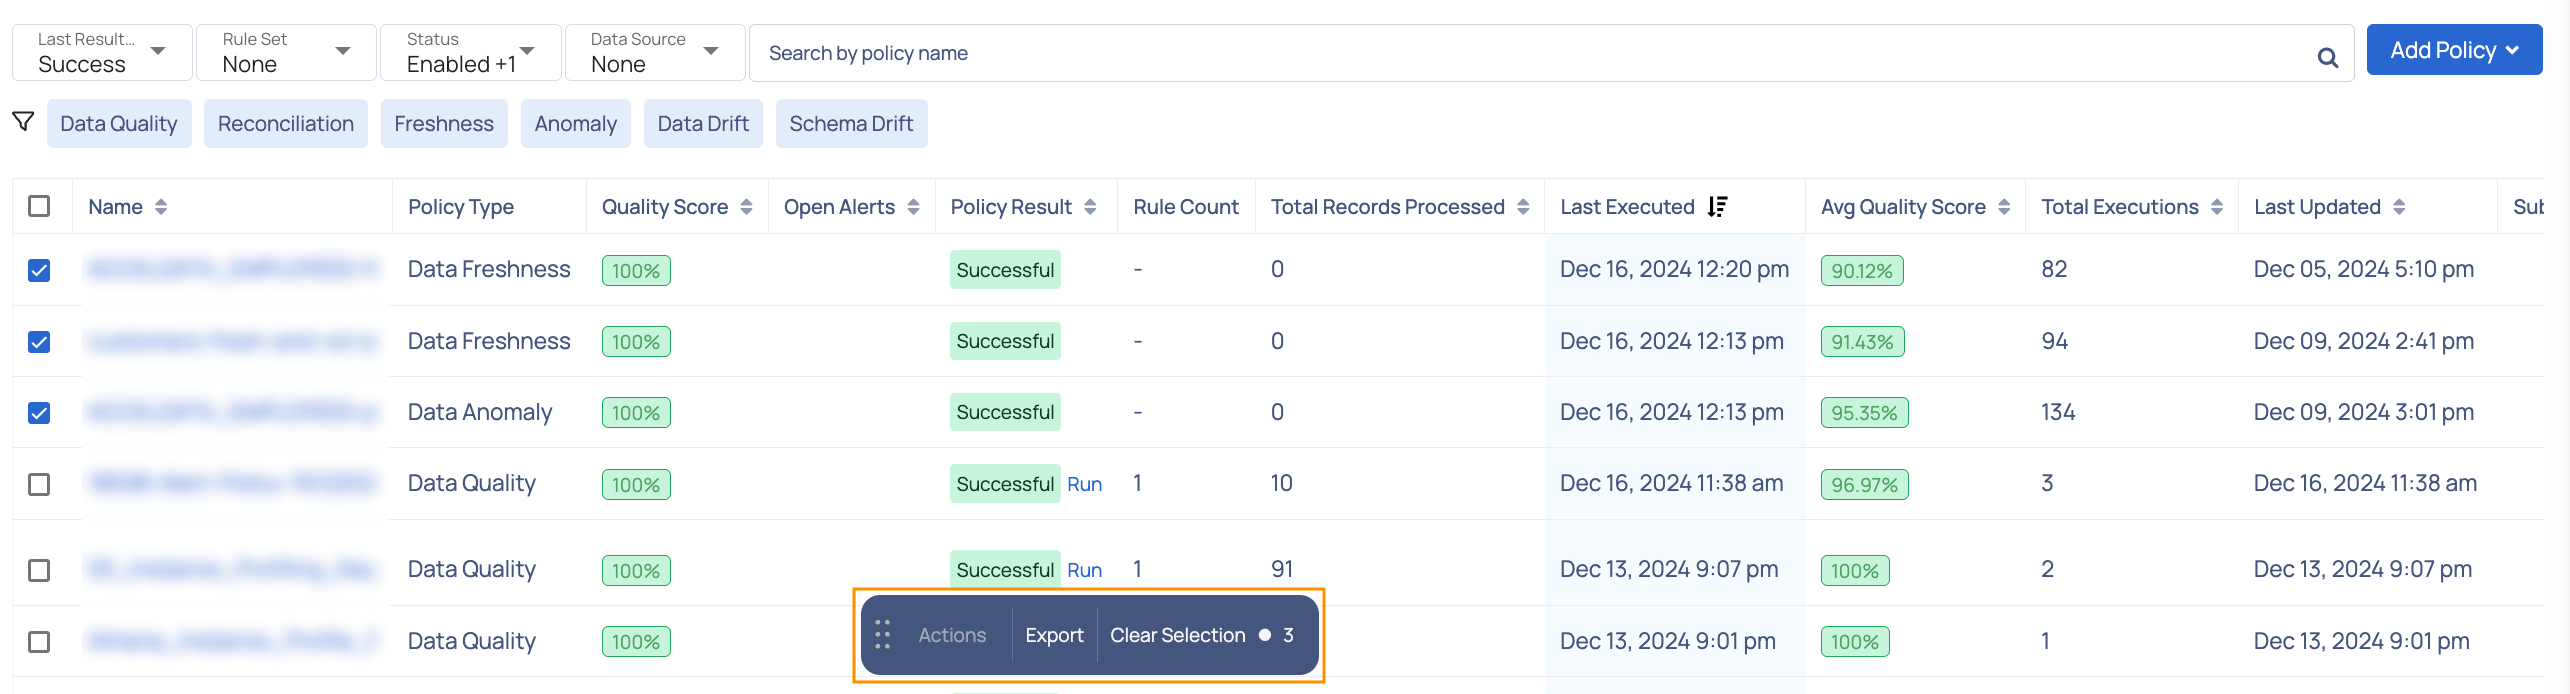
- Click on the check box
next to the policy name. An Action button will appear at the bottom of the screen. - Click the Export button. The Export Policies pop-up window appears which displays the pre-checks.
In the Note: section we are doing pre-checks before export:
- Feature which are not supported as per the current release
- List of configurations or checks needs to be present in the destination environment
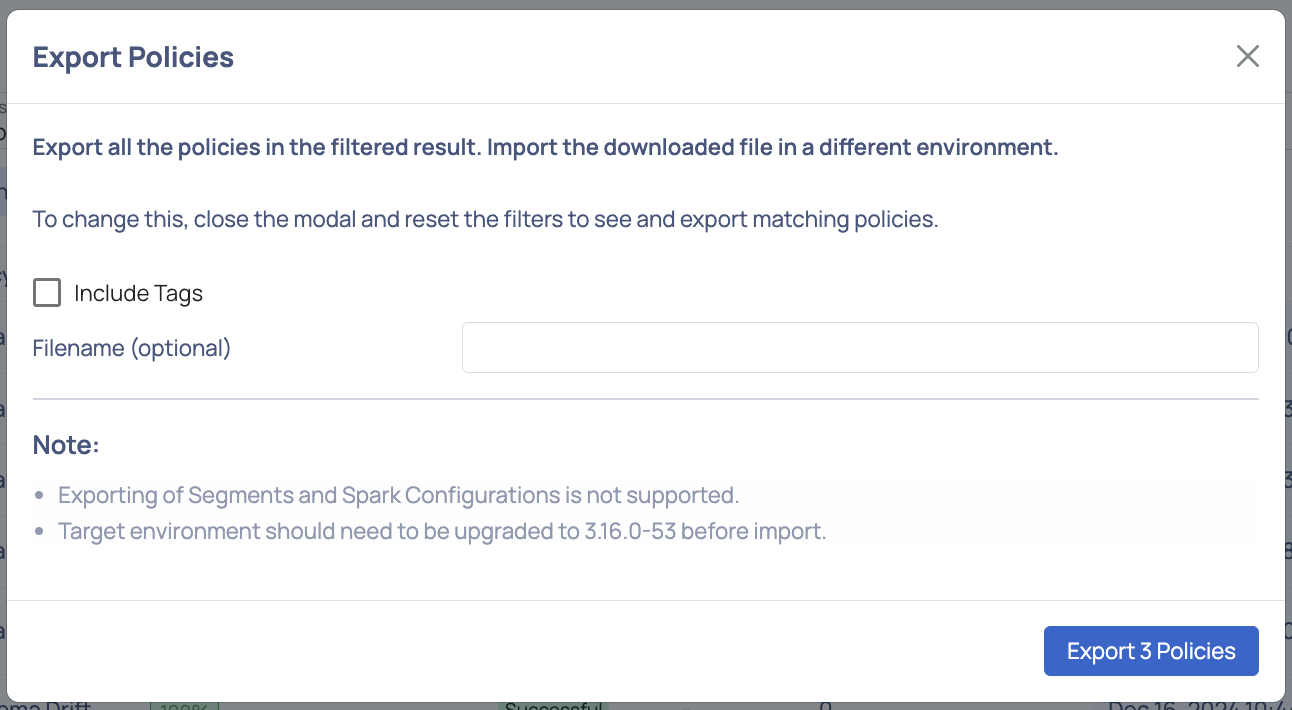
- If you want the tags to be included in the exported file, check the Include Tags field.
- (Optional) Provide a name to the exported file in the Filename field. The file is saved with the name you provide. If you do not provide any name, the ADOC default name for exported files is used.
- Click the Export Policies button. The policies are saved to your system drive as a
.zipfile.
- The package, version, and UDTs that must be configured in the destination environment before import will be shown if the export policies have UDT repo-driven rules.
- The produced policy zip file now contains the ADOC version name. This aids file management.
SQL Expression templates are exported by default even if they are not associated with a policy.
RBAC Restriction: Policies may be created during import, but they might not be visible to users who lack the necessary domain-level permissions to create or view policies on the imported assets.