User Management
The User Management page lists all the users present in your ADOC account. You can view the list of ADOC users, their status, roles, groups, and last login timestamp. You can also add new users to your ADOC account by sending them invites to join.
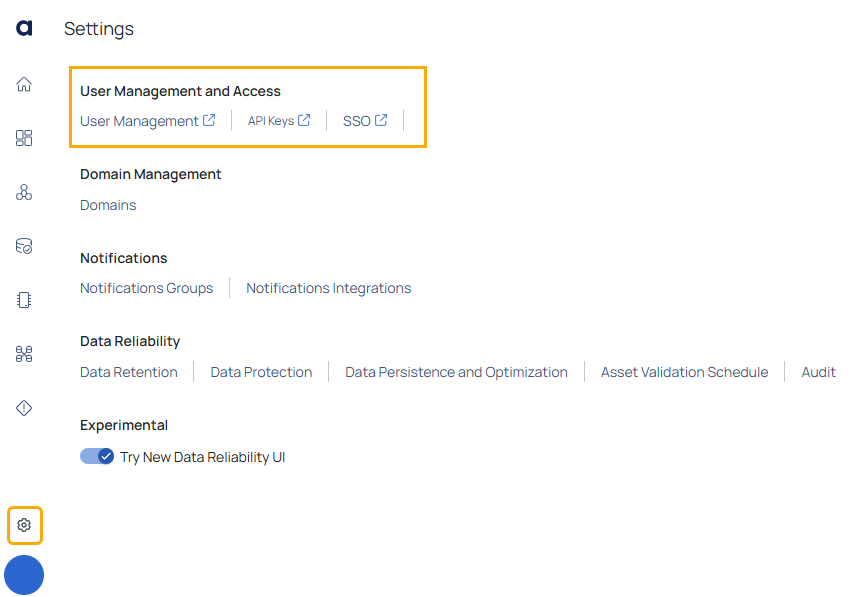
To navigate to the User Management page:
- Click
Settings from the left pane. - Click User Management.
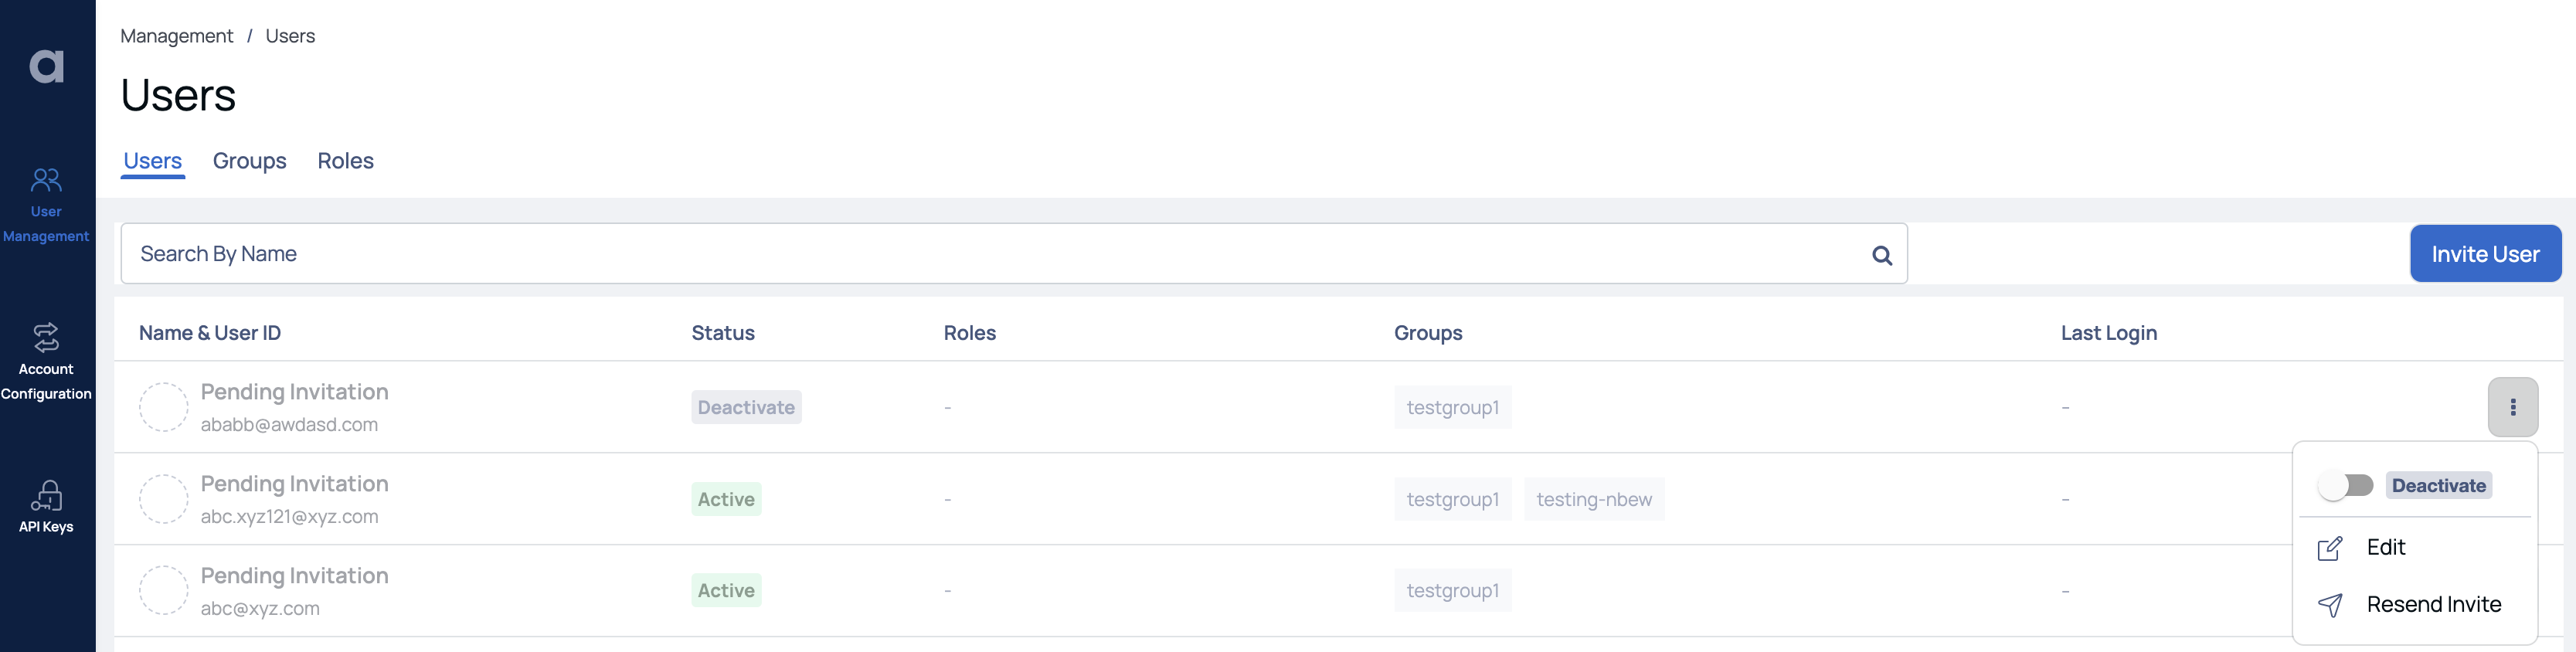
Users
You can view the following columns in the Users Management table.
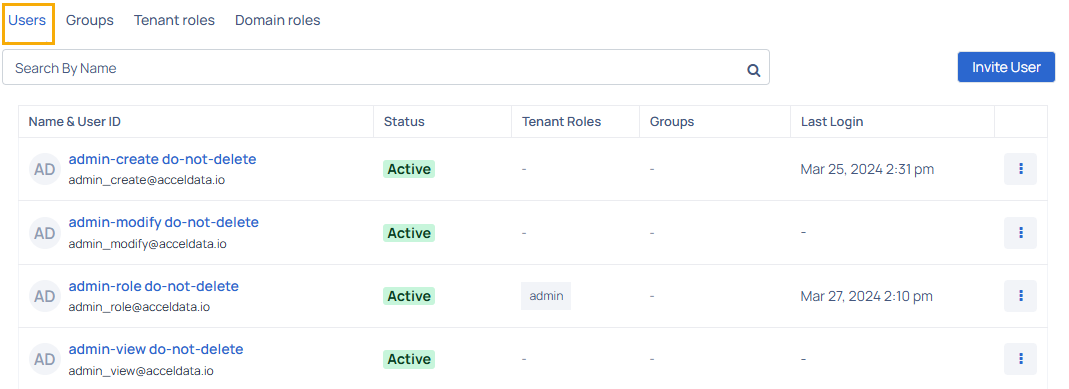
| Column Name | Description |
|---|---|
| Name & User ID | Name and Email ID of the user. |
| Status | Status of the user i.e., active or inactive user. |
| Tenant Roles | Role of the user i.e., admin, user, viewer, or any other user-defined role that the user is added to. |
| Groups | Name of groups that the user is added to. |
| Last Login | Date and time when the user was last active. |
Inviting Users
The Admin has the ability to invite multiple users to the application at once. To invite one or more users, you need to know their Email IDs. When a user is invited, they will receive an Email containing a link to sign up for ADOC.
To invite a user, perform the following steps:
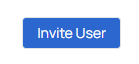
- Click the Invite Users button. The Invite Users page is displayed.
- Enter the Email IDs of the recipients using commas to separate them.
- Select the roles that you would like to assign to the recipients.
- Select the groups that you would like to add the recipients to.
- Click Review.
If the Email IDs of the recipients are incorrect or the users already exist, an error will be displayed.
- Click Send Invites.
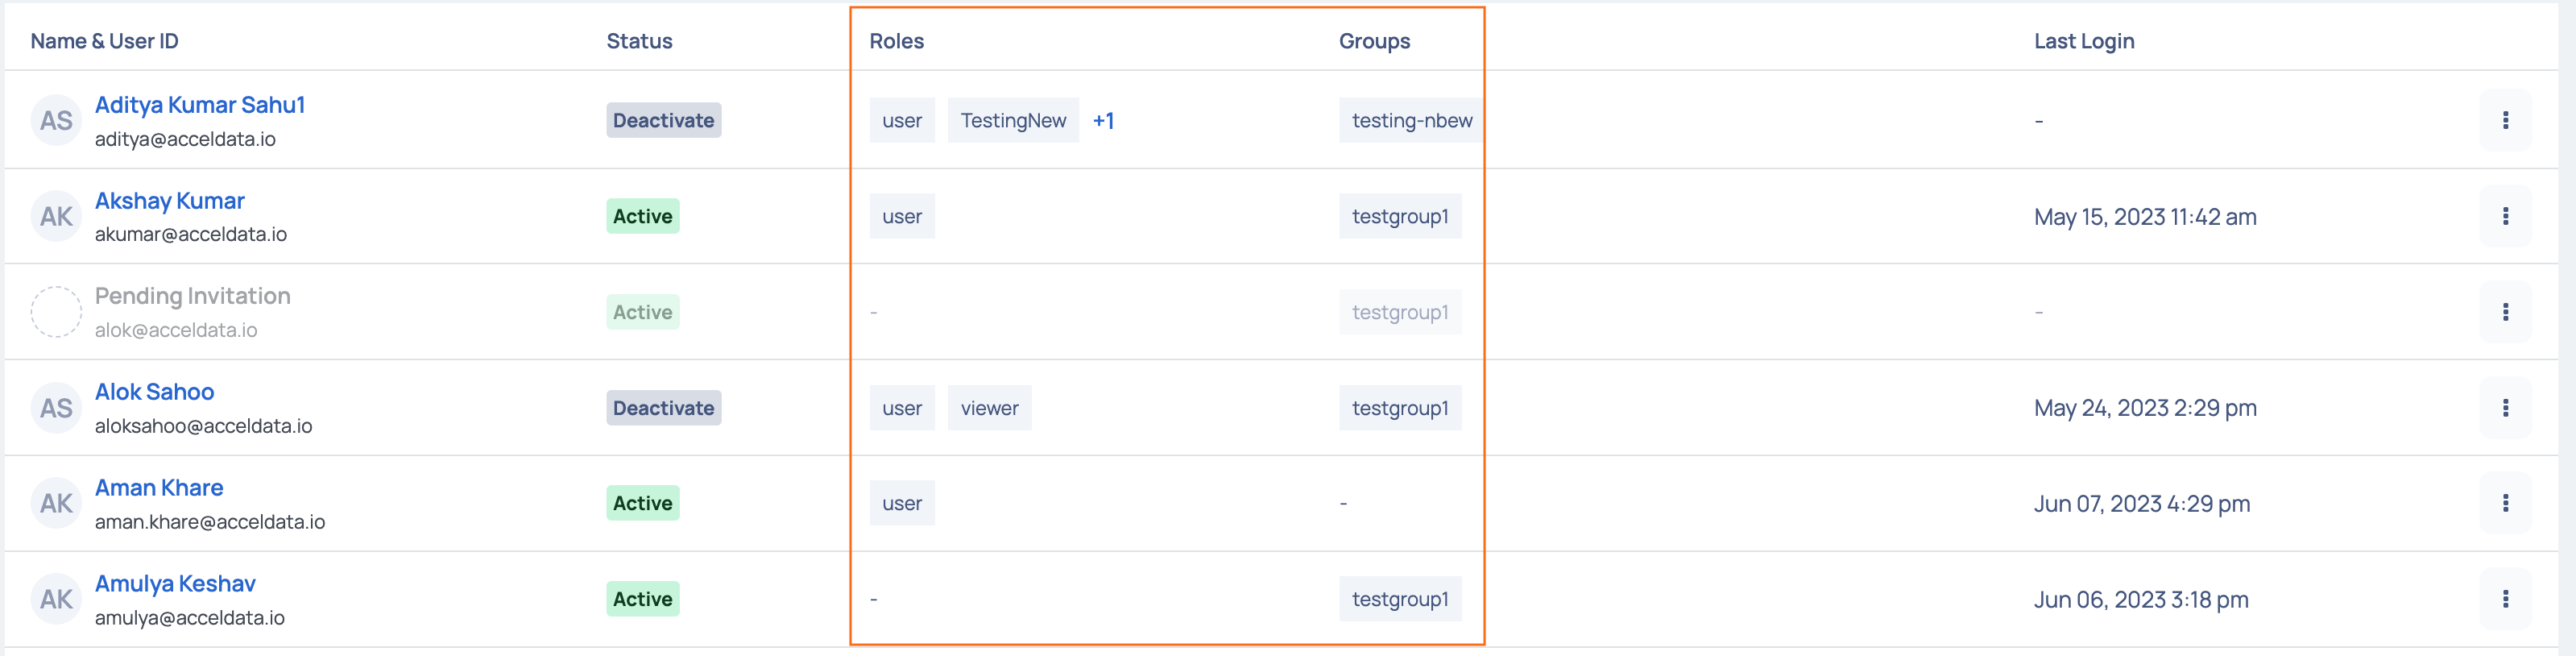
Once the user accepts your invitation and joins ADOC, you will be able to view their record on this page. The Roles column shows all the user roles assigned by the admin, and the Groups column lists the names of the groups the user has been added to.
Deactivate, Edit, and Resend Invite
To deactivate a user or resend the verification Email to an invited user, you can click the ellipsis menu on the right most corner and select the required option. The Resend Invite option is applicable to only those users who have not yet verified their Email address.
To access the Edit User page, click on the
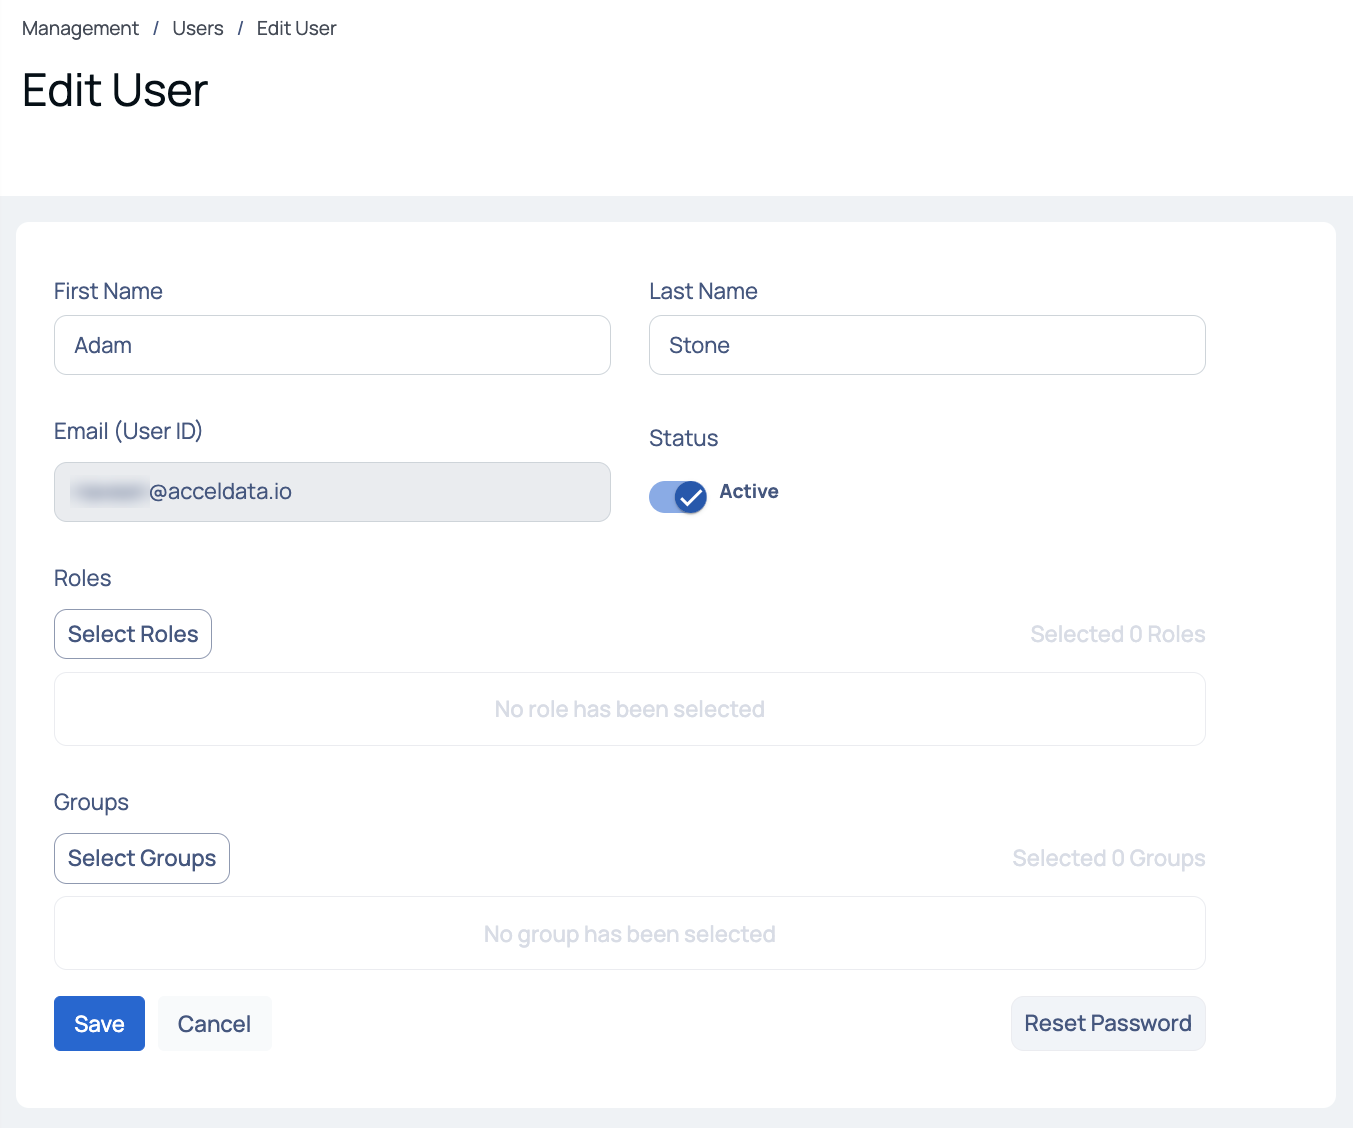
Edit User Details
To search for a user, enter the username in the search bar and hit the enter key. To switch between list view and card view, click the respective icons. To go back to ADOC application, click Go Back to Application in the bottom left of the screen.
Groups
You can view the following columns in the Groups Management table.
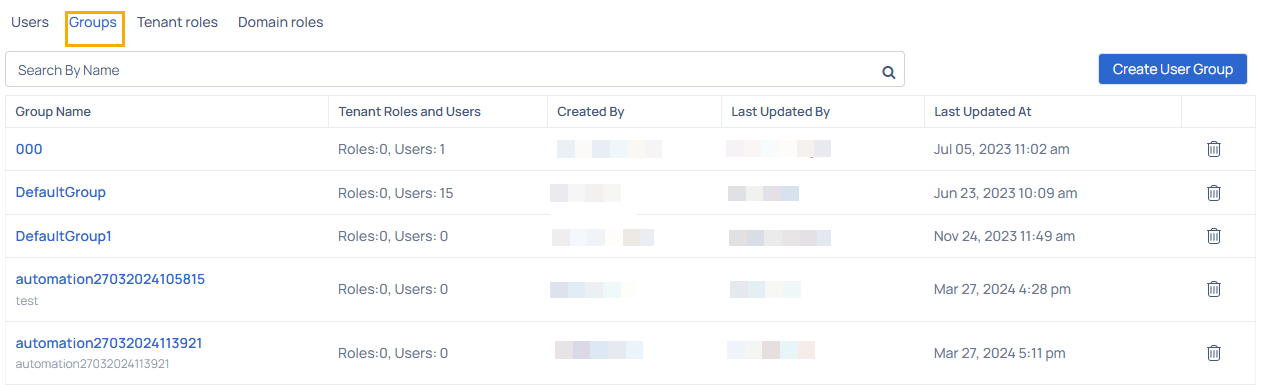
| Column Name | Description |
|---|---|
| Group Name | Name of the group created within the system |
| Tenant Roles and Users | Displays the number of roles and users assigned to the groups |
| Created By | Name of the user or system responsible for creating the group. |
| Last Updated By | Name of the user who last made updates to the group. |
| Last Updated At | Date and time when the group was last modified. |
Creating User Groups
The Groups page in the user management section also provides you with the feature to create user groups with selected roles to leverage some of the following reasons:
- Access Control: By creating user groups with specific roles, you can control the level of access and permissions granted to different groups of users.
- Collaboration and Collaboration Management: User groups facilitate collaboration among team members by allowing them to be organized into specific groups. This makes it easier to manage user permissions, share resources, and collaborate on data analysis, troubleshooting, or decision-making processes.
- Scalability and Efficiency: As the number of users grows, managing individual user permissions can become cumbersome. User groups simplify the management process by applying roles and permissions at the group level. This improves scalability and efficiency in user administration.
- Role-Based Access Control (RBAC): User groups provides a more systematic and streamlined approach to access control, making it easier to manage permissions across multiple users.
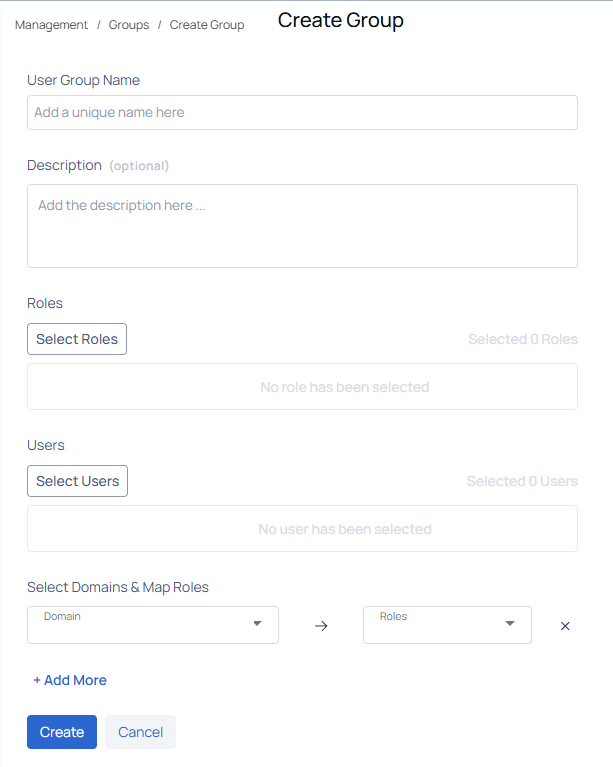
To create a user group, perform the following steps:
- Navigate to the Groups tab to access the Groups page.
- Click on the Create User Group button to proceed to the Create Group page.
- Enter a unique name for the user group.
- Choose the roles you wish to assign to the group.
- Select the user names from the organization who should be included in the group.
- (Optional) Provide a description explaining the purpose of creating this user group.
- Click the Save button to save the changes.
After creating the User Group, you can access the list of user groups and view the following information for each group: Group Name, number of Roles and Users, name of the user who last updated the group, and the date and time of the last update.
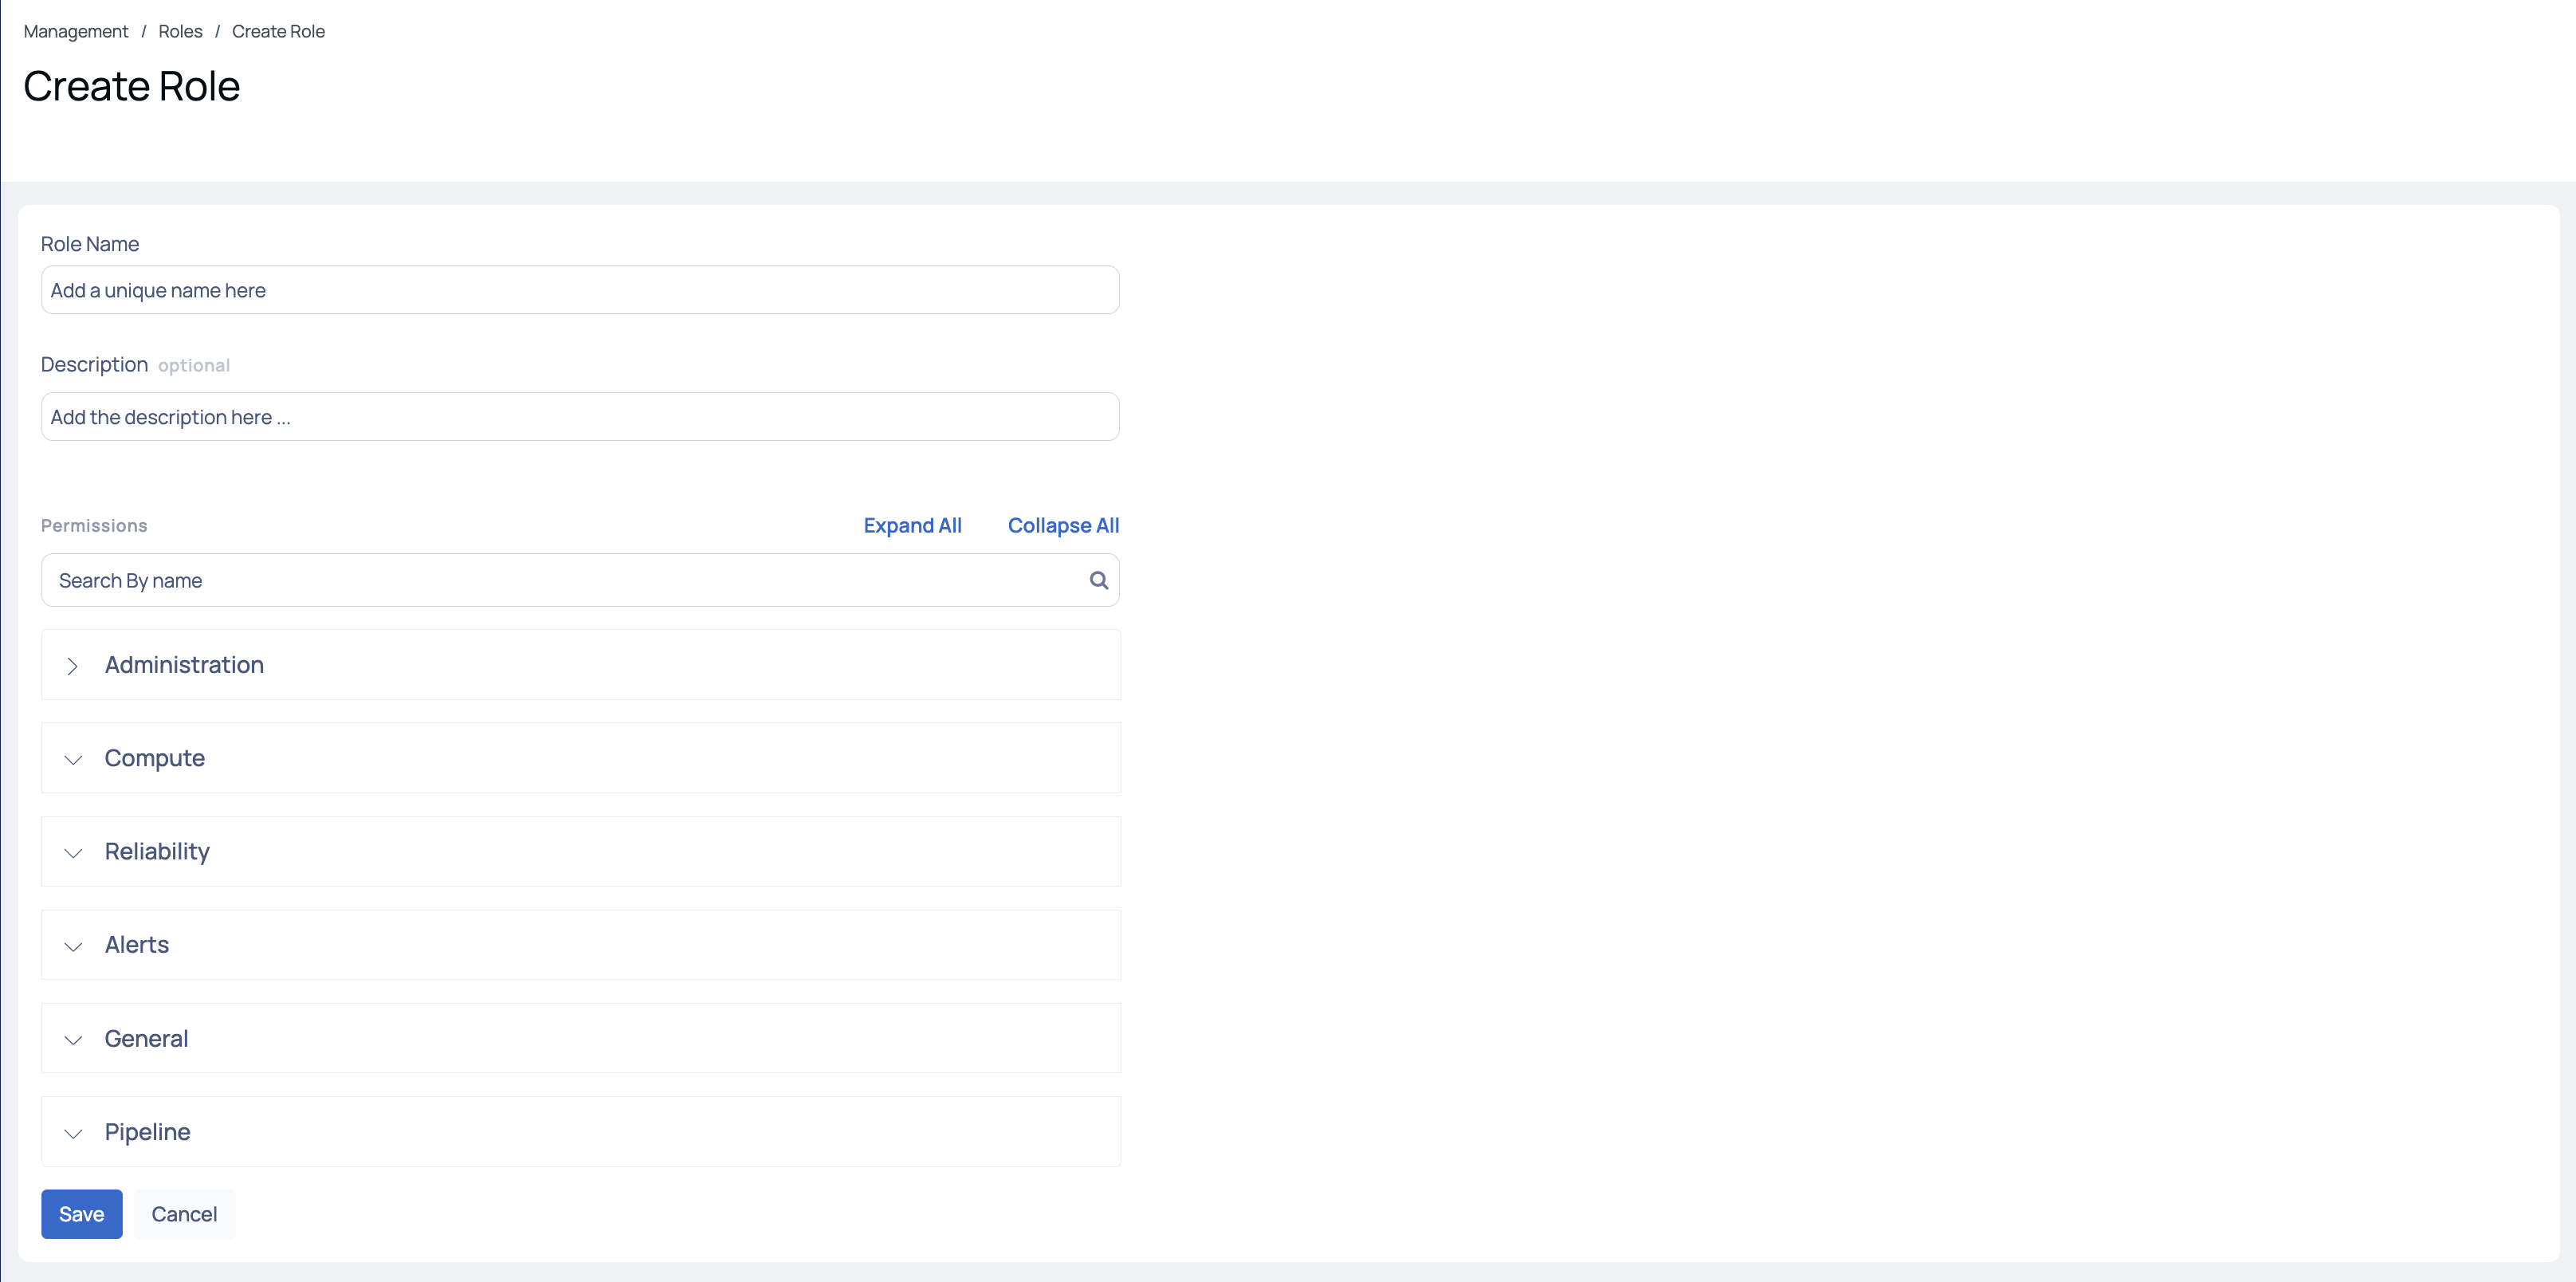
Creating Roles
By defining user-defined roles, administrators can fine-tune permissions and restrictions, ensuring that users have the appropriate level of access and capabilities based on their responsibilities. This helps enhance security, maintain data integrity, and tailor the user experience to meet specific business requirements.
Every user in the Acceldata platform is automatically assigned a default role called Users upon creating their account. It is mandatory to have at least one associated role for every user.
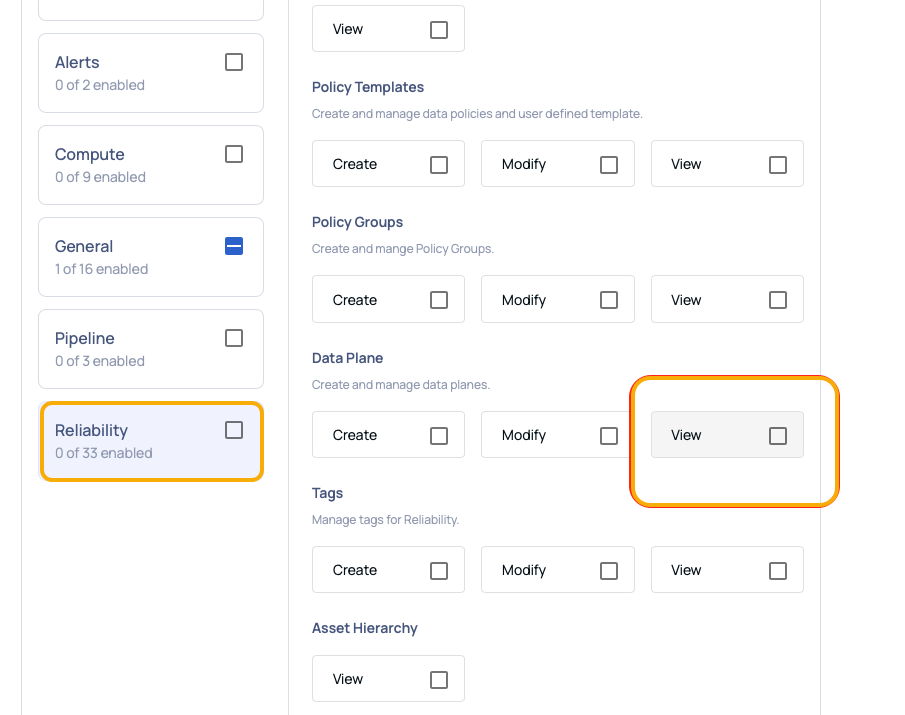
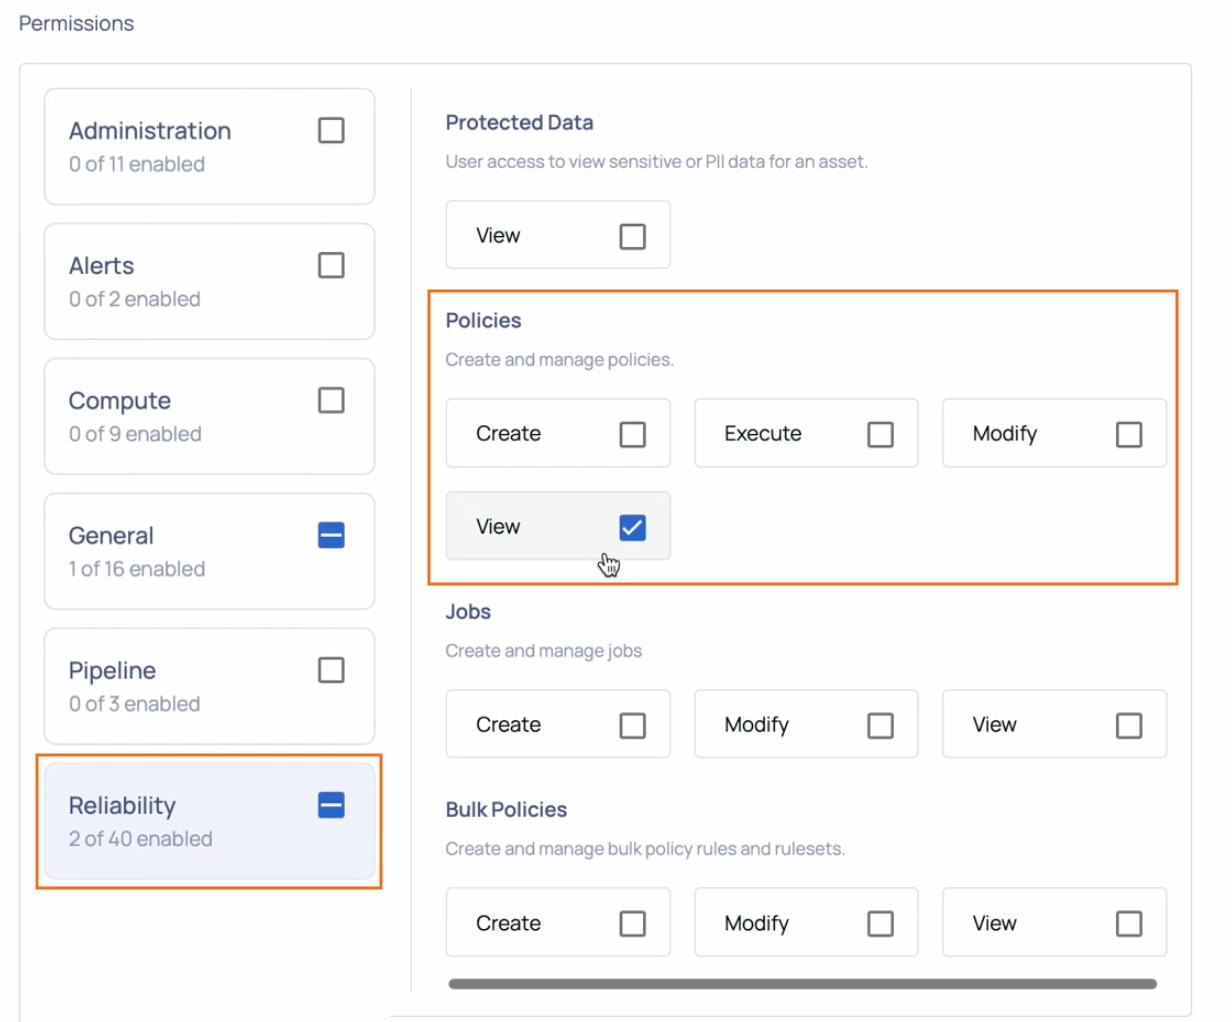
ADOC provides a range of permissions that can be configured, including Administration, Compute, Reliability, Alerts, General, and Pipeline. Each permission type allows for actions such as Create, Modify, and View on various features within the application.
To ensure a better user experience, it is recommended to select role permissions in groups rather than individually. For example, choosing permissions like 'Create, Modify, View' or 'Modify, View' or 'View' provides a more cohesive experience. Selecting only 'Create' or 'Modify' as standalone permissions might have a usability impact and lead to confusions.
The following table displays the different features provided within each category of permissions in ADOC:
To create a user-defined role in ADOC, do the following:
- Navigate to the Roles tab to access the Roles page.
- Click on the Create Role button to proceed to the Create Role page.
- Enter a unique name for the role group.
- (Optional) Provide a description explaining the purpose of creating this role.
- Search for the desired permissions and select the corresponding actions (Create, Modify, View) to associate with them. Customize the role's permissions by specifying the actions that align with your specific requirements.
- Click the Save button to save the changes.
Create User-defined Roles
To optimize user experience and address internal dependencies, it is highly recommended to assign view permissions for all features within a category when defining user roles. This practice is especially crucial for User-Defined Roles, as various features may rely on one another.
Roles and Permissions
The permissions for a user of ADOC varies depending on the roles assigned to them. The roles defined by ADOC are
| Roles | Definition |
|---|---|
| Owner | The Owner has full access to all features and settings within the ADOC application. |
| Admin | The Admin has comprehensive access to user management features, including inviting users, creating groups, and defining roles. |
| User | Every new user is assigned this default role. |
| Editor | The Editor can make changes to, update, or configure various features within the ADOC application. |
| Viewer | The Viewer role provides view-only access to the features in the ADOC application. This role includes a list of minimal permissions required for specific features:
|
Tenant Roles
The Tenant Roles page enables administrators to create and manage user-defined roles, providing granular control over permissions and access within the ADOC application. This feature allows organizations to customize roles based on specific requirements, ensuring users have the appropriate access levels to perform their responsibilities effectively.
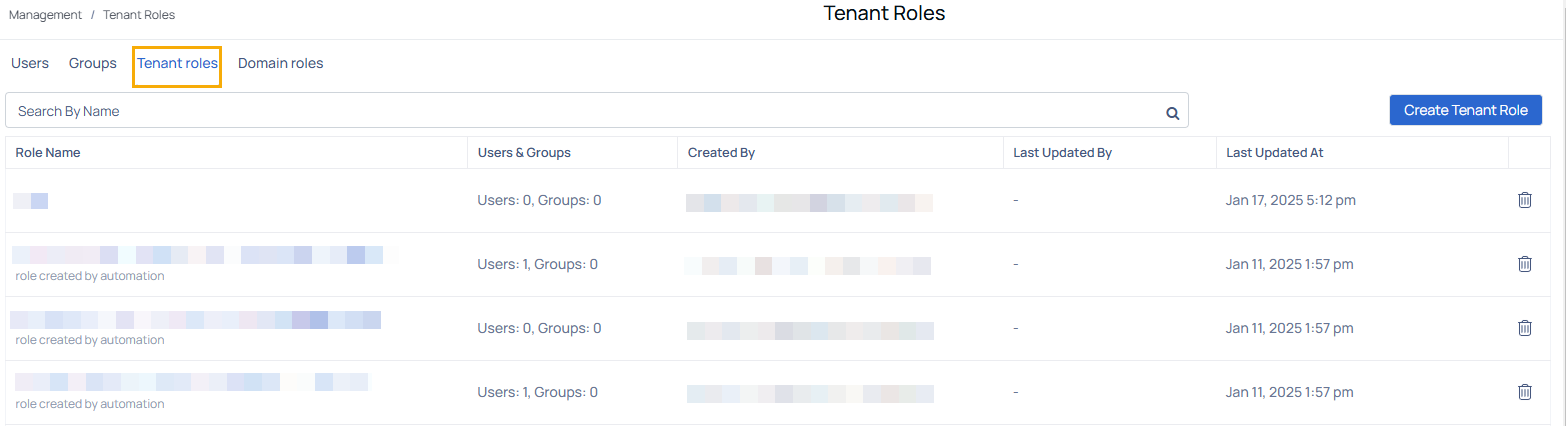
Viewing Tenant Roles
The Tenant Roles page displays the following columns in the Management table:
| Column Name | Descriptions |
|---|---|
| Role Name | Name of the tenant role created in the system. |
| Users & Groups | Displays the number of users and groups associated with the role. |
| Created By | Name of the user or system responsible for creating the role. |
| Last Updated By | Name of the user who last updated the role. |
| Last Updated At | Date and time when the role was last modified. |
Creating a Tenant Role
Administrators can define custom roles with specific permissions to suit their organization's needs. Follow these steps to create a new tenant role:

- Navigate to the Tenant Roles Page
- Click the Create Tenant Role button.
- Enter a Role Name (required) and an optional Description to specify the role's purpose.
- Browse the Permissions categories, such as Administration, Alerts, Compute, Reliability, General, and Pipeline.
- Select the desired actions (Create, Modify, View) for each permission based on the role's requirements.
- After the permissions are configured click the Save button to create the rule.
Editing an Existing Tenant Role
After the role has been created administrators can edit its details, including permissions and associated actions. To edit an existing role, follow these steps:
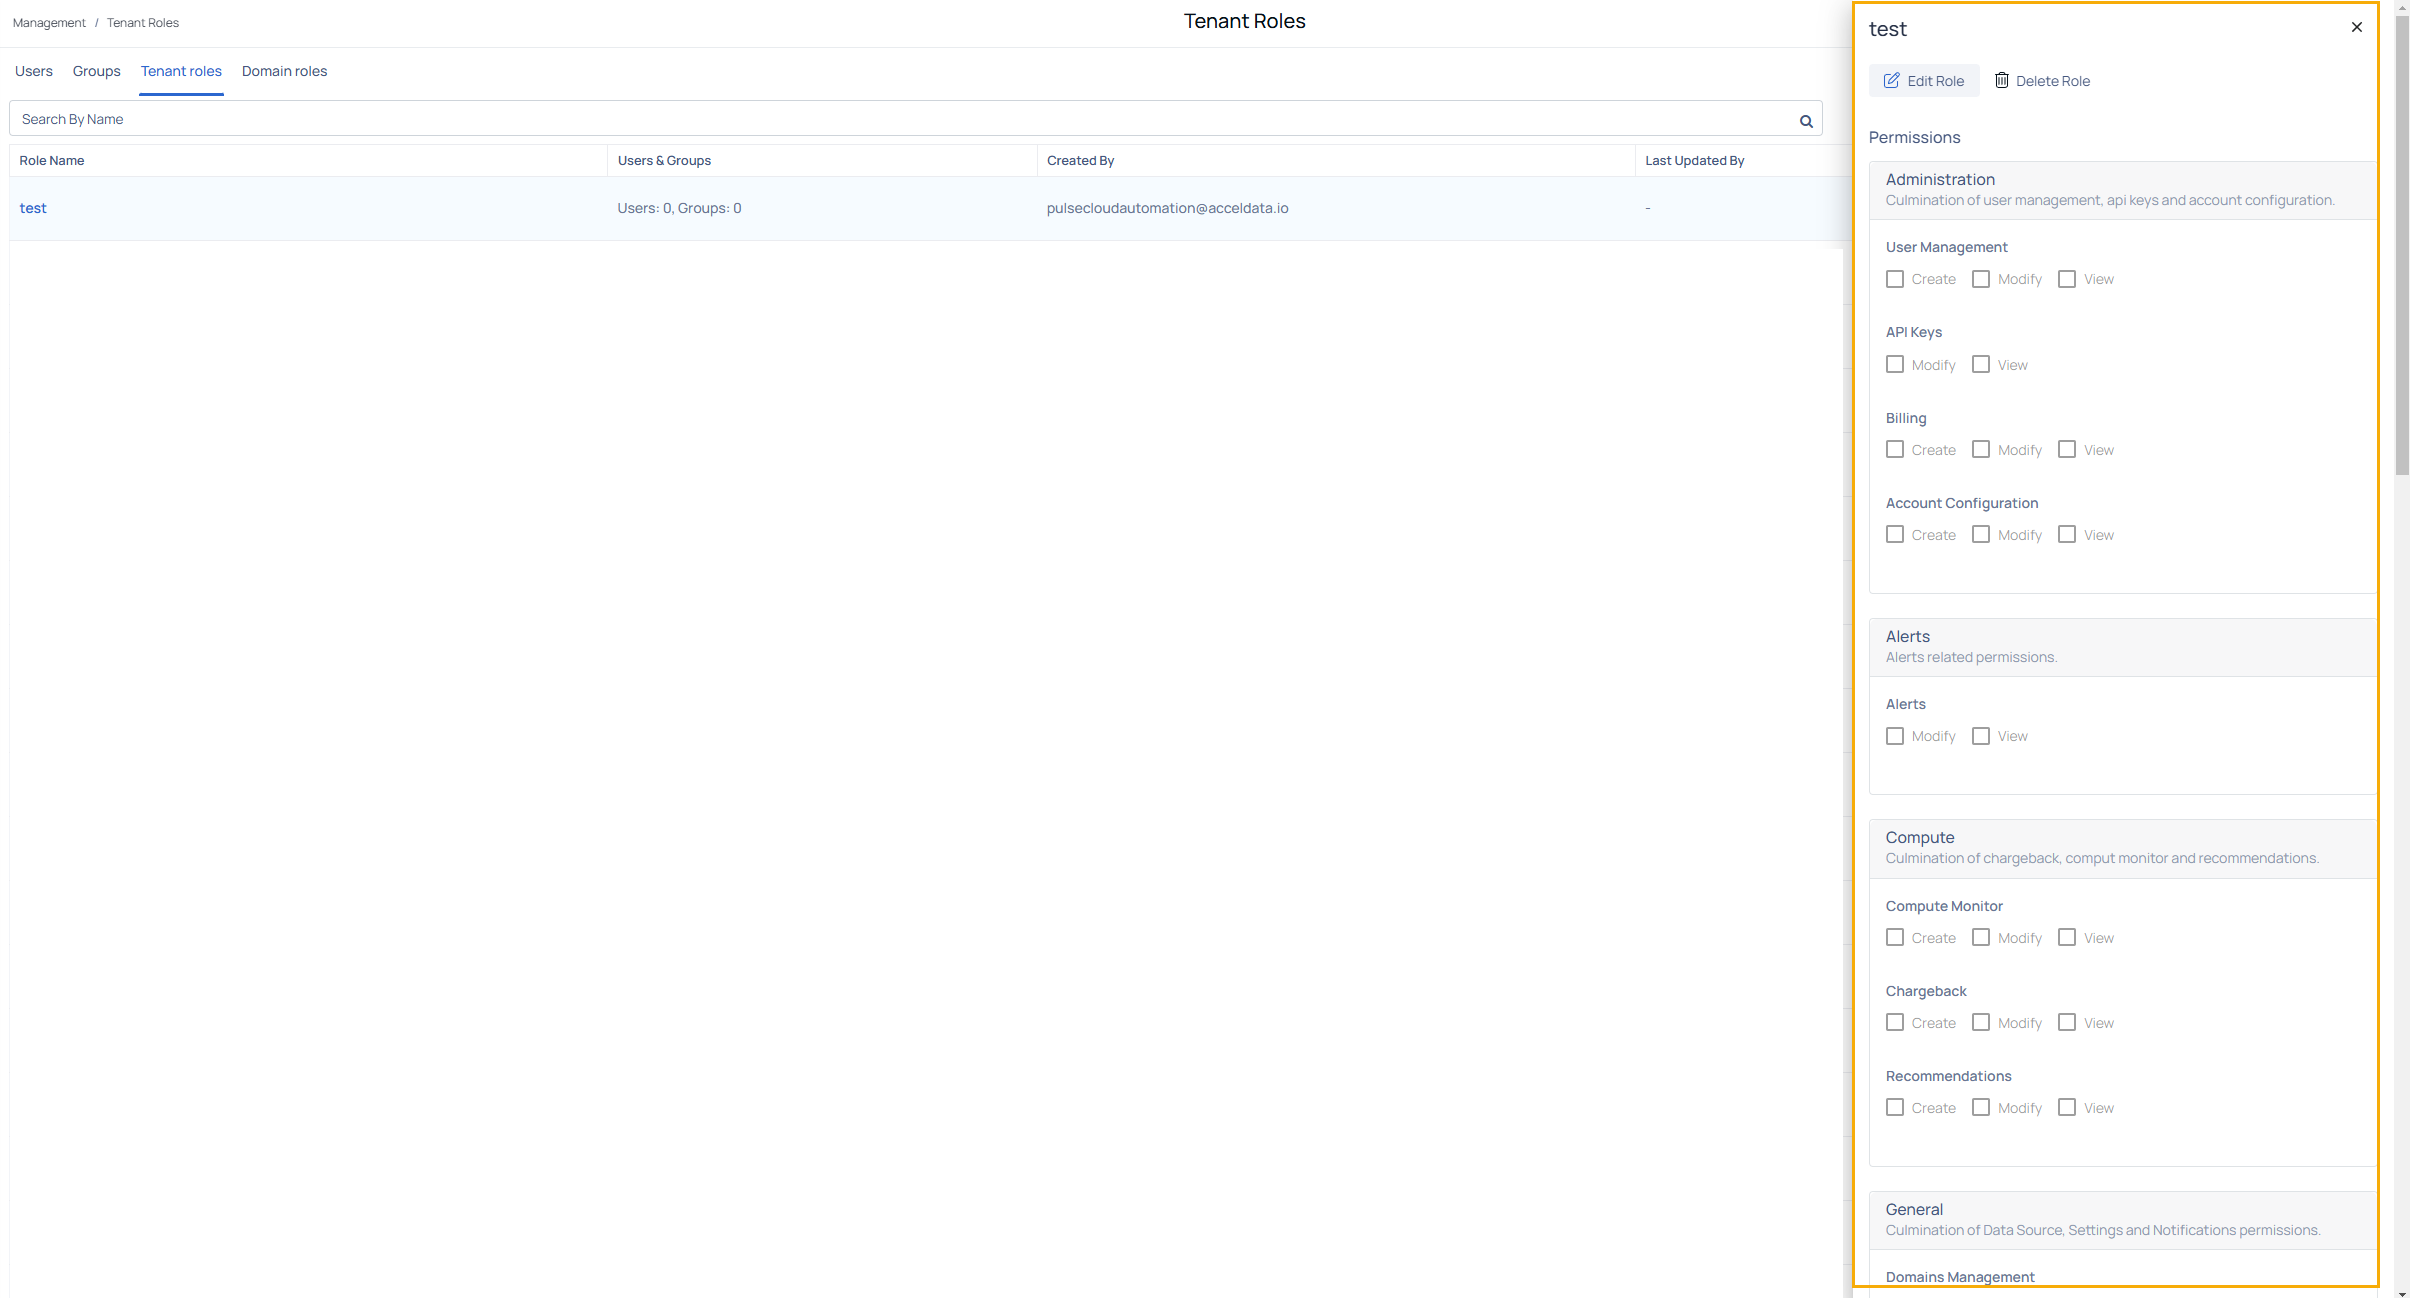
- Navigate to the Tenant Roles page.
- Click on the Role Name you wish to edit. This action opens the Role Details panel.
- In the Role Details panel, you can:
- Edit Role: Click the Edit Role button to update the role's name, description, and permissions.
- Delete Role: Click the Delete Role button to remove the role from the system (if applicable).
- Update Permissions: Permissions are categorized into sections, such as Administration, Alerts, Compute, and General. For each permission, select or deselect the actions (Create, Modify, or View) based on the updated requirements.
- After making the necessary modifications, click Save to apply the changes.
- Ensure all roles have a clear and descriptive name to simplify identification and management.
- Group permissions (e.g., Create, Modify, View) cohesively for a better user experience.
- Assign View permissions across features within a category to avoid dependencies and usability issues.
FAQ
Q I have 'View Data Source' permission, but data sources are not visible in the UI. Why is this happening?
A: In addition to the 'View Data Source' permission, the user must also have the 'View Data Plane' permission to access and display data sources. Without this, the system cannot load data sources in the UI. To resolve this issue, ensure that both permissions are assigned to the user.
Q: What should I do if I can't execute a policy?
A: Administrators can assign specific permissions to users for creating and managing policies, including Create, Execute, Modify, and View. If a user has only the View permission, they can see the policy but cannot execute, modify, or create one. As a result, the
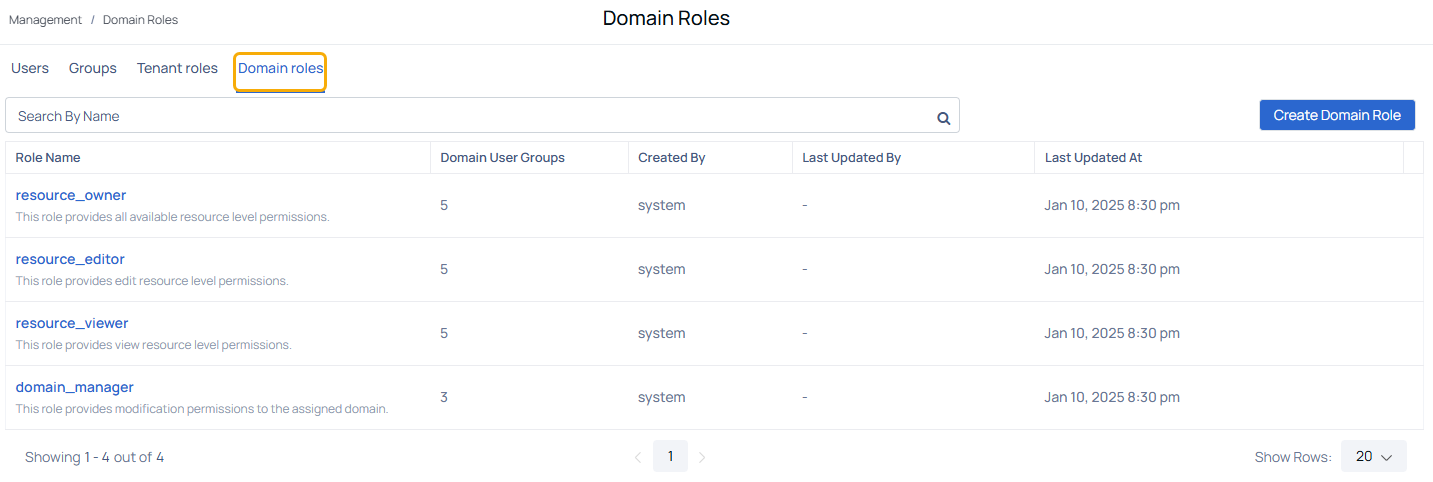
Domain Roles
The Domain Roles page provides administrators with the ability to manage resource-level permissions and domain-specific roles. This feature allows fine-grained access control for assets, domains, and reports within the system.
Viewing Domain Roles
The Domain Roles page displays the following columns:
| Column Name | Descriptions |
|---|---|
| Role Name | Name of the domain role created in the system. |
| Domain User Groups | Number of user groups associated with the domain role. |
| Created By | Name of the user or system responsible for creating the domain role. |
| Last Updated By | Name of the user who last updated the domain role. |
| Last Updated At | Date and time when the role was last modified. |
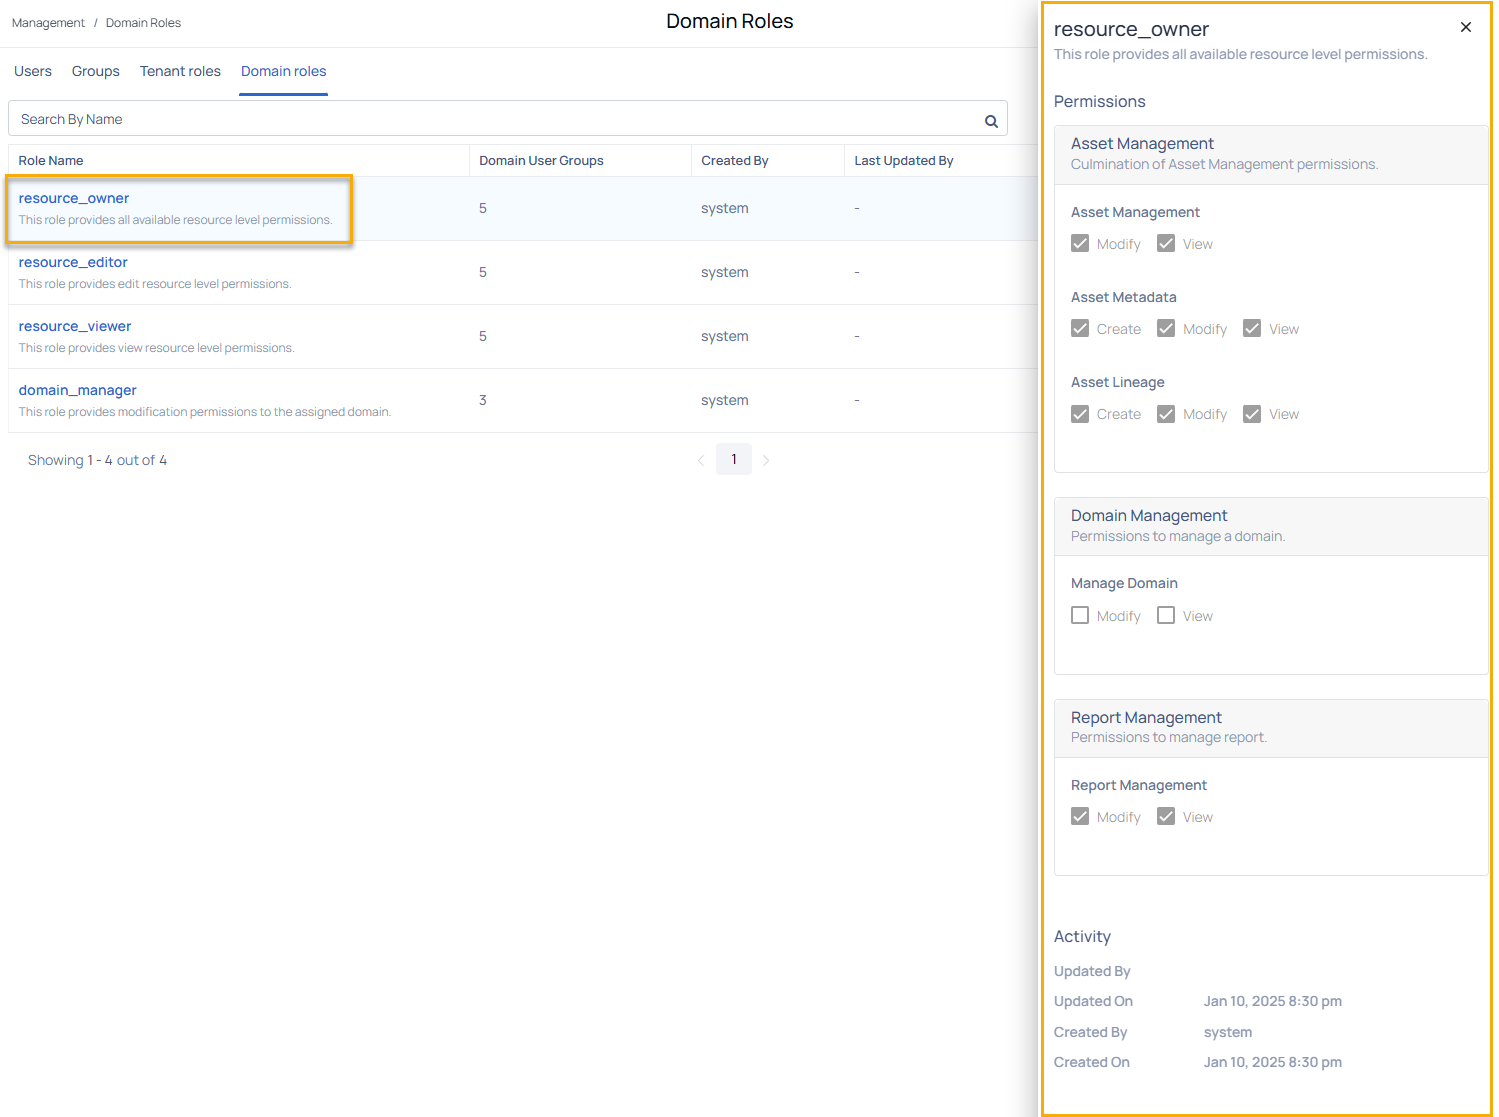
Creating a Domain Role
Administrators can create new domain roles to assign specific permissions for assets, reports, and domain management. Follow these steps to create a domain role:
- Navigate to the Domain Roles tab.
- Click the Create Domain Role button.
- Enter a Role Name (required) and an optional Description to specify the role's purpose.
- Browse the available Permissions Categories, including:
- Asset Management: Manage assets, metadata, and lineage.
- Domain Management: Permissions to manage a domain.
- Report Management: Permissions to manage reports.
and select the appropriate actions ( Create, Modify, or View) under each permission category.
- Click the Save button to create the new domain role.
Editing a Domain Role
To edit a domain role:
- Navigate to the Domain Role page.
- Click on the Role Name to open the Role Details panel.
- In the Role Details panel, you can:
- Update the permissions by selecting or deselecting actions (Create, Modify, View).
- View the Activity section to see the creation and modification history.
- After making the necessary updates, click Save to apply the changes.
Asset Management - Manage assets, metadata, and lineage.
Domain Management - Permissions to manage domains.
Report Management - Permissions to create, modify, or view reports
By using Domain Roles, organizations can establish robust access controls tailored to their operational requirements, ensuring efficient resource and domain-level management.