Schema Registry serves as a centralized repository for message metadata. It stores schemas that define the structure and type of messages. Schema Registry also provides pluggable serializer and deserializer interfaces and supplies serializer and deserializer implementations at runtime based on the incoming messages. Additionally, it facilitates the reuse, discovery, authoring, and collaboration of schemas.
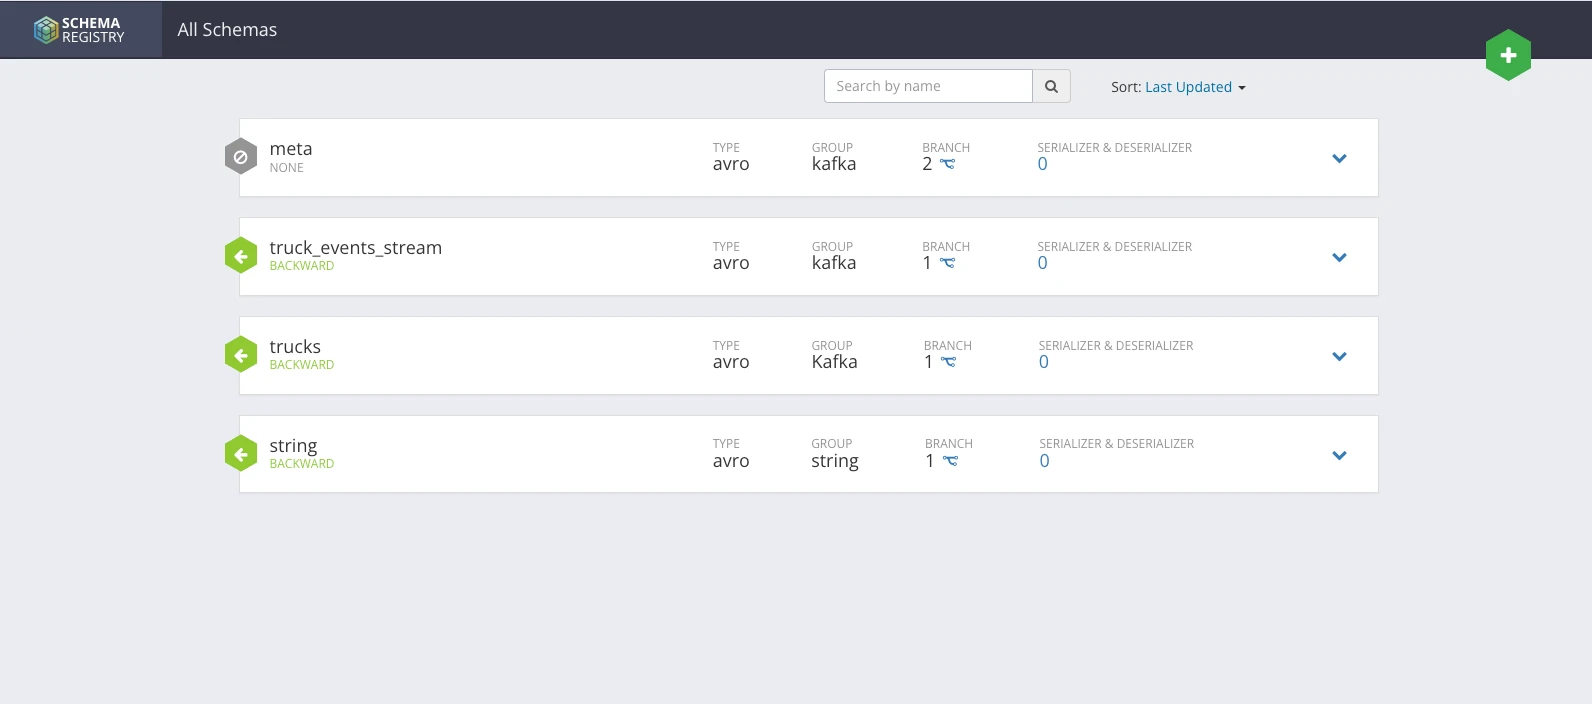
Each schema is primarily represented by the following metadata:
Name: The unique name of the schema within the registry.
Type: The schema type, such as Avro, ProtoBuf, or JSON.
Schema Group: The group to which this schema belongs, which could be categories like Kafka, Hive, Spark, or system logs.
Compatibility: The level of compatibility between different versions of the schema.
Description: Information about the various versions of a schema.
Schemas can evolve over time through multiple versions. Each version of a schema includes:
Schema Text: The textual representation of the schema.
Description: Details about this specific version.
Compatibility
The compatibility between different versions of a schema can be set to one of the following options:
Backward: This setting ensures that a new version of the schema is compatible with the previous version. This means data written with the earlier version can be deserialized using the new version of the schema.
Forward: This option indicates that the current schema version is compatible with future versions. Thus, data written with a new version can still be read by the old version of the schema.
Full: This setting means that a new version of the schema supports both backward and forward compatibility.
None: There is no compatibility between different versions of the schema.
Installation
Initialize Database
Create a user in the assigned database and provide access to the registry server host:
The following steps are an example for MYSQL database. Do the following on MySQL CLI to enable the registry user to access the registry database.
Ambari Installation Steps
To install Ambari Registry Mpack, perform the following:
Download the branch from the code and zip it with tar.gz extension.
Upload the gzipped file to the ambari-server.
Execute the below command to install:
On running the above commands, the following message is displayed:
However, it requires a few symlink modifications on the Ambari server before initiating a restart.
Login to the Ambari UI and navigate to the Add Schema Registry service.
Select the hosts for the Registry server.
Update the configuration according to the specified sections. The following configurations are necessary for enabling the registry server, as well as for authentication, authorization, and other authentication mechanisms.
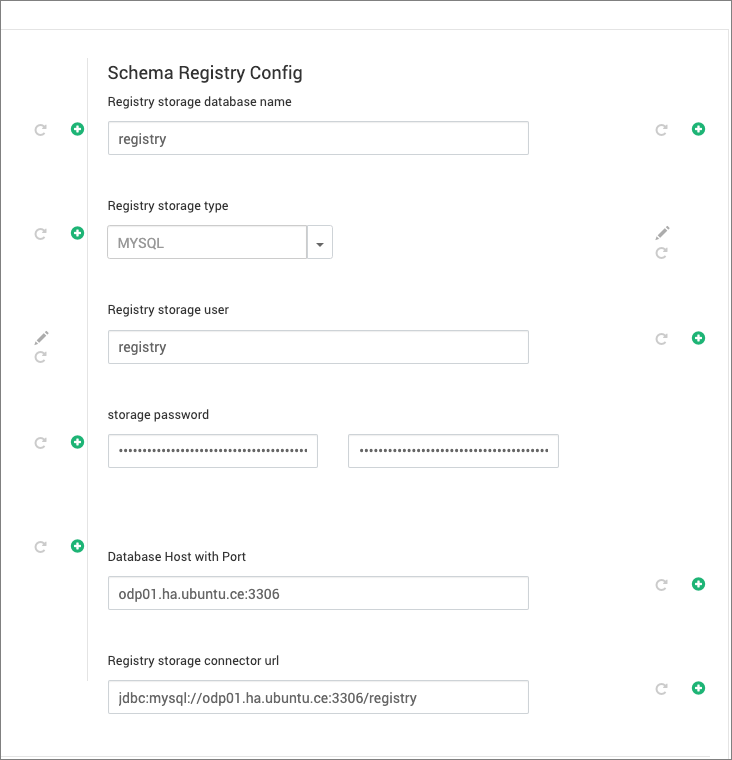
Database Configuration (Mandatory)
Update the necessary configurations below to maintain the schema registry service metadata on an RDBMS service:
Add details for the storage user, storage password, database type, and host:port as established during the initial database setup.
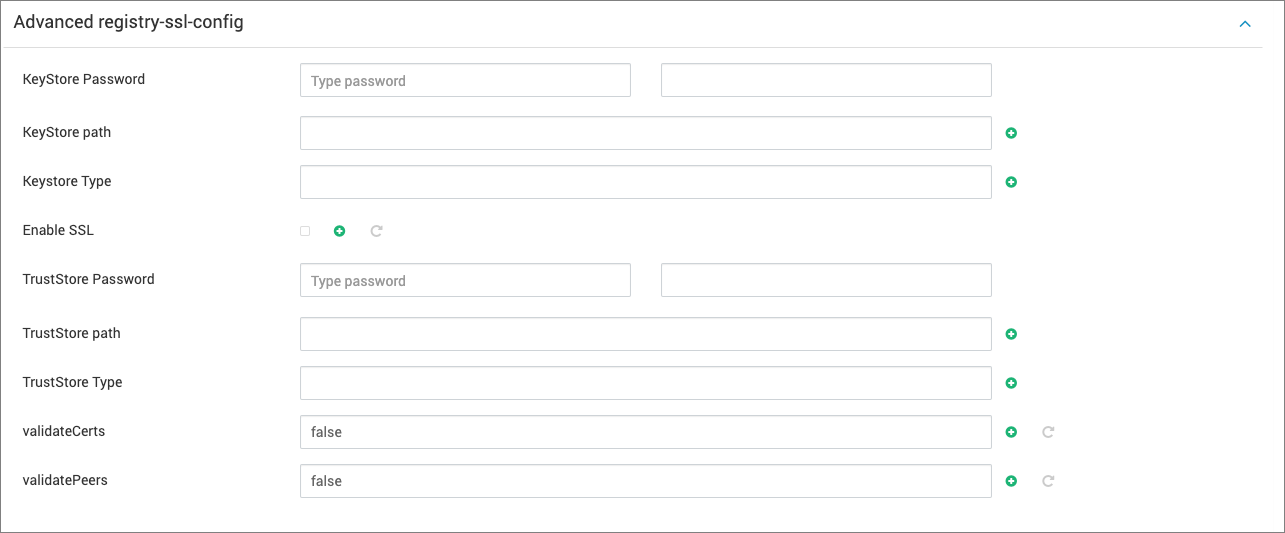
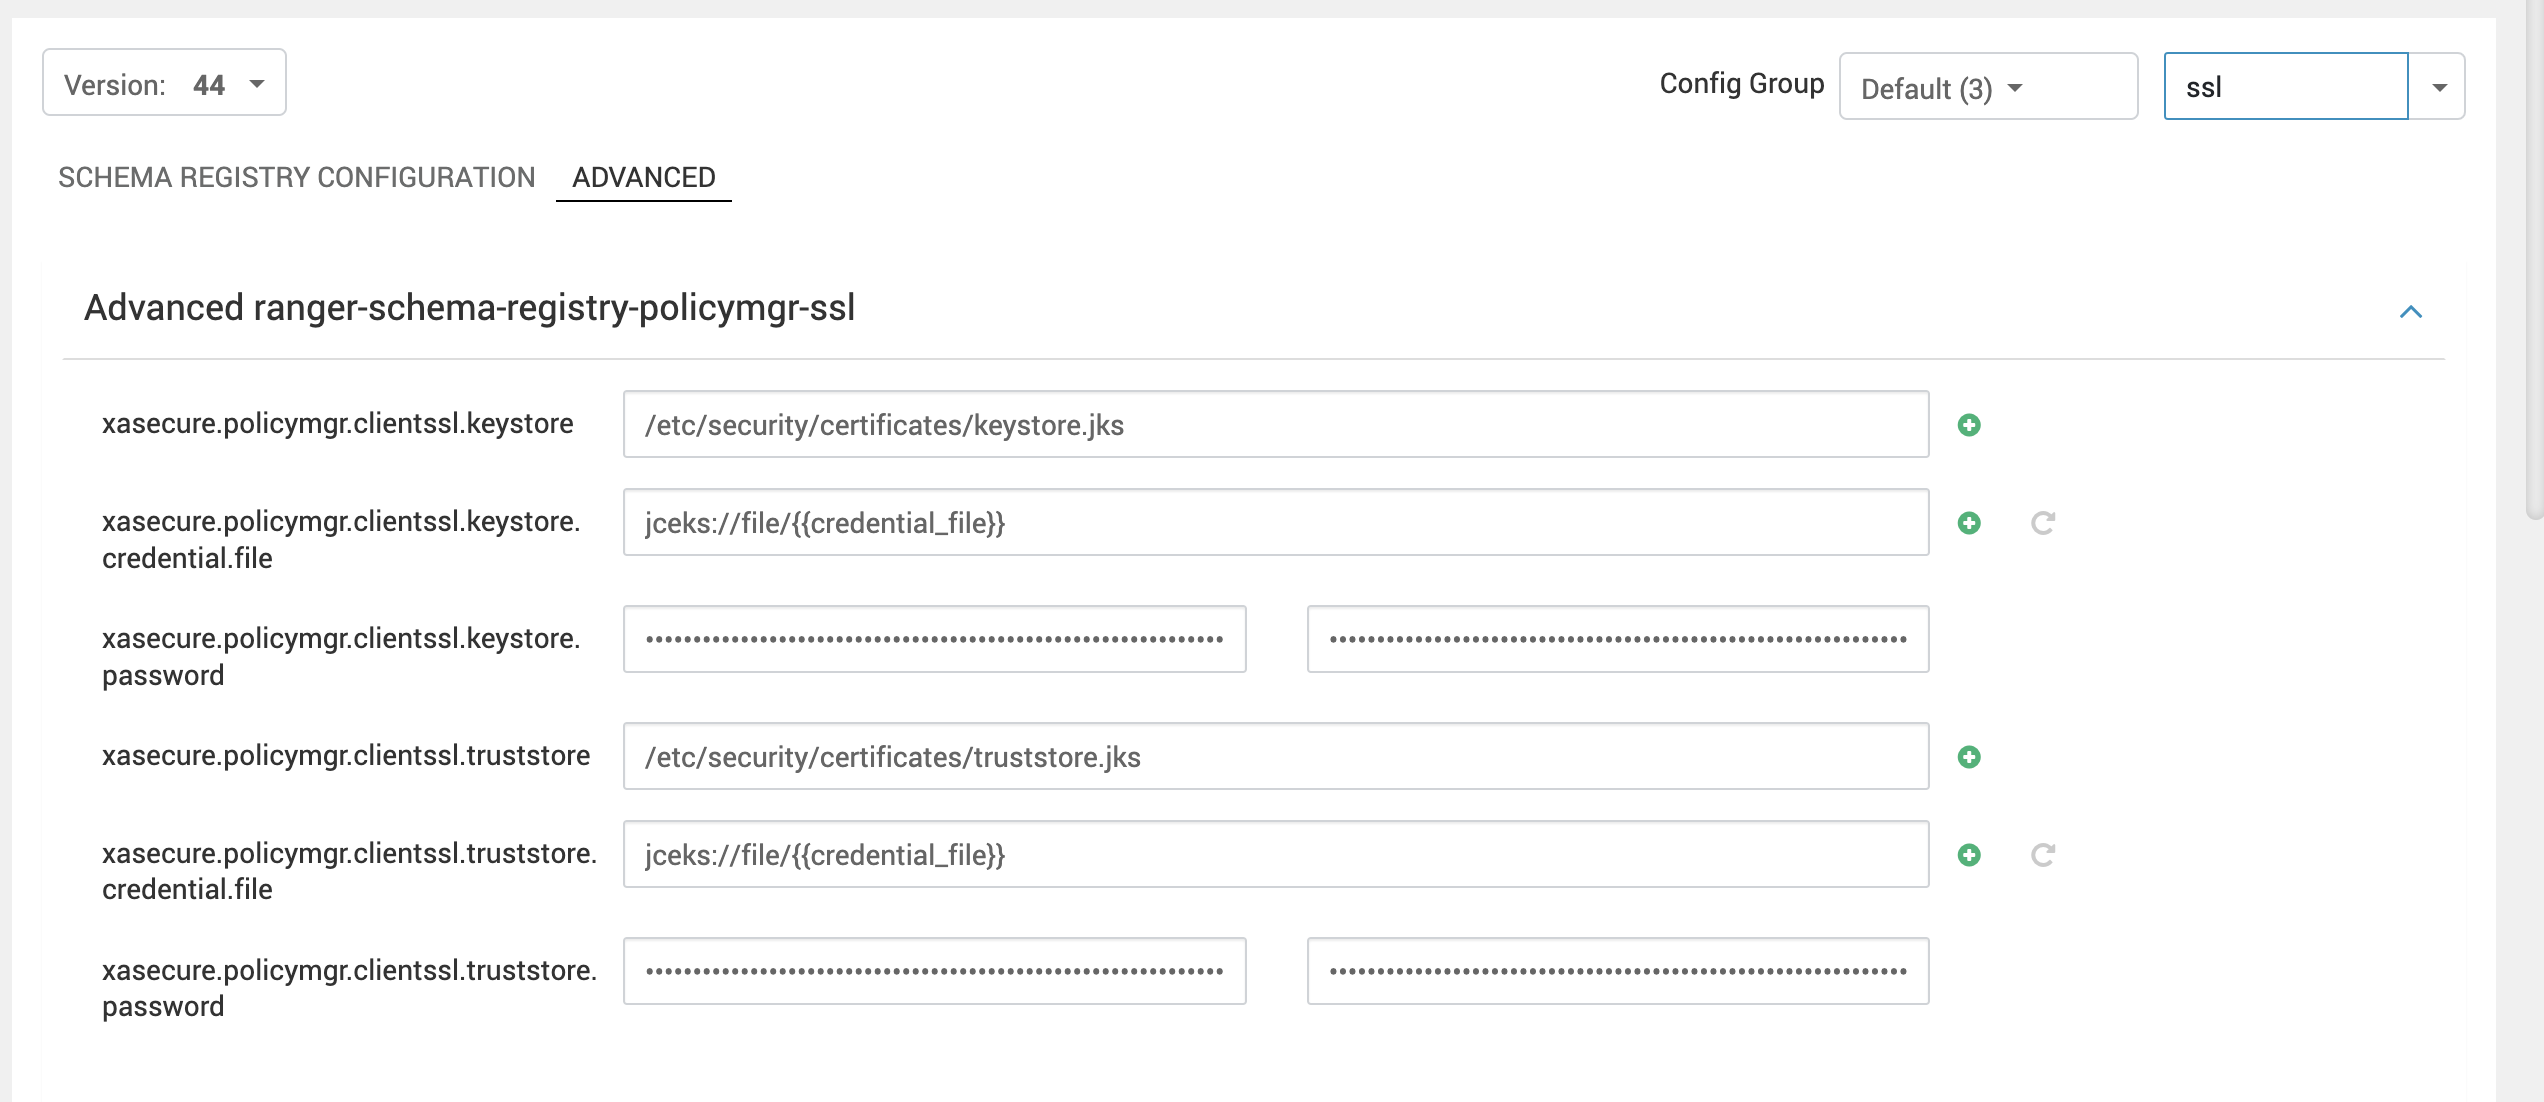
SSL Enablement
Update the following properties as per your SSL configurations for the respective hosts:
Kerberos Configuration
Service principal and keytab configuration will be automated by Ambari, but one manual adjustment is necessary for handling authentication to local rule translation, as illustrated here:
Verify the property
hadoop.security.auth_to_localin the HDFS/YARN core-site, or adapt your own rule following this example:
To adjust the kerberos.name.rules property in Custom registry-common, modify the rules from newlines to spaces as follows:
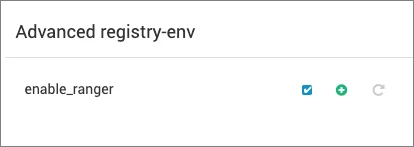
Ranger Configuration
To enable or disable Ranger authorization, update the below configuration and select the enable_ranger checkbox:
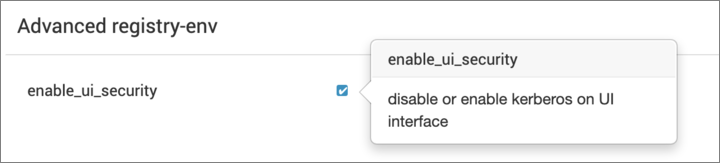
When enabling Ranger in a Kerberized environment, ensure to perform the following:
Enable Kerberos on the UI by checking the enable_ui_security checkbox.
Set the Authentication Type to “Kerberos” in the Ranger Schema Registry configuration properties section.

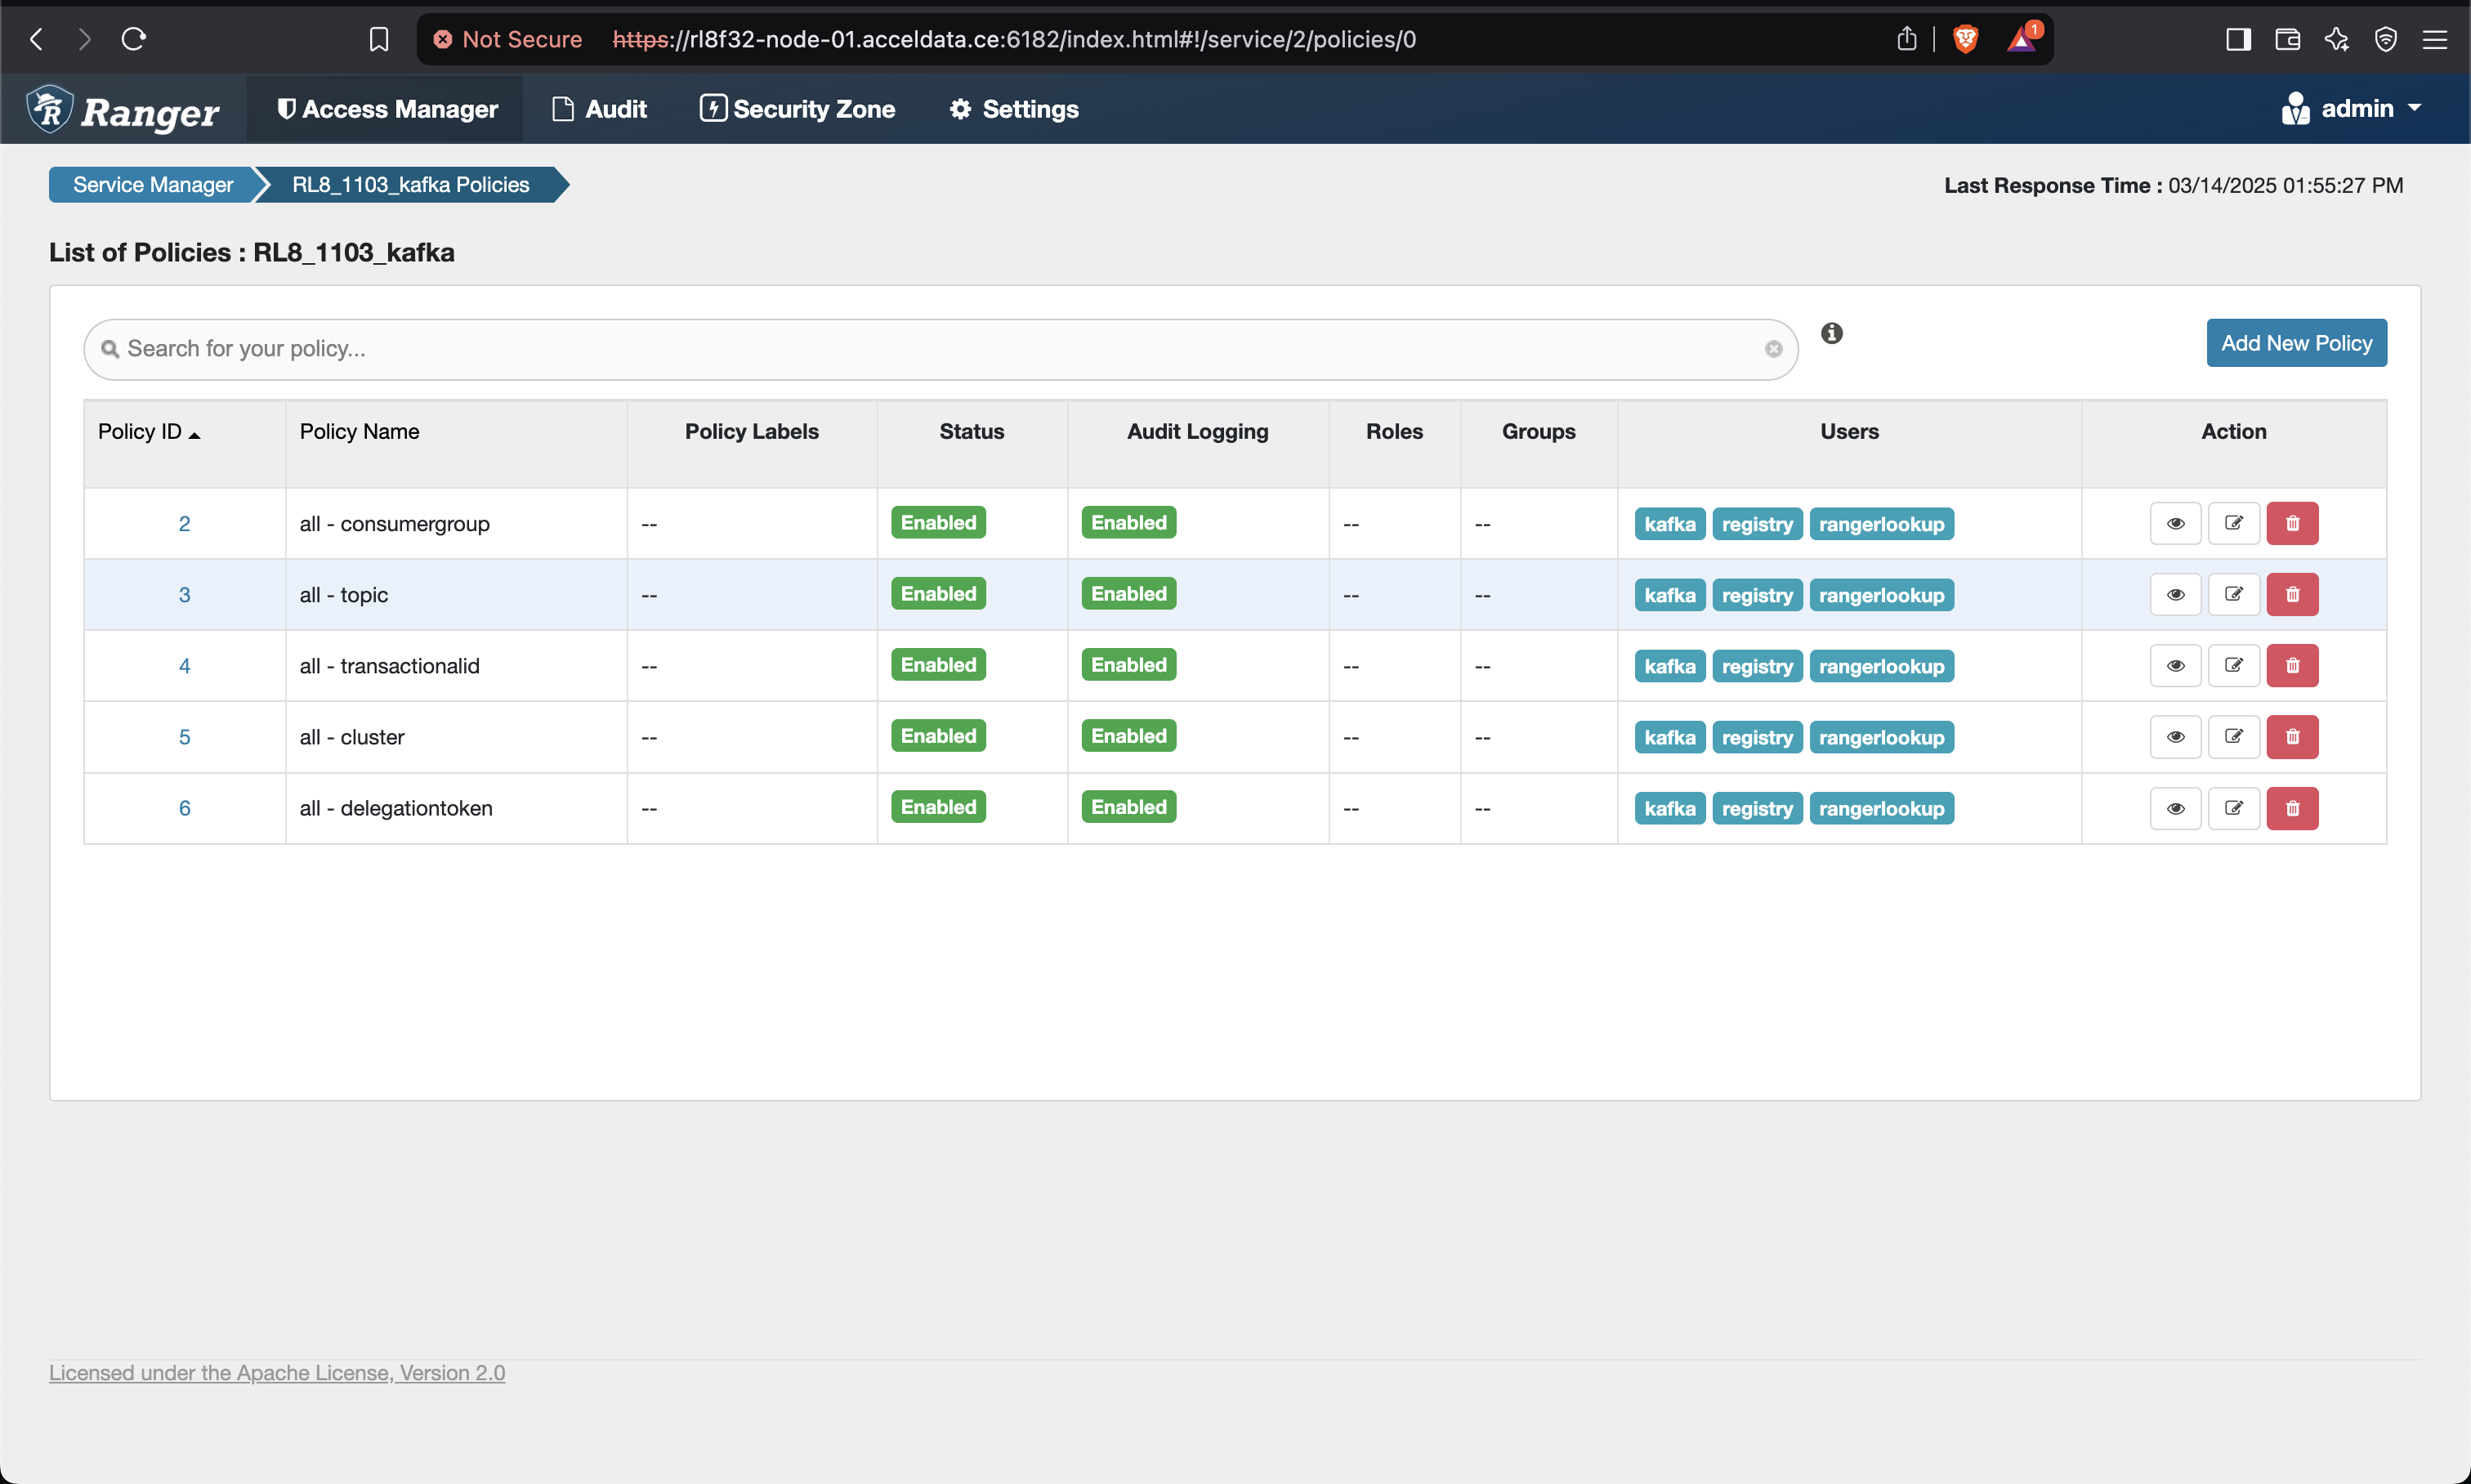
Add the below mentioned policies on the Ranger UI for Schema Registry.

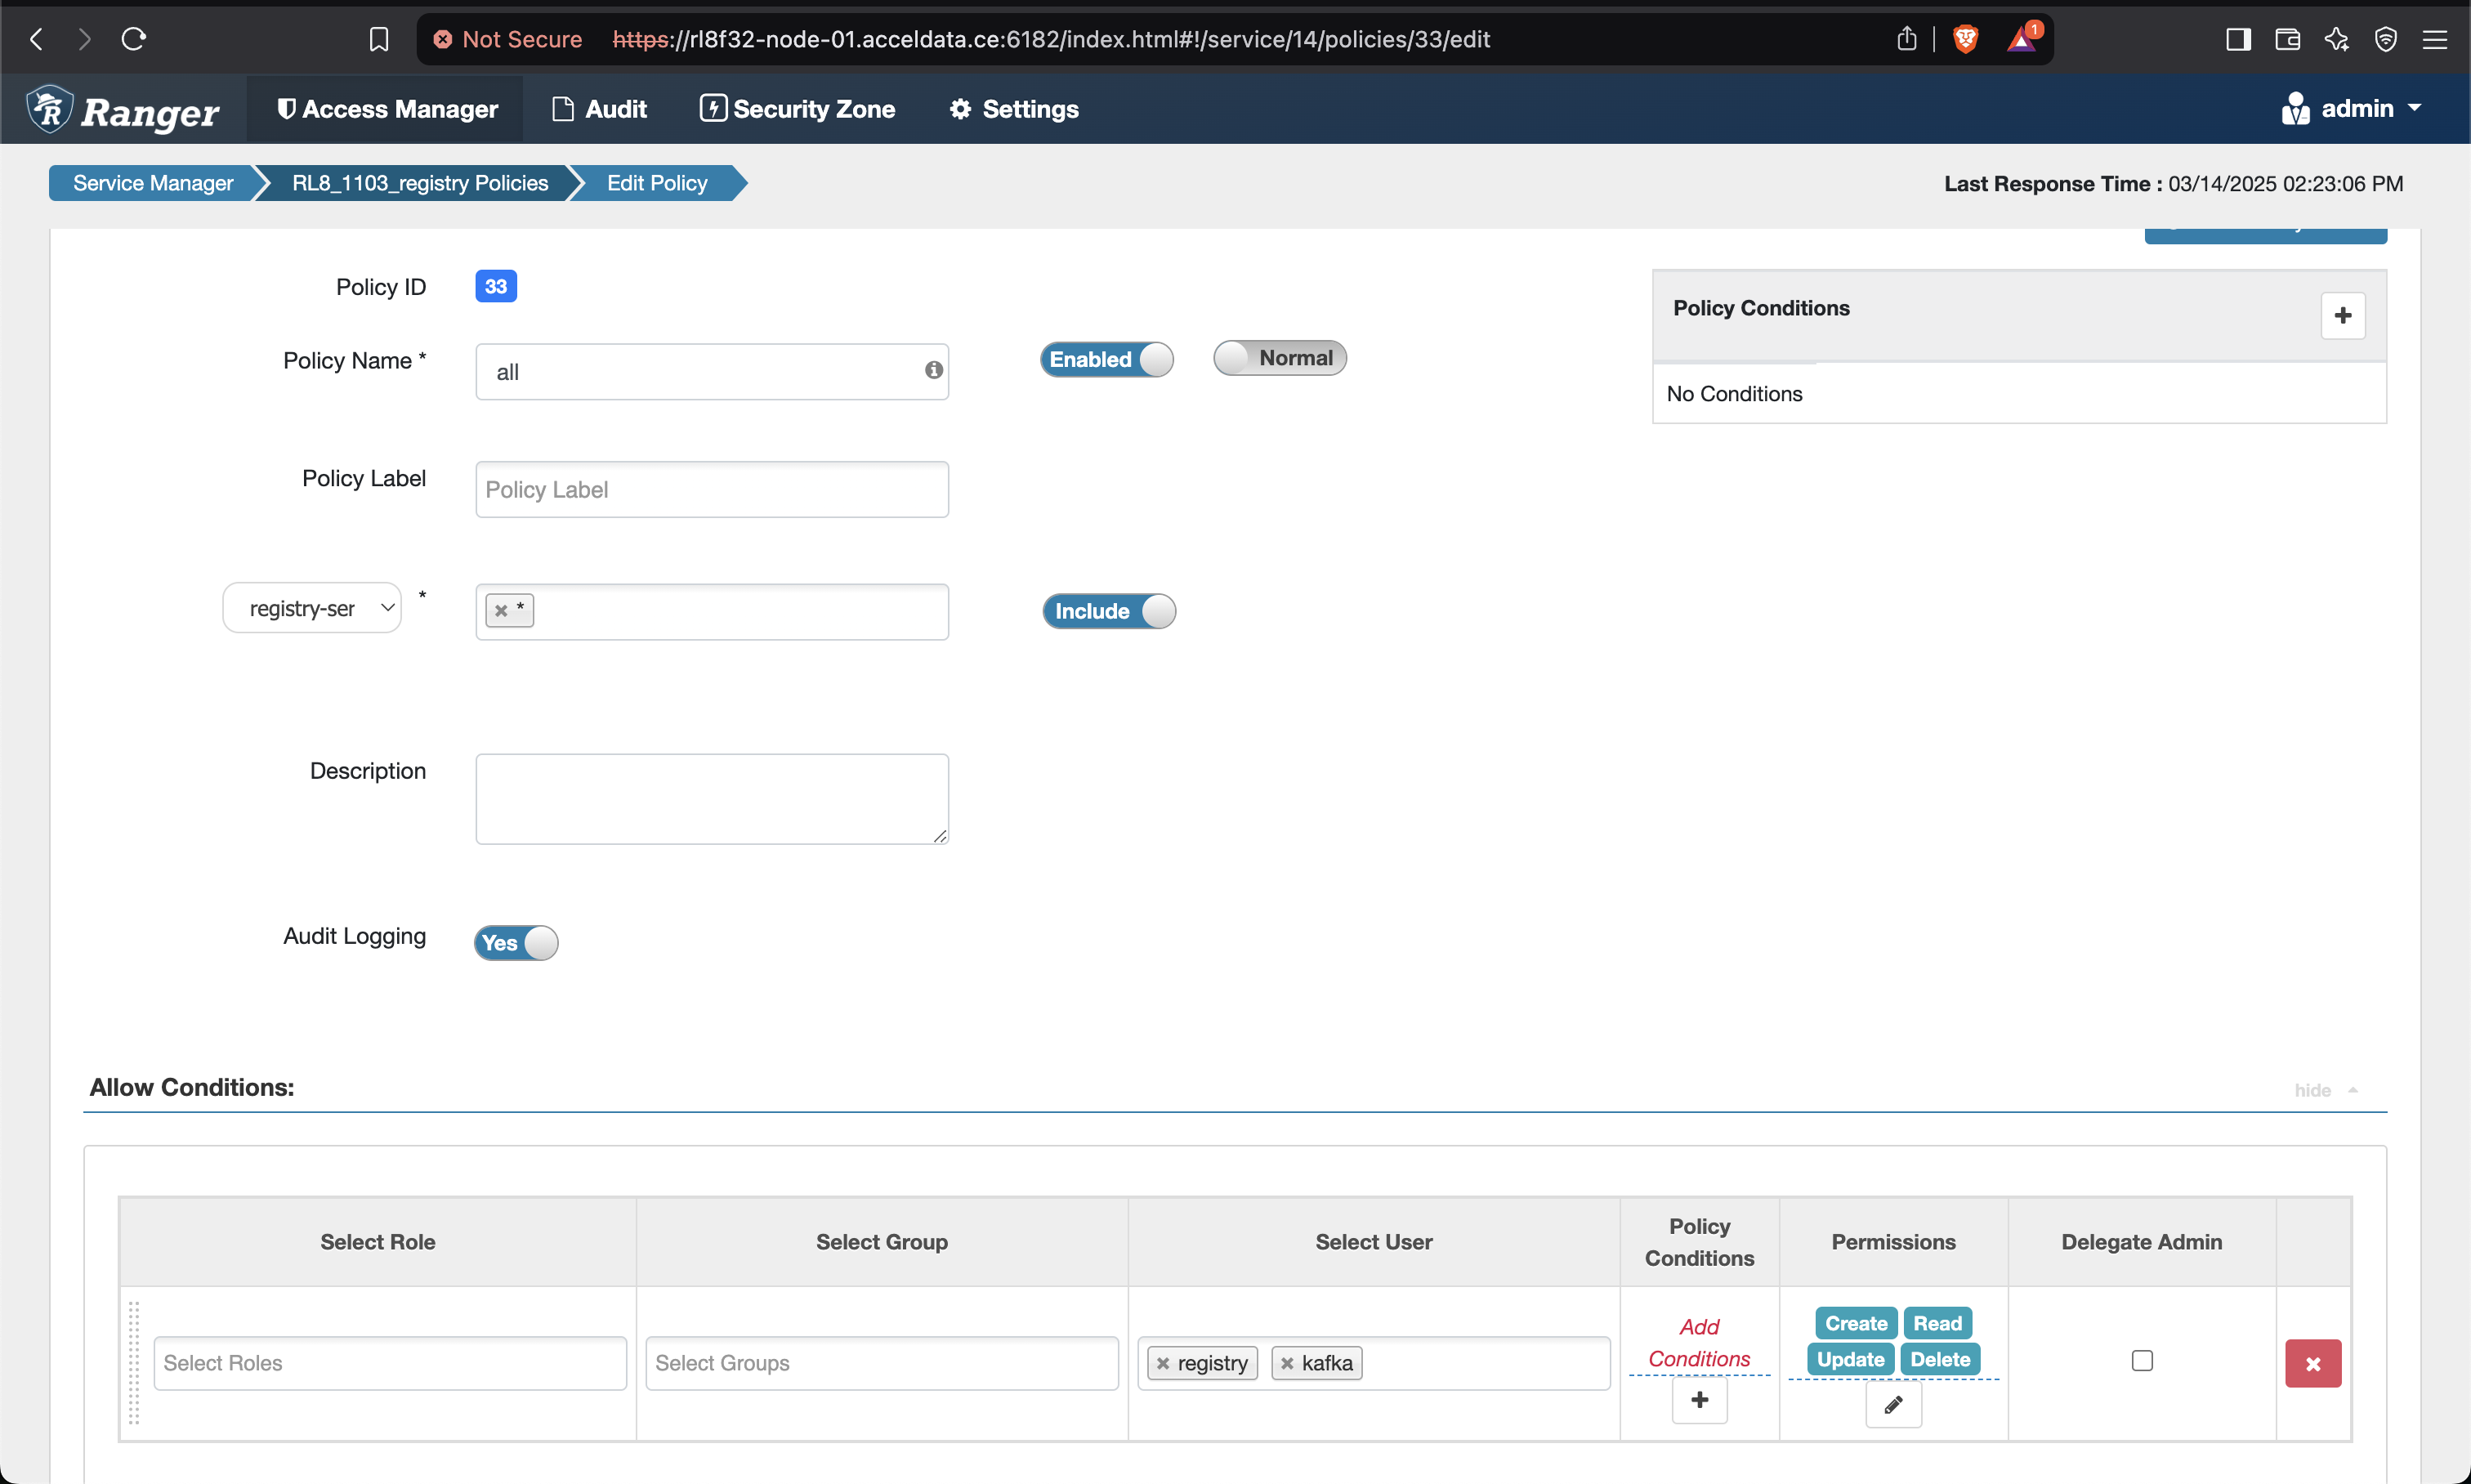
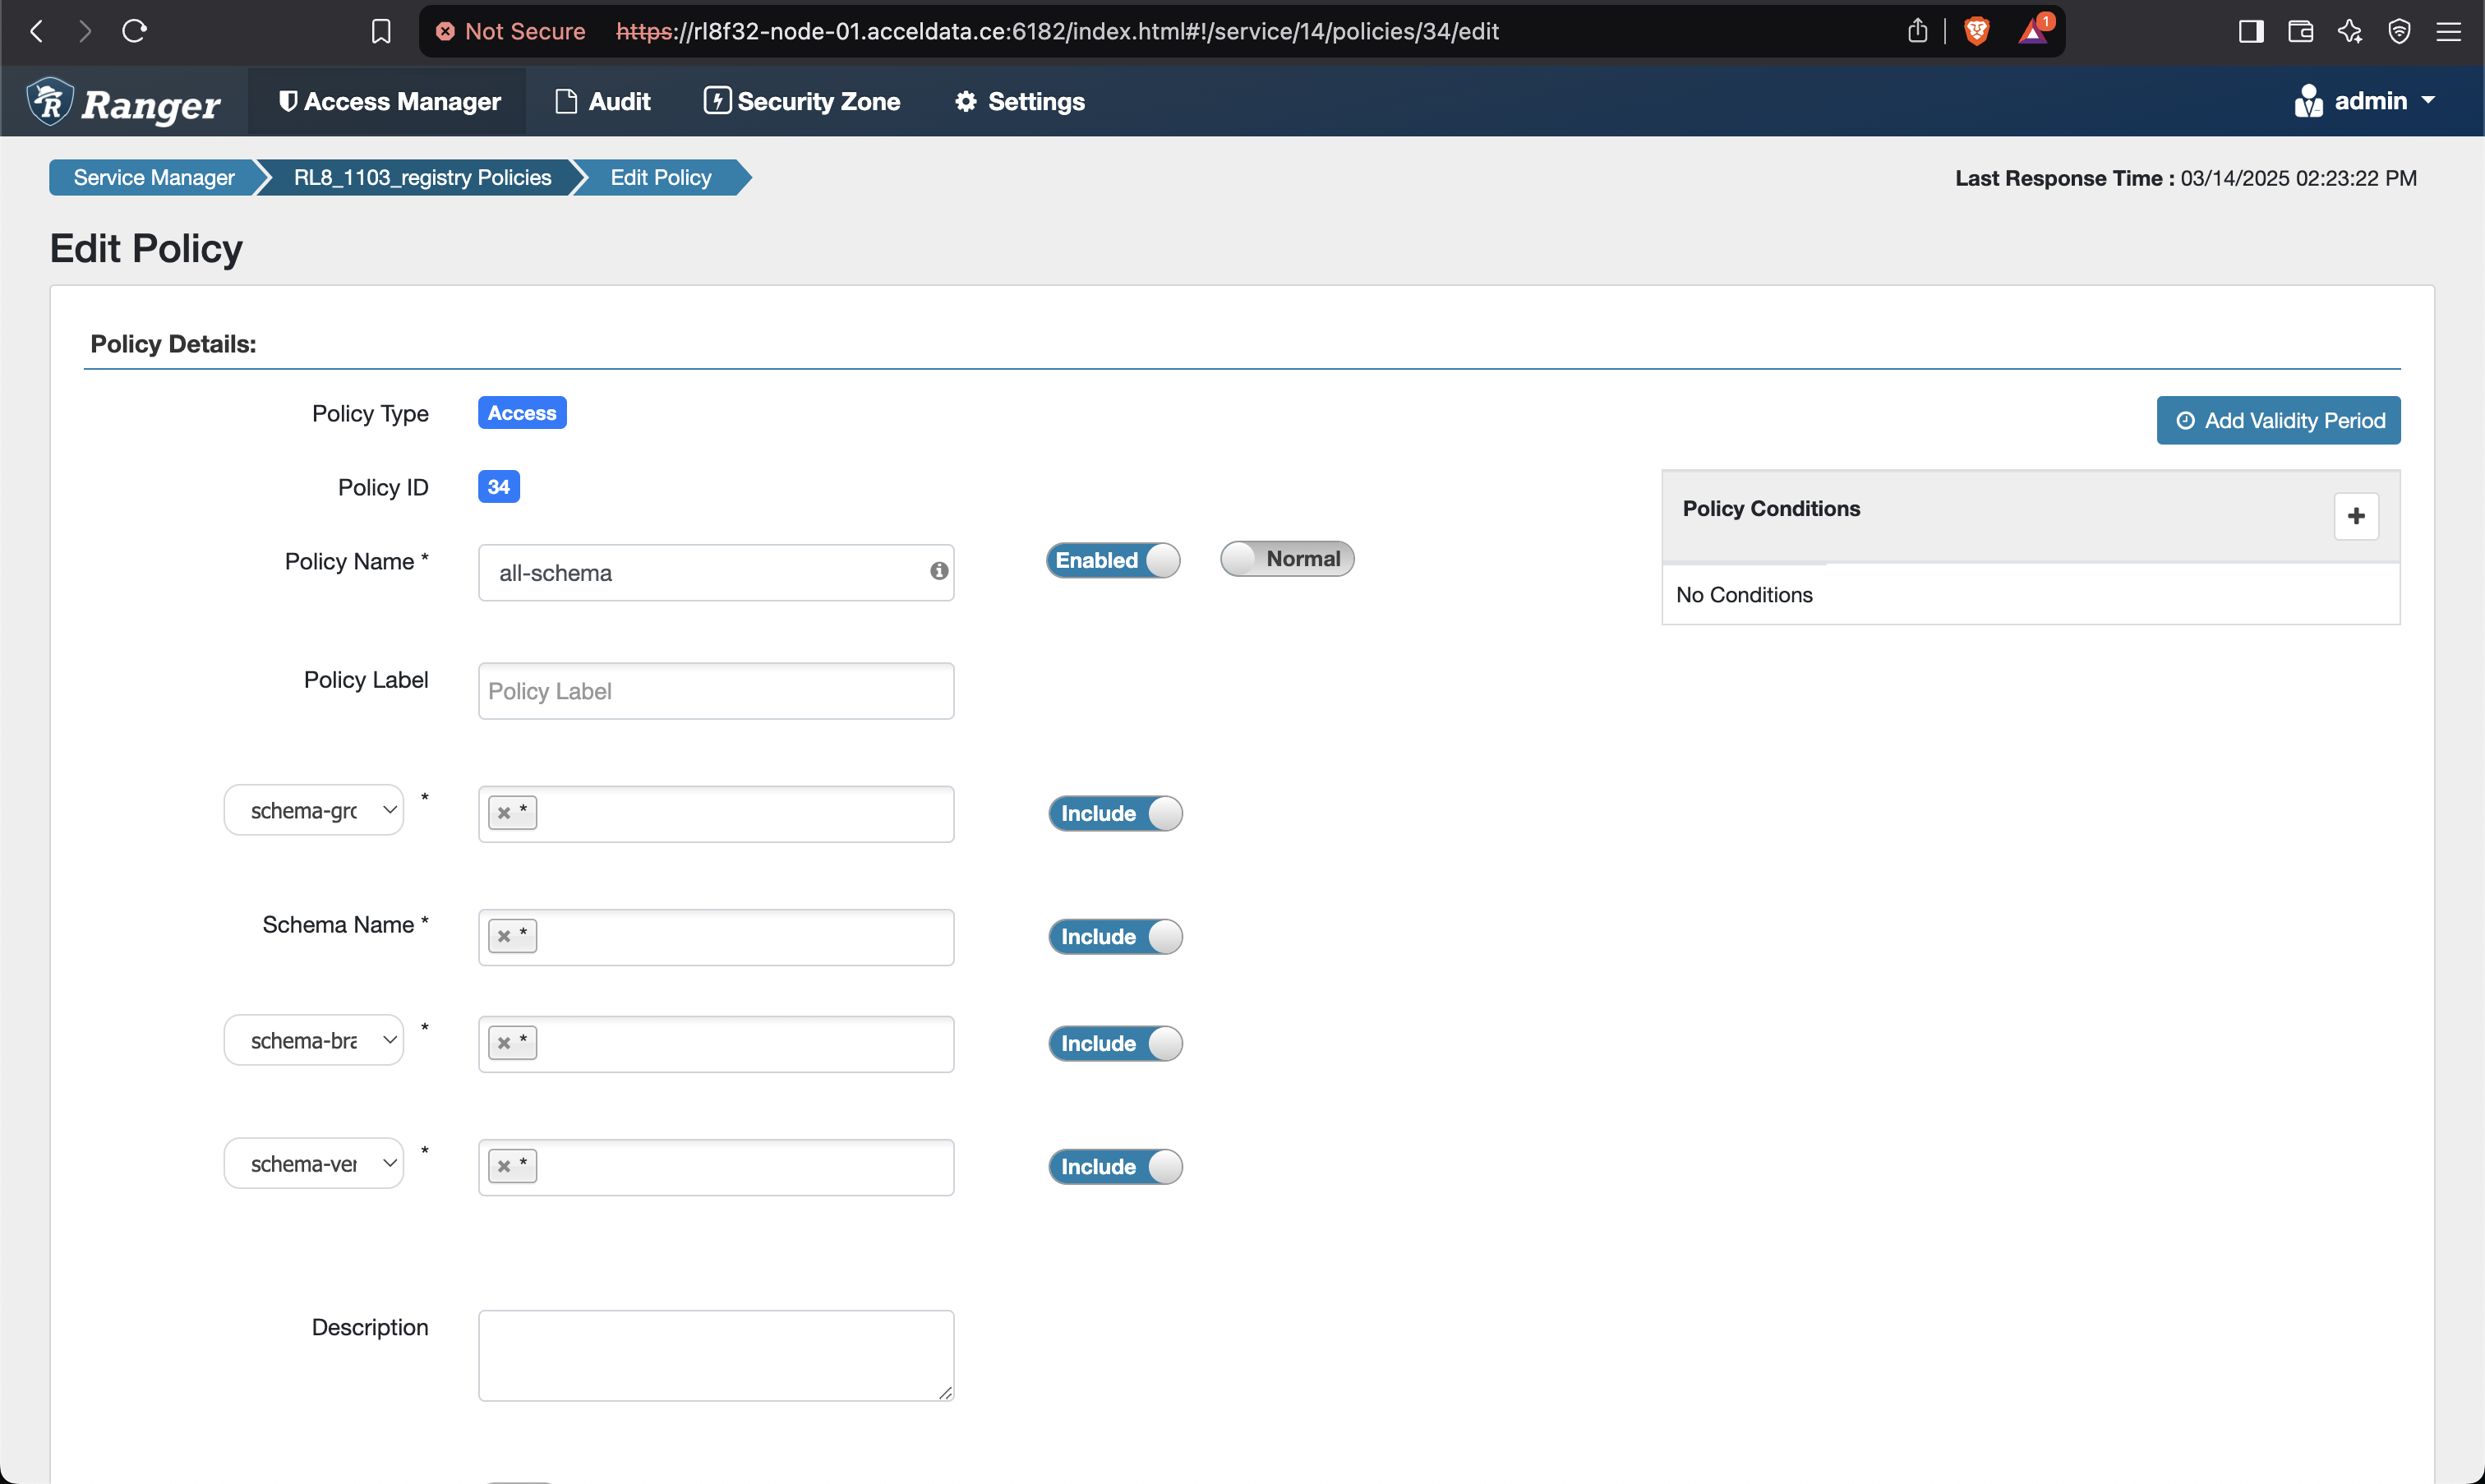
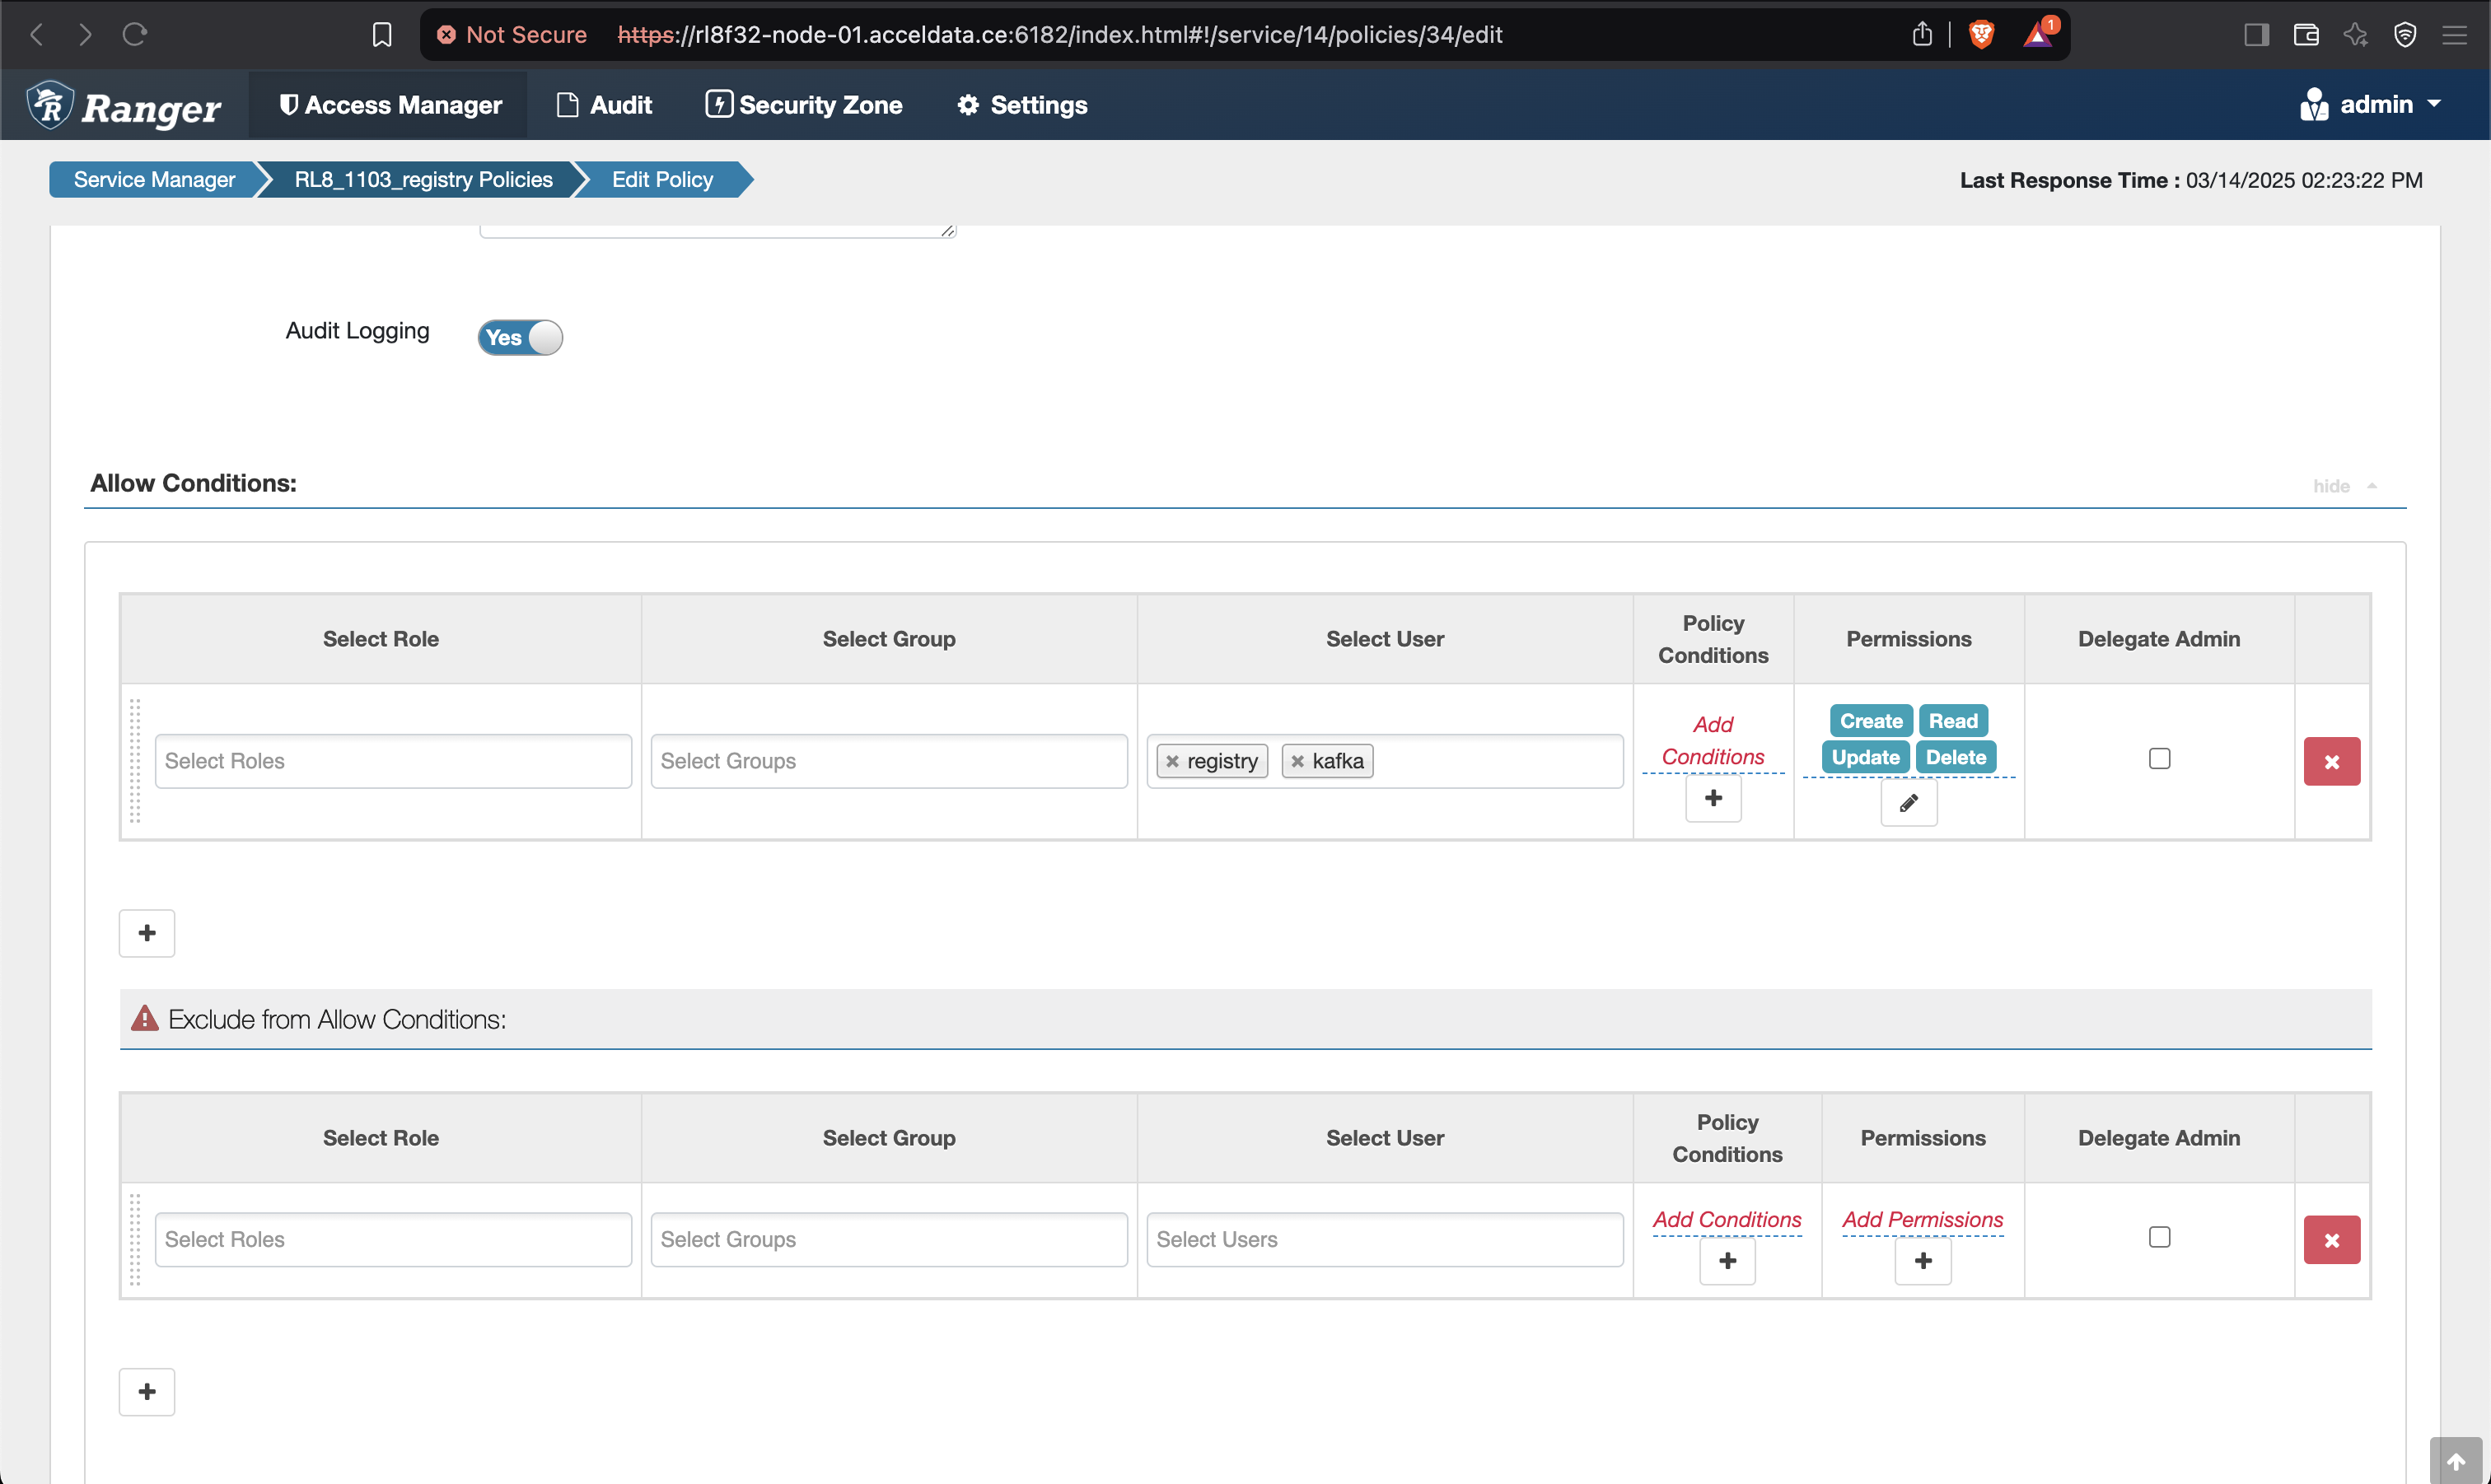

Save and give permissions to users for all the policies as shown below.
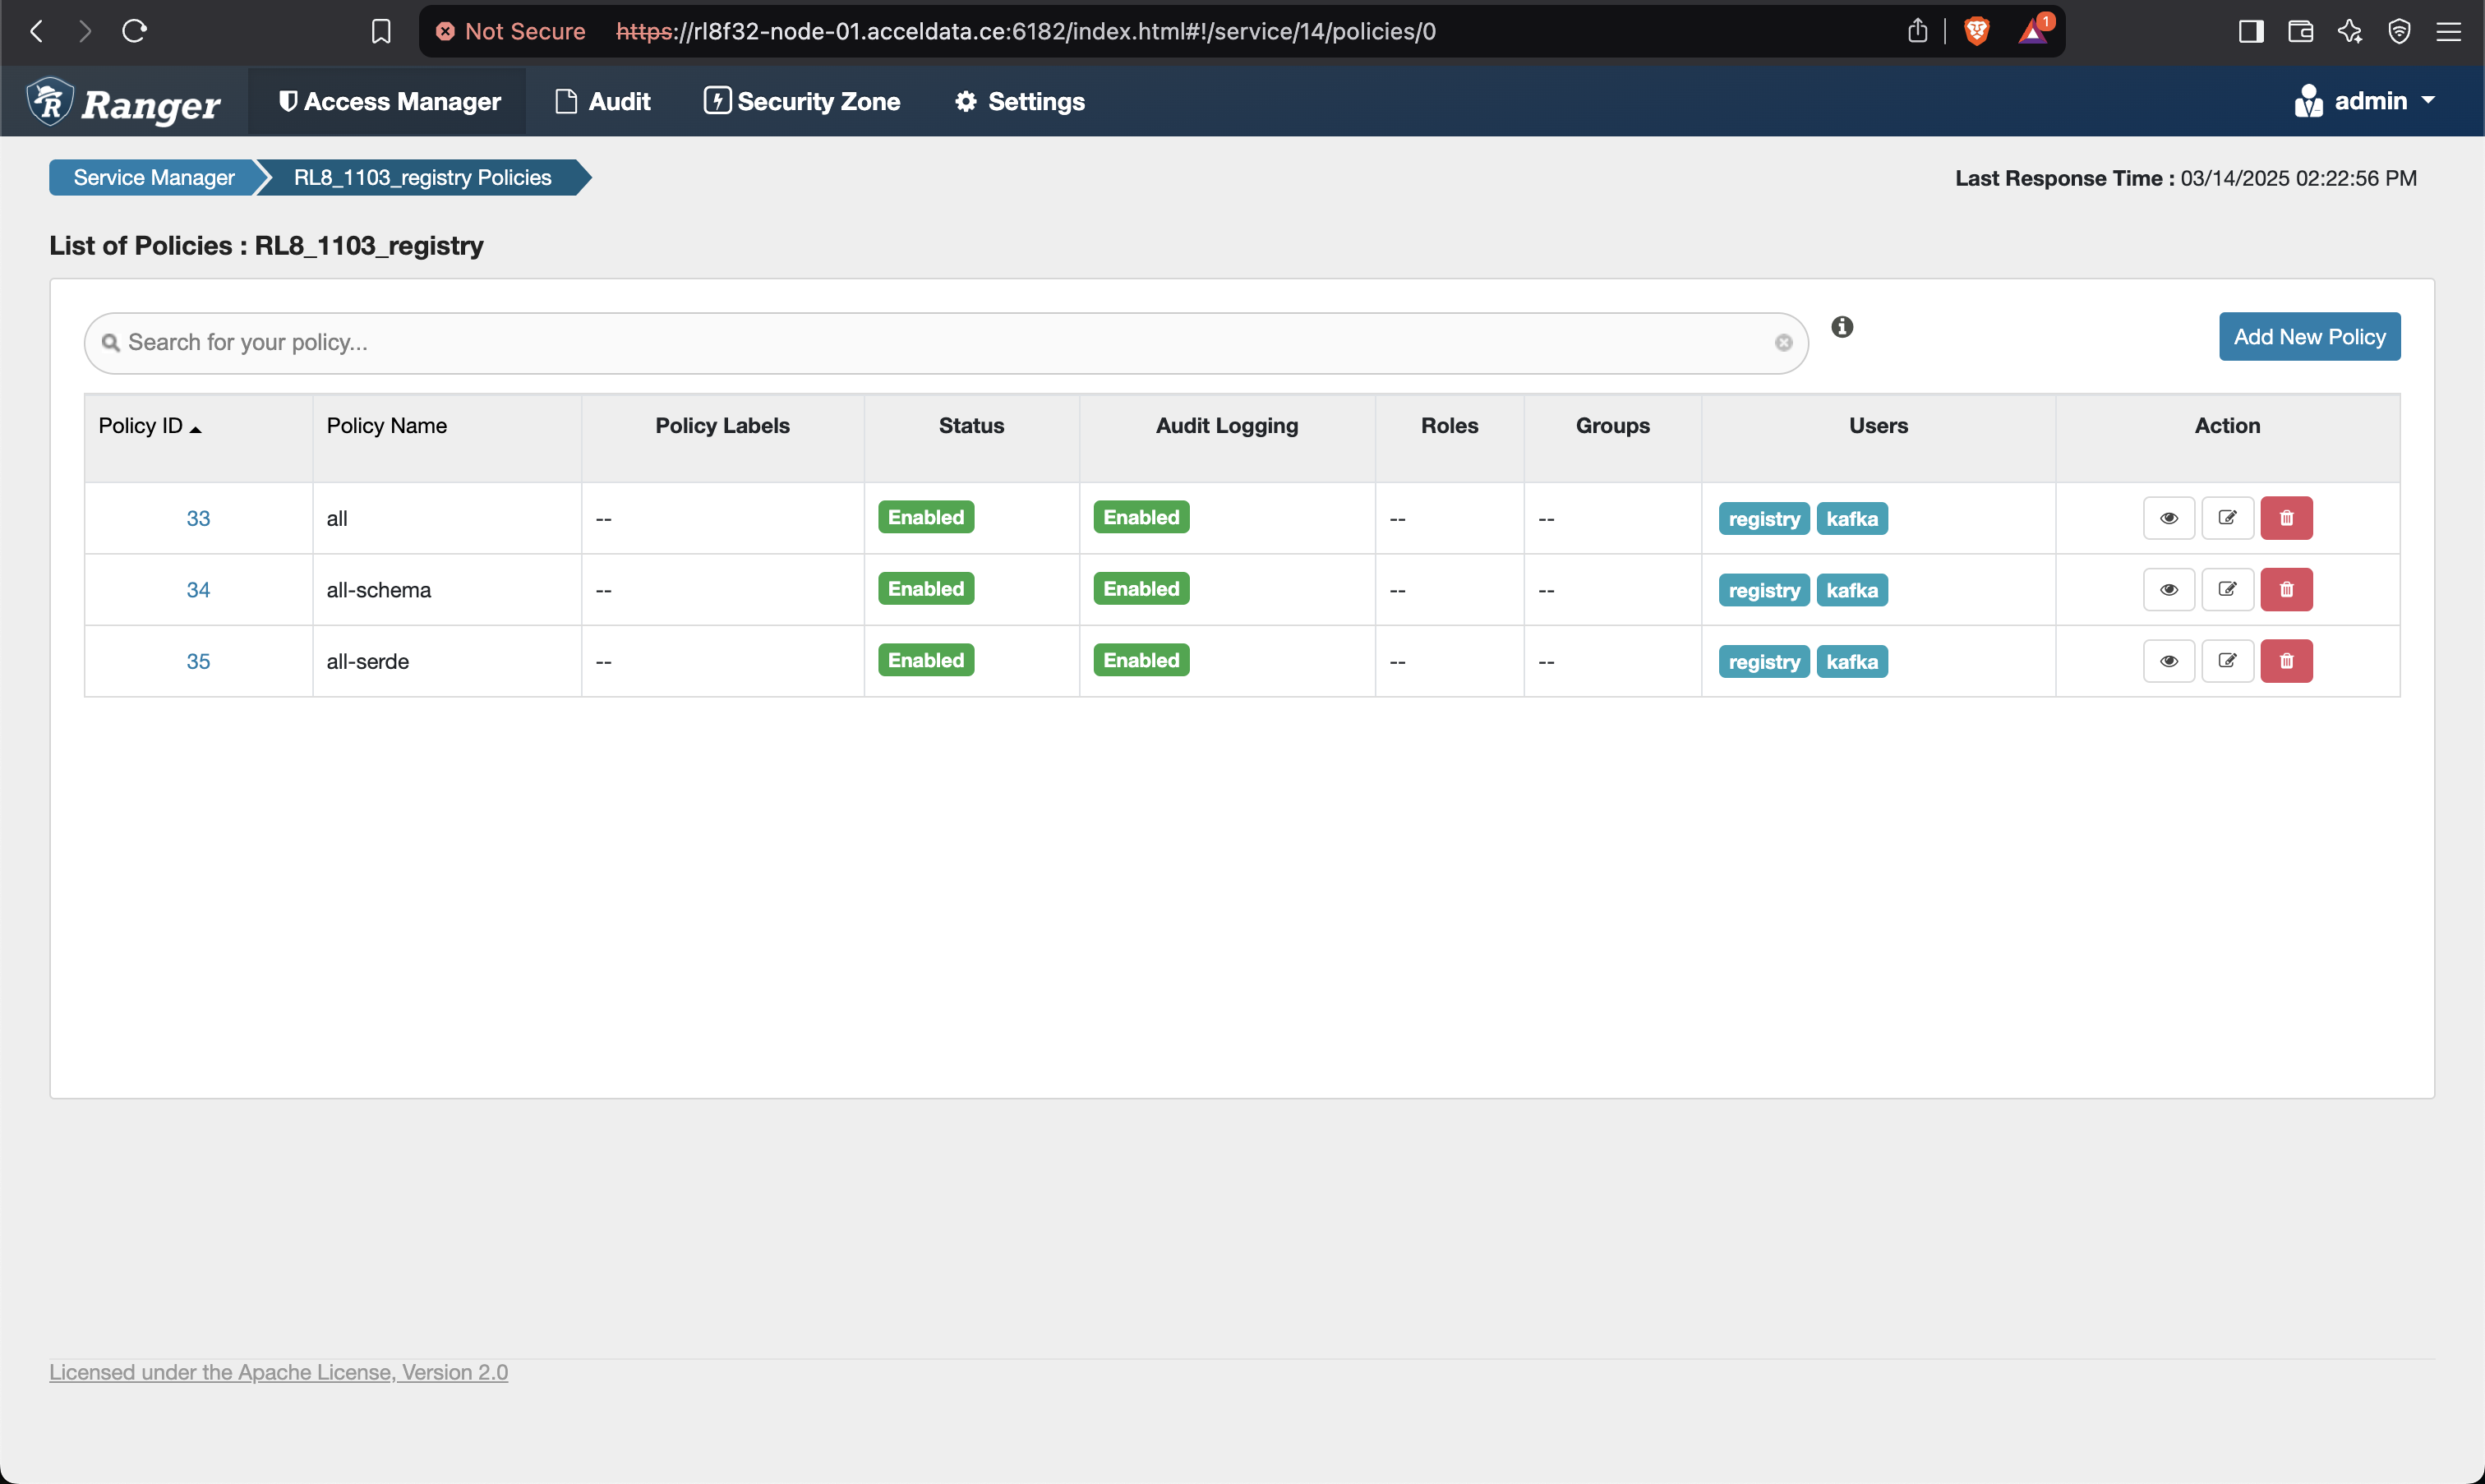
Make sure to give permission to the registry user in the Kafka policies as well.
For advanced changes navigate to the Advanced ranger-schema-registry-security section. If Ranger is enabled with SSL, then, update the following properties as per your cluster settings:
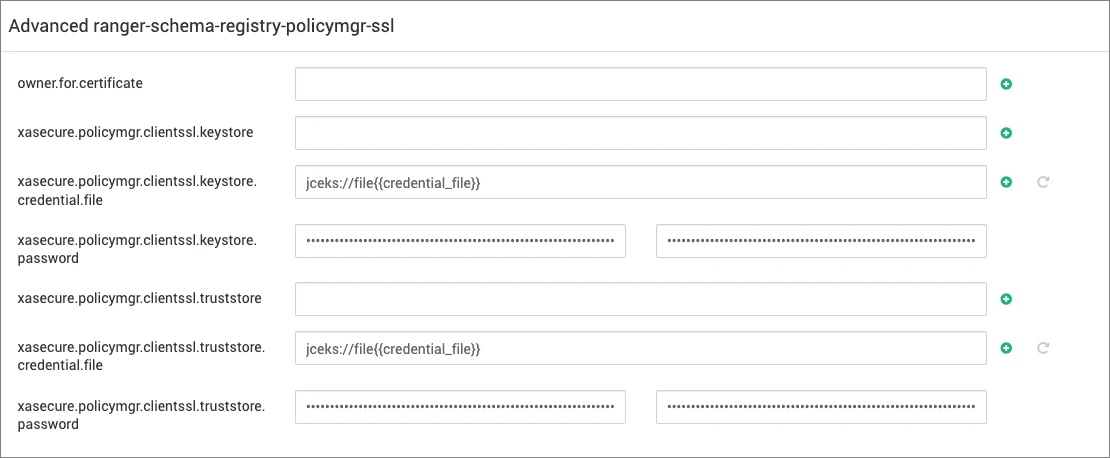
For reference, you can check the below screenshot.
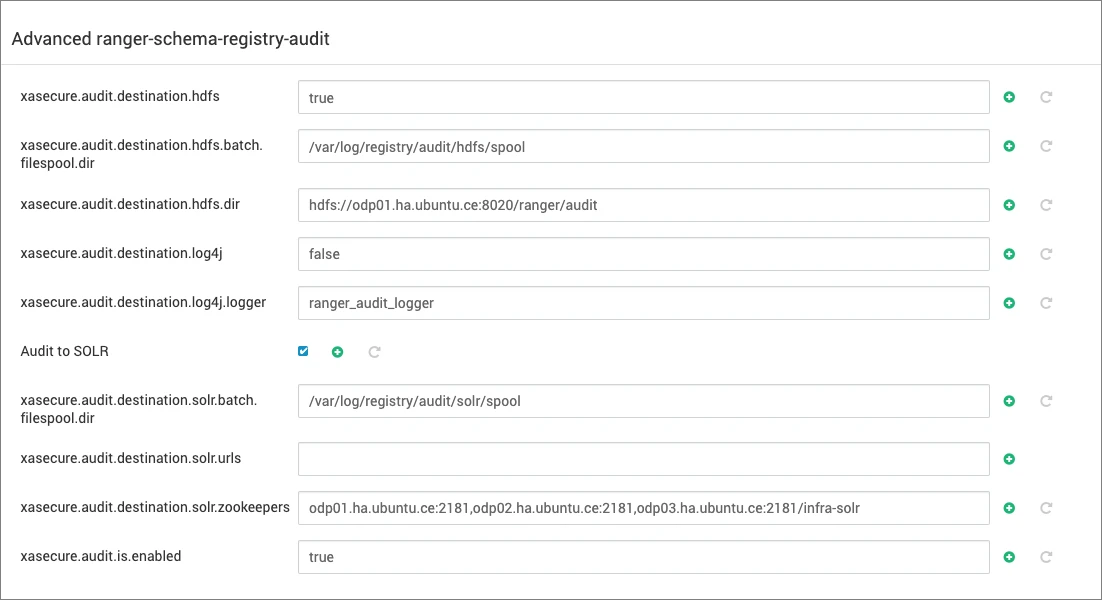
Ranger Audit can be enabled or disabled based on the settings in the Ranger configuration:
To disable HDFS/Solr auditing, update the following configurations:
xasecure.audit.is.enabled=falsexasecure.audit.destination.hdfs=falseDeselect the option for Audit to SOLR.
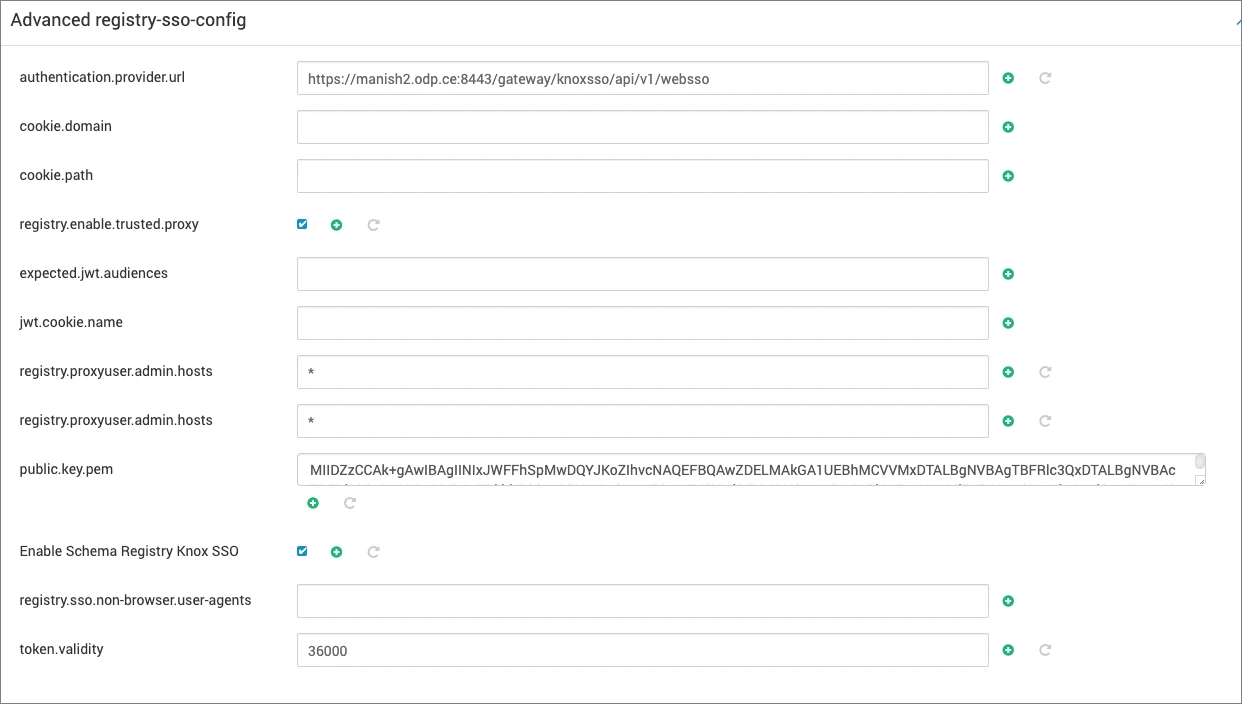
Knox Configuration
All Knox configuration details will be automatically filled in by the Ambari service advisor during the installation of the service. If modifications are necessary, refer to the following section:
Start all stopped or required services.
Access the UI as per the enabled protocol:
HTTP -
http://hostname:7788HTTPS -
https://hostname:7790
Running Kafka (Example)
Create a Kafka Topic
Grant your user permissions to access the running producer and consumer for the specified topic:
ACL
Ranger
Run Producer to Register Schema and Send Data
Navigate to the schema-registry Avro examples directory by executing:
To send messages to the topic
truck_events_stream``, update thedata/kafka-producer.propsfile with the necessary configurations and save it. Modify the security protocol andsasl.jaas.configaccording to your security context. Once updated, execute the following command to start sending messages:
Run Consumer to Retrieve Schema and Deserialize Messages
Navigate to the schema-registry Avro examples directory by executing:
To consume messages from the topic
truck_events_stream, update thedata/kafka-consumer.propsfile and save the changes. Adjust the security protocol andsasl.jaas.configaccording to your security context. After making these updates, execute the subsequent command to begin consuming messages.
Note Any client integration code must make a dependency on schema-registry-serdes.
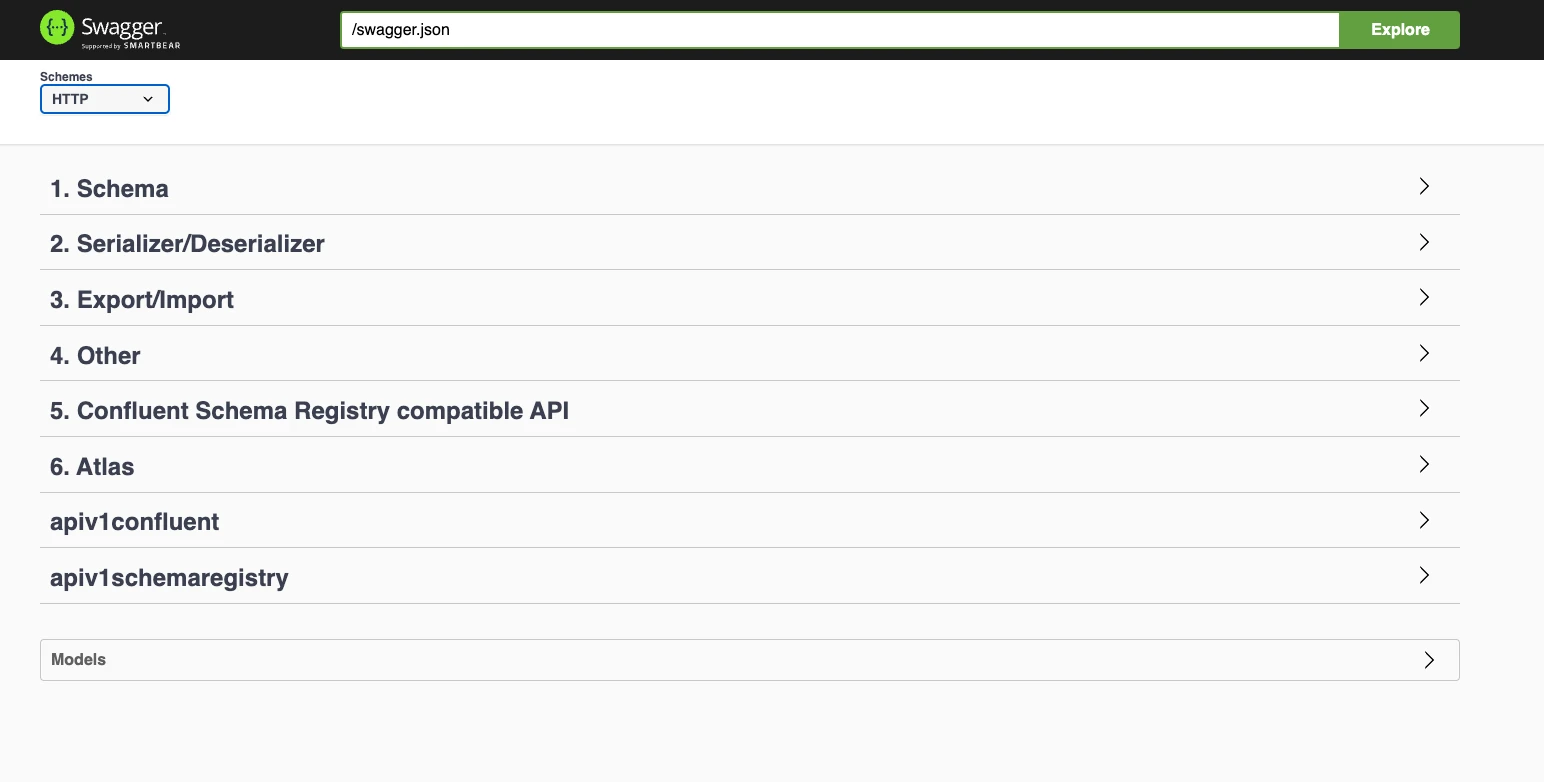
API Examples
You can access all available APIs for Schema Registry, along with descriptions and use cases, by visiting the following Swagger URL:
http://registry_hostname:7788/swagger
Using Schema related APIs
The following code snippets illustrate how to use the SchemaRegistryClient for various functions such as registering new versions of schemas, retrieving registered schema versions, registering serializers/deserializers, and fetching serializers/deserializers for a specific schema.
Create a New Schema with API
When a new schema is created, three objects are created: a SchemaMetadata, a SchemaBranch and a SchemaVersion. To create all of them, two API endpoints are required:
To create a new SchemaMetadata, use the REST API endpoint
POST /api/v1/schemaregistry/schemas. This endpoint allows you to register metadata about a schema. The Swagger documentation provides an example body and a curl command for further guidance:
This command, when executed successfully, returns an ID indicating the creation of the SchemaMetadata.
To create a new SchemaVersion, use the endpoint
POST /api/v1/schemaregistry/schemas/{name}/versions, where{name}refers to the name of the previously created SchemaMetadata. This endpoint also creates a new SchemaBranch (MASTER) and a new SchemaVersion, both linked to the specified SchemaMetadata. The Swagger documentation again provides an example body and a curl command to assist with usage:
This request helps in registering a new version of a schema, linked to the created metadata, under the MASTER branch.
Default Serializer and Deserializer APIs
Default serializer and deserializer for a given schema provider can be retrieved with the below APIs:
Using Serializer and Deserializer Related APIs
Registering a serializer and deserializer involves the following steps:
Upload the JAR File: First, upload a JAR file that contains the necessary serializer and deserializer classes along with any dependencies.
Register the Serializer/Deserializer: Once the JAR file is uploaded, proceed to register the serializer and deserializer classes.
Map the Serializer/Deserializer with a Registered Schema: After registration, map the serializer and deserializer to a specific schema that has already been registered in the system.
Fetch and Use the Serializer/Deserializer: Finally, fetch the registered serializer and deserializer to marshal (serialize) and unmarshal (deserialize) payloads effectively.
Upload the jar File
Register the Serializer and Deserializer
Map Serializer or Deserializer with Schema
Map the serializer and deserializer with a schema key. For each schema, one serializer or deserializer is sufficient unless you want to maintain multiple implementations of serializers or deserializers.