NextGen Data Plane
Dataplane V1 has been deprecated. Its visibility is now managed by a feature flag, which, when deactivated, prevents users from creating new Dataplane V1 instances. The UI has transitioned to the Nextgen Dataplane for a more streamlined experience. While existing Dataplane V1 instances can still be deleted, upgrading is no longer supported.
Overview of Next Gen Data plane
The NextGen Data Plane is a breakthrough approach in ADOC that simplifies and improves the way you set up and manage data processing pipelines and services. The intuitive framework makes it easier than ever to configure and manage applications. This unique platform simplifies installation and upgrades while also reducing errors, resulting in a smooth user experience. This guide gives an overview of the framework for configuring and managing applications in the data plane.
Key Features
- Simplified Deployment Process: You can now configure and deploy the data plane with minimal need for manual input through an intuitive user interface (UI).
- Consistent and Reliable Upgrades: Deployment templates are auto-generated and unchangeable, ensuring consistent behavior across various environments and clients.
- Effortless Configuration Management: Application configurations can be managed directly from the UI and are automatically updated without requiring service restarts.
Workflow Overview
- Tenant Configuration: Configure the data plane for a given tenant through the UI and save the deployment settings.
- Application Configuration Updates: Update application configurations via the UI. Each change is recorded in the database, ensuring traceability and easy reversal if needed.
- Configuration Propagation: The catalog service sends the updated configurations to the analysis service. The Analysis Service keeps an in-memory record of the current configurations.
- Service Syncing: Specific services like ADOC Monitor and standalone services within the Data plane retrieve the latest configurations from the Analysis Service.
Using NextGen Data plane
Flow for First-Time Installation
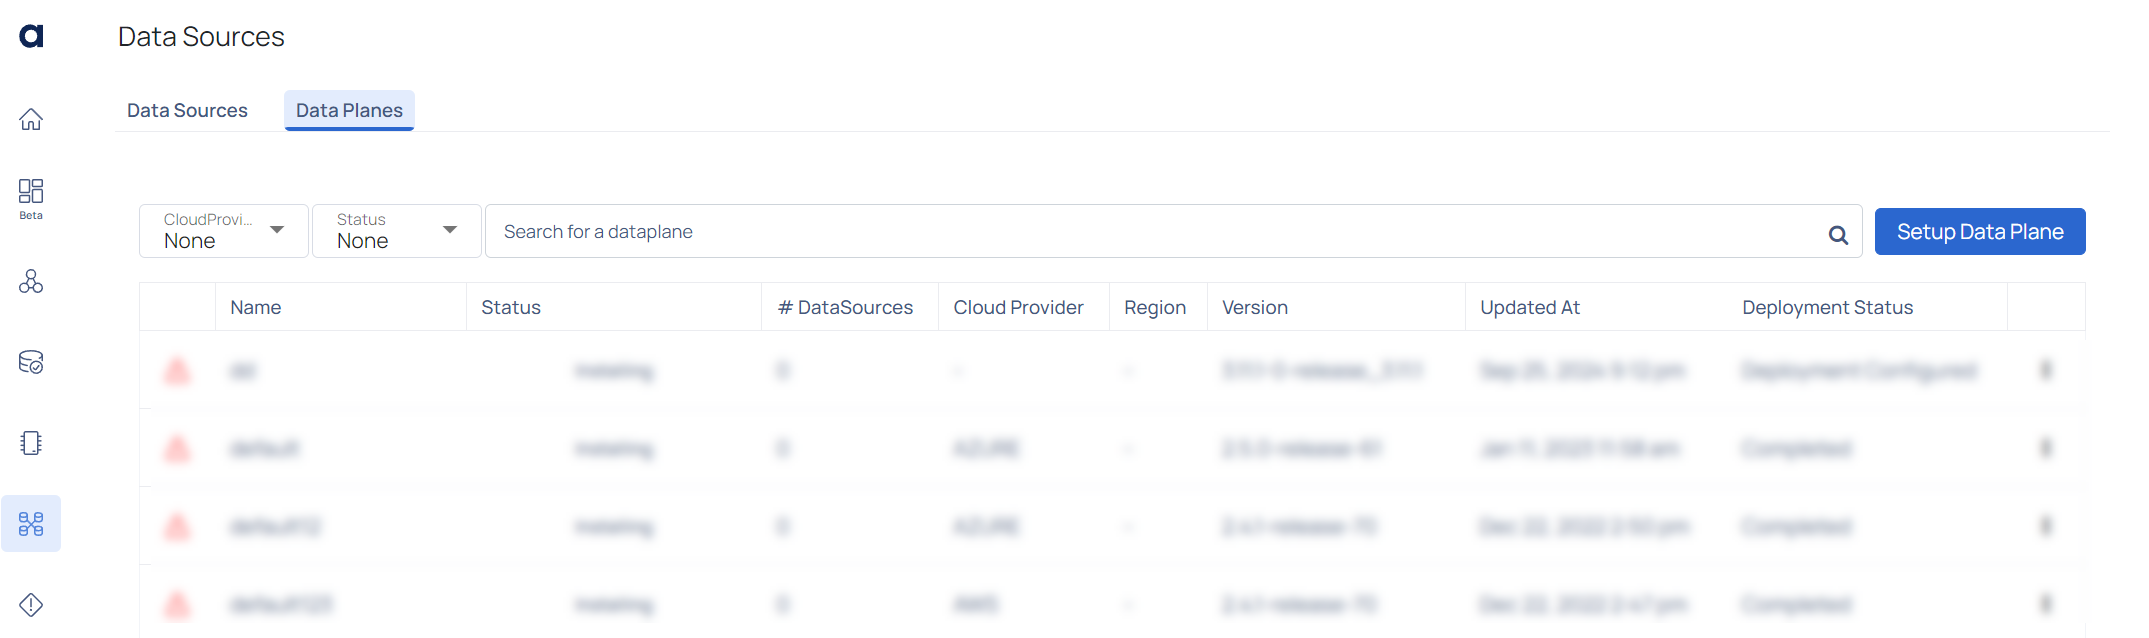
To begin setting up Next Gen Data plane, navigate to the Data Planes tab. Here, you will see an option to select NextGen Data Plane from the Setup Data Plane drop-down menu. This option allows you to configure a new data plane using these enhanced capabilities.
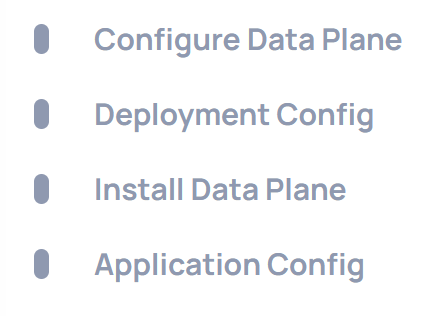
The navigation menu on the left side of the screen guides you through the setup and configuration process for data plane. Every stage is intended to ensure a seamless and effective deployment. The following is an description of each menu item:
| Steps | Description |
|---|---|
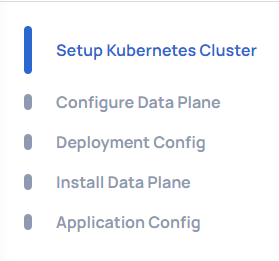
| Setup Kubernetes Cluster | This is the first step in the process where you set up the necessary Kubernetes cluster. The setup can be done using various cloud providers like AKS, GKE, EKS, or Minikube for sample workloads.
|
| Configure Data Plane | After setting up the Kubernetes cluster, this step involves configuring the Data Plane. You will input specific settings and parameters required for your Data Plane to function correctly. |
| Deployment Config | This step involves configuring the deployment parameters. Here, you will define the deployment specifics, such as the number of nodes, resource allocations, and other critical settings necessary for deploying your applications. |
| Install Data Plane | In this step, you will execute the installation of the Data Plane based on the configurations defined in the previous steps. This involves deploying the Data Plane components to the Kubernetes cluster. |
| Application Config | The final step is to configure the applications that will run on the Data Plane. This involves setting application-specific configurations and ensuring they are correctly deployed and managed by the Data Plane. |
Setup Kubernetes Cluster
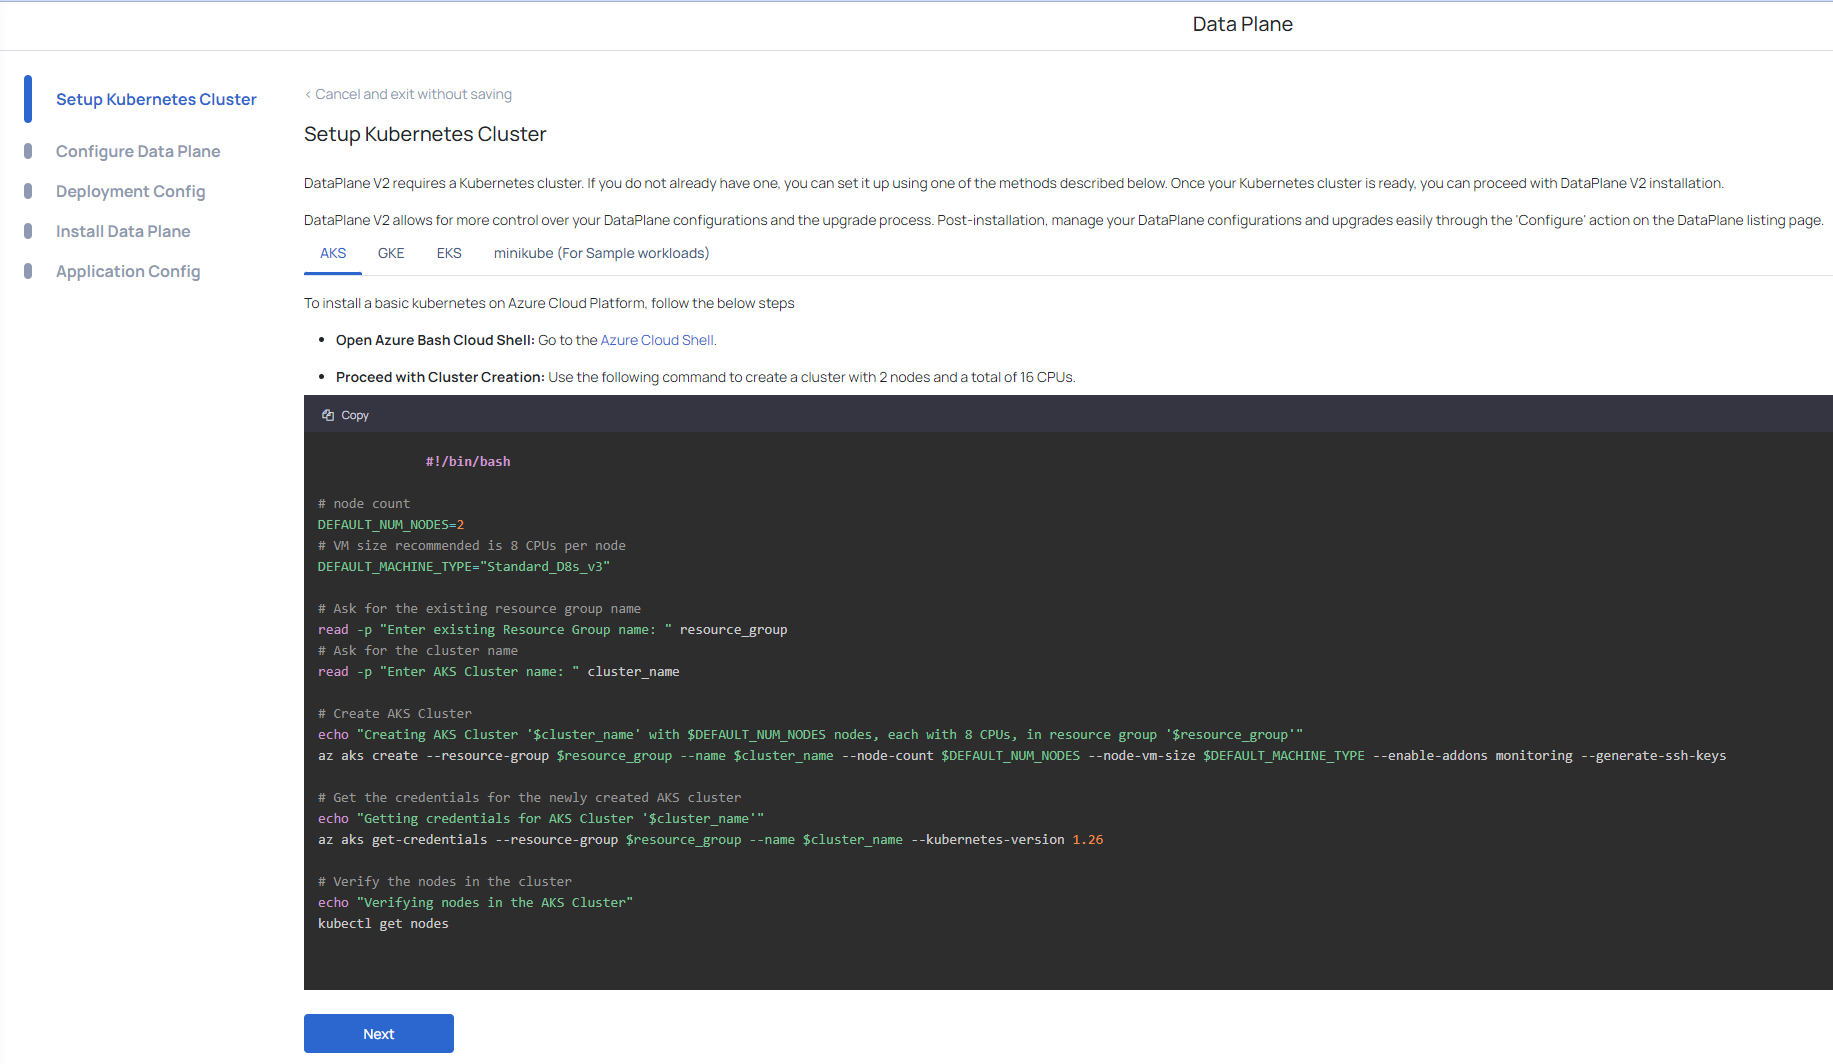
- Navigate to the Setup Kubernetes Cluster page.
- Cluster Setup Requirements:
- NextGen Data Plane Requirement: It requires a Kubernetes cluster. If you do not already have one, you can set it up using one of the methods described below.
- Control and Flexibility: NextGen Data Plane allows for more control over your configurations and the upgrade process. Post-installation, you can easily manage your data plane configurations and upgrades through the Configure action on the data plane listing page.
- Once your cluster has been built and verified, click Next to move on to the next step in the configuration process.
Configure Data Plane
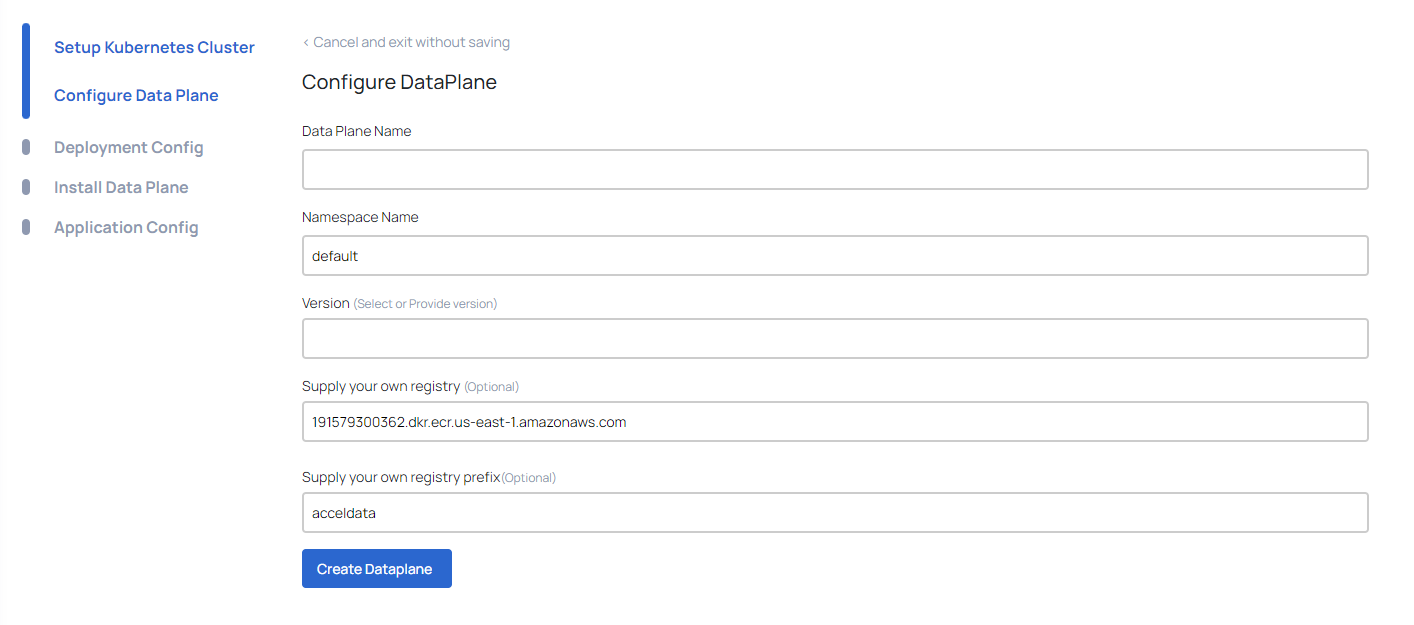
This page allows you to configure the necessary settings for your Data Plane. Follow these steps to complete the configuration:
| Field | Description |
|---|---|
| Data Plane Name | Enter a unique name for your Data Plane. This name will be used to identify the Data Plane within your environment. |
| Namespace Name | Specify the namespace where the Data Plane will be deployed. The default value is usually default, but you can change it based on your Kubernetes setup. |
| Version | Select or provide the ADOC release version you wish to configure Data Plane. |
| Supply Your Own Registry (Optional) | If you have a custom container registry, provide the URL here. This is optional and can be left with the default value if you are using the default Acceldata image registry. |
| Supply Your Own Registry Prefix (Optional) | If using a custom registry, specify the prefix for the registry here. This is also optional and can be left with the default value if not applicable. |
| Create Dataplane | After filling in all the required fields, click the Create Dataplane button to proceed with the configuration. |
- Data Plane Name:
my-dataplane - Namespace Name:
default - Version:
3.4.0 - Supply Your Own Registry (Optional):
191579300362.dkr.ecr.us-east-1.amazonaws.com - Supply Your Own Registry Prefix (Optional):
acceldata
Deployment Configuration

This page allows you to configure the values.yaml file, which defines the deployment settings for your Data Plane services. Follow these steps to configure your values.yaml file:
- Edit the YAML configuration: The text editor on this page displays the current values.yaml file. Modify the parameters according to your deployment requirements. Here it list all the dataplane related services for where for respective services user can provide deployment config as per requirement. The example provided for analysis service includes settings resource limits, volume, volume mounts, and replicas etc.
- Validate the configuration: After editing the YAML file, click the Validate button to check for syntax errors and ensure that the configuration is correct.
- Save and Proceed: Once validated, click the Save and Next button to save your configuration and proceed to the next step in the deployment process.
Install Data Plane
This page provides instructions for installing the Data Plane. You can choose between two installation types: Automatic or Manual.
Once you select either Automatic or Manual during this stage, you cannot switch to the other installation method later. Ensure you choose the method that best suits your requirements.
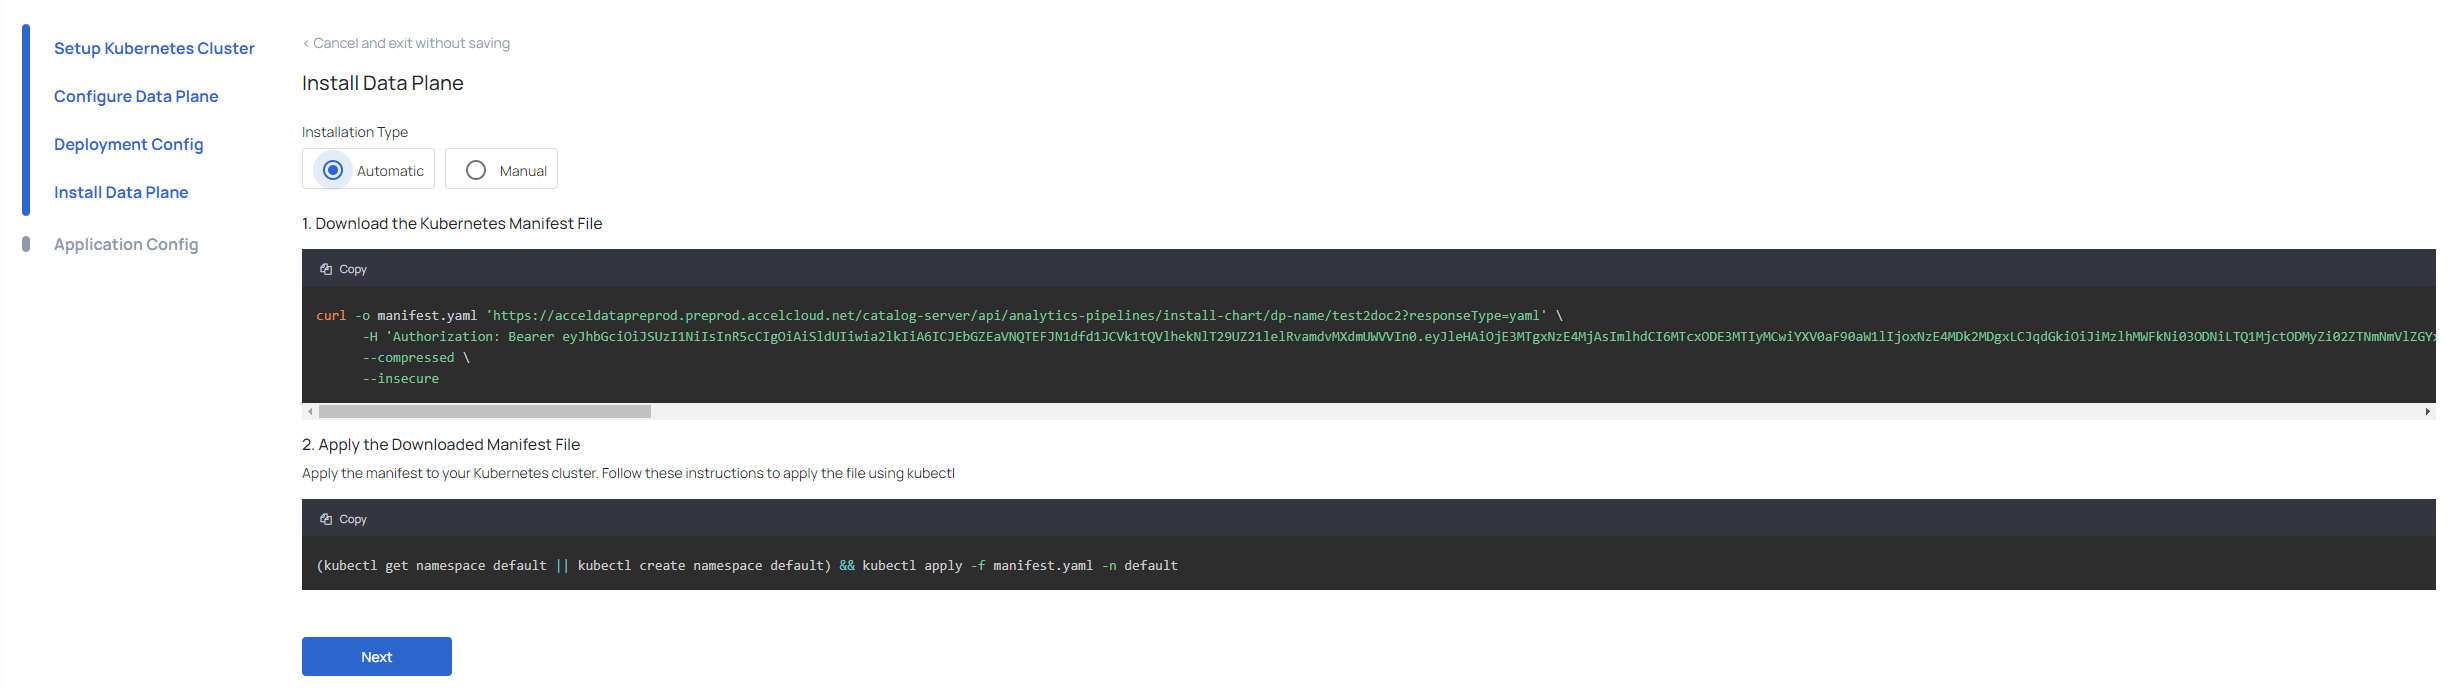
- Select Automatic Installation: Ensure the Automatic option is selected under the Installation Type section.
- Download the Kubernetes Manifest File: Use the provided command to download the Kubernetes manifest file.
- Run Installation command: Run the provided command to apply the downloaded manifest file to your Kubernetes cluster.
- Apply the Downloaded Manifest File: Apply the manifest file to your Kubernetes cluster.
- Click the Next button to proceed to the next step
Application Config
This page allows you to configure the application settings for your Dataplane. Follow these steps to update and apply your application configuration.

| Field | Description |
|---|---|
| Global Storage Configuration | Displays the type of global storage configured. In this example, it shows GCS (Google Cloud Storage). |
| Secrets Manager Configuration | Indicates the number of secrets manager configurations set up. In this example, it shows 3. |
| Spark Runtime | Specifies the runtime environment for Spark. Here, it shows Kubernetes. |
| Additional Configurations | Indicates whether HDFS, Hive, HBase, and Kerberos are enabled. In this example, HDFS and Hive are enabled, while HBase and Kerberos are not. |
Update Application Config

Dataplane Config
| Field | Description |
|---|---|
| Crawler | Settings for the crawler service. |
| Profile | Profile feature settings. |
| Data Quality | Data quality settings. |
| Reader | Reader settings. |
| Asset Monitor | Asset monitor settings. |
| Secret Manager | Secret manager configuration. |
| Global Storage | Configuration for global storage. |
| Kerberos | Kerberos configuration (enabled from the deployment config flow). |
| Spark | Spark configuration. |
| Others | Other miscellaneous settings |
Cluster Config
| Field | Description |
|---|---|
| Kubernetes | Kubernetes Configuration |
| Databricks | Databricks Configuration |
| Dataproc | Dataproc Configuration |
| Livy | Livy Configuration |
Bulk Edit: Use the Bulk Edit option to update multiple configurations at once.
Apply Config: Once you have made the necessary changes to the configurations, click the Apply Config button to save and apply your updates.
- Select Configuration Type: Click on the configuration type you wish to update, such as Global Storage or Secret Manager.
- Edit Values: Modify the values as required in the fields provided.
- Apply Changes: After making the necessary changes, click the Apply Config button to ensure the configurations are saved and applied.
After successfully installing the dataplane, you will be able to view the newly constructed dataplane on the Dataplane Dashboard.

Post-Creation Configuration and Management
After successfully setting up the NextGen Data Plane, you can manage and configure various aspects of your data plane using the intuitive user interface. This section provides an overview of the post-creation configurations and management options available.
Editing Deployment Configuration (Manual Data Plane)

Navigate to the Data Planes Tab:
- In the Data Planes tab, locate the data plane you wish to configure.
- Click on the ellipsis
menu next to the desired data plane and select Edit Deployment Config.
Edit Data Plane Settings: You will be directed to the Configure Data Plane page where you can update specific settings for your data plane.
Fields to Edit or Configure:
| Fields | Description |
|---|---|
| Data Plane Name | Enter or update the unique name for your data plane. |
| Namespace Name | Specify the namespace where the data plane is deployed. |
| Current Version | Displays the current version of the data plane. |
| Version | Select or provide the ADOC release version you wish to configure. |
| Registry URL and Prefix (Optional) | Provide the URL for a custom container registry and prefix if applicable. |
- Update Deployment Configuration: After updating the necessary fields, click on the Update Dataplane button to save the changes.

Editing Application Configuration (Manual Data Plane)

- Access Application Configuration: In the Data Planes tab, select the data plane and click on the ellipsis
menu. Choose the Edit Application Config. - Update the Application Settings: You will see various fields related to different services within the data plane.
- Apply Configuration: Make necessary updates to the application configuration fields and click on the Update Application Config button to apply the changes.
Editing Deployment Configuration (Automatic Data Plane)
- Navigate to Configuration Options: For an automatic data plane, navigate to the Data Planes tab and select the data plane.
- Edit Deployment and Application Configuration:
- Similar to the manual setup, you can edit deployment and application configurations by selecting the respective options from the ellipsis
menu. - The process involves updating the necessary fields and applying the configurations.
- Similar to the manual setup, you can edit deployment and application configurations by selecting the respective options from the ellipsis

Editing Application Configurations (Automatic Data Plane)
This page allows you to edit the application settings for your Dataplane. For more information, see Application Configuration.

The NextGen Data Plane offers a streamlined and user-friendly interface for configuring and managing data processing pipelines and services. By utilizing the post-creation configuration options, you can ensure optimal performance, reliability, and scalability of your data plane.
Configuring Data Persistence Formats
Users can now define the format in which they want to keep their persisted entries. This feature enables better customization and agility, addressing a wide range of organizational needs.
Supported Formats:
- Parquet (Default)
- CSV
- JSON
To configure the data persistence format:
- Navigate to the Application Config page.
- Under the Dataplane Config section, locate the
MEASURE_RESULT_SAVE_FORMATsetting. - Enter your preferred format (
parquet,csv, orjson) in the provided field. - Click Apply Config to save your changes.
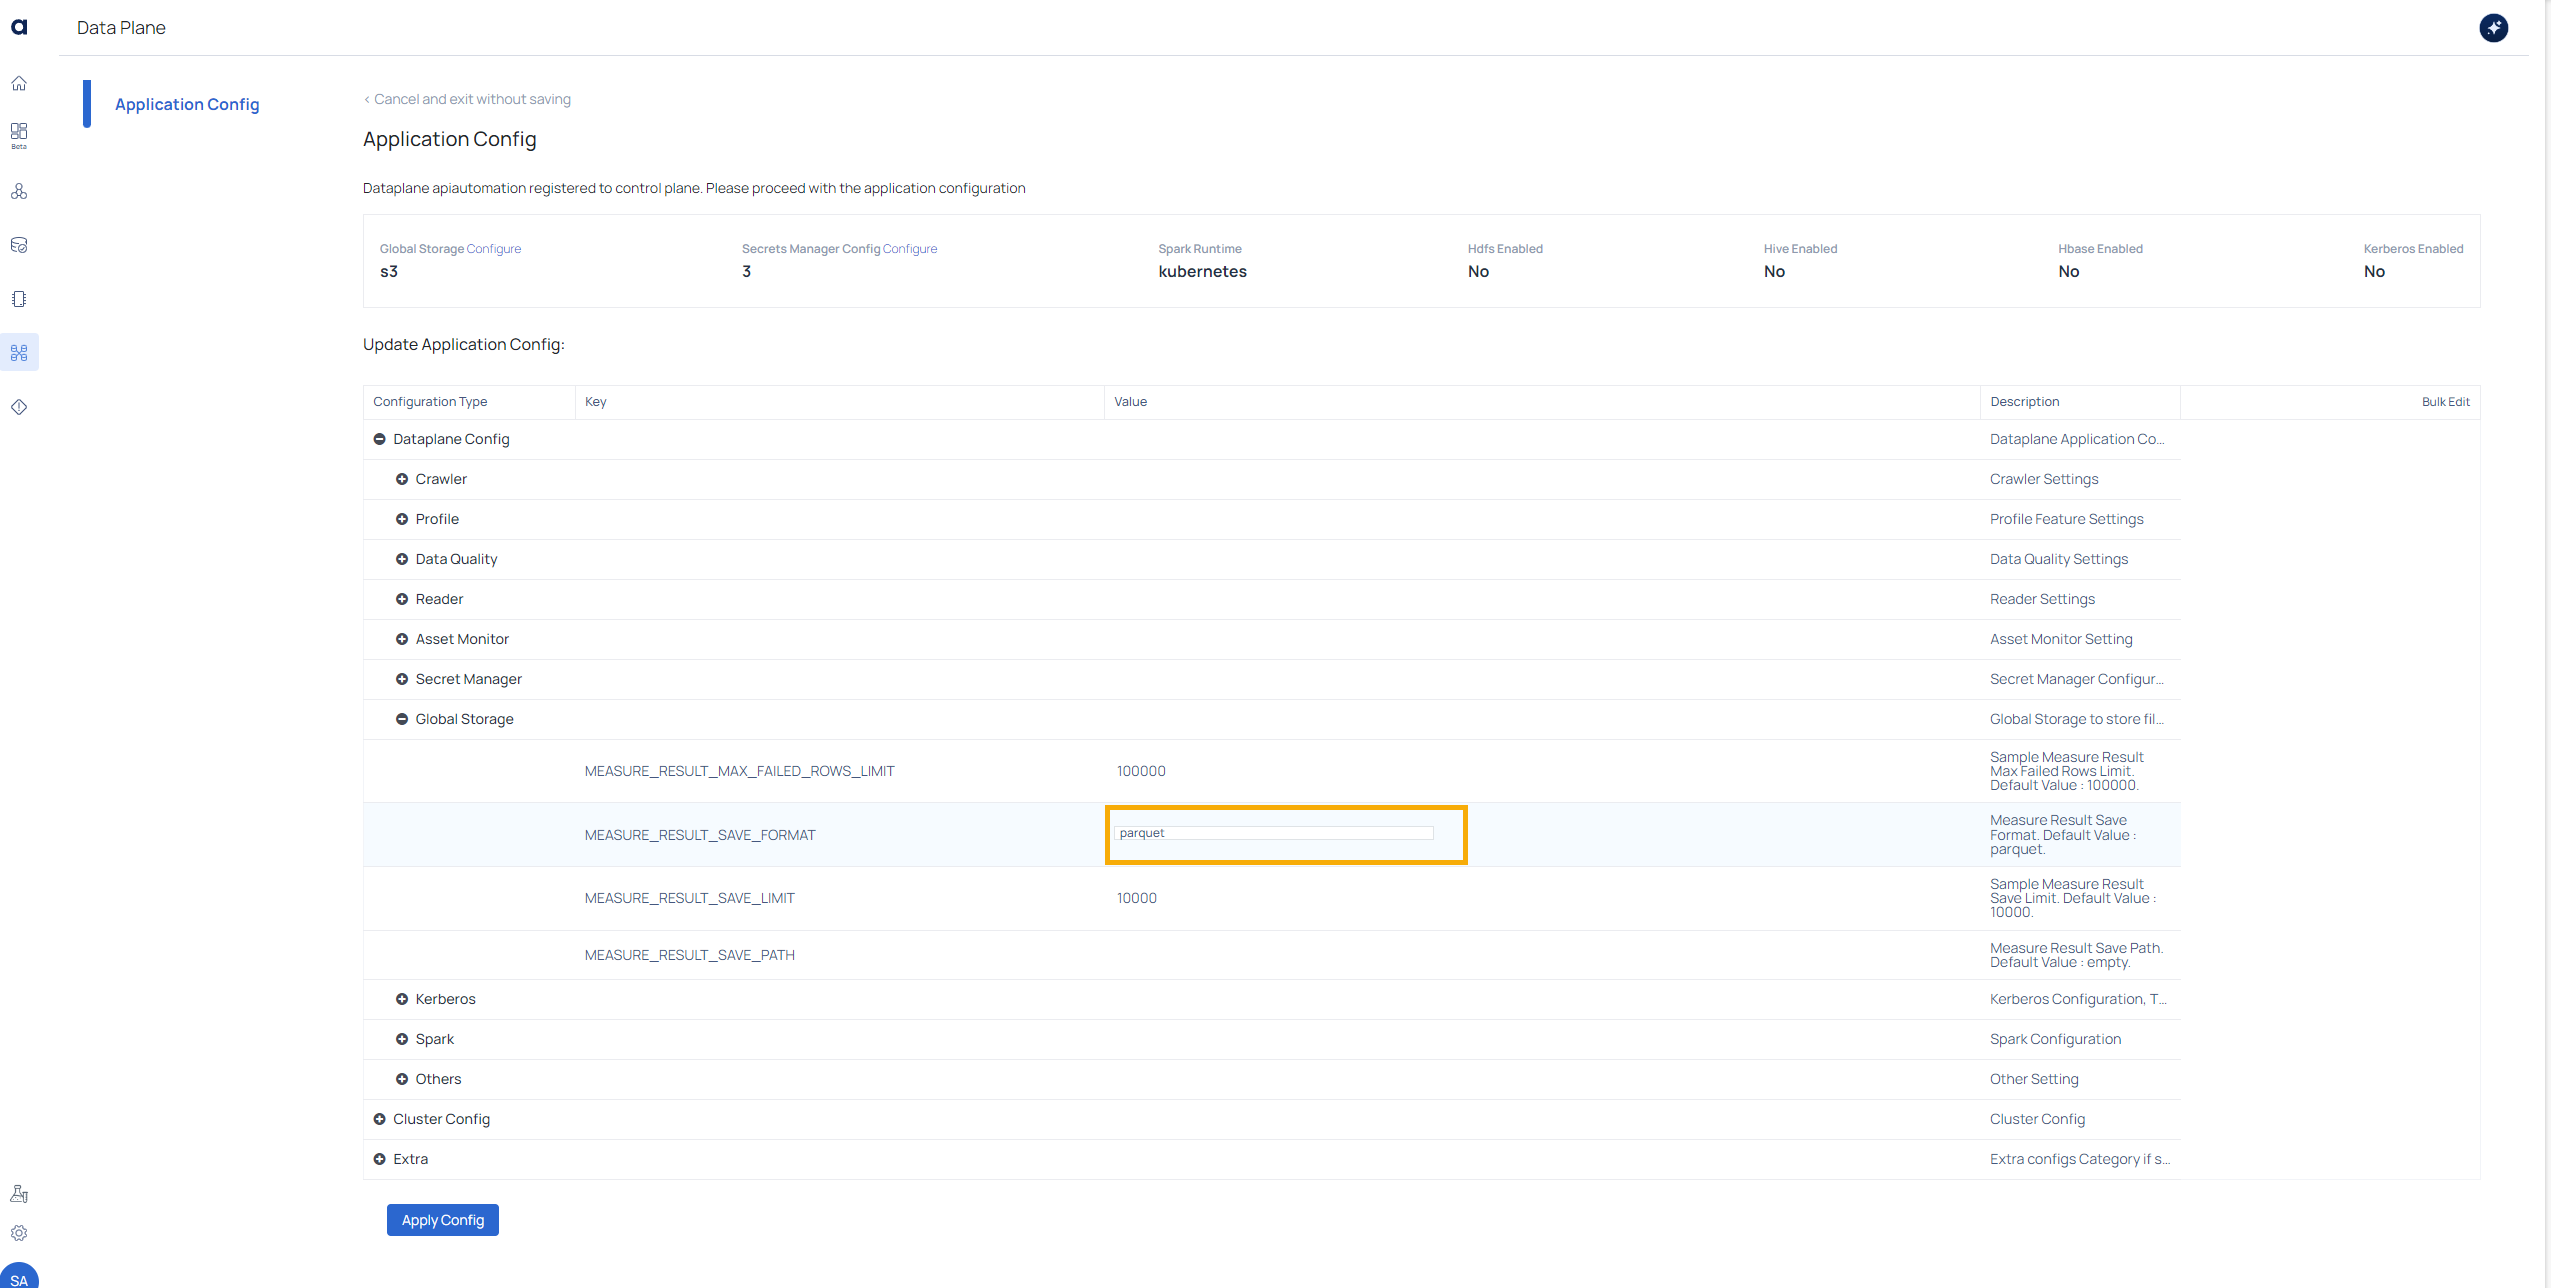
By default, the system is configured to save data in Parquet format. However, by entering csv or json, users can easily switch to these formats as needed. This enhancement provides users with the flexibility to choose the data format that best suits their specific use cases, such as compatibility with legacy systems or ease of data sharing.