Installation of Dataplane on AWS
This document explains how to create Data Plane on AWS. Acceldata uses AWS Stack to install Data Plane. A Stack in AWS is a collection of AWS resources which can be managed as a single unit. Acceldata Data Observability Cloud provides you two cloud formation templates (CFTs) in YAML file format to create a Stack to install Data Plane.
- CFT to Create Role: This template helps you to create a role in AWS. This role will be used to create the data plane.
- CFT to Create Stack: This template helps you to create the Stack for data plane creation.
The procedure to create stack in AWS is as follows:
- Create Role: Use ADOC Create Role CFT to create the role in AWS. You must perform this operation only once. To learn about how to do this, see Create Role Using CFT.
- ADOC Setup: Perform the initial data plane setup in ADOC environment before navigating to AWS. To learn about how to do this, see ADOC Setup.
- Create Stack: Use ADOC Create Stack CFT to create stack that installs data plane in AWS. To learn about how to do this, see AWS Setup.
Prerequisites
- You must have the AWS admin access to execute the steps in Create Role Using CFT section.
Create Role Using CFT
In this section you must use the ADOC CFT to create the Stack which has all the Roles required for data plane creation. You must login to AWS as an admin to create the Role Stack.
To create the Role:
- Login to AWS.
- Navigate to Stacks.
- Click Create Stack and select With new resources (standard).

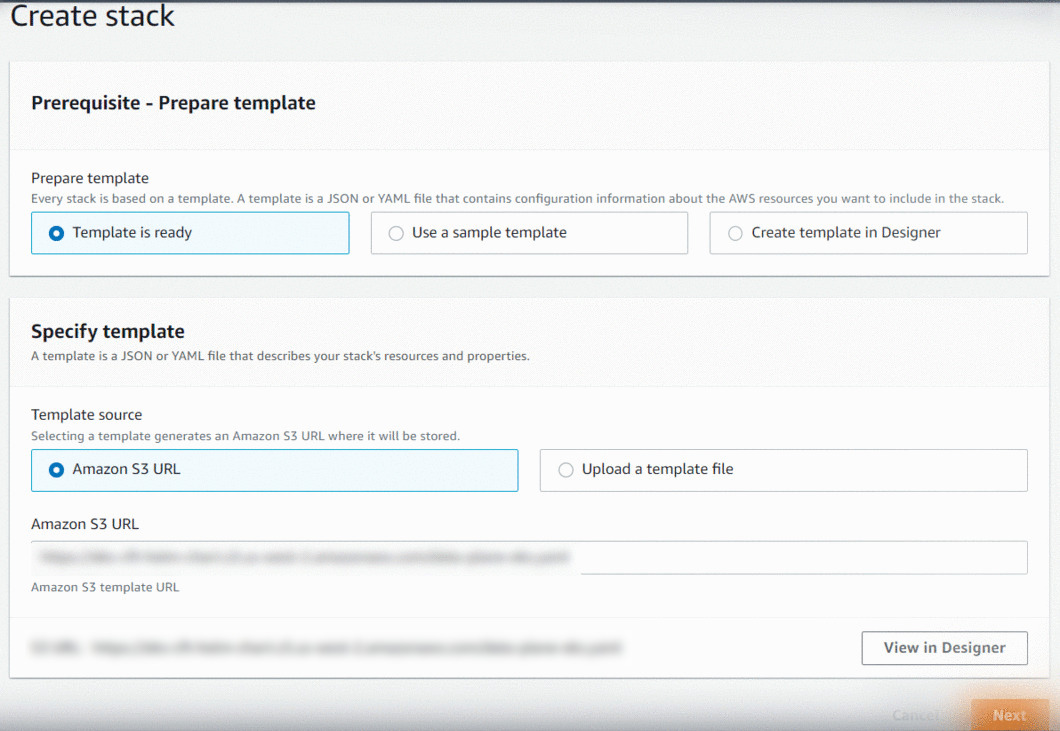
- Select Amazon S3 URL in the Specify template section.
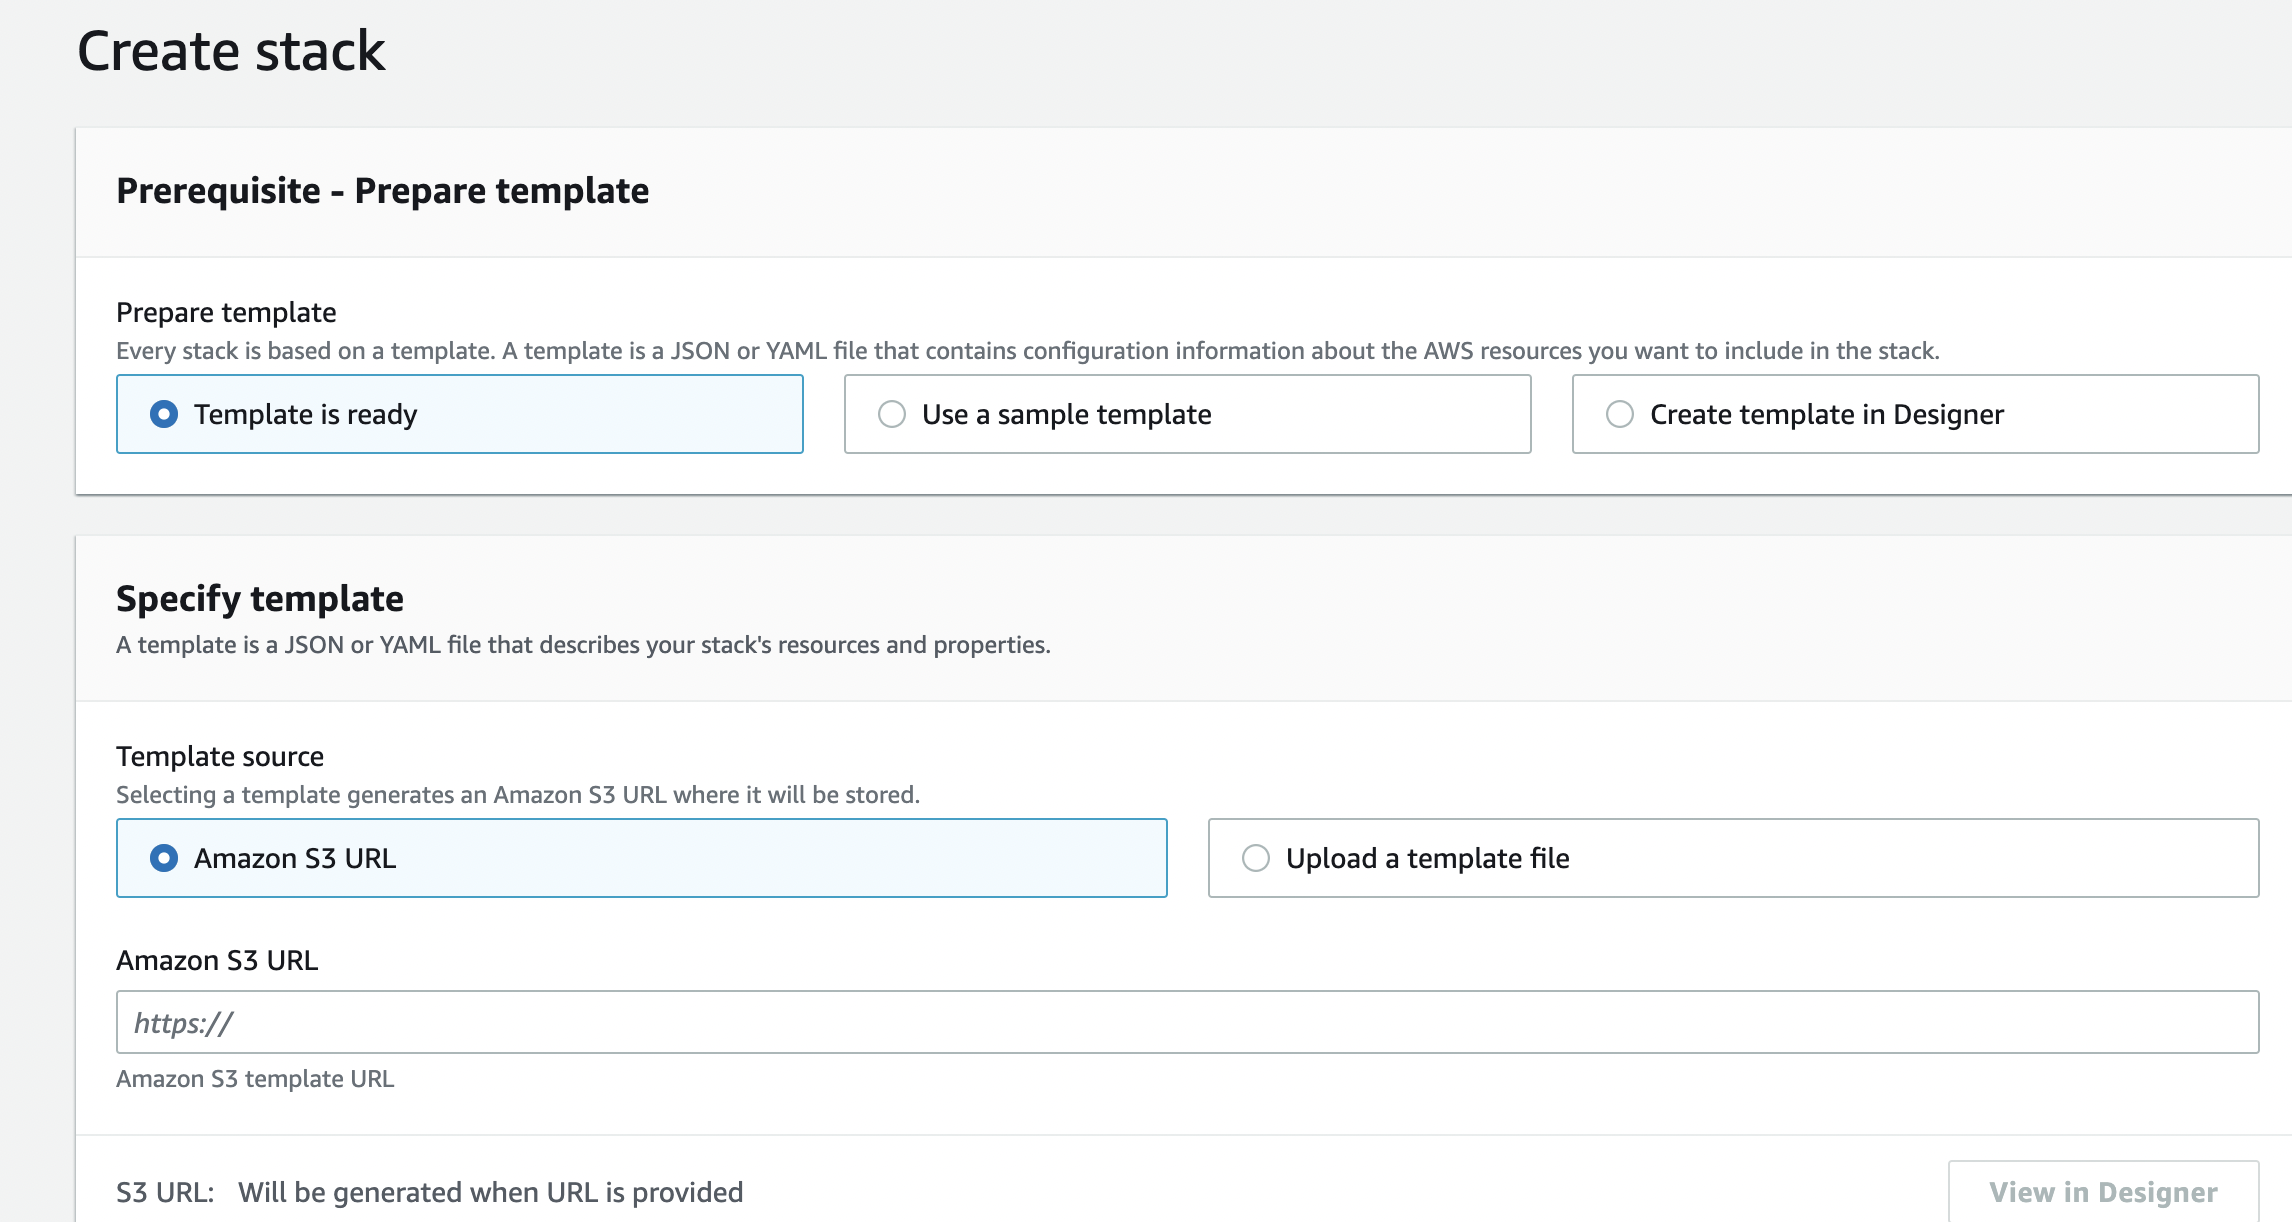
- Copy the following URL and paste it in the Amazon S3 URL field.
https://eks-cft-helm-chart.s3.us-west-2.amazonaws.com/data-plane-roles.yaml- Click Next.
- Enter a name for the stack in the Stack name field.
- Enter a name for the role used to create kubernetes cluster in the Name of the role which creates kubernetes cluster field.
- Enter the name of the S3 bucket in which analysis service results would be stored, in the Name of the S3 bucket where analysis service will store result field. This is the S3 bucket owned by customer in which Acceldata stores the results.
- Select either New VPC or existing VPC in the Option to create Creator role for New VPC or for Existing VPC field.
- If you selected existing VPC in the previous step, enter the VPC ID in the VPC ID of Dataplane for Acceldata field. If you selected New VPC, enter NA.
- Do not change the values in the Name of the S3 bucket where helm charts associated with data plane will be there field.
- Click Next.
- Complete the steps to create the Stack.
ADOC Setup
The installation process starts in ADOC. Once you complete the steps in ADOC, you are automatically redirected to AWS.
- Click Register from the left pane.
- Click Data Plane
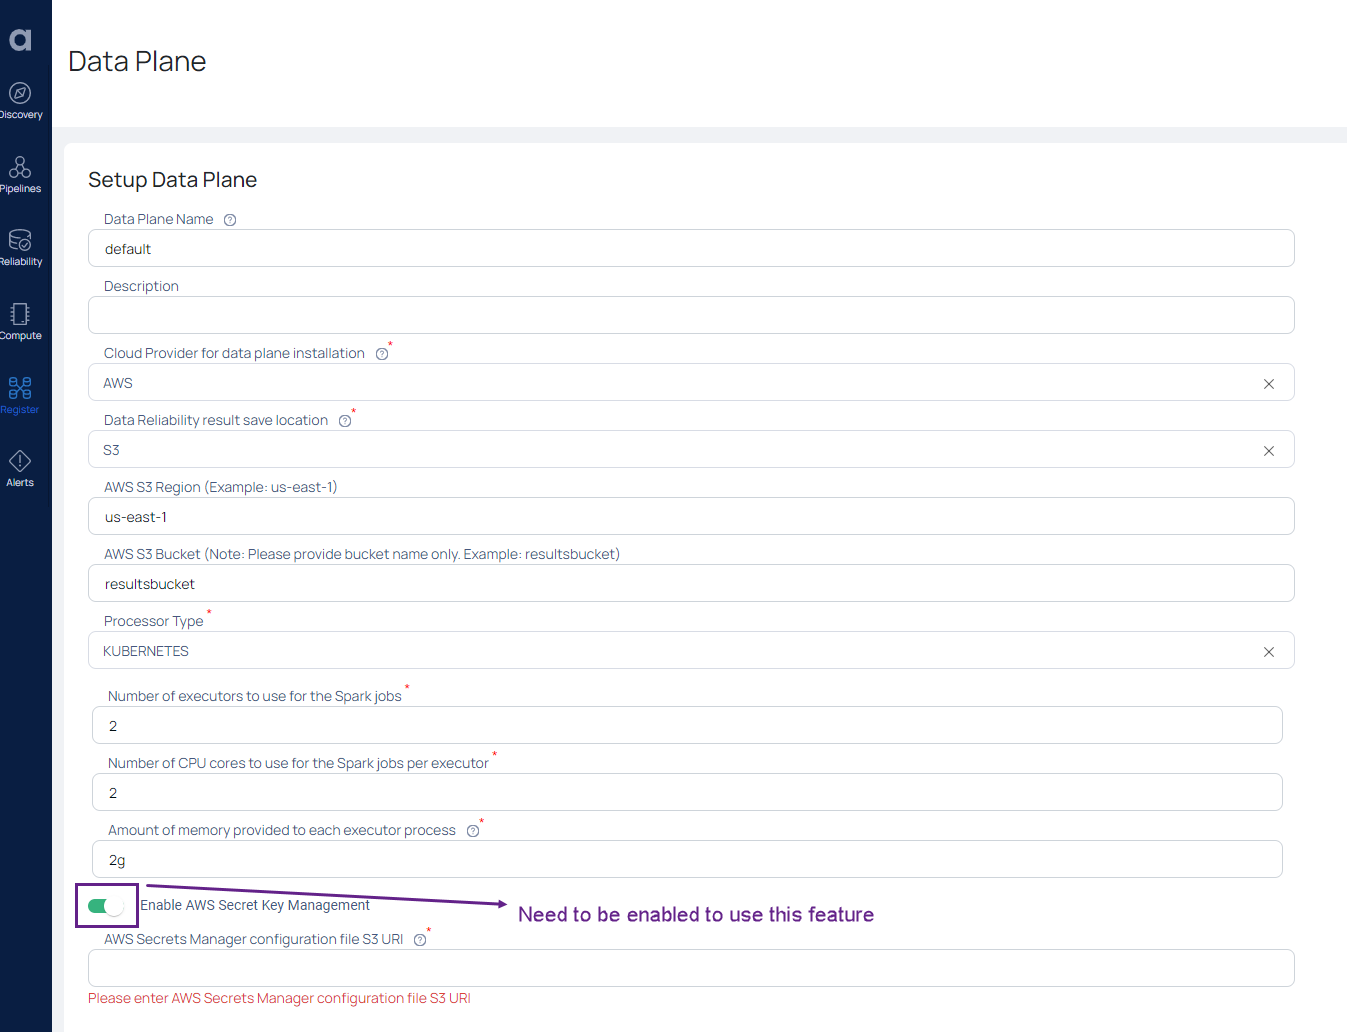
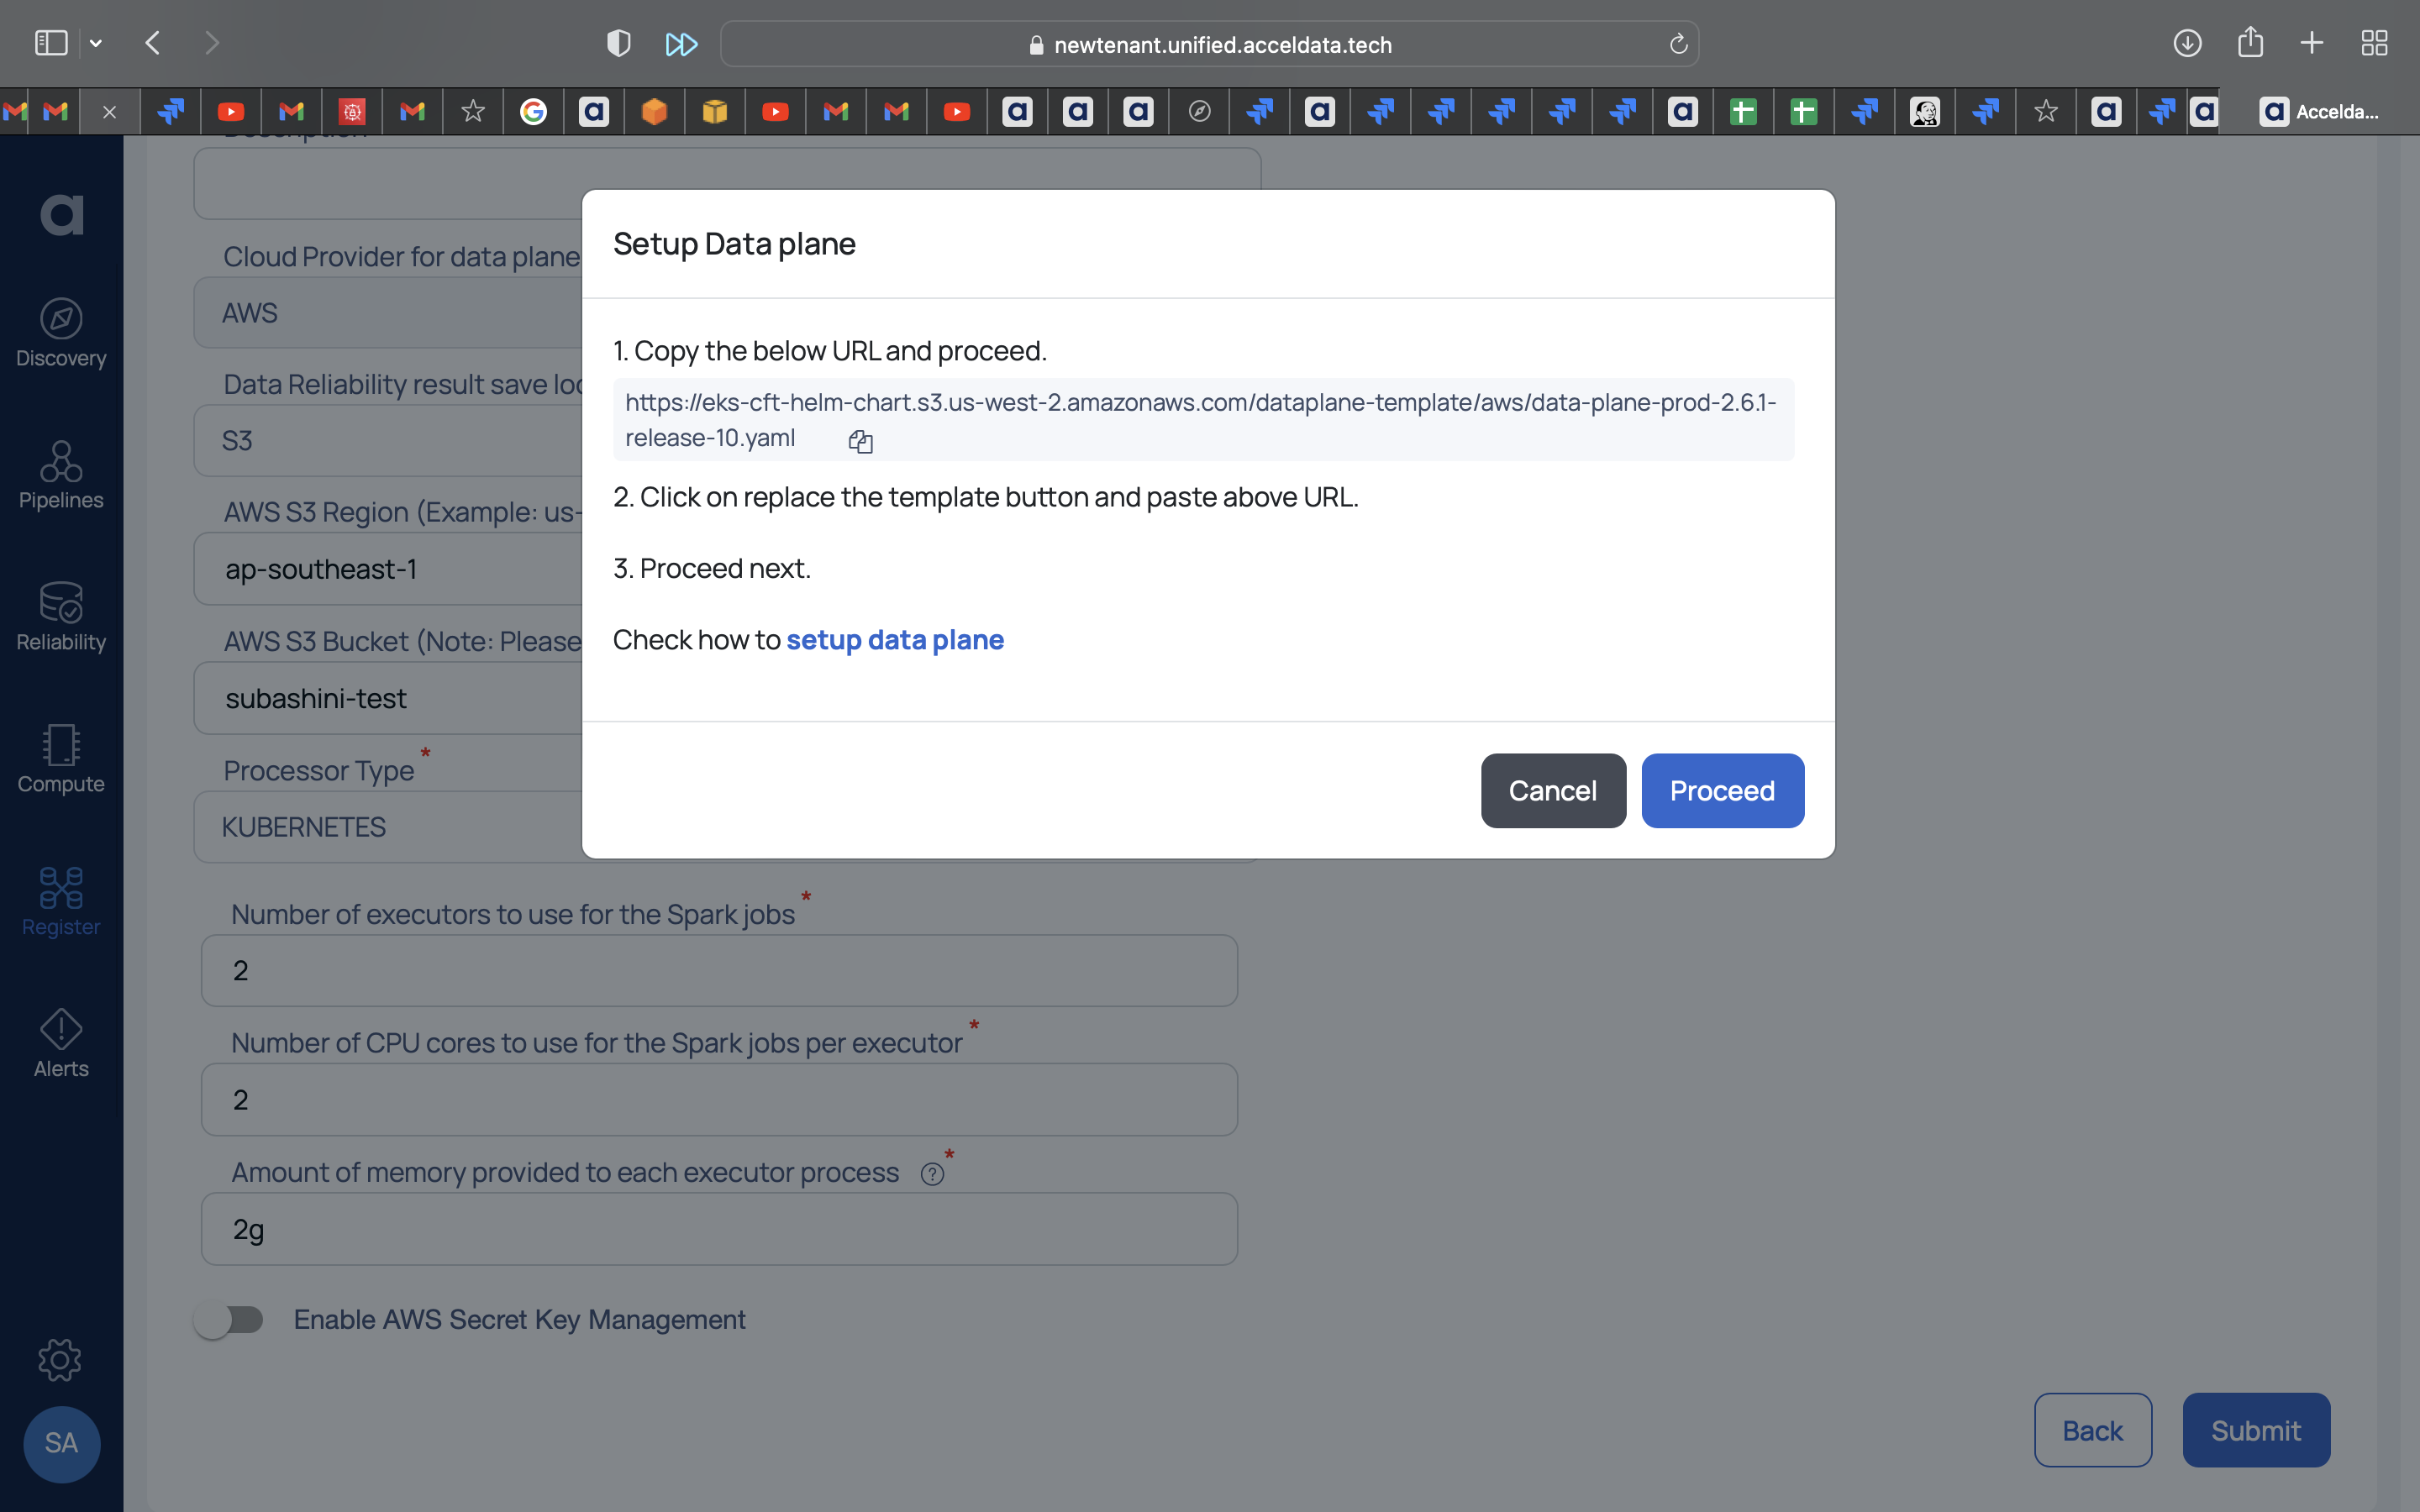
- Click Setup Data Plane.
- Enter a name for the data plane in the Data Plane Name field.
- (Optional) Enter a description for the data plane in the Description field.
- Select AWS in the Cloud Provider for data plane installation field.
- Select S3 in the Data Reliability result save location field.
- Enter the region in which your AWS bucket exists, in the AWS S3 Region field.
- Enter the S3 bucket name where the data plane installation results must be stored in the AWS S3 Bucket field.
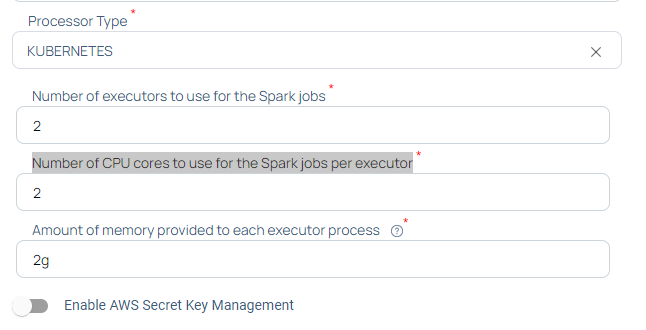
- Select one of the Processor Type.
10.1. Enter the Number of executors to use for the Spark jobs. The default value is 2.
10.2. Enter the Number of CPU cores to use for the Spark jobs per executor.The default value is 2.
10.3. Enter the Amount of memory provided to each executor process. The standard value is 2g. It should be in the same style as JVM memory strings, with a suffix indicating the size unit (e.g 512m, 2g).
- Click Submit.
When you click Submit, the values.yml file is downloaded. You must upload this file to your S3 bucket and note down the URL of the file after its uploaded to the bucket.
- Click Proceed. The AWS cloud formation wizard page opens in a new tab in your browser.
Log in to your AWS account. The AWS Create Stack page opens as shown in the following image. This Stack is used to create the data plane.
Before you proceed with creating the Stack to create data plane, you must upload the values.yaml file (downloaded in step 11), to the S3 bucket. You can open your S3 bucket in a new browser tab so that you can return to the cloud formation tab later on and continue the configuration.
Upload Values YAML file to S3 Bucket
You must upload the dataplane-values.yaml file in an S3 bucket and note down the URI of this file in the S3 bucket.
Important: If you rename the values.yaml file, do not include any special characters or whitespace in the file name. You must only include alphabets, numbers, and () in the file name.
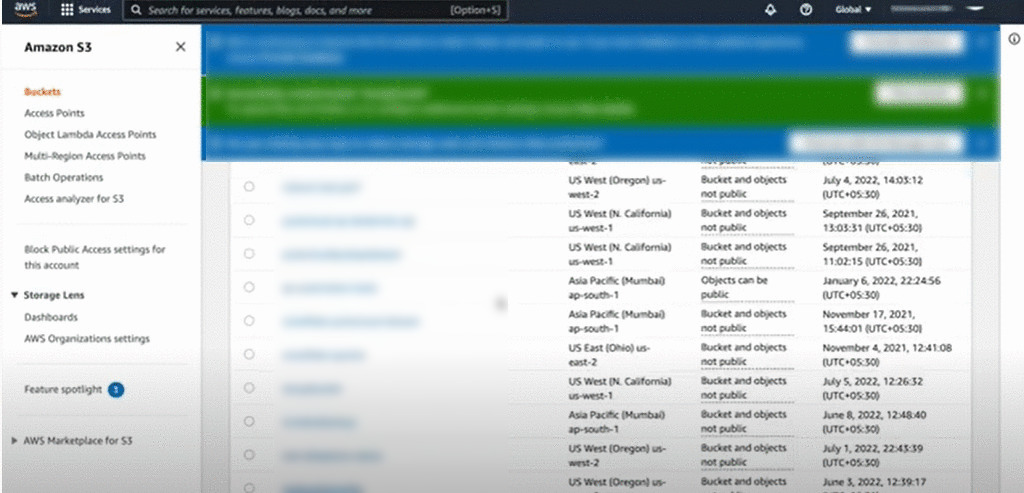
- Navigate to the S3 bucket console.
- Select a bucket from the list of buckets.
- Click Upload. The Files and Folders page is displayed.
- Select the values.yaml file.
- Click Upload.
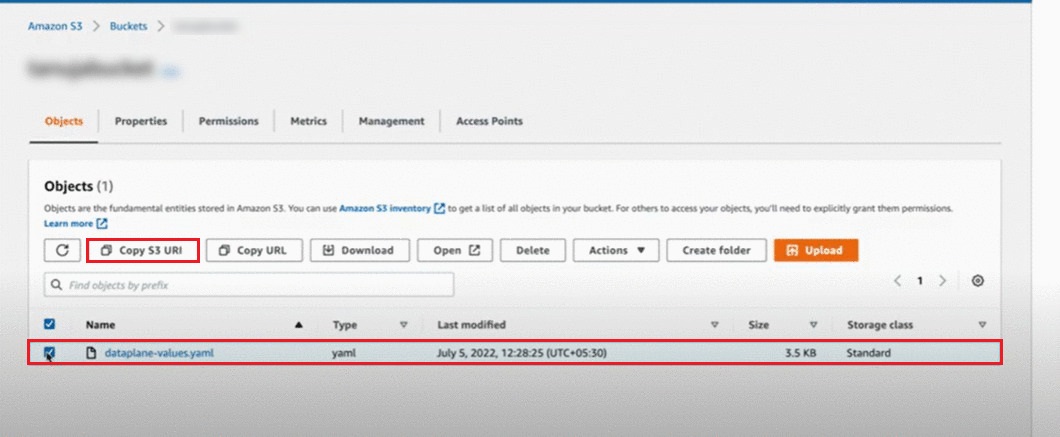
- Open the S3 bucket and navigate to the location where you uploaded the values.yaml file.
- Select the check box for the values.yaml file.
- Click Copy S3 URI. Note down this URI. You need to provide it at a later stage during the data plane setup.
AWS Setup
Create Stack
Once you upload the values.yaml file to the S3 bucket, you can continue with the creation of Stack to create the data plane. You can return to the browser tab on which the Create Stack button page was displayed.

- Since Stack is created from the ADOC template, the basic options on the Create Stack page like Template is ready and Amazon S3 URL are already selected.
- The location of the template file is pre-filled by Acceldata in the Amazon S3 URL field (path field). This file acts as a template to create the Stack.
- If you have navigated away from the Create Stack page, you can go back to ADOC and click the Proceed button. The AWS Create Stack page is opened in a new browser tab.
To create the Stack for data plane:
- Click Next on the Create Stack page. The Specify stack details page is displayed.
- Enter a stack name in Stack Name field.
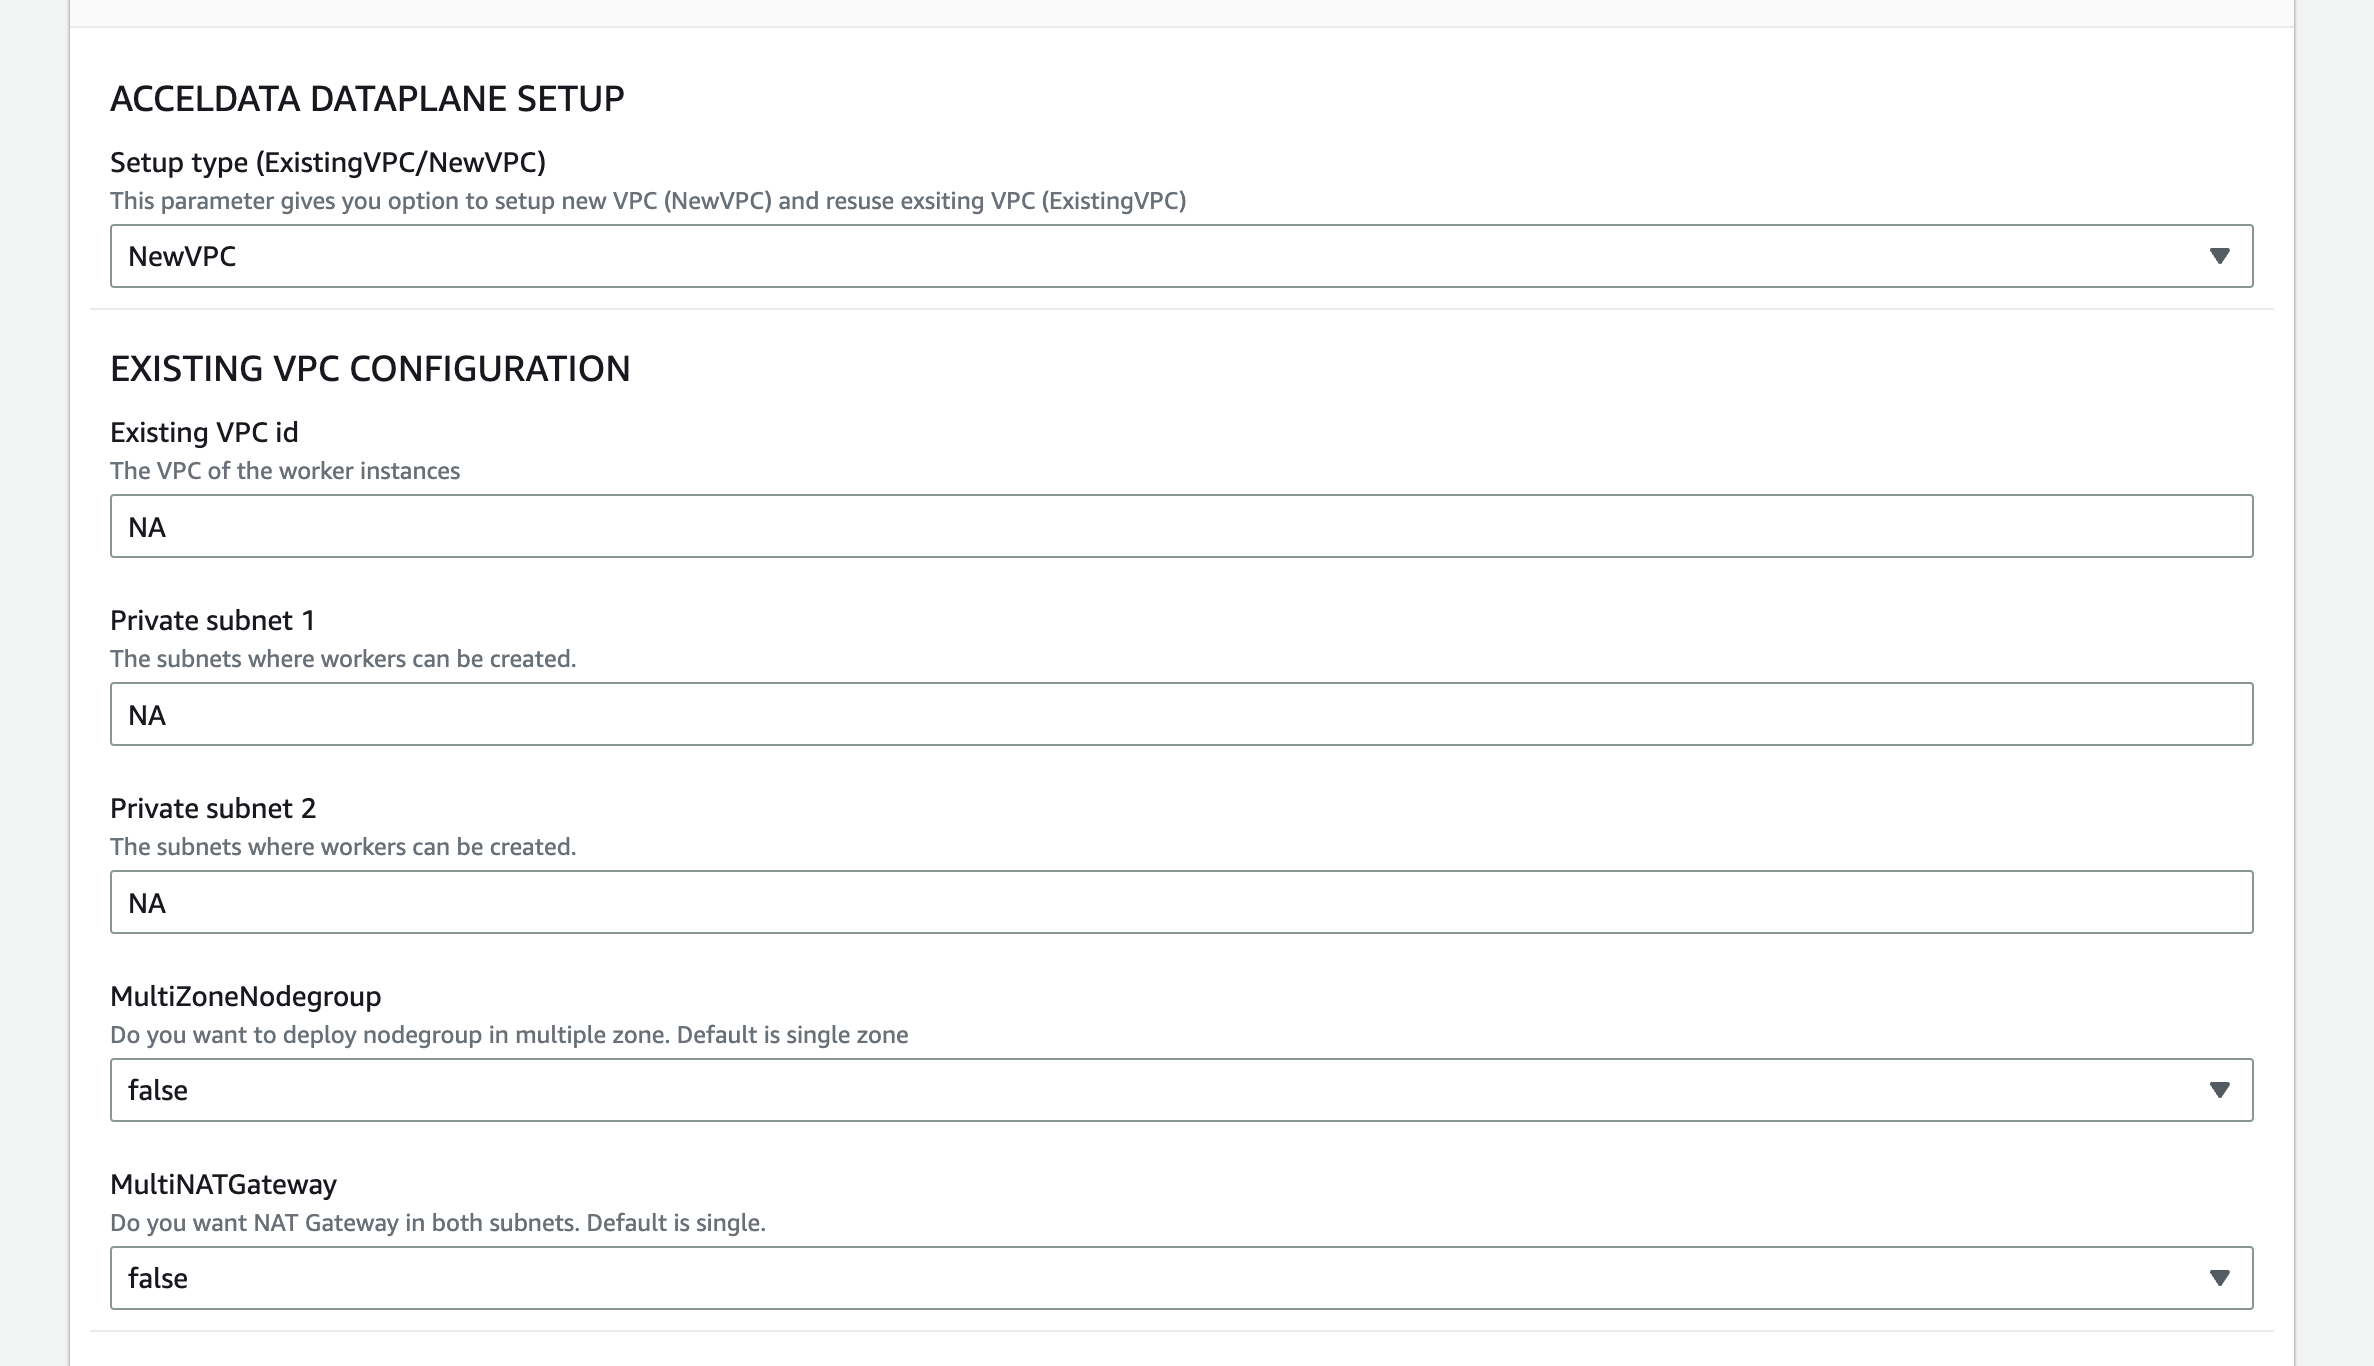
- Select either NewVPC or ExistingVPC in the Setup Type drop-down field. You must select the same option here that you selected in the Create Role Using CFT section of this document (in Step 11).
Type NA for all the fields under the Existing VPC Configuration section, if you selected the NewVPC option. When you use a new VPC, ensure that the new VPC network has access to the data source, via peering, or by editing the security group of EC2 nodes.
To use an existing VPC, you must select ExistingVPC in the Setup Type field. You must configure the following fields for an existing VPC. To use an existing VPC, you must have at least two private subnets. The availability zones of both the private subnets must be different. Both the private subnets must have an active Internet connection. The EKS node uses private subnets to configure load balancer and create worker nodes.
- Existing VPC id: Enter the VPC ID of the worker instance.
- Private subnet 1: Enter the subnet ID of the first private subnet.
- Private subnet 2: Enter the subnet ID of the second private subnet.
- MultiNATGateway: Set to true if NAT Gateway in both subnets are required. By default it is set to single.
- MultiZoneNodegroup: Set to true if the user wants to deploy the nodegroup in multiple zones. By default it is to a single zone.
You have six sections to complete the setup. The six sections are EKS Cluster Configuration, EC2 Configuration, Helm Values Configuration, Jobs Configuration Parameters, Analysis Service Results Storage and Role for EKS Cluster. The fields in these sections are explained as follows.
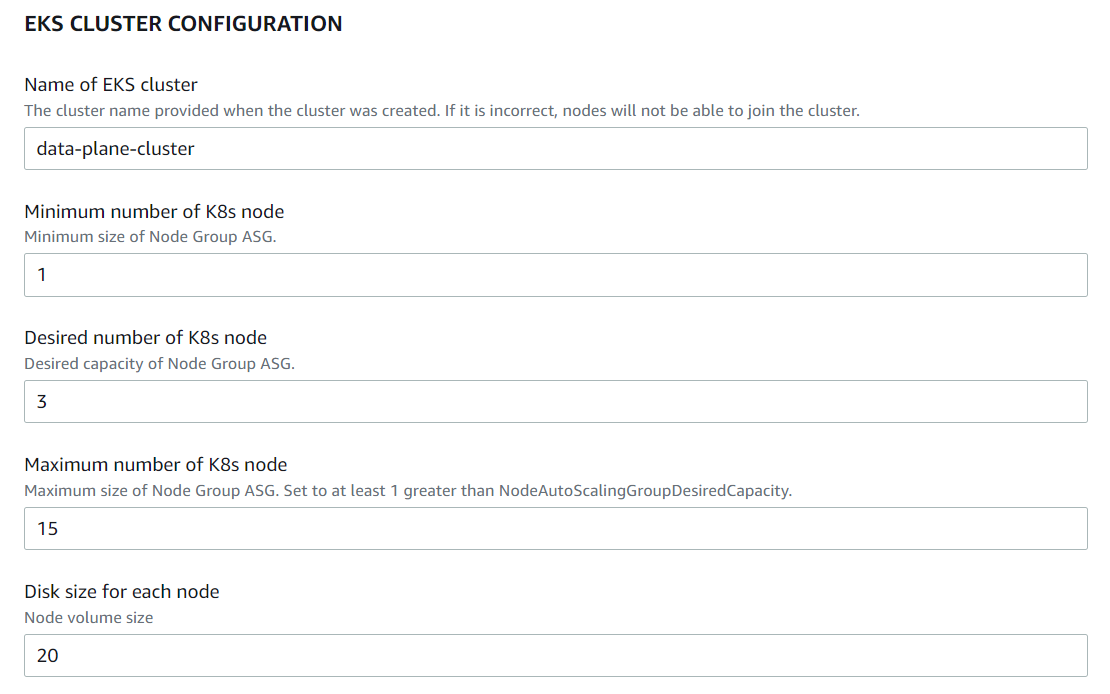
EKS Cluster Configuration
- Name of EKS Cluster: Enter the name of the EKS cluster.
- Minimum number of K8s node: Specify the minimum number of Kubernetes nodes needed.
- Desired number of K8s node: Specify the desired number of Kubernetes nodes needed.
- Maximum number of K8s node: Specify the maximum number of Kubernetes nodes needed.
- Disk size for each node: Specify the disk size for each node.
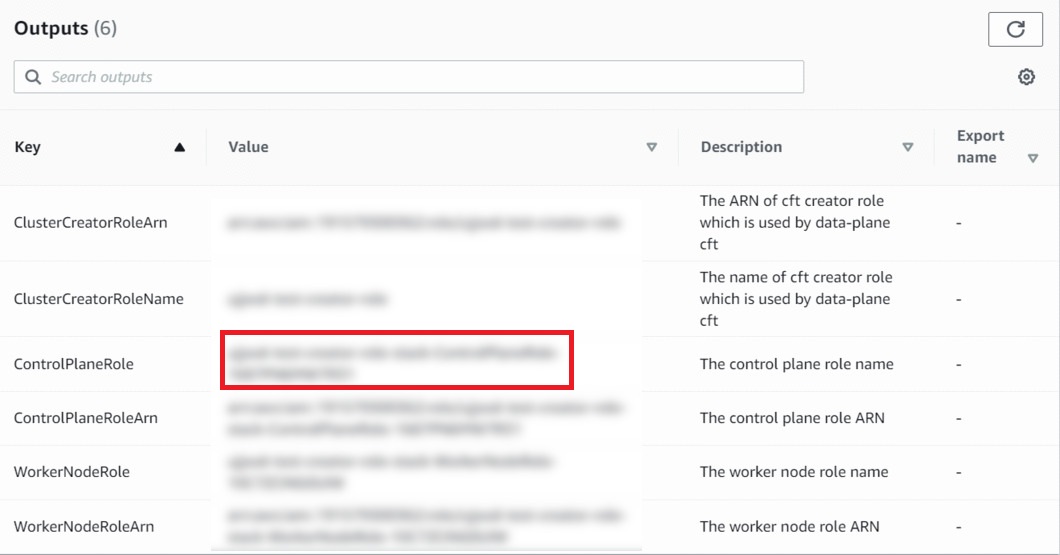
The following four field's values must be extracted from the Create Role Using CFT section created above.
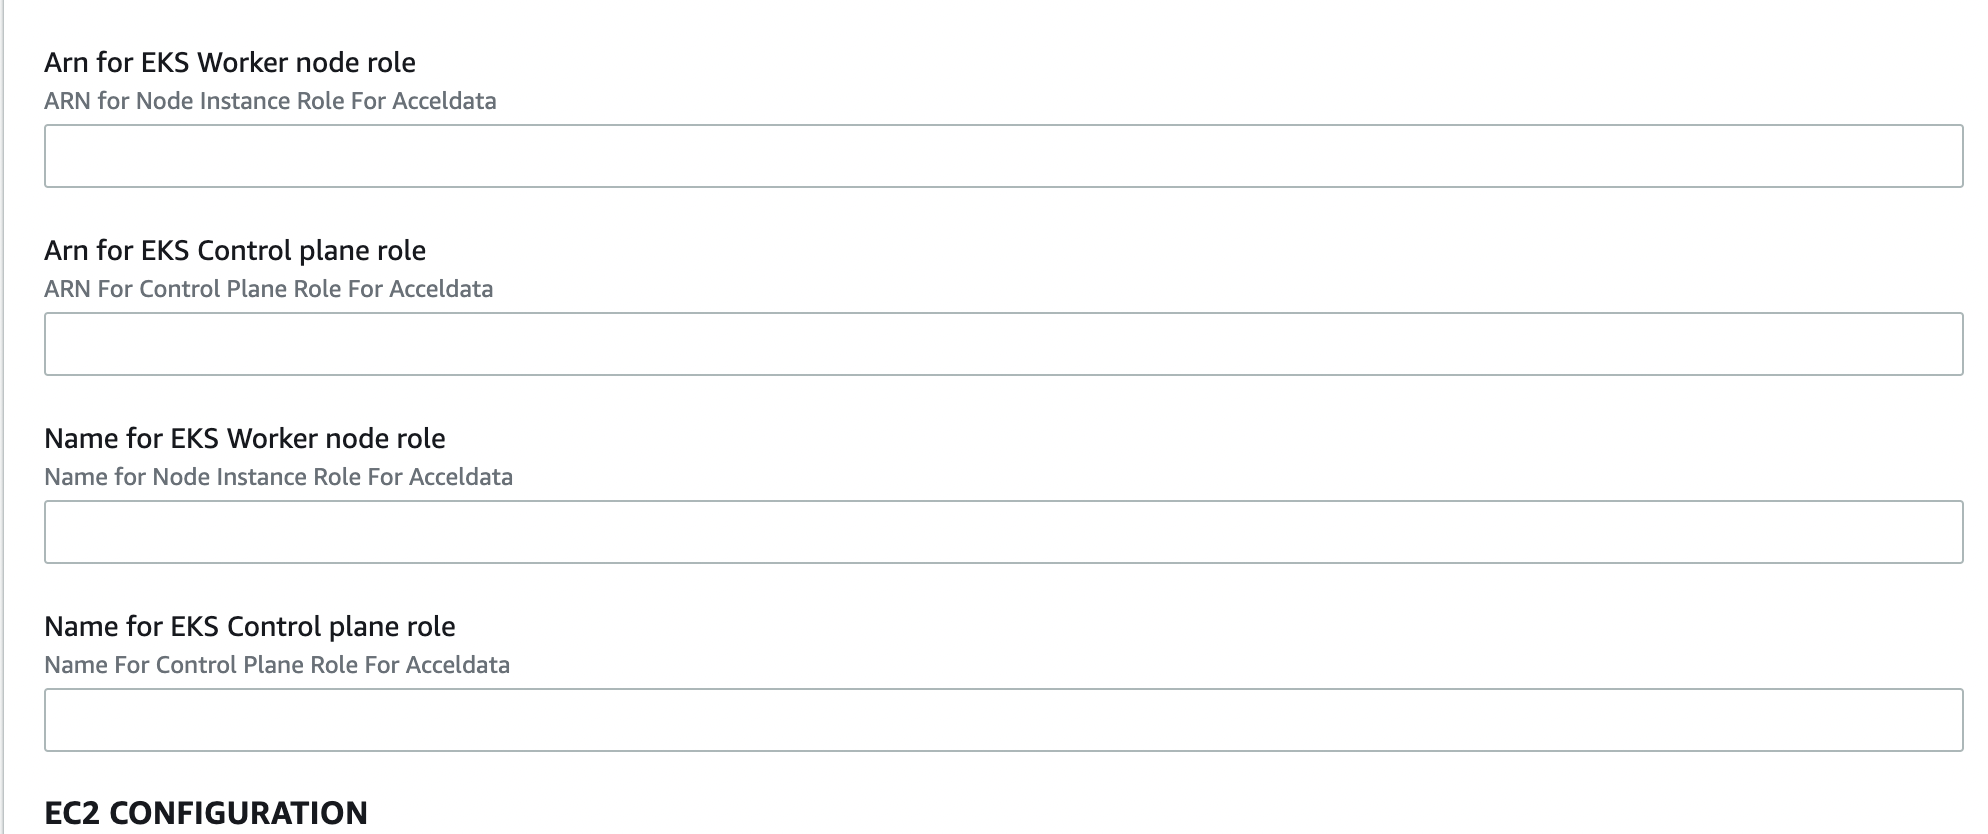
You must navigate to the Outputs tab of the stack created in the Create Role Using CFT section.
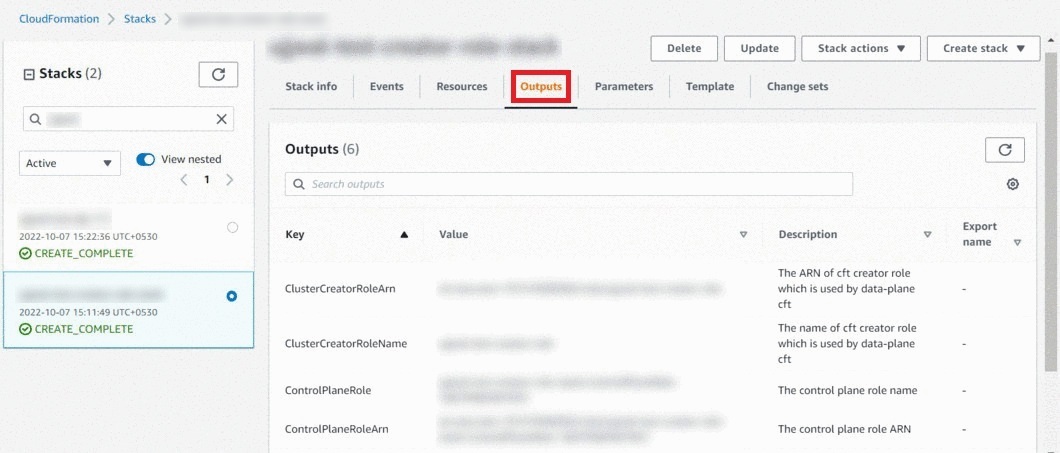
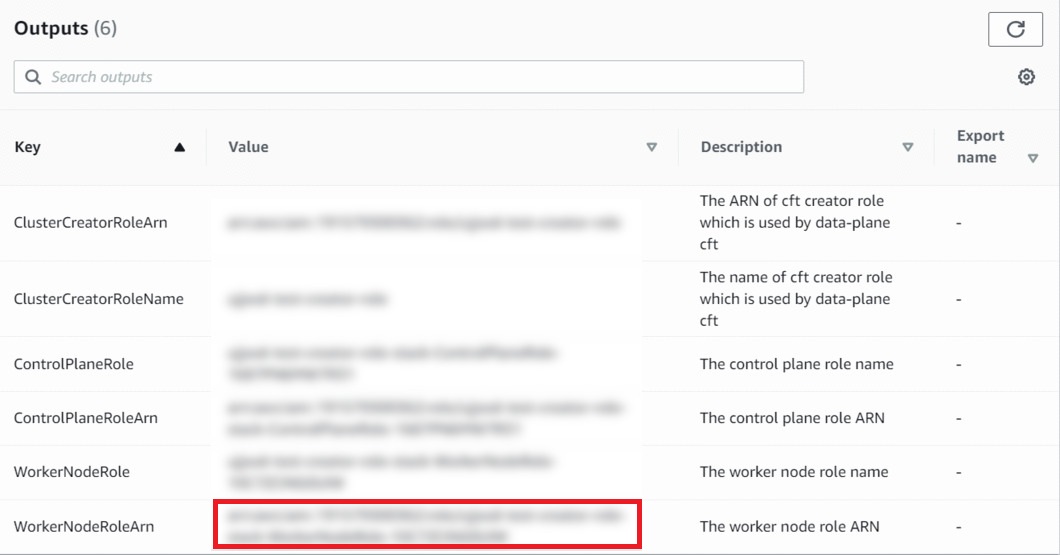
- ARN for EKS Worker Node Role: Copy the value of the WorkerNodeRoleARN field from the output tab of the Create Role Stack and paste it in this field.
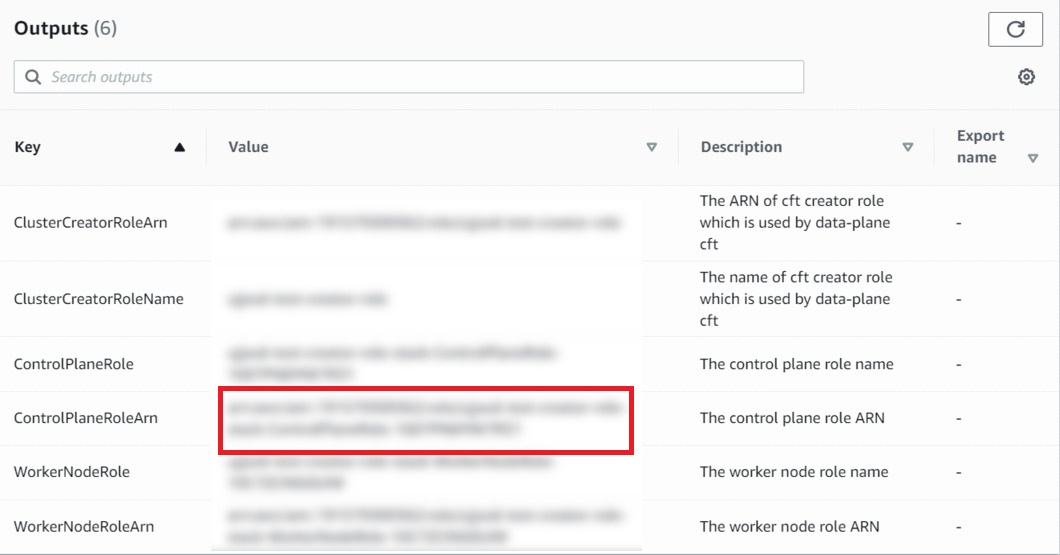
- ARN for EKS Control Plane Node: Copy the value of the ControlPlaneRoleARN field from the output tab of the Create Role Stack and paste it in this field.
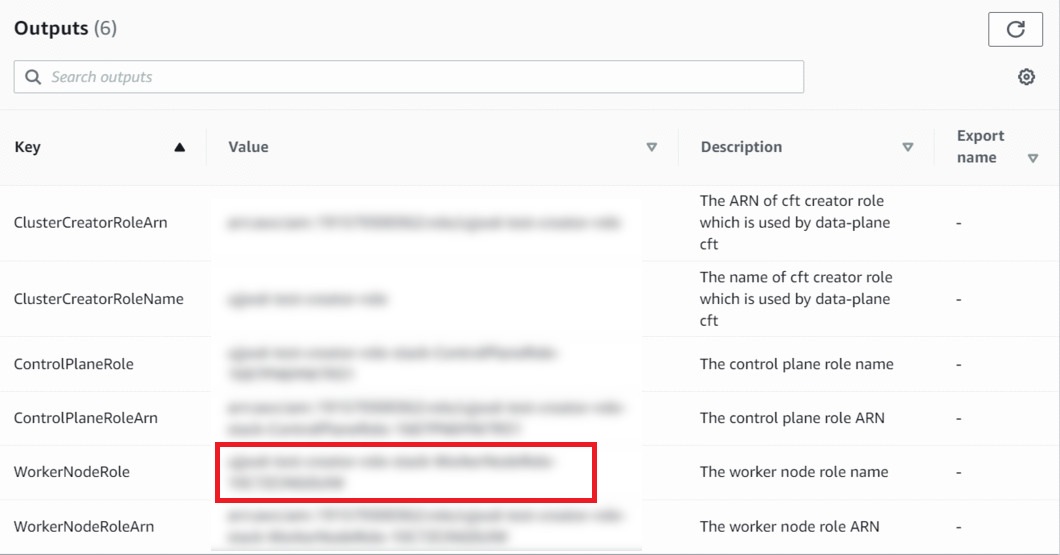
- Name for EKS Worker Node Role: Copy the value of the WorkerNodeRole field from the output tab of the Create Role Stack and paste it in this field.
- Name For EKS Control Plane Role: Copy the value of the ControlPlaneRole field from the output tab of the Create Role Stack and paste it in this field.
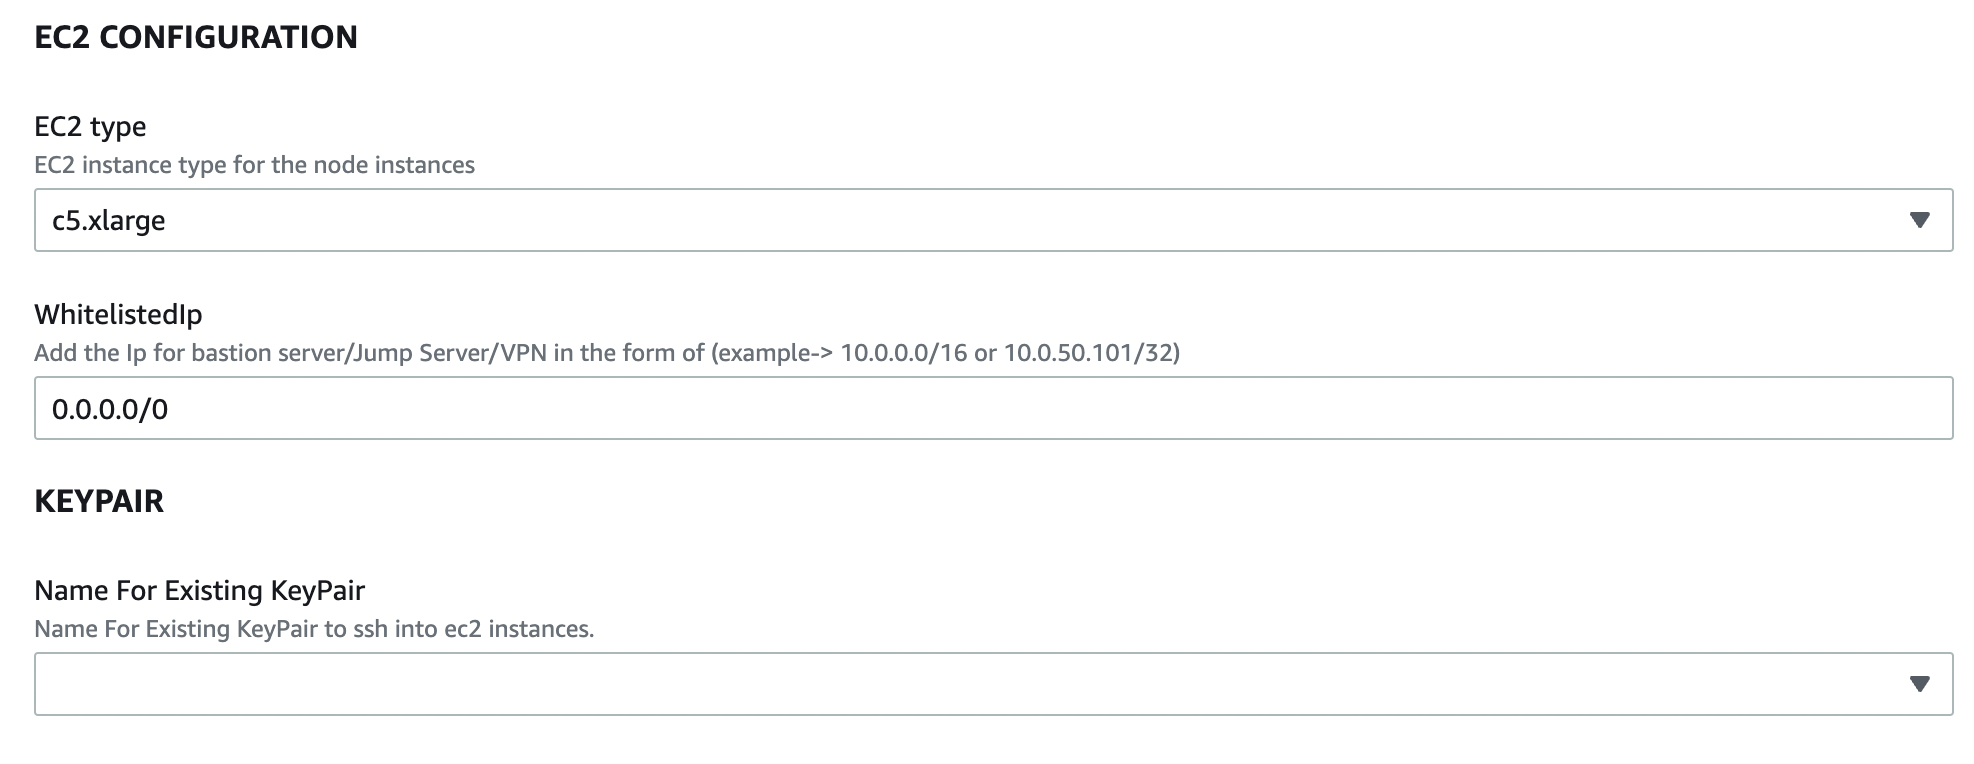
EC2 Configuration
- EC2 Type: Select the EC2 instance type size required for node instances.
- WhitelistedIp: Enter the trusted IP addresses from which you will access EC2. If you do not have the IP addresses, do not alter the default IP address.
KeyPair
- Name for Existing Keypair: Select the PEM file from your AWS account. This will be used as password to access EC2.
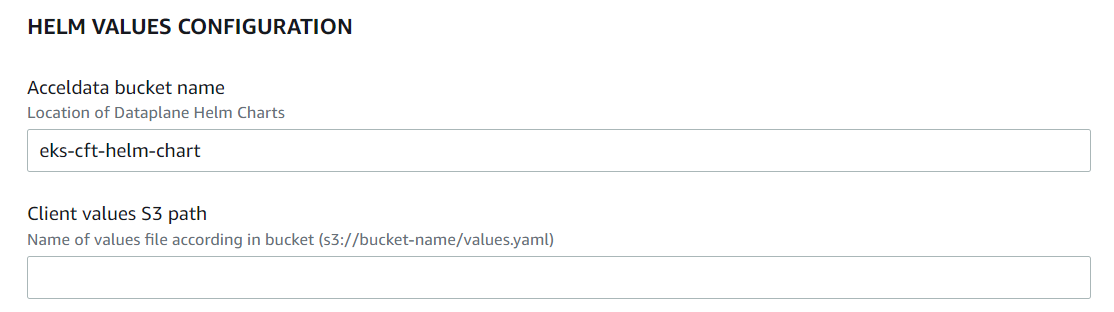
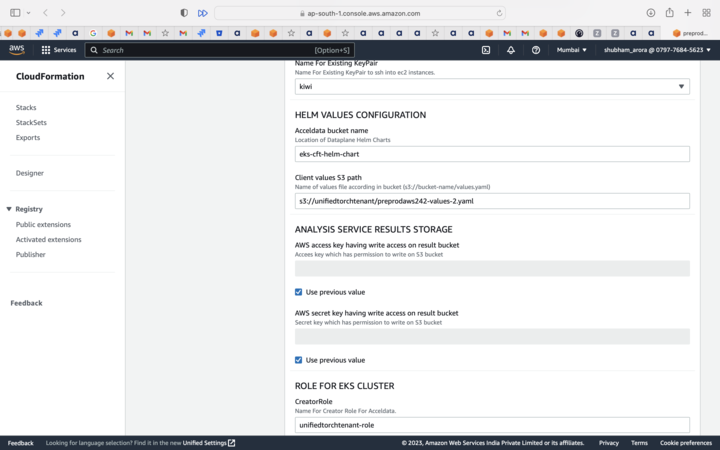
Helm Values Configuration
- Acceldata bucket name: this is Acceldata's bucket where helm values are configured. This field is pre-populated. Do not change this field's values.
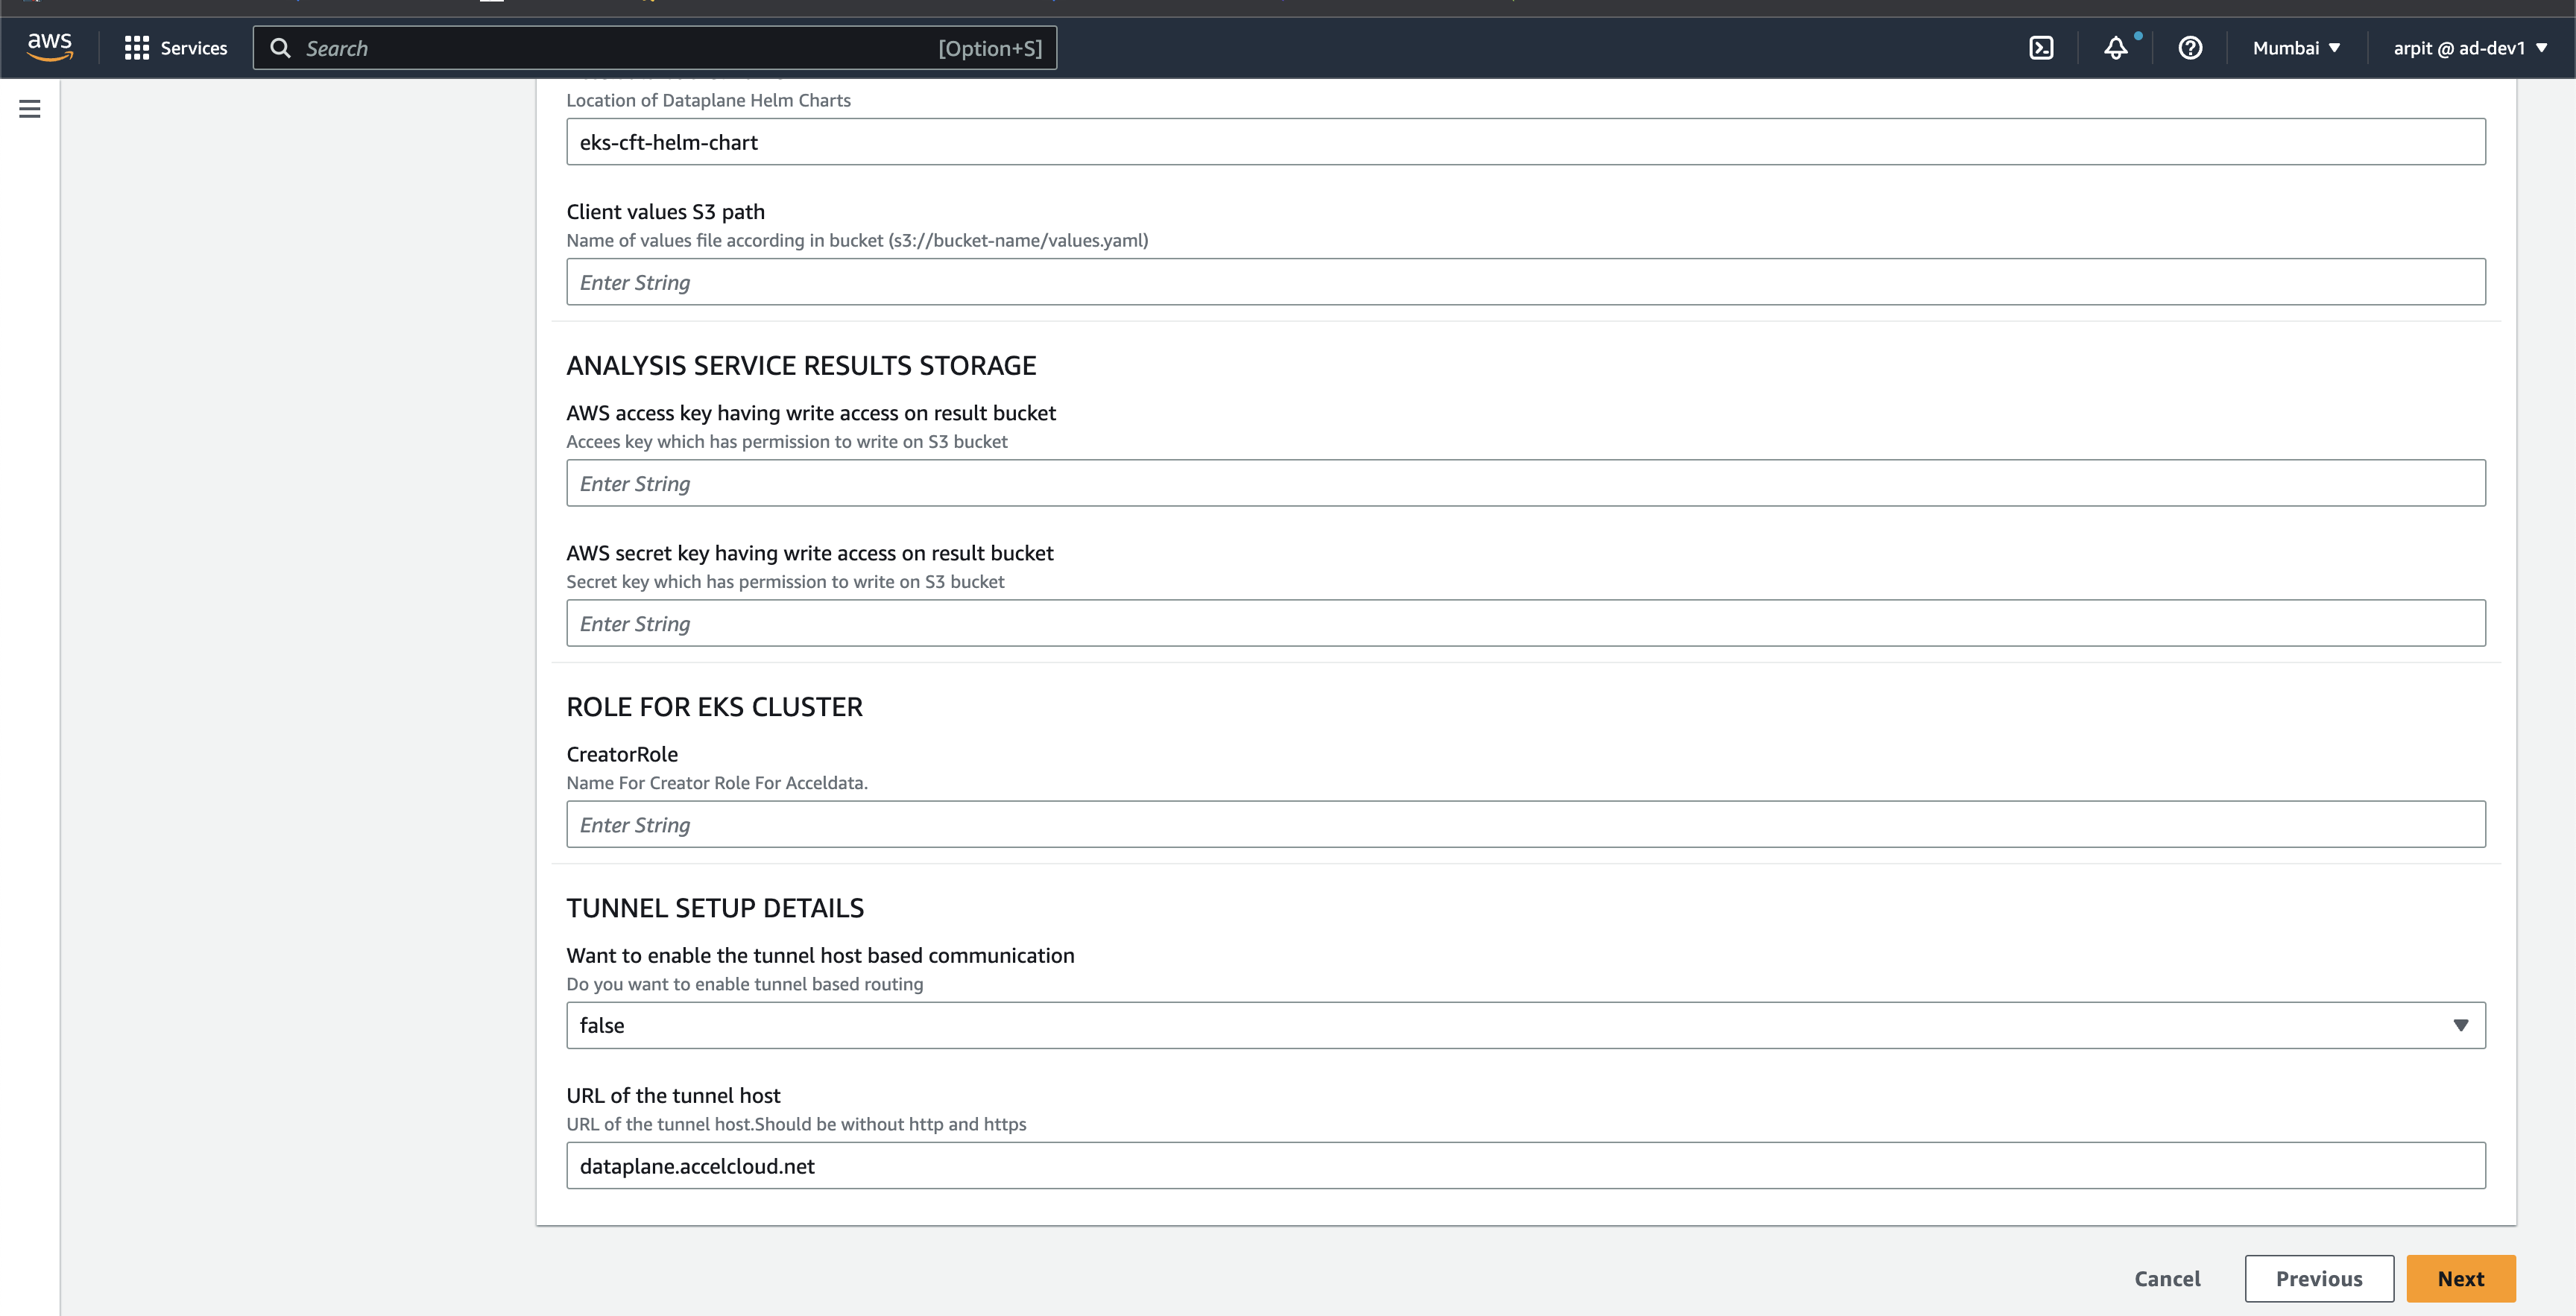
- Client values S3 path: Specify the S3 bucket path in which the dataplane-values.yaml file is stored. (The file was uploaded while setting up the Upload Values YAML file to S3 Bucket section).
Analysis Service Results Storage
In this section, you must enter the details of the S3 bucket where the analysis results of your data must be stored. This location must be an S3 bucket. You can also use the same bucket in which the dataplane-values YAML file is stored or a different S3 bucket. You must provide the keys to right data to this bucket since Acceldata needs to add analysis data.
- AWS access key having write access on result bucket: Do not enter any value in this field. This value will be generated automatically when IAM role is created from the Create Role Stack.
- AWS secret key having write access on result bucket: Do not enter any value in this field. This value will be generated automatically when IAM role is created from the Create Role Stack.
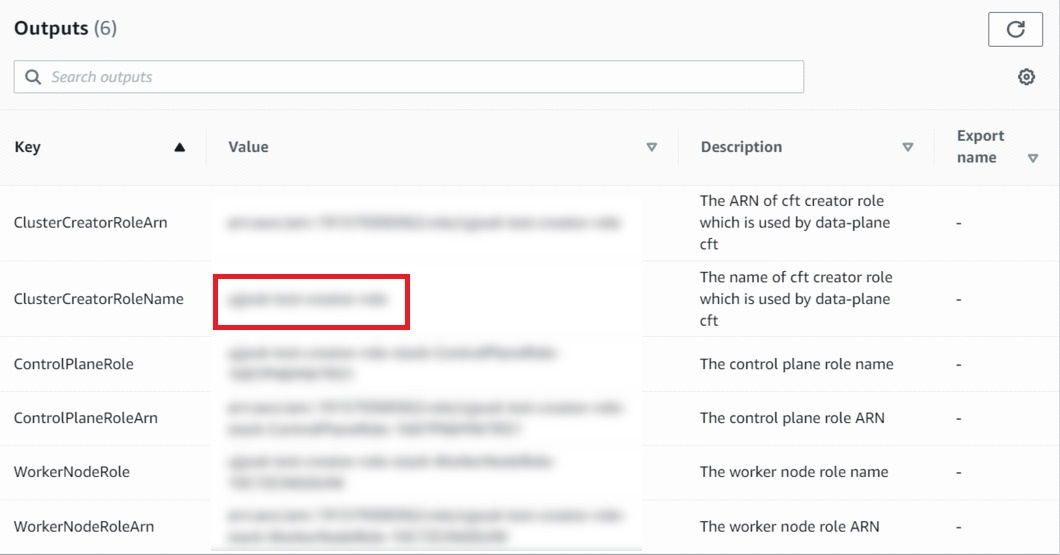
Role for EKS Cluster
- Creator Role: The value of this field must be copied from the Output tab of the Create Role Stack.

Navigate to the Output tab of the Create Role Stack and copy the value of the ClusterCreatorRoleName field and paste it in the Creator Role field.
- Click Next. You are redirected to the AWS Stack Options page.
- Select the role name from the IAM role drop-down menu. This must be the same name as present on the ClusterCreatorRoleName field of the Create Role Stack (Output tab).
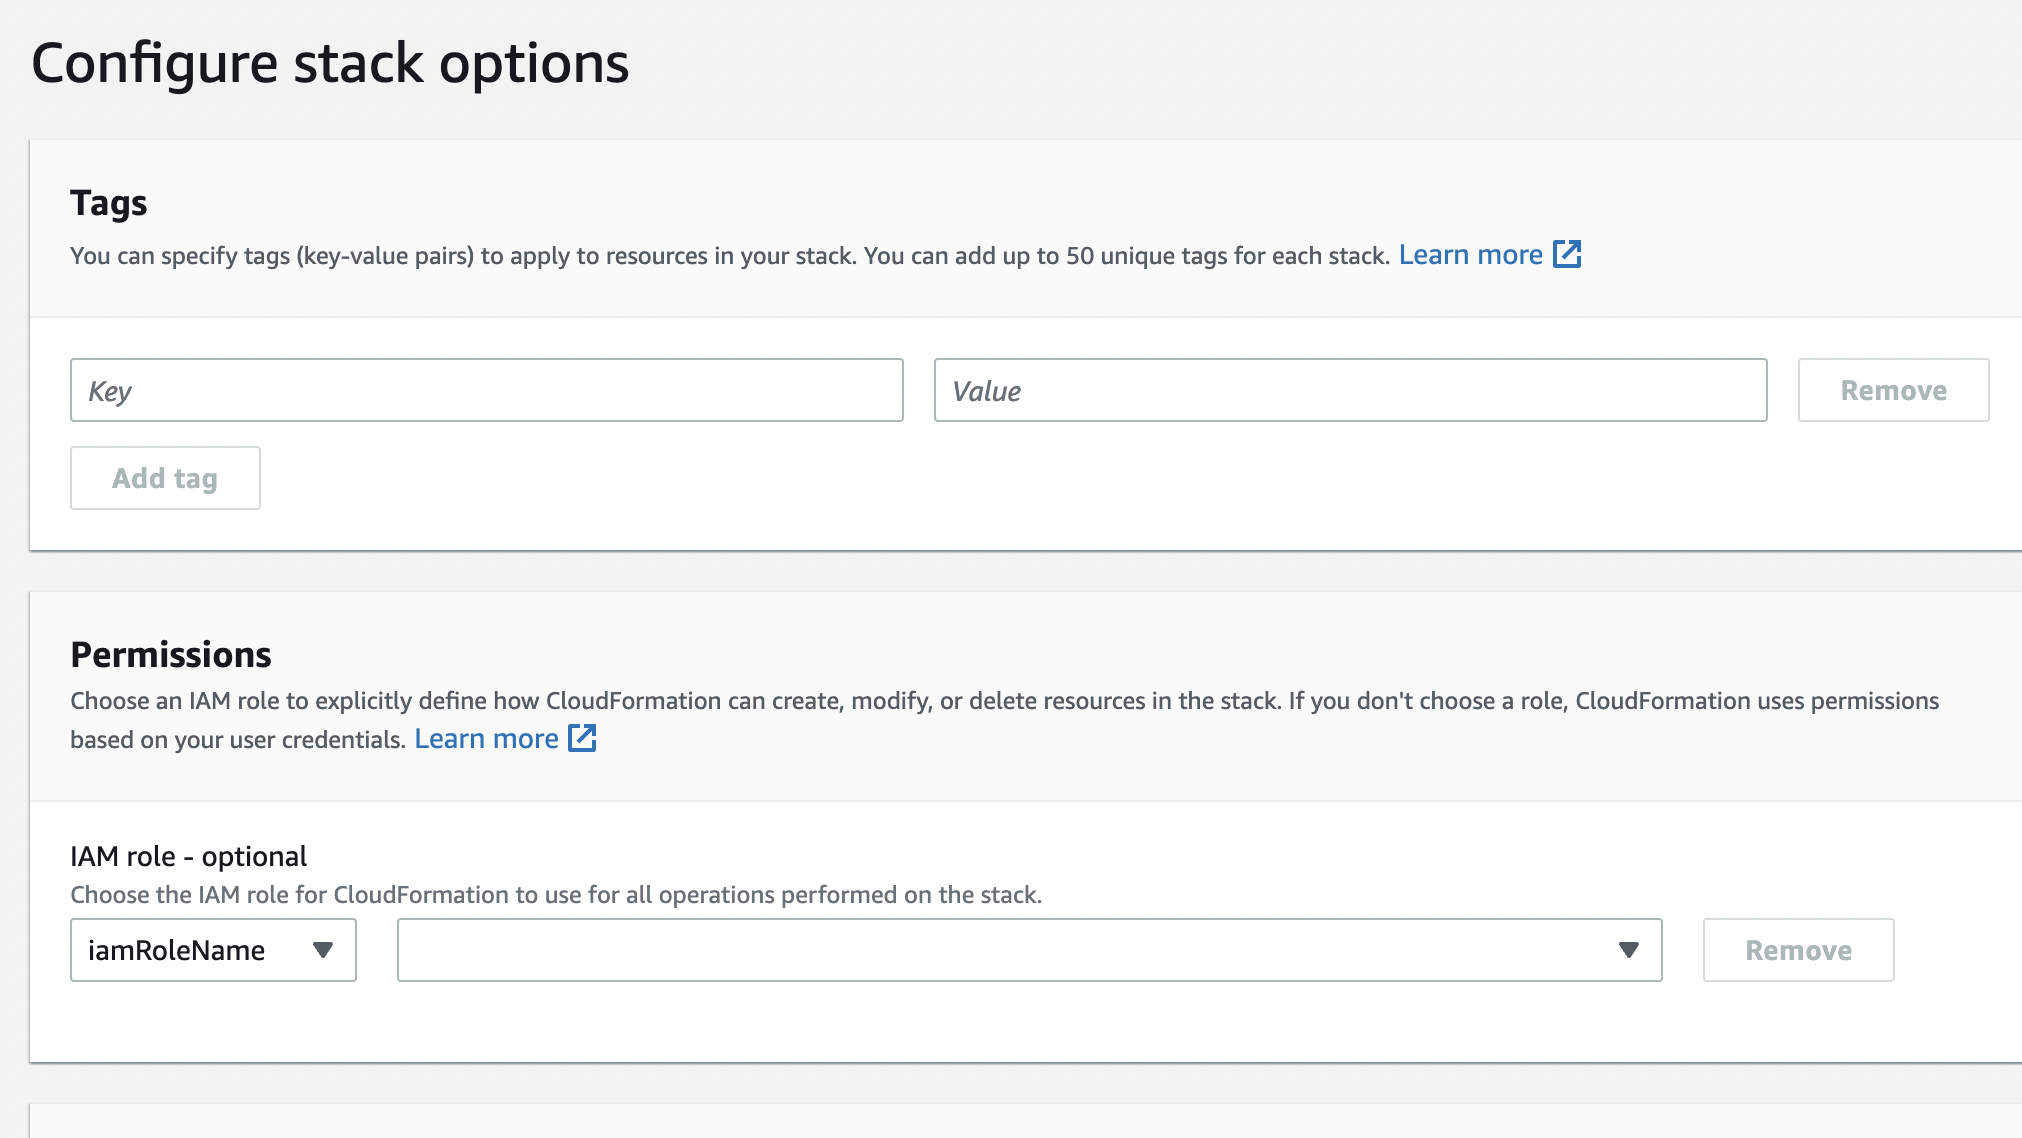
The name selected in the IAM role drop-down menu must match with the name present in the ClusterCreatorRoleName field of the Create Role Stack (Output tab).

- You can refer the AWS Cloud Formation Stack Options documentation page and configure the fields.
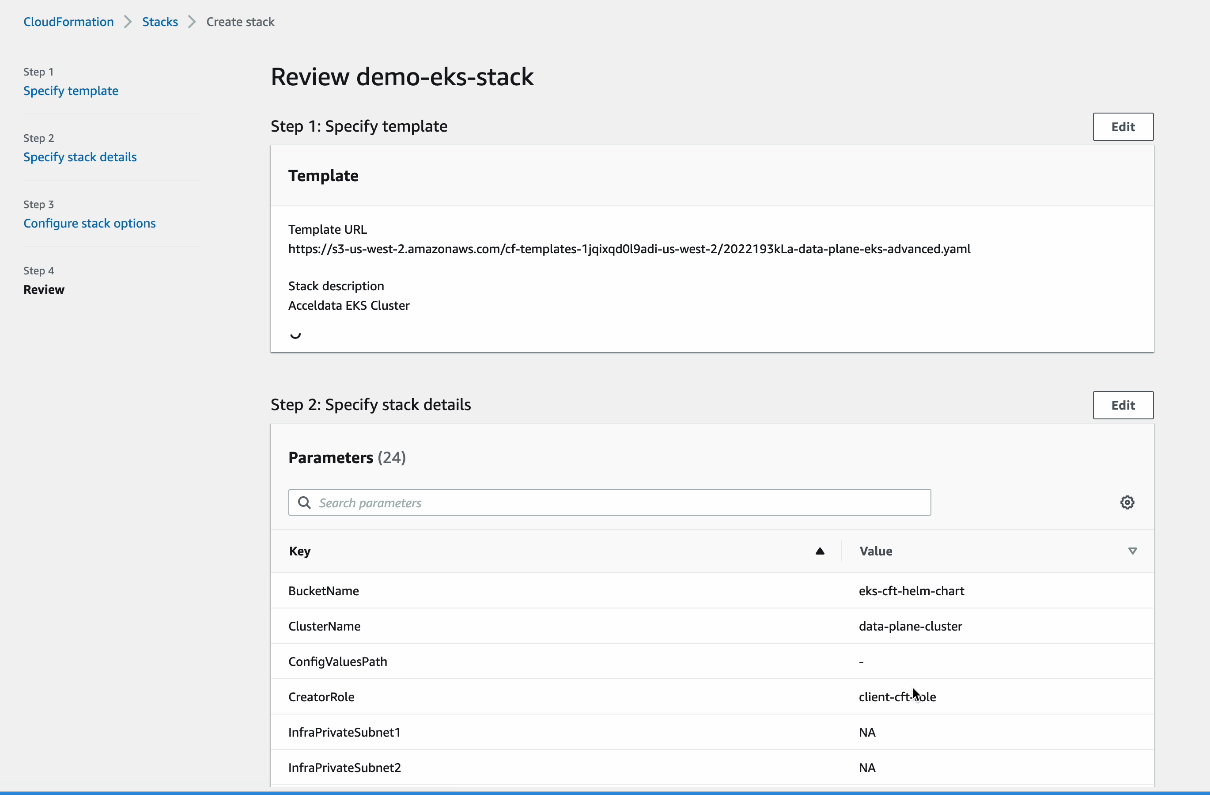
- Click Next. You are redirected to the AWS Review page.
- Review if all the data is accurate.
- Click Create stack.
Upgrade AWS Data Plane
Prerequisites to Upgrade AWS Data Plane
To upgrade the AWS Data Plane, you must perform the following pre-requisites: These steps are applicable only to AWS Data Plane.
- On the Control Plane UI, click the Upgrade button.
- Fill out the form and submit it
- Copy the Amazon S3 template and click the Proceed button.
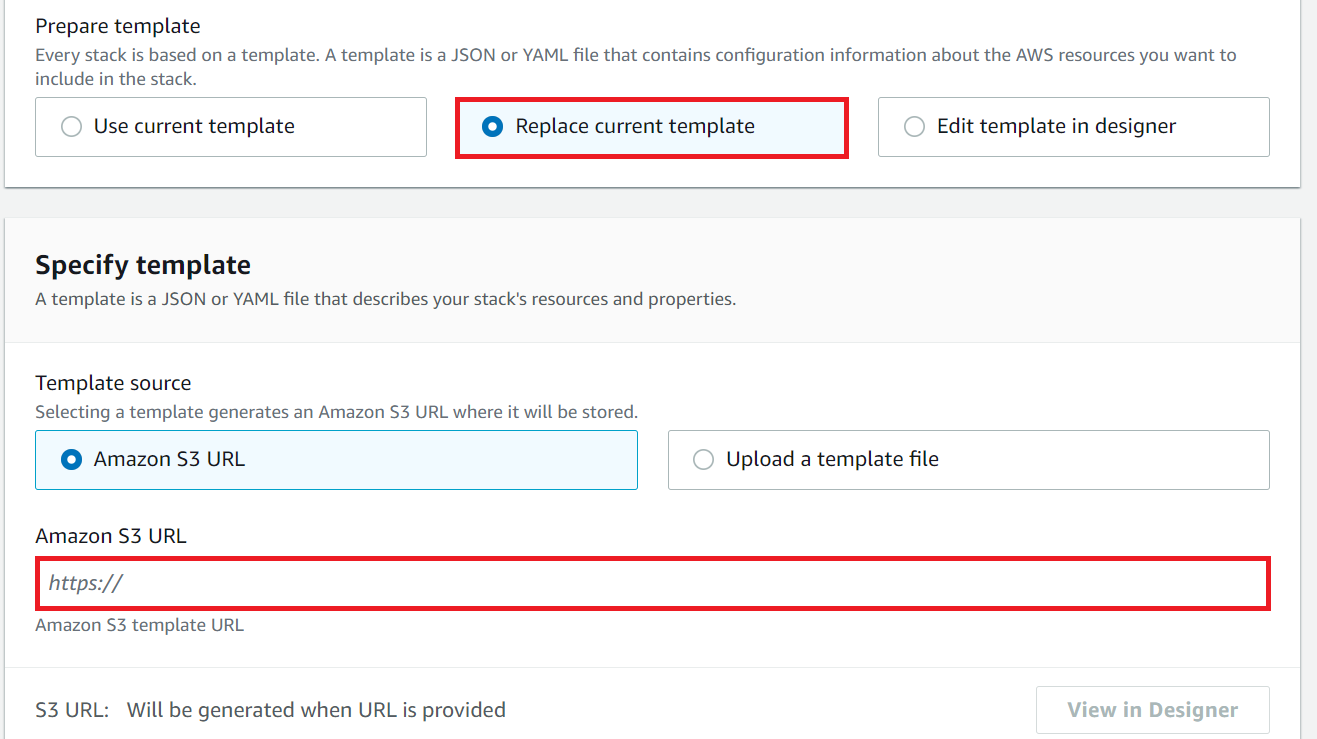
- Now, in the AWS workspace, paste the S3 URL into the Amazon S3 URL field.
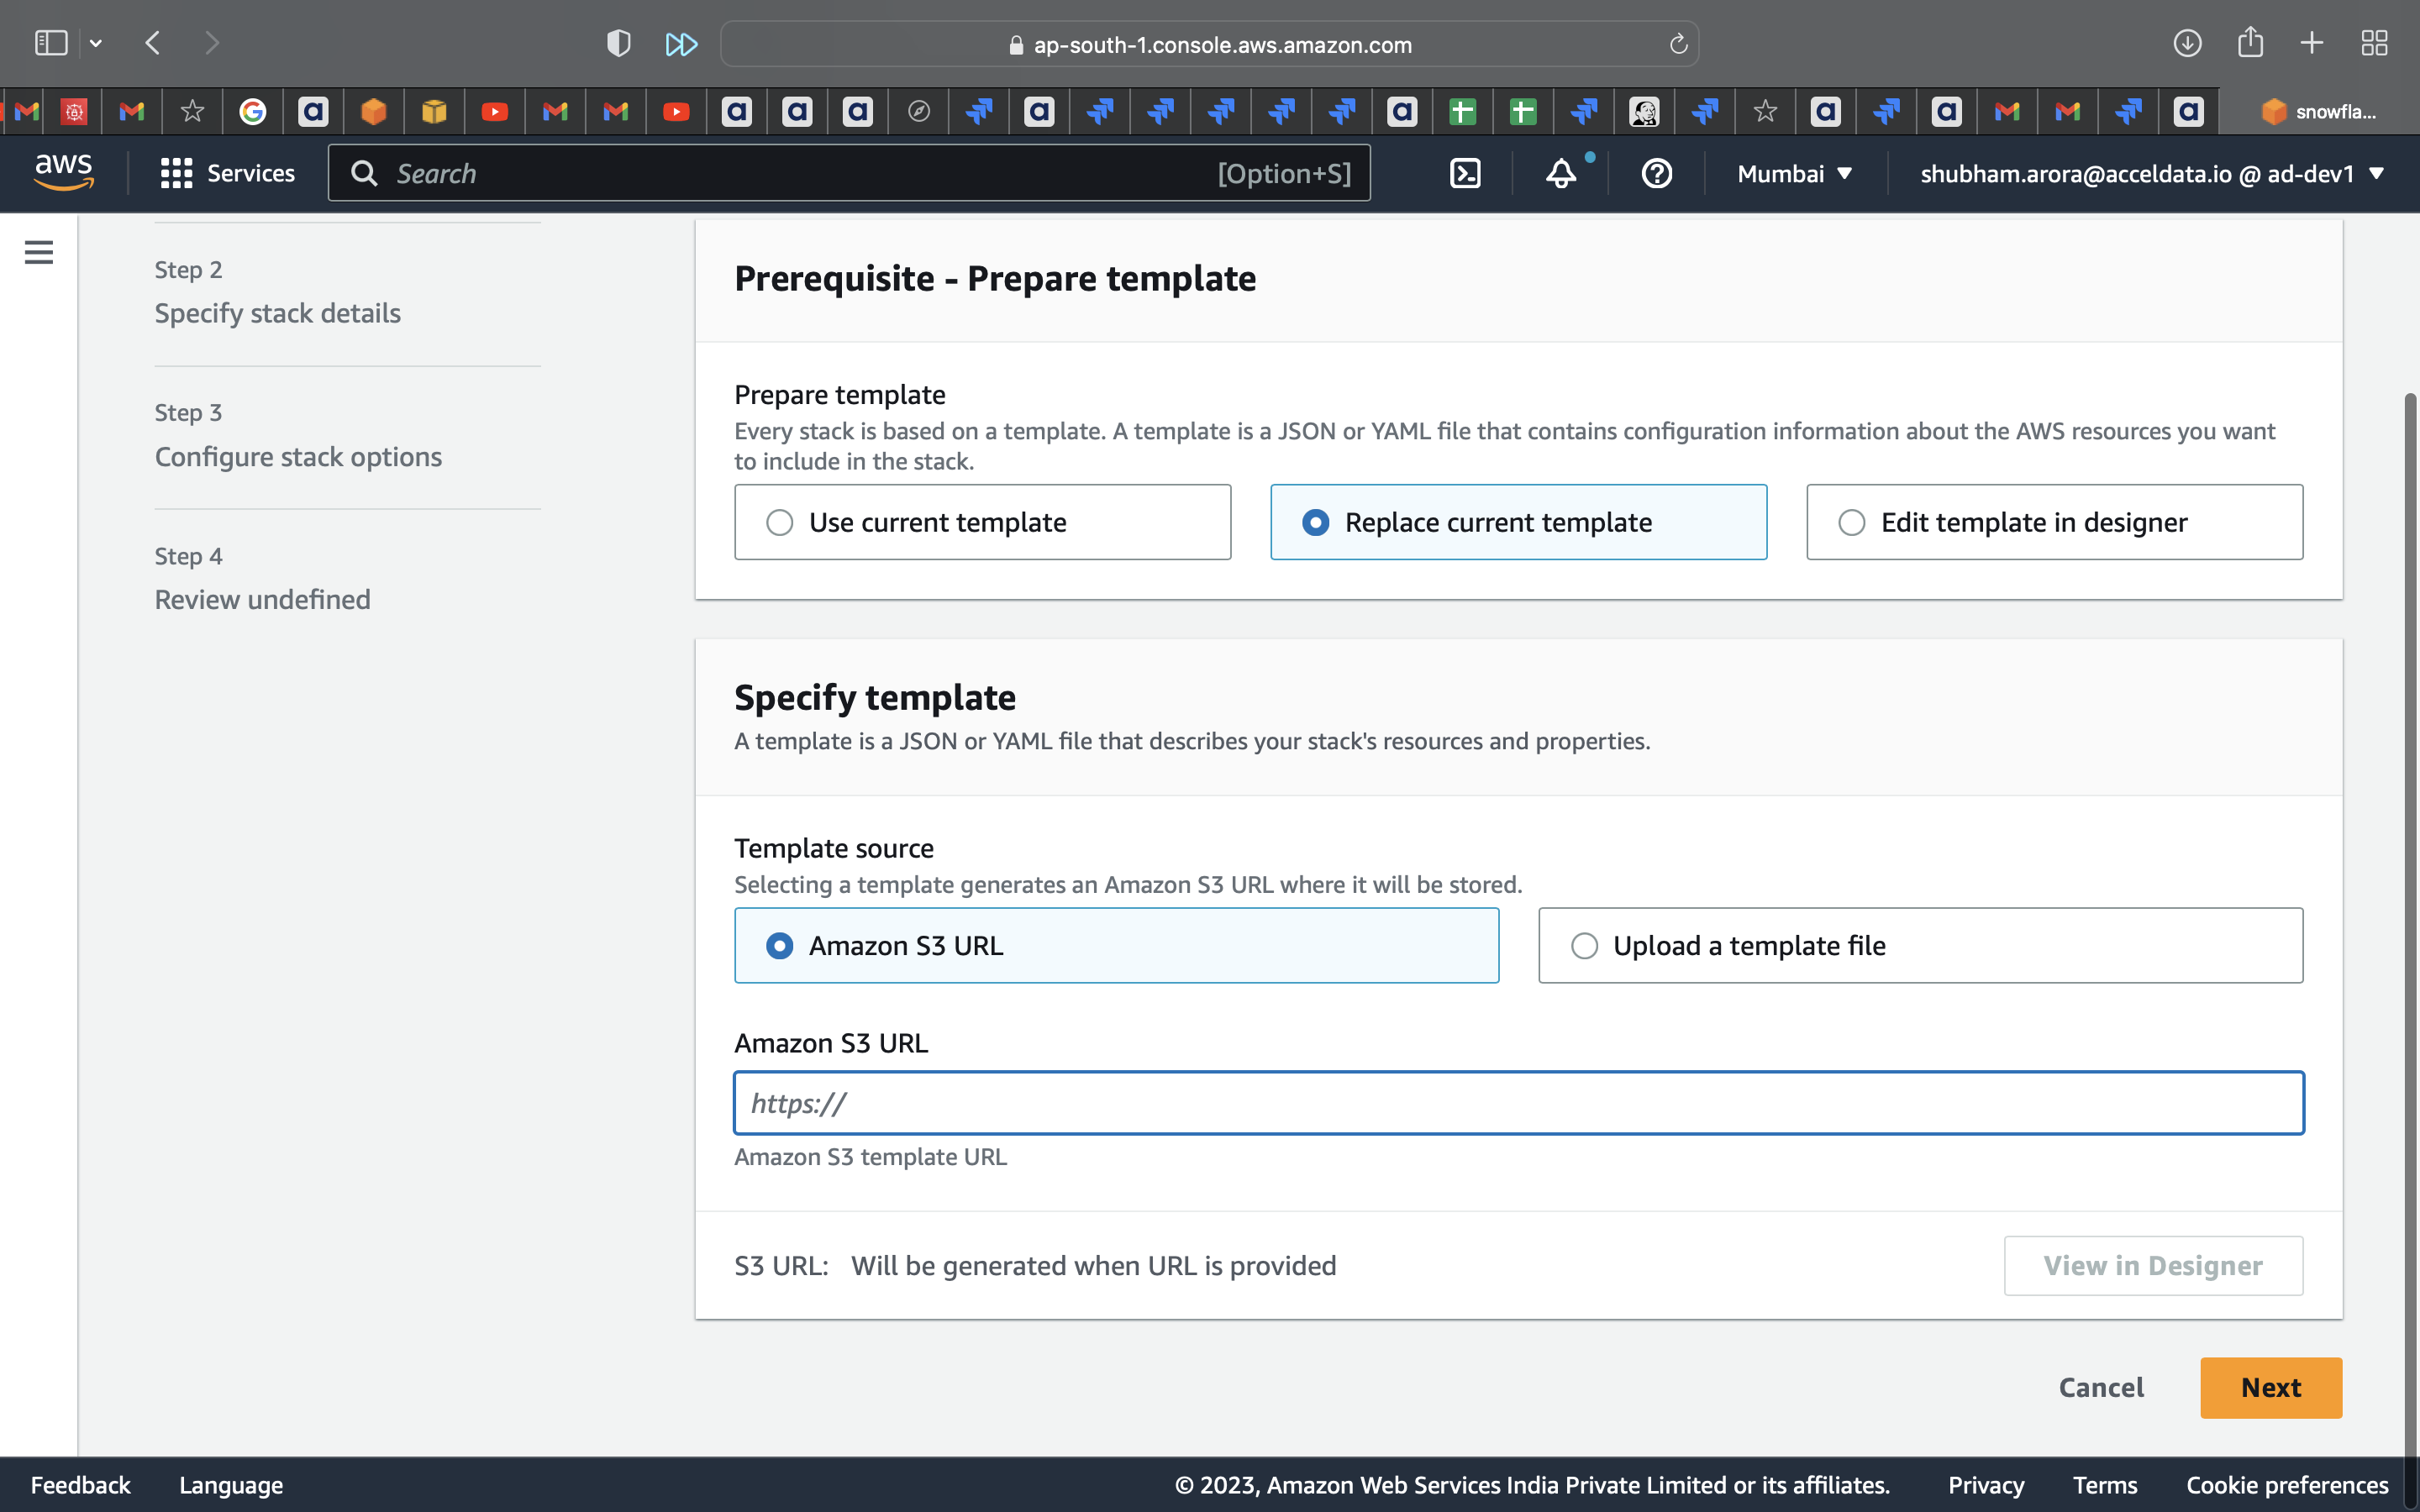
- Click Replace current template.
- Provide the following link as the new template in the Amazon S3 URL field.
- Click Next multiple times, until you reach the final page.
- Acknowledge the changes by selecting the check box.
- Click Submit.
Dataplane step updates:
Note: In this version of ADOC, the EKS Version has been upgraded to V1.24
Follow the steps to update the Dataplane:
- Setup a new AWS dataplane using the ADOC platform.
- Wait until the new Dataplane is up and operating and listed in the ADOC platform's Datplane section.
- Delete the Cloud Formation template from your previous Data plane.
- Edit your Data Sources so that they point to the newly generated dataplane.
Upgrade AWS Data Plane
Once you navigate to AWS, click Replace Current Template. You must select Amazon S3 URL as the Template source. In the Amazon S3 URL field, you must enter the following.
https://eks-cft-helm-chart.s3.us-west-2.amazonaws.com/dataplane-template/aws/data-plane-prod-<<control plane version>>.yamlFor example, if you want to upgrade the data plane to version 2.5.0, release 152, you must use the above URL in the following format.
https://eks-cft-helm-chart.s3.us-west-2.amazonaws.com/dataplane-template/aws/data-plane-prod-2.5.0-release-152.yaml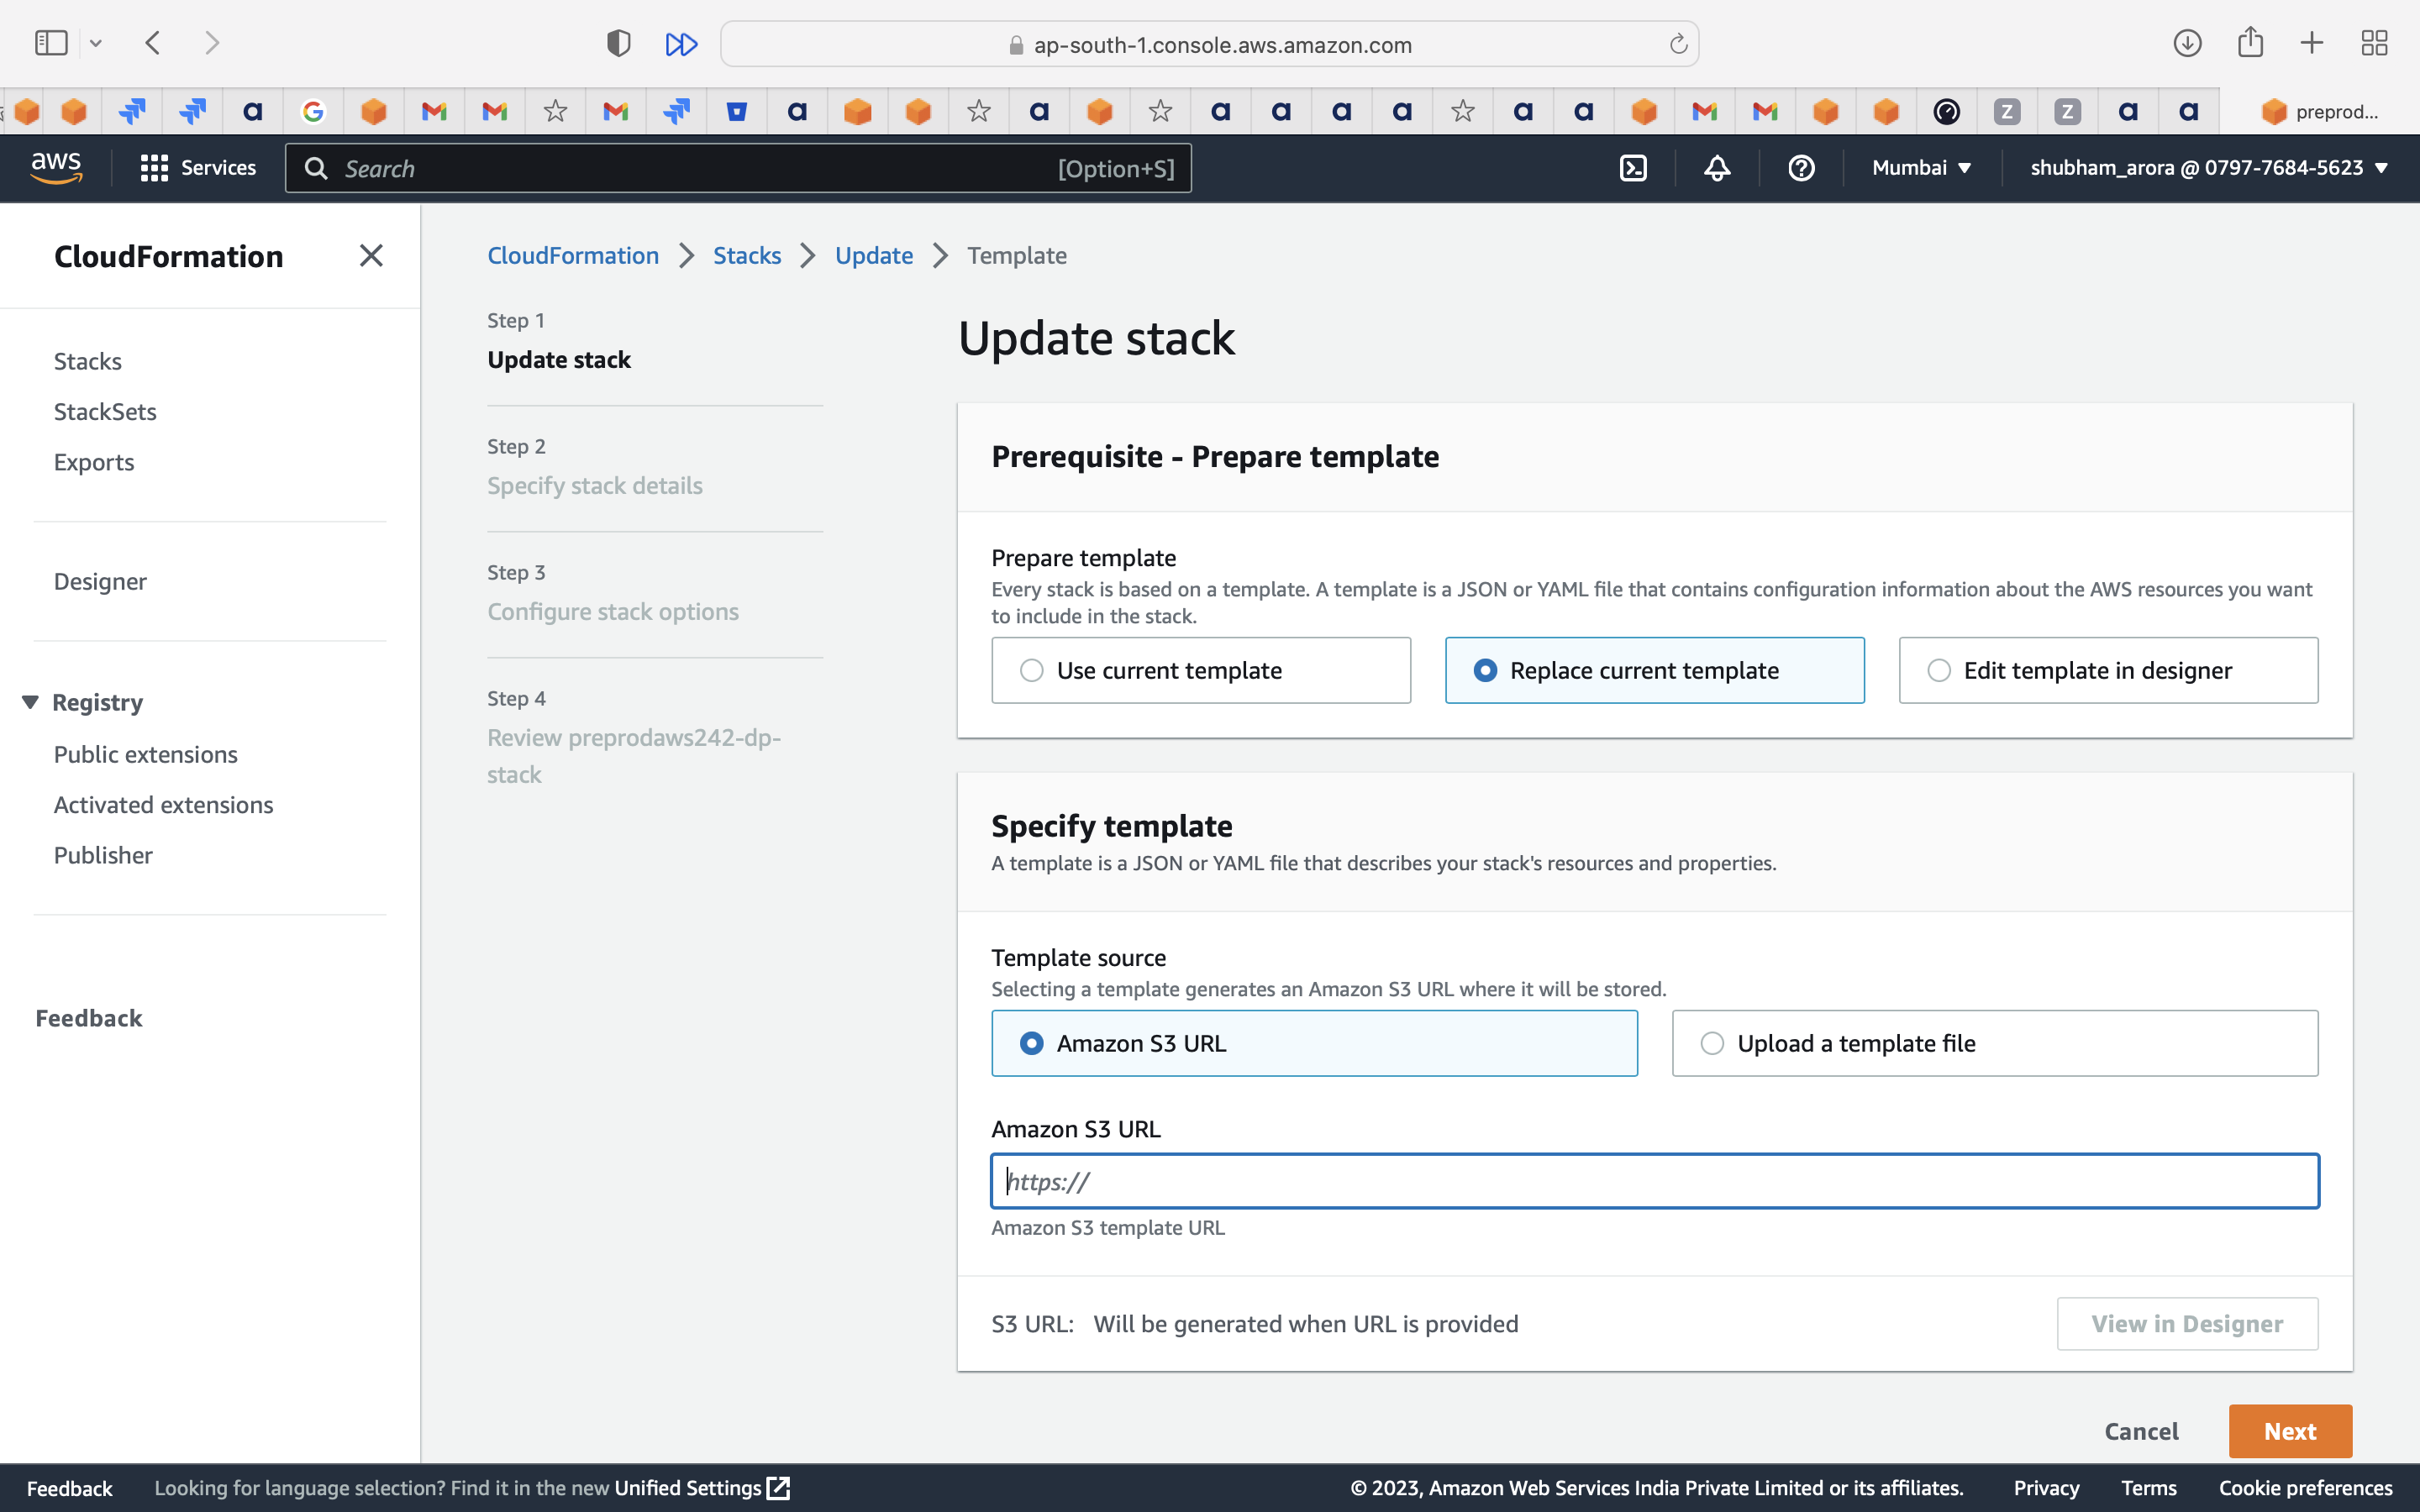
Click Next.
In the Client Values S3 path, you must replace the existing S3 path value with the newly downloaded values.yaml file from ADOC UI.
Click Next and complete the upgradation process.
Troubleshooting
Issue: Getting a "No resources found in default namespace" error message
Solution
Ensure that the name of the YAML file you uploaded to S3 bucket, does not have special characters. You can only use a combination of alphabets, numbers, and () as a file name.