Dashboard
Using Dashboard, you can create an environment to add visualizations of charts within services. To access Dashplots, perform the following. To access the Dashplot studio, click the View icon on the global dashboard and select Dashplots.

Creating a Dashboard
To create a dashboard, do the following.
Click the Create button. A Create Dashboard slide-on window appears.
Assign a value to the following labels.
- Name: Name of the dashboard you are creating.
- Type: Choose Dashboard, ListView, or Workbook from the dropdown menu.
- Tags: Tags related to your dashboard. You can enter multiple tags. Type the name of a tag and press the enter key. You can then add another tag using the same procedure.
- Message: Description of your dashboard.
Click the Create button.
A new dashboard is created.
Importing Dashboards
You can import a dashboard to the existing list of dashboards. To import a dashboard file, do the following.
- You can upload a file in
.ZIPformat only. - You can upload one file at a time.
JSON file import or export. Dashboard export and import are both available in.zip format.
- In Dashboards tab, click
drop-down and select the Import button. - Click Browse button and select a
.ZIPfile from the list. - (Optional) Check the box Overwrite Dashboard if already present.
- (Optional) Check the box < 3.0.0 dashboard If the dashboard was exported from pulse version lower than 3.0.0.
(Optional) Click Close button to cancel importing.
3. Click Import Directory.
The dashboard .ZIP file is now imported.
Exporting Dashboards
You can export one or multiple dashboards to your system. The file downloaded is in .ZIP format. To export dashboards, do the following.
- In Dashboards tab, click the
Export Dashboards button. - In the Export Dashboards window, click the checkbox against the dashboards you want to export from the list.
- Click Export Dashboards button.
A single file with selected dashboards is downloaded to your system in a .ZIP format.
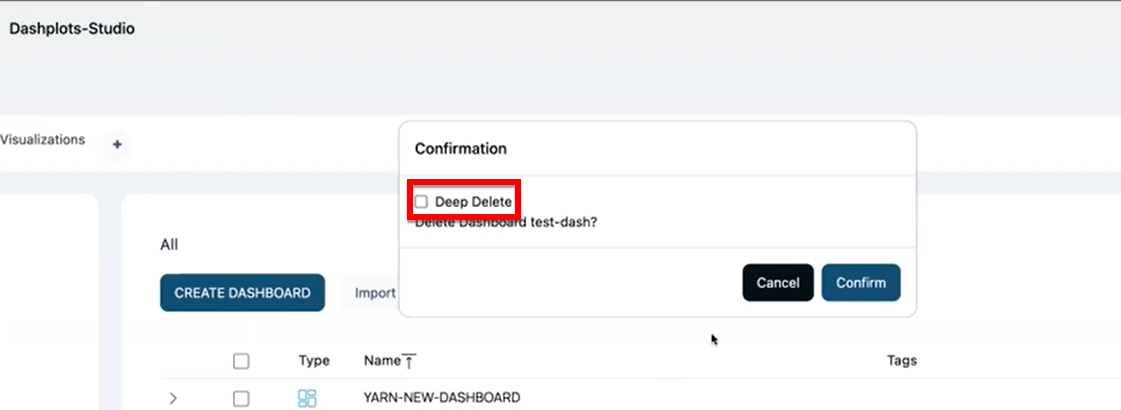
Deleting Dashboards
To delete a dashboard from the list, do the following.
- Click the
icon at the right end of the dashboard entry. The icon is only visible while hovering over the dashboard row. - In the Confirm window, click Delete to confirm deletion of the dashboard.
The dashboard is now deleted.
If you do not want to delete the visualizations of a Dashboard, you must not select the Deep Delete check box. This ensures that only the Dashboard is deleted and the visualizations added to the Dashboard are retained on the Visualizations tab.