You can add a SQL View, Visual View and upload queries to build Data Lineage in Torch. The following section describes the procedure to Add SQL View, Add Visual View, and Query Lineage.
Add SQL View
A SQL View is a custom asset that is created by a SQL query involving actual assets belonging to a particular datasource. SQL View is helpful in cases where the data needs to be analyzed by combining/joining multiple tables. SQL View facilitates to create a custom asset whose base will be a SQL Query which will be executed on the datasource, to query data from a data source per your requirements.
This helps you to rapidly perform analysis and derive insights on data spread across multiple tables within a datasource.
From the Discover window, you can add SQL Views to make discoverability of assets quicker and more insightful. To add a SQL view, perform the following steps:
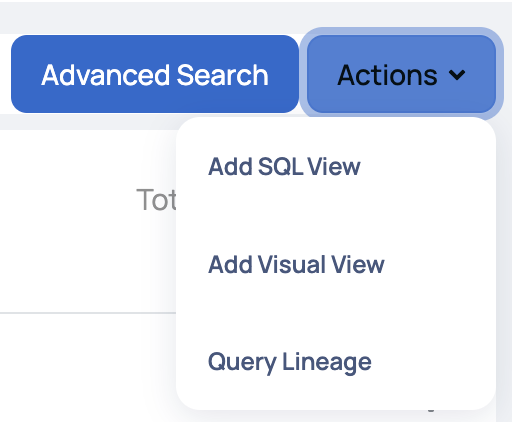
- From the Actions menu, click Add SQL View. The Create SQL View window pops-up.
- Fill in the following information in the Create SQL View window:
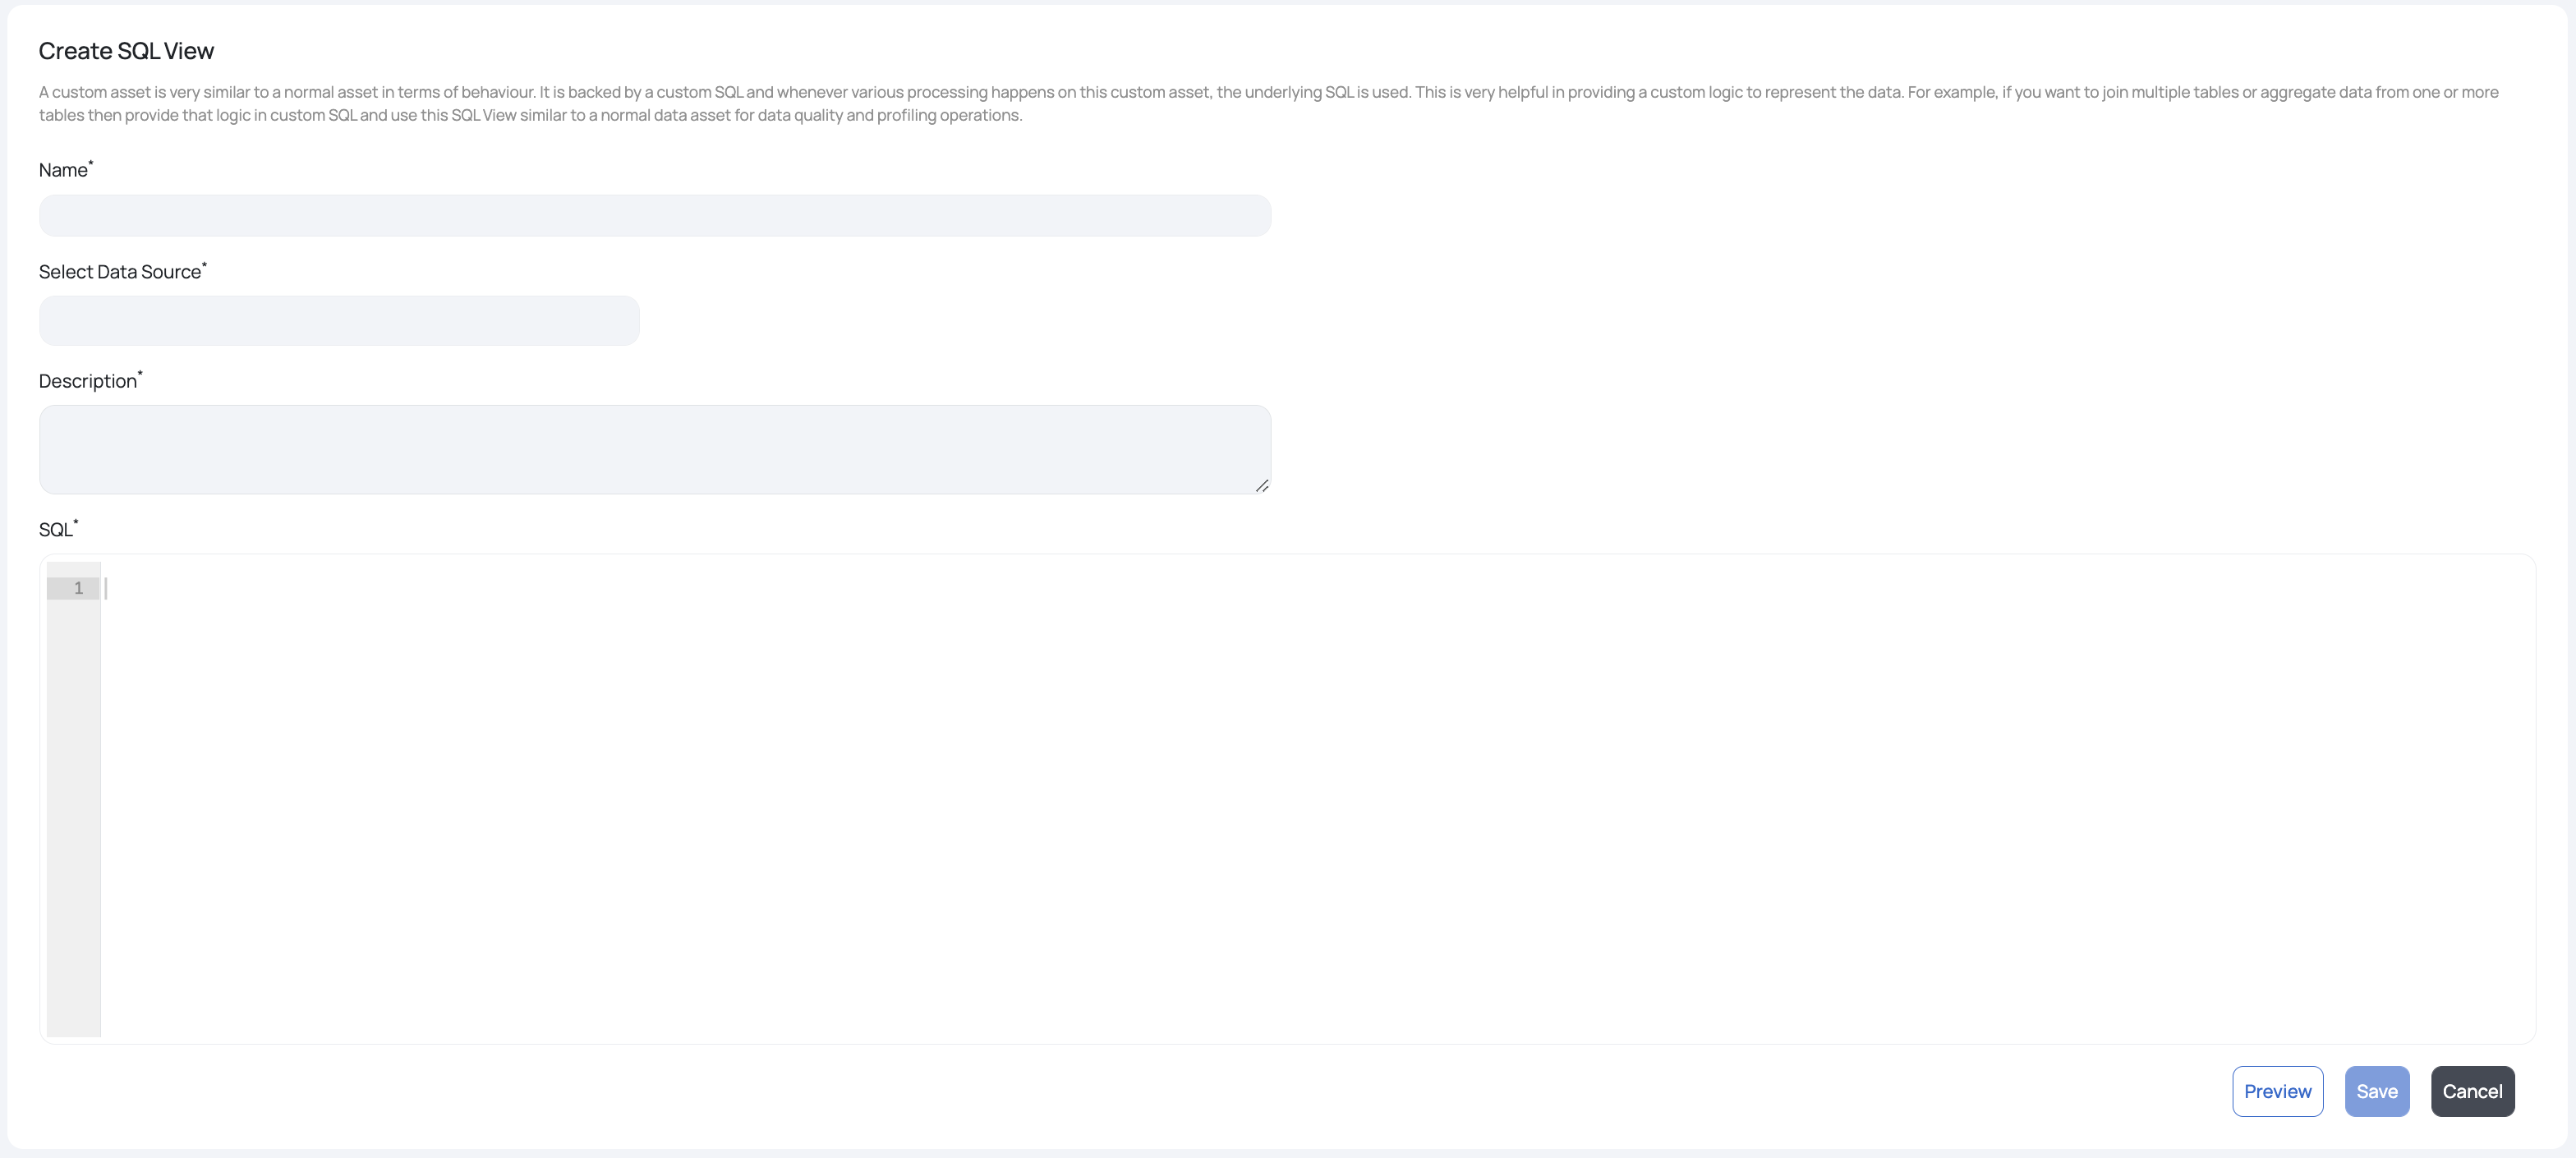
Create an SQL View Window
| Field Name | Description | Example |
|---|---|---|
| Name | Name of the SQL View | Transactions_May |
| Select Data Source | Data source type | AWSATHENA_,_ AZURE, MSSQL, BIGQUERY, HIVE, MEMSQL, MYSQL, ORACLE, POSTGRESQL, REDSHIFT, and SNOWFLAKE |
| Select Source | This field varies according to the Source Type that is selected. This field could be requesting for a data source, database, catalog, schema, or a table. | On selecting AWS_ATHENA as the Source Type, the following assets are required: Catalog and Database. |
| Description | Description that explains the purpose of the business entity | To get all the transactions made by a customer for the month of May |
| SQL | SQL query for the business entity | SELECT * FROM tablename |
- To preview the SQL View, click the Preview button. The SQL View table is displayed below.
- Click Save to save the SQL View, else click Cancel.
The saved SQL View is added to the assets panel in the Discover window. To view all the existing and newly created SQL Views, click the SQL View tab.
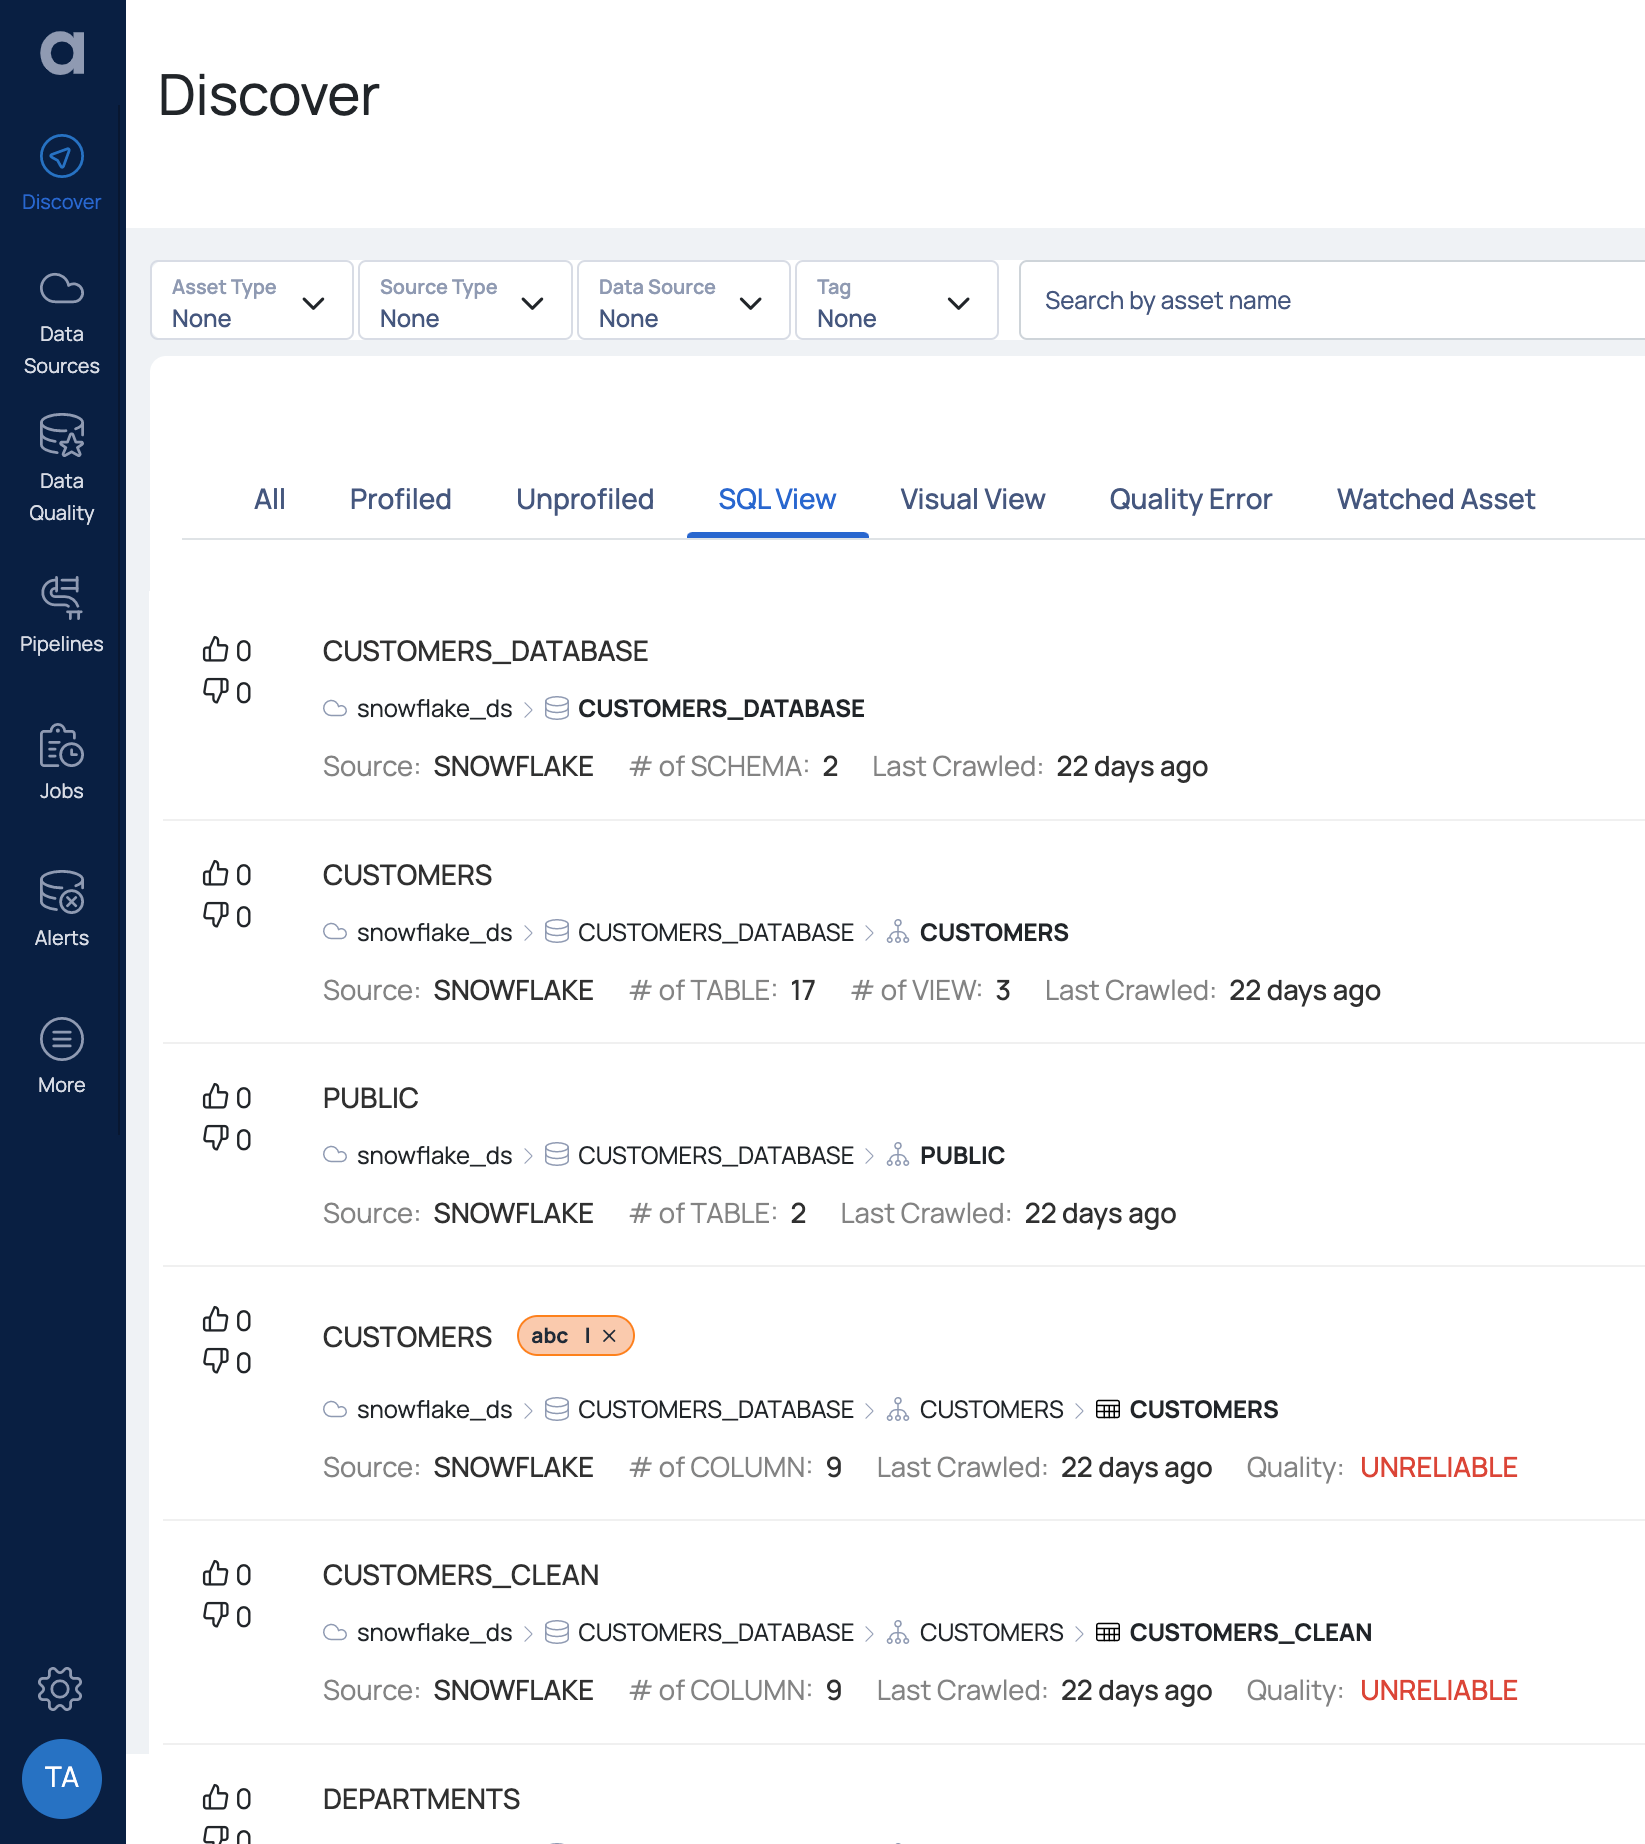
SQL View Tab
Mini Profiling Support for Business Assets
Torch supports Mini-profiling of business assets for the following data sources only:
- Snowflake
- PostgreSQL
- MySQL
- Athena
- BigQuery
- Amazon Redshift
Add Visual View
Visual View is a custom asset that is created by joining multiple assets from different data sources. This is similar to how views in databases are created by combining/joining multiple tables. However, in the case of Visual View, the view is represented by UI, and the tables may come from multiple data sources.
Once the visual view is created, it is considered as a normal asset on Torch, which can be further analyzed like any other asset.
Since Visual View can be formed from multiple tables or assets belonging to different data sources, it cannot be associated with a single source type. Hence, we need to associate the Visual View with a virtual data source. For more information on how to create a Virtual data source, see Virtual Data Source.
To add a Visual View, perform the following steps:
- From the Discover page, navigate to Actions > Add Visual View. The Create Visual View page is displayed.
- Provide a relevant name for the Visual View.
- Select a virtual data source.
- Provide a description and click Next. An empty canvas is displayed.

- Click Add Asset from the top-right corner of the canvas. The Join Assets pop-up is displayed. Complete the following procedure to create the initial stage of your visual view.
A stage is basically two assets joined using SQL query statements. There can be multiple stages in a single visual view.
a. Select the first asset.
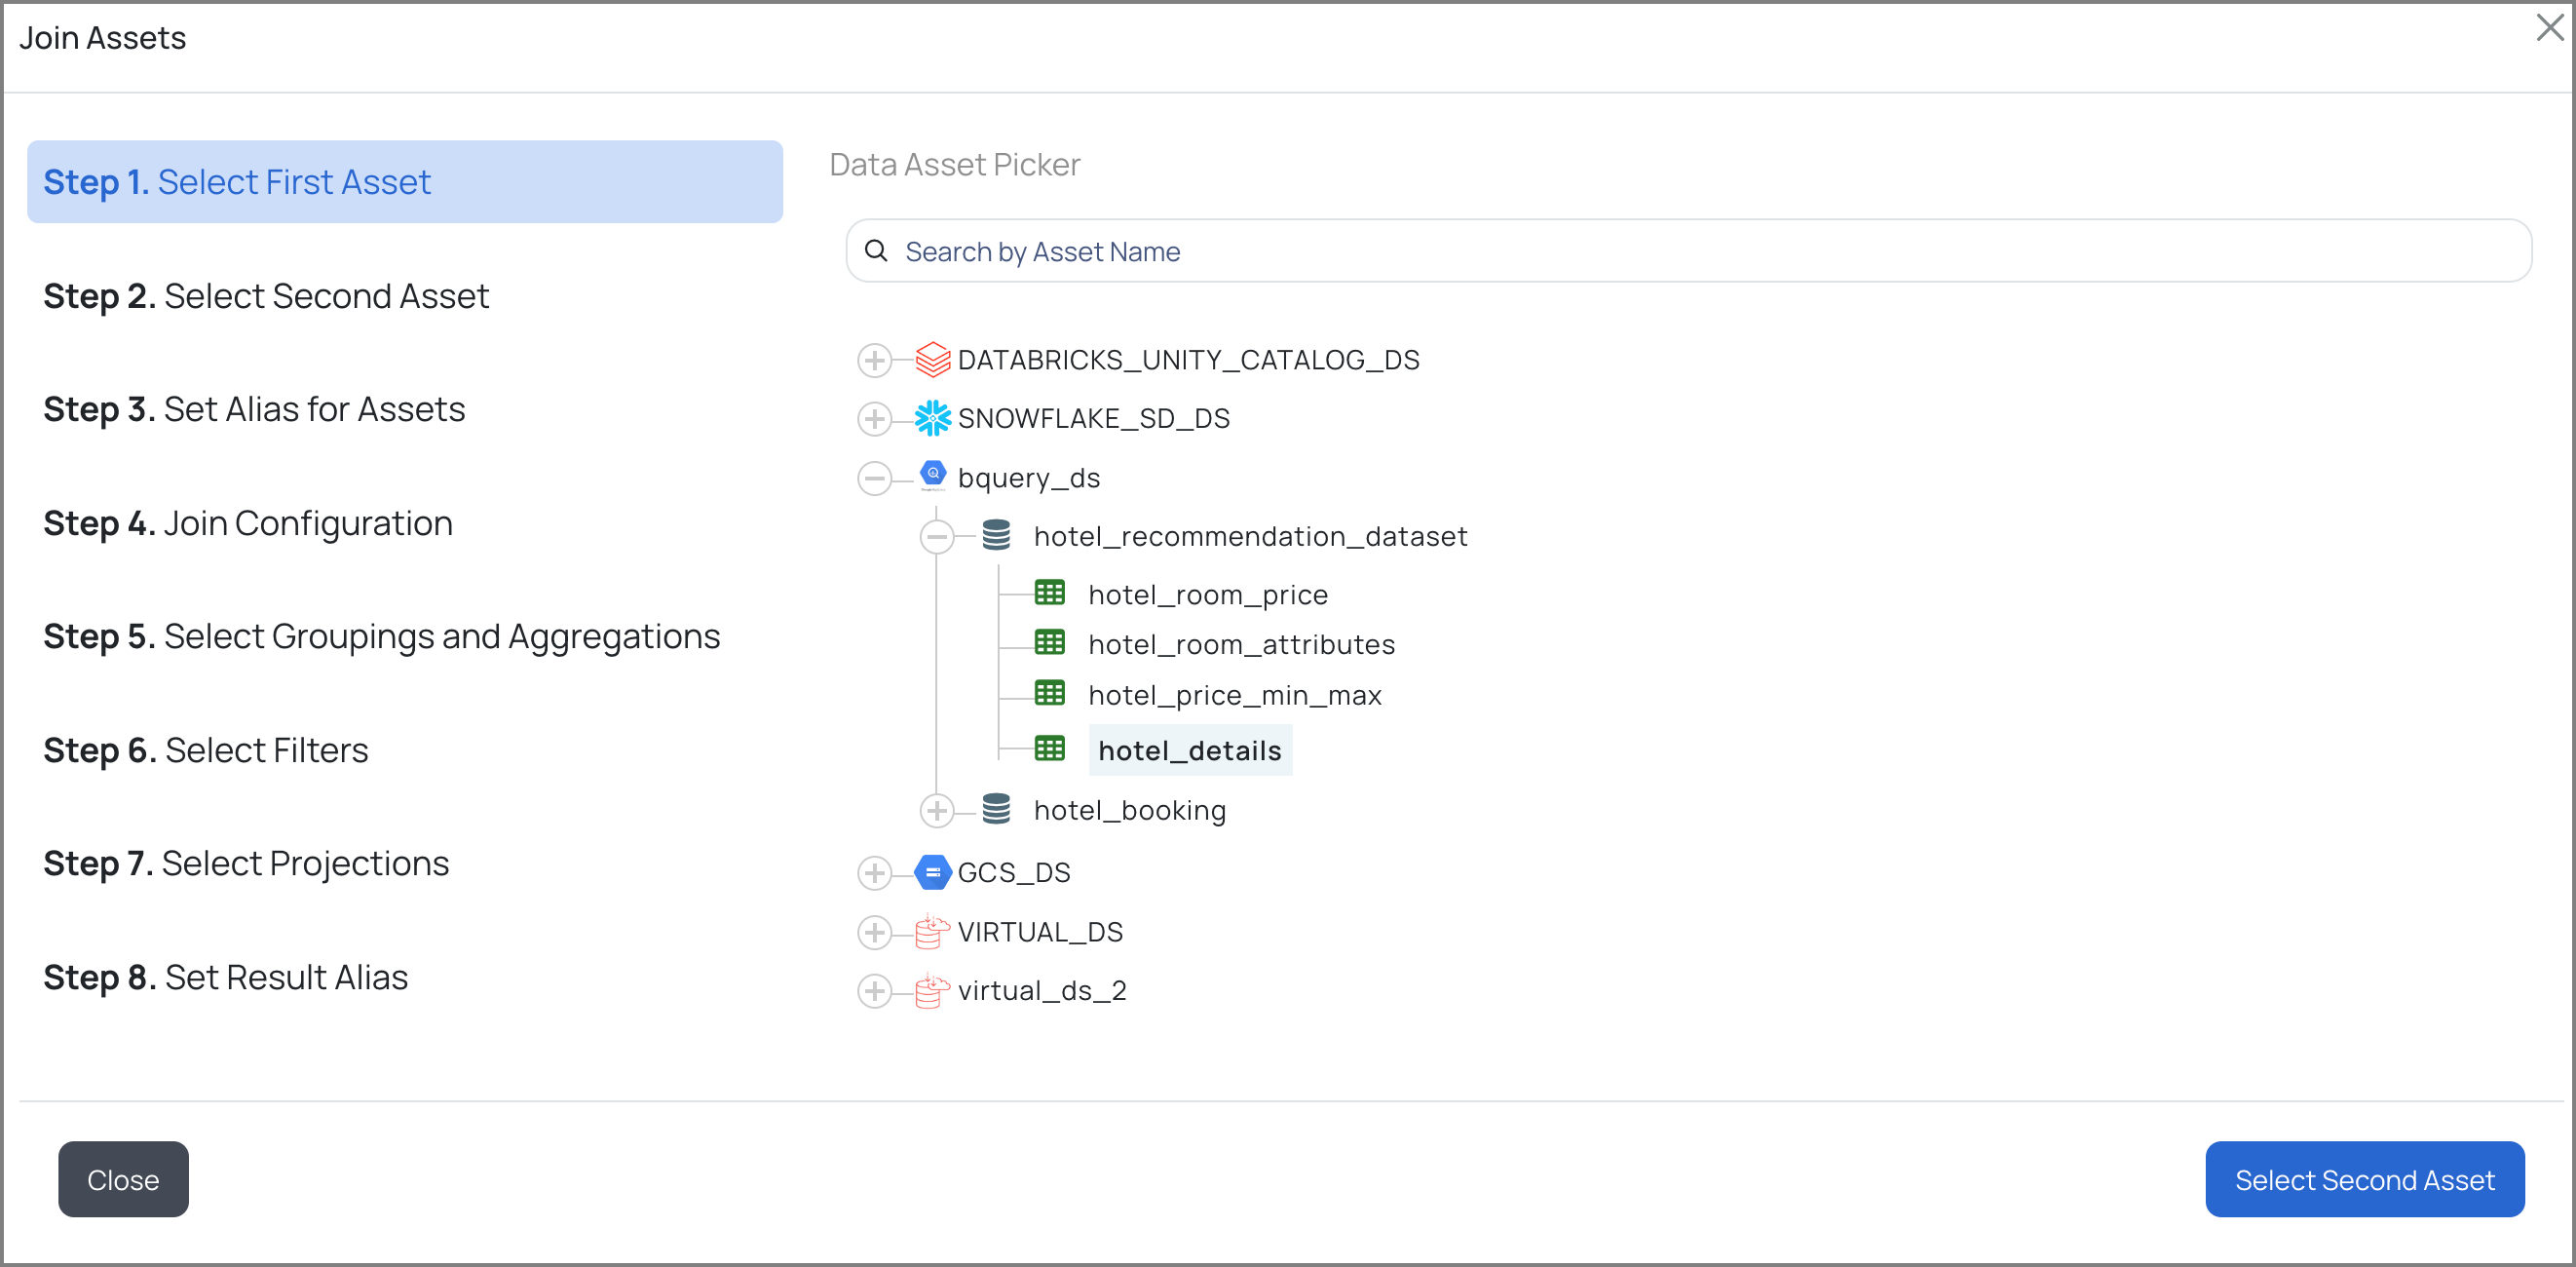
First Asset
b. Select the second asset.
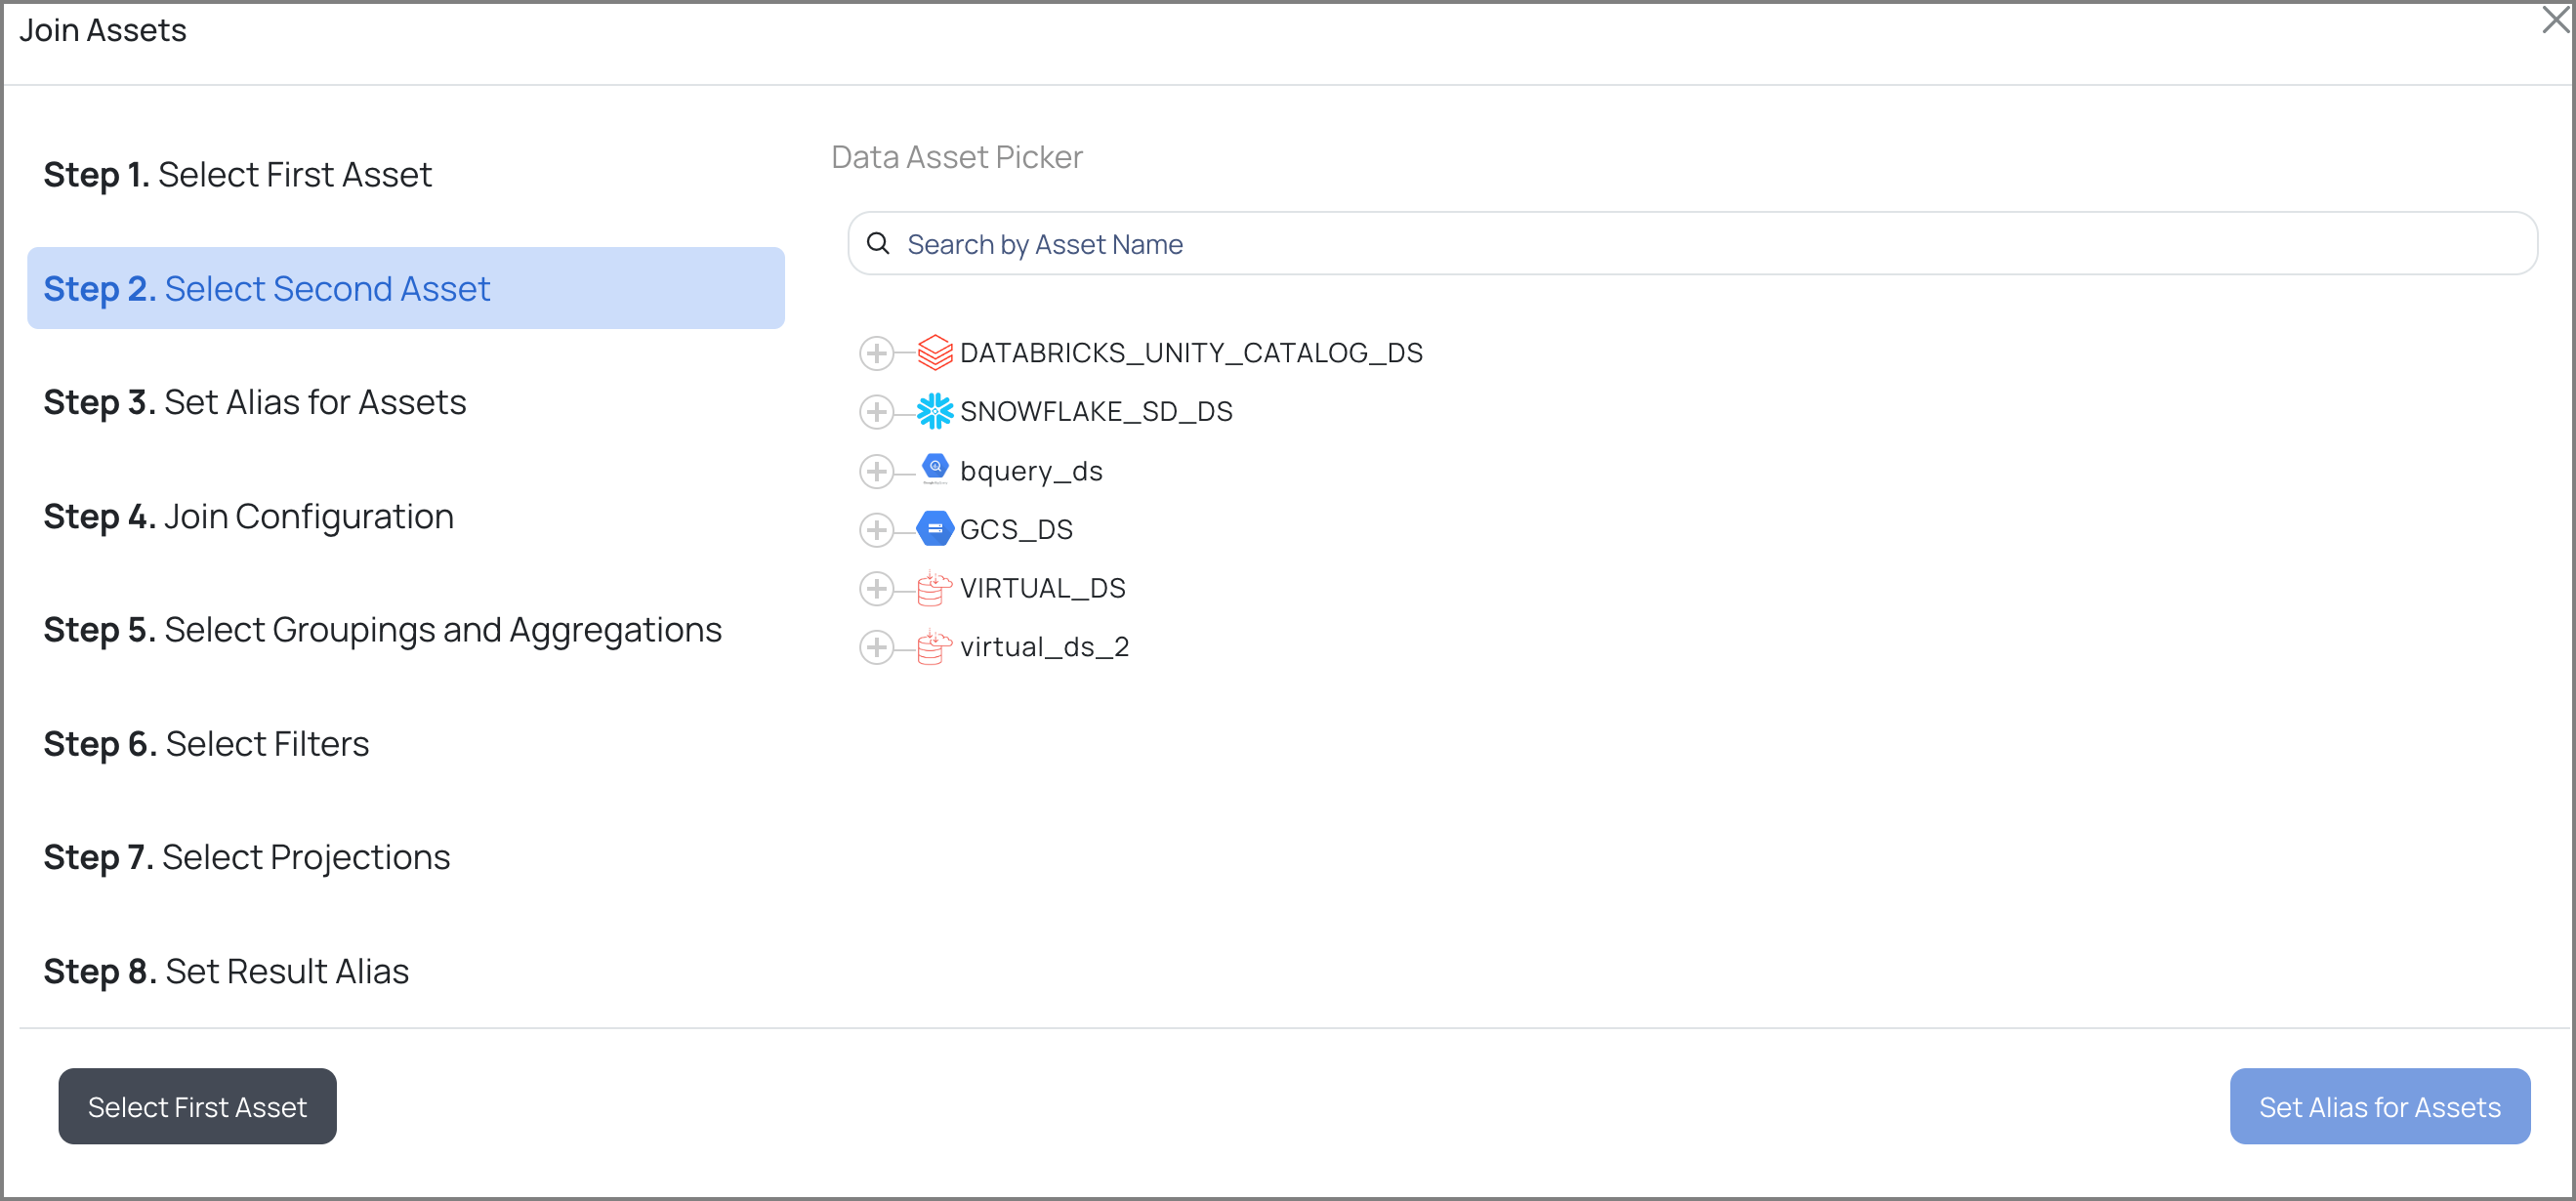
Second Asset
c. Provide aliases for the first and second asset. An alias is an additional name given to the selected assets to help them be identified more easily.
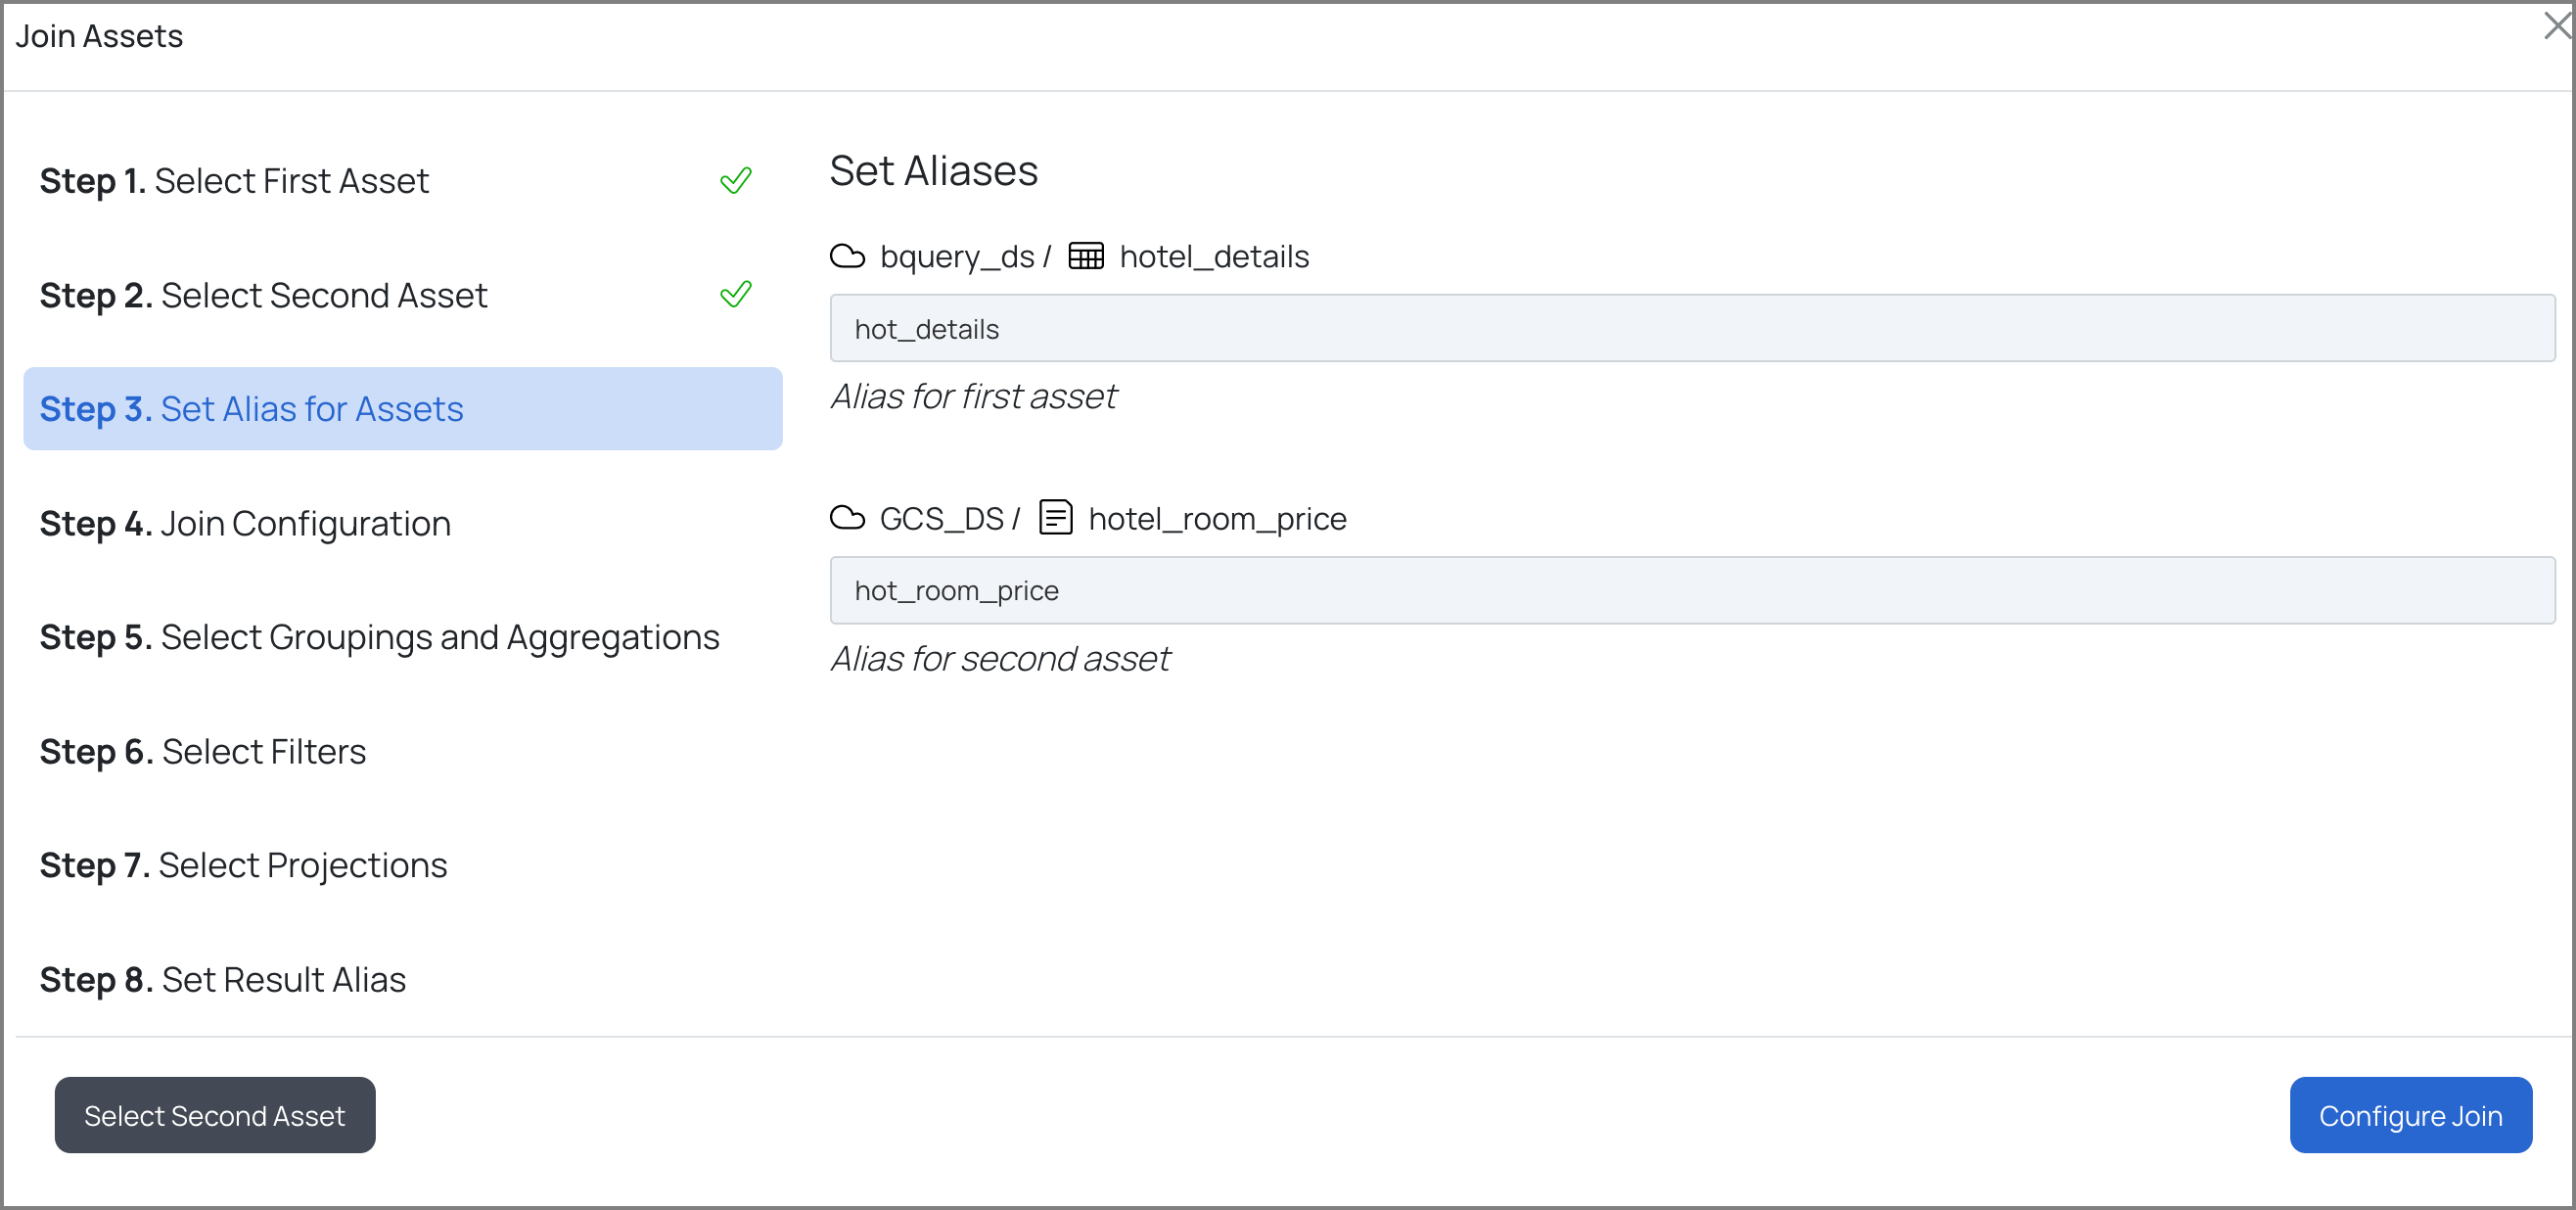
d. Select one of the following types of join for the selected assets and the columns for the join:
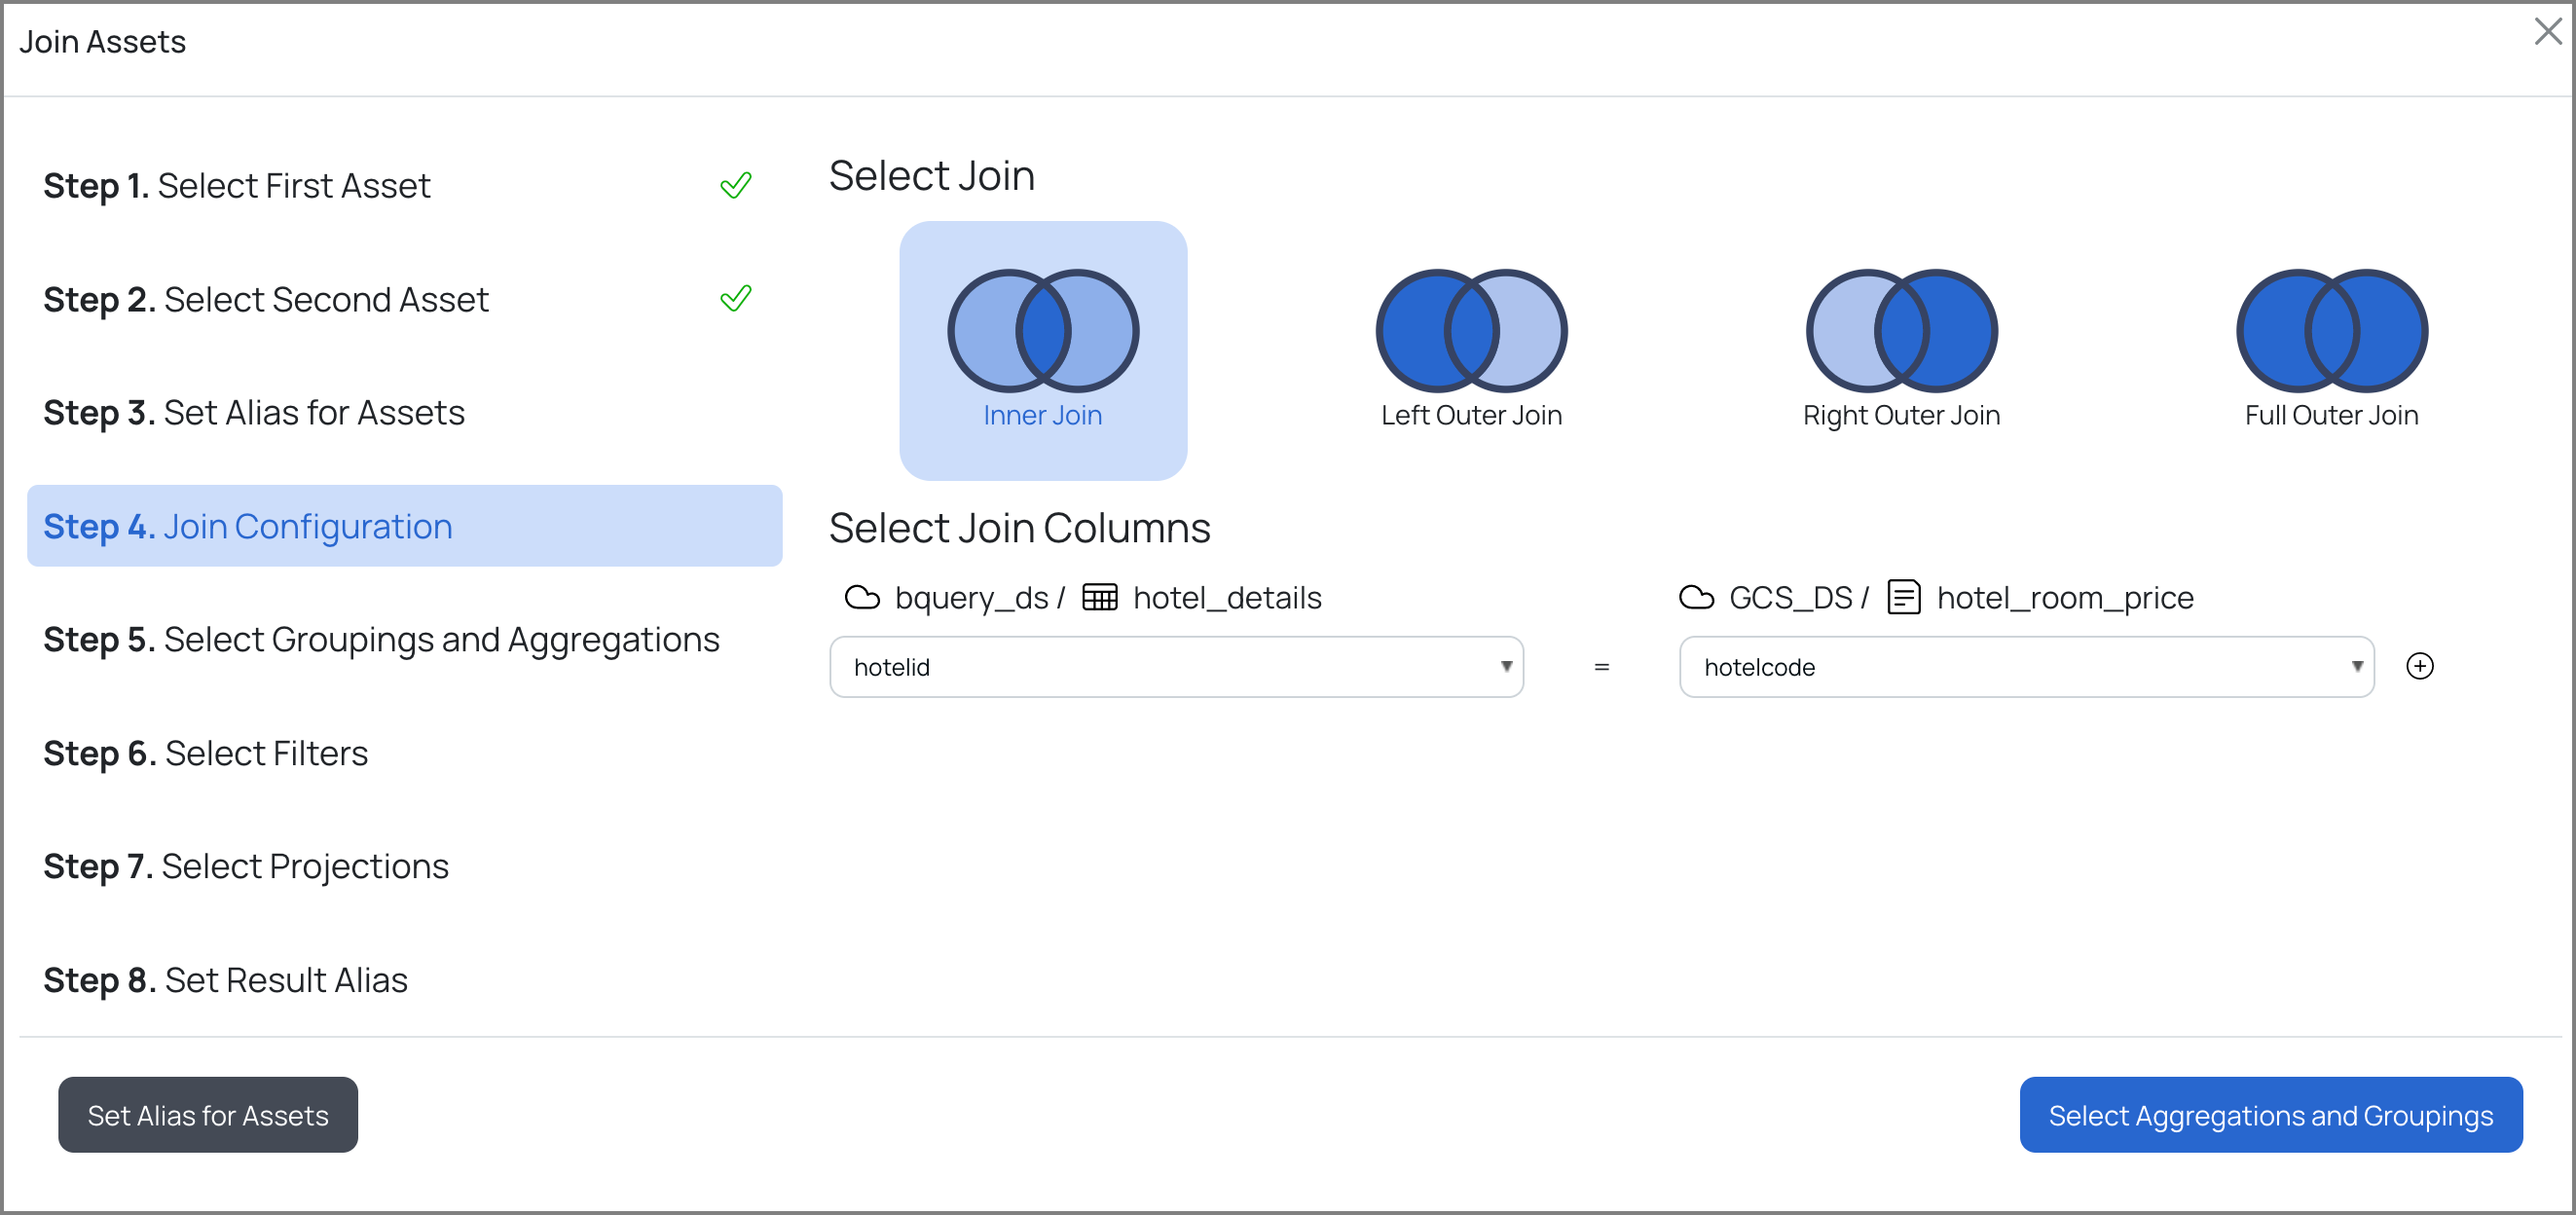
| Type of Join | Definition | Syntax |
|---|---|---|
| INNER JOIN | The INNER JOIN keyword selects records that have matching values in both tables. | SELECT column_name(s) FROM table1 INNER JOIN table2 ON table1.column_name = table2.column_name; |
| LEFT OUTER JOIN | The LEFT JOIN keyword returns all records from the left table (table1) and the matching records from the right table (table2). The result is 0 records from the right side, if there is no match. | SELECT column_name(s) FROM table1 LEFT JOIN table2 ON table1.column_name = table2.column_name; |
| RIGHT OUTER JOIN | The RIGHT JOIN keyword returns all records from the right table (table2) and the matching records from the left table (table1). The result is 0 records from the left side, if there is no match. | SELECT column_name(s) FROM table1 RIGHT JOIN table2 ON table1.column_name = table2.column_name; |
| FULL OUTER JOIN | The FULL OUTER JOIN keyword returns all records when there is a match in the left (table1) or right (table2) table records. | SELECT column_name(s) FROM table1 FULL OUTER JOIN table2 ON table1.column_name = table2.column_name WHERE condition; |
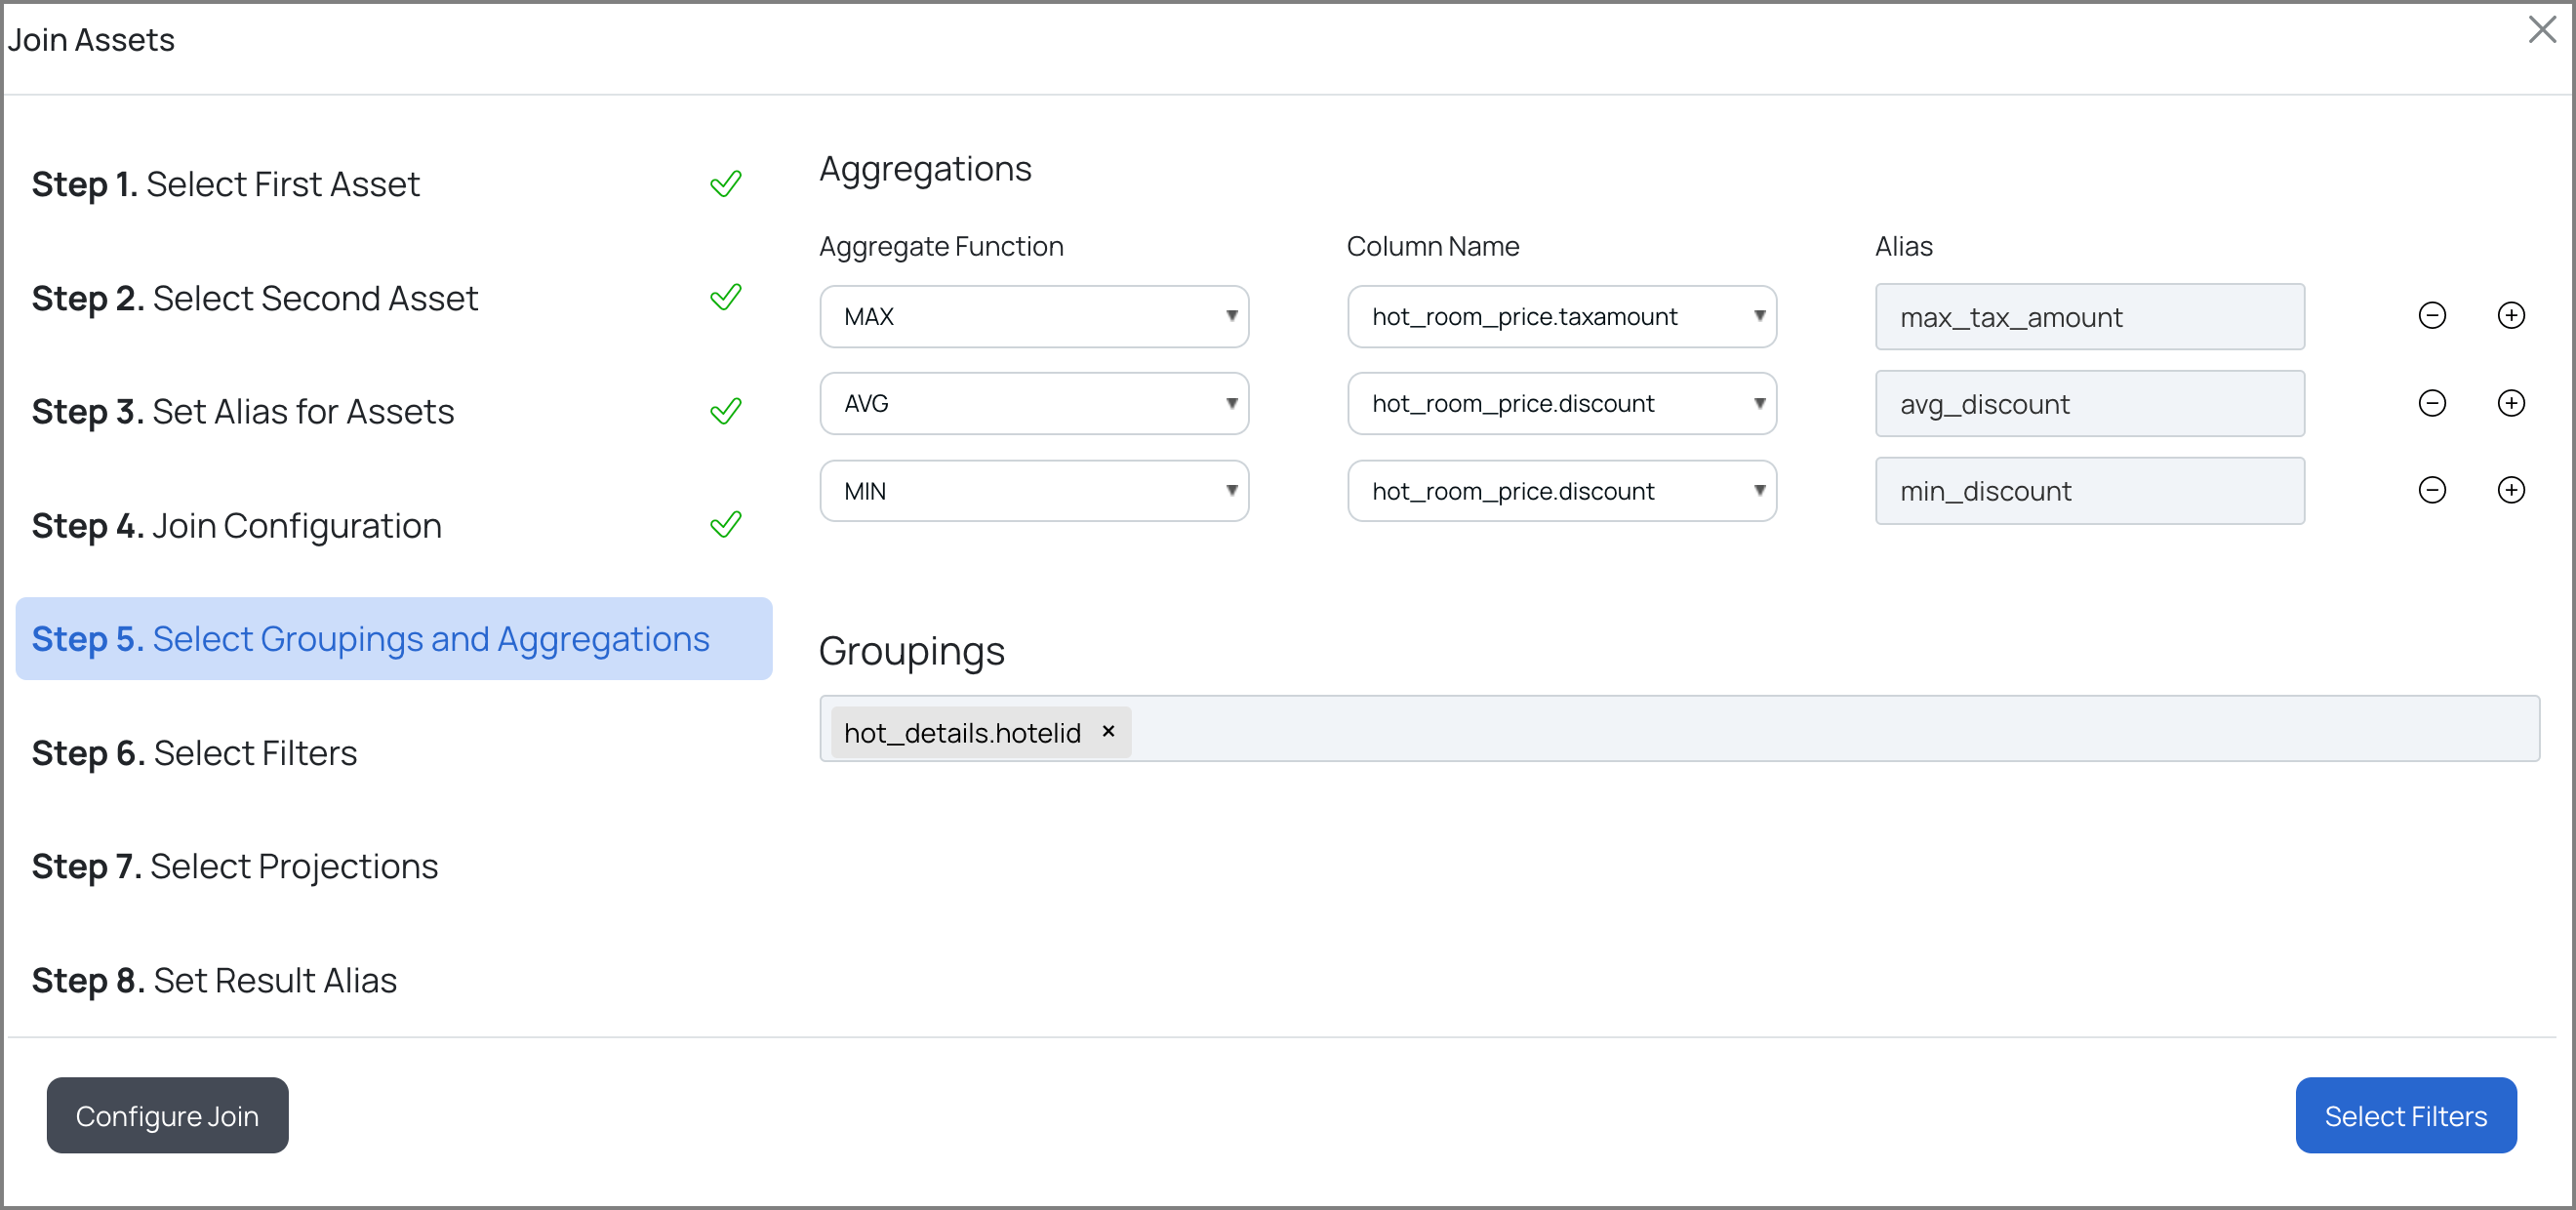
e. Set Aggregations and Groupings for the Group By clause, by performing the following:
- Select an aggregate function from the Aggregate Function drop-down list.
- Select a column name from the Column Name drop-down list.
- Provide an alias for the aggregation.
- Select one or more Group By column(s) from the Groupings drop-down list.
- Click Next.
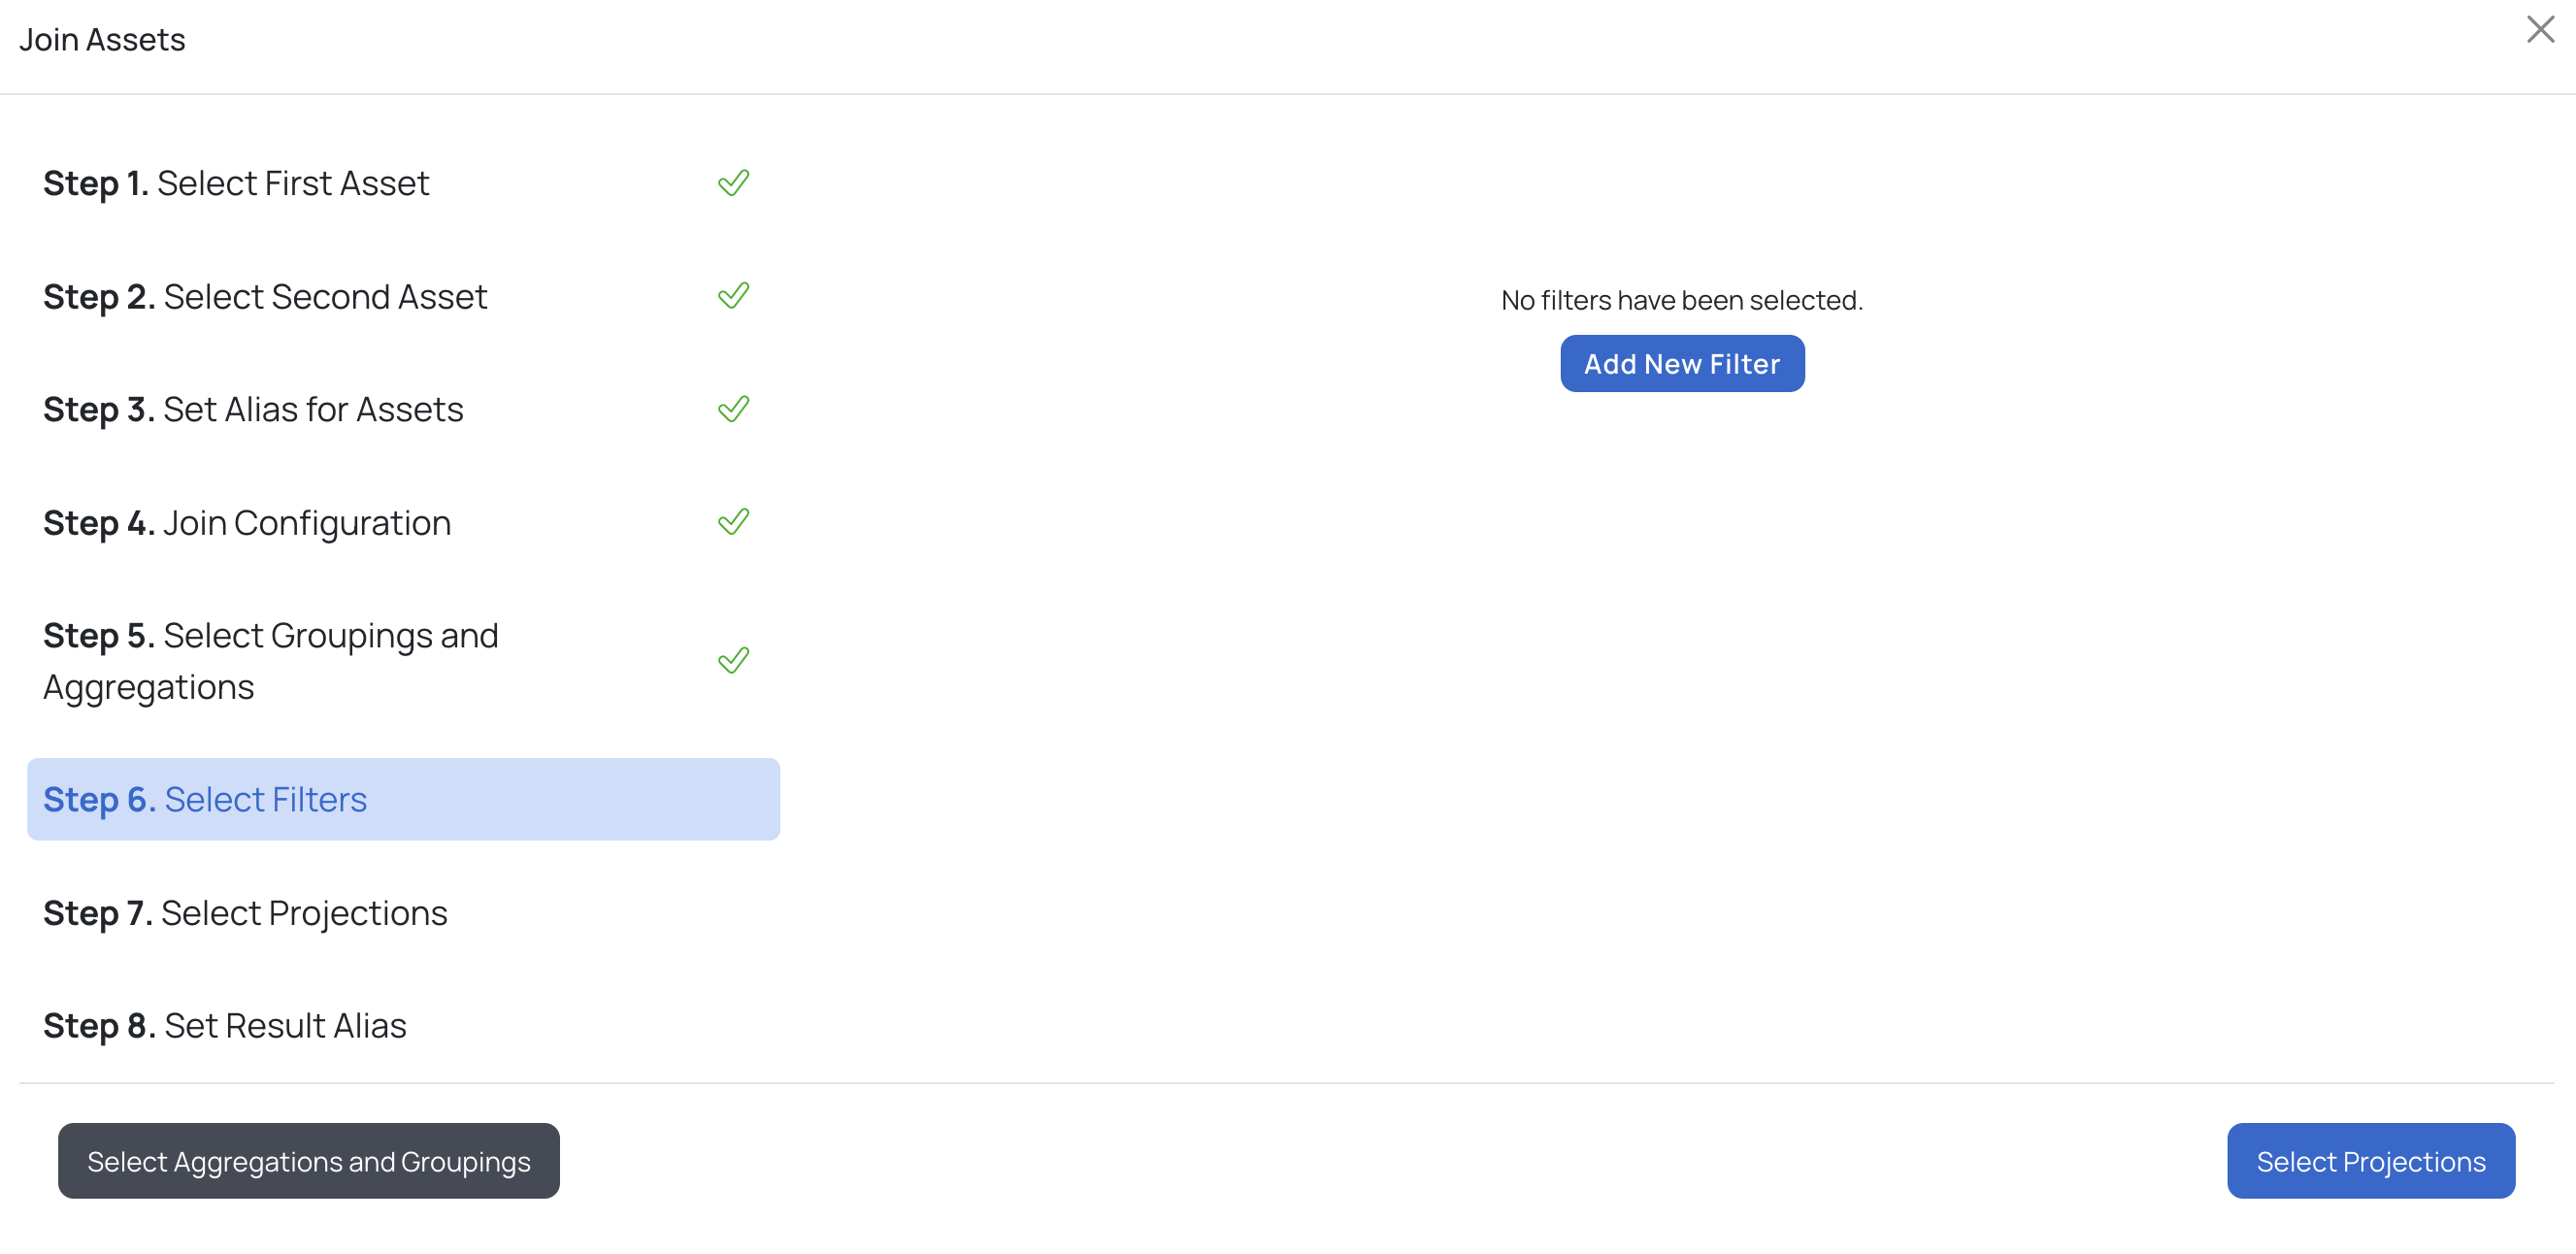
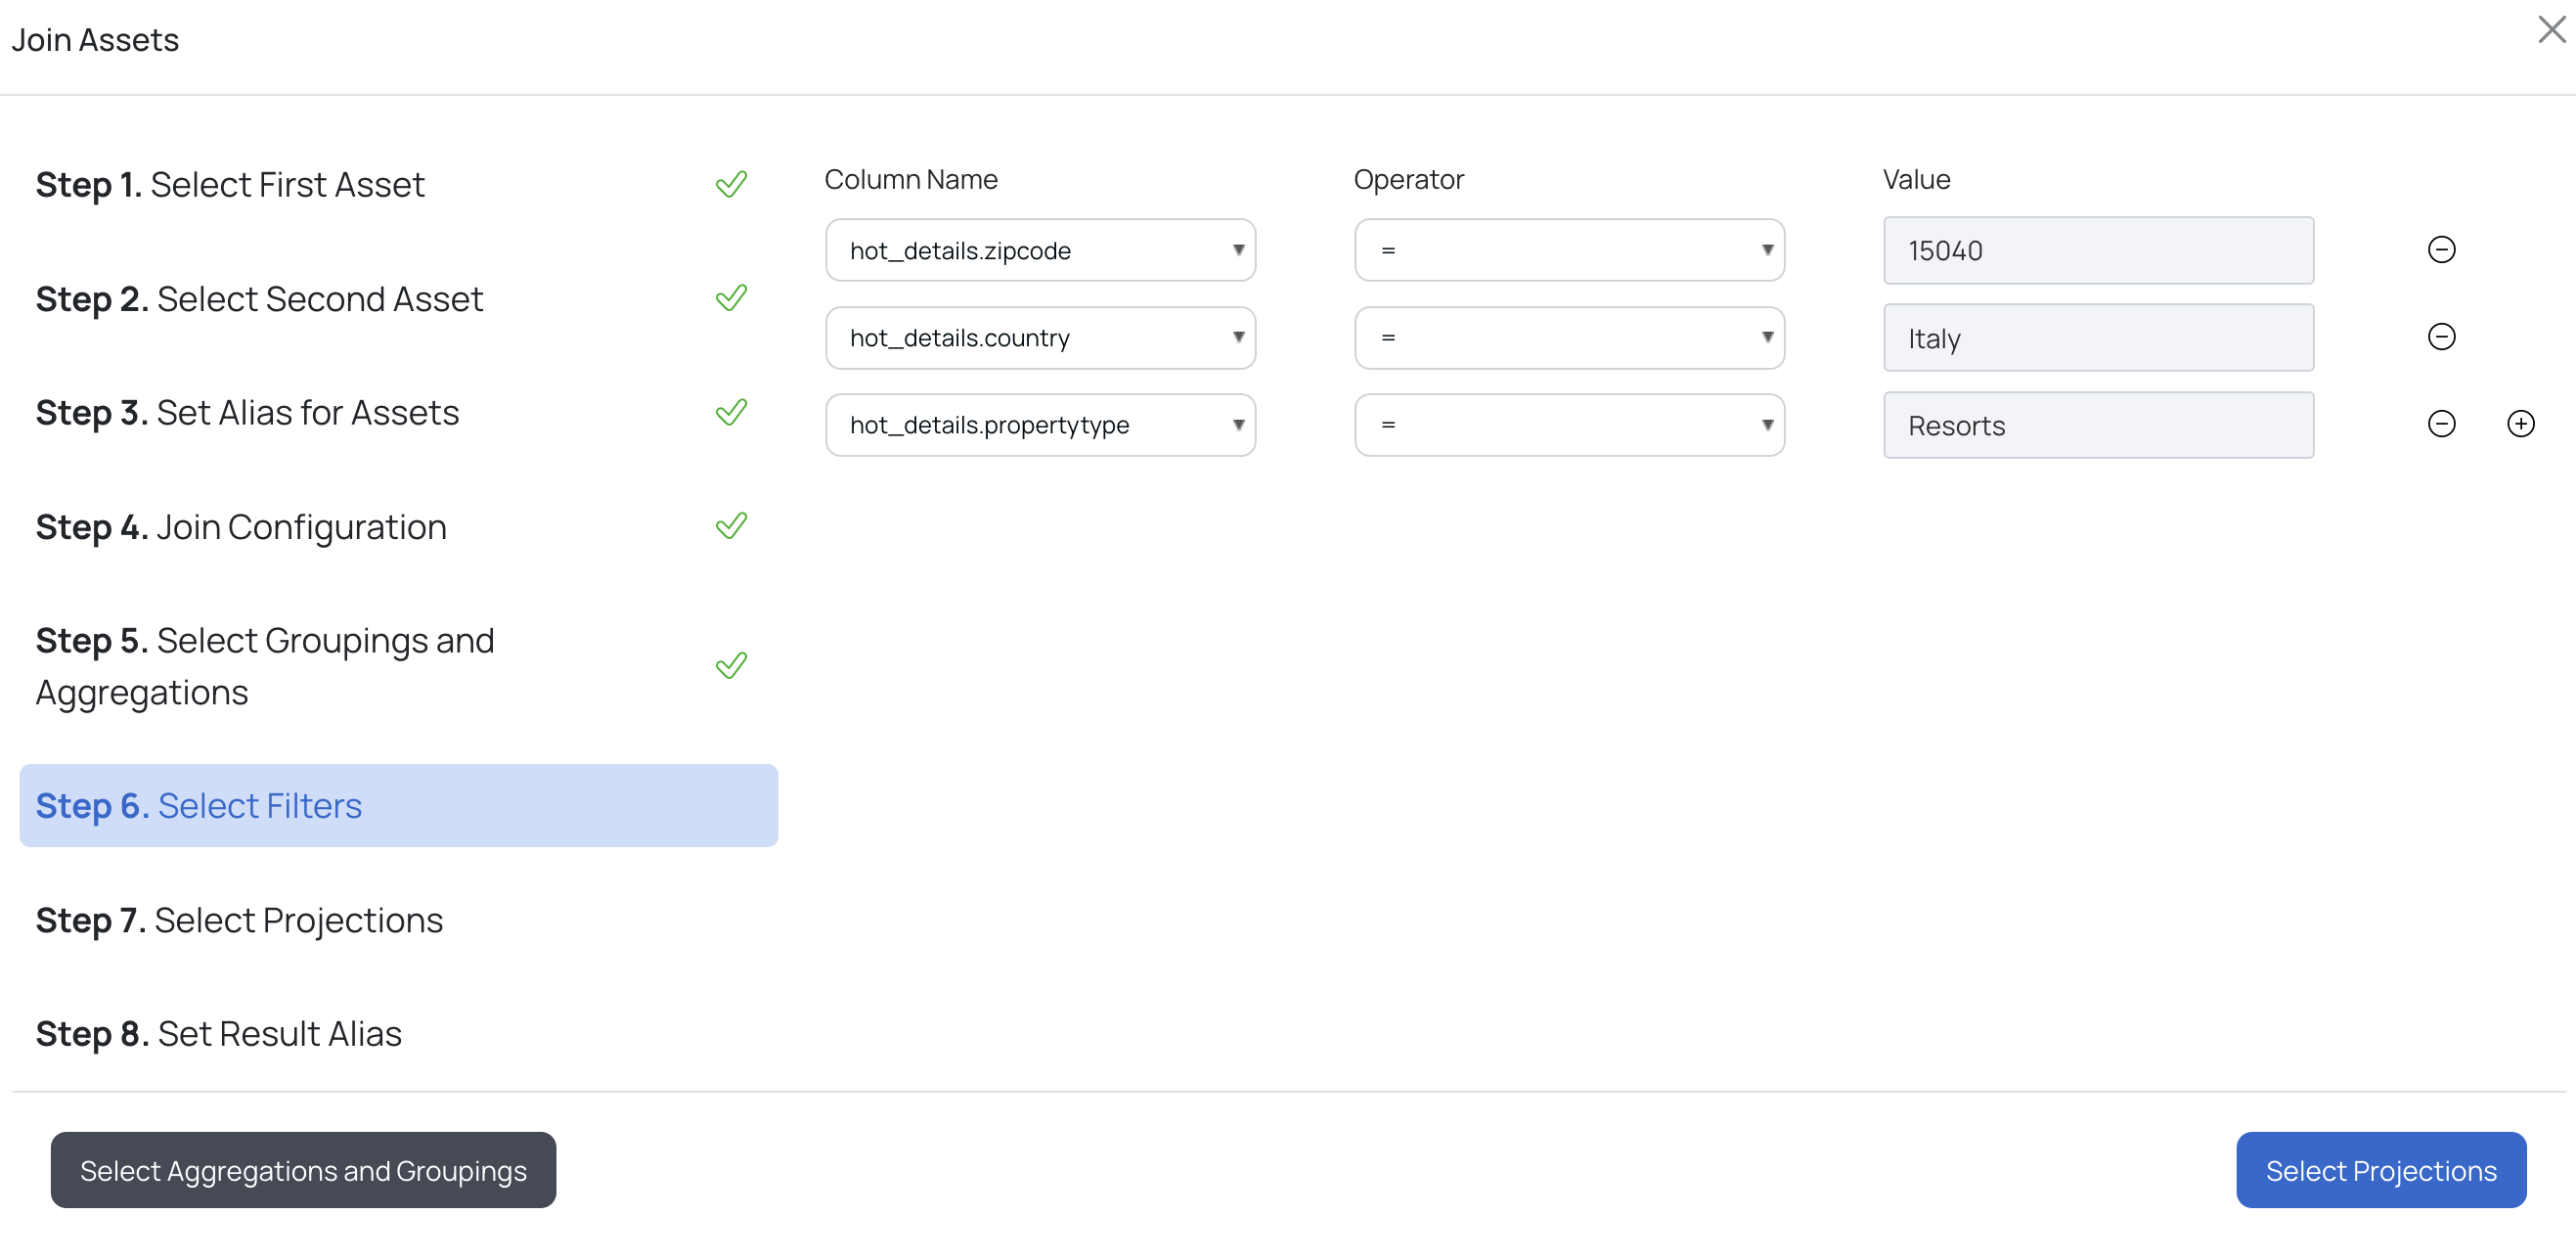
f. Set Filters by clicking the Add New Filter button and performing the following:
i. Select a column from the Column Name drop-down list.
ii. Select an operator from the Operator drop-down list.
iii. Provide a value in the Value input box and click the Next button.
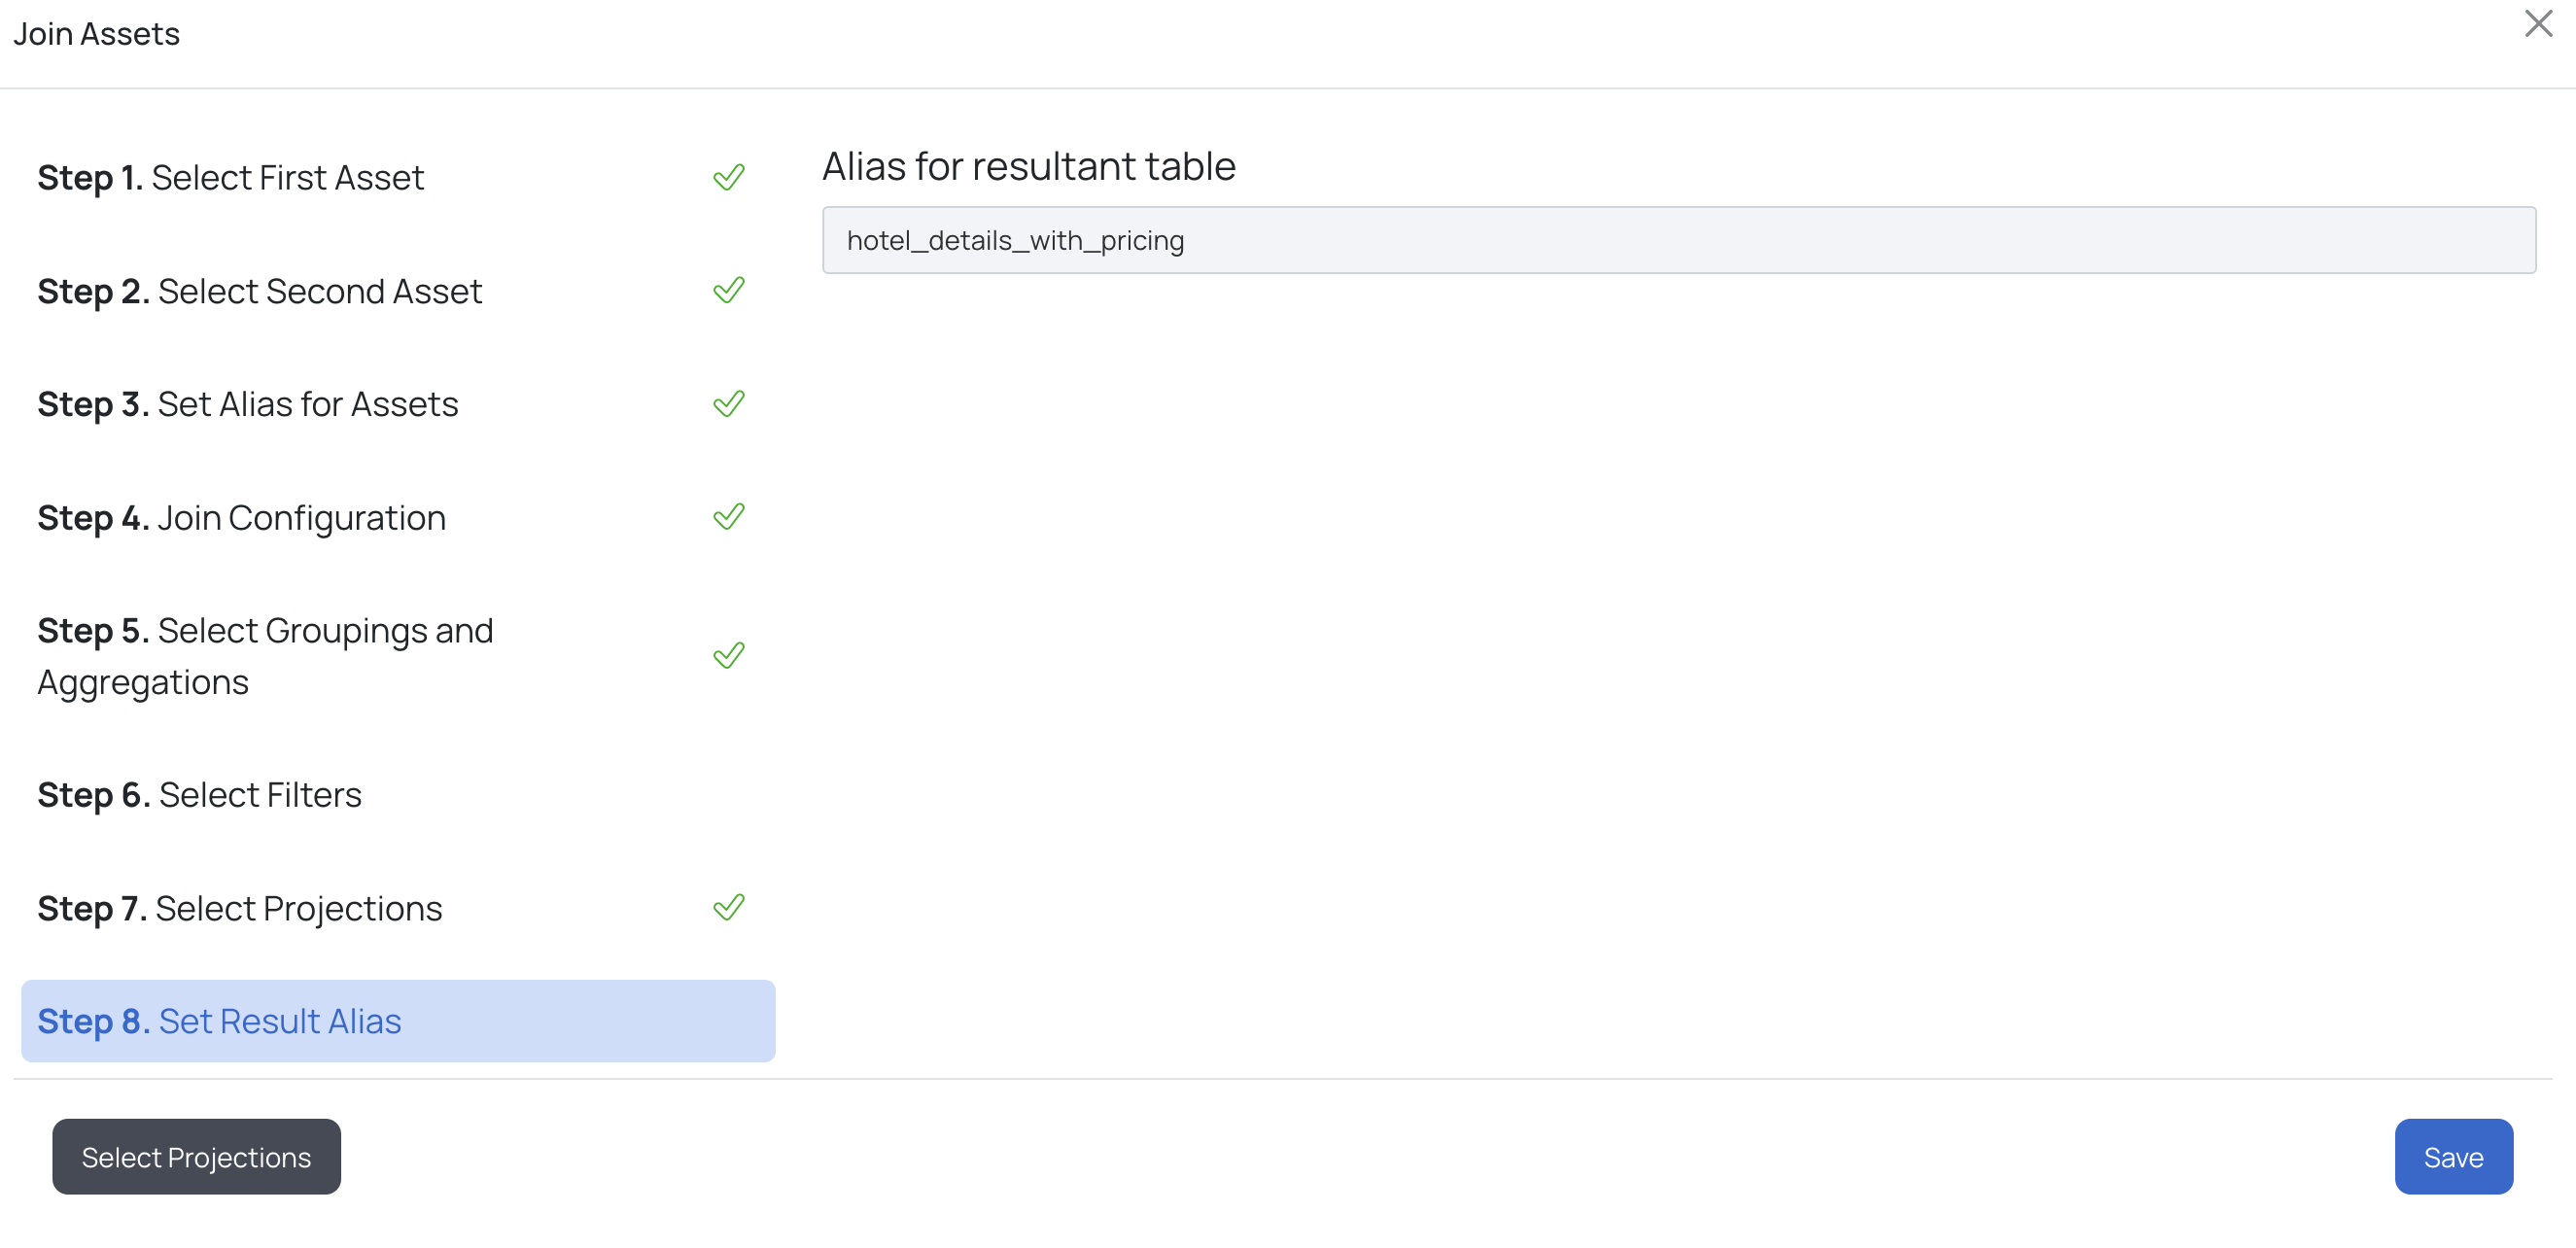
g. Select Projections
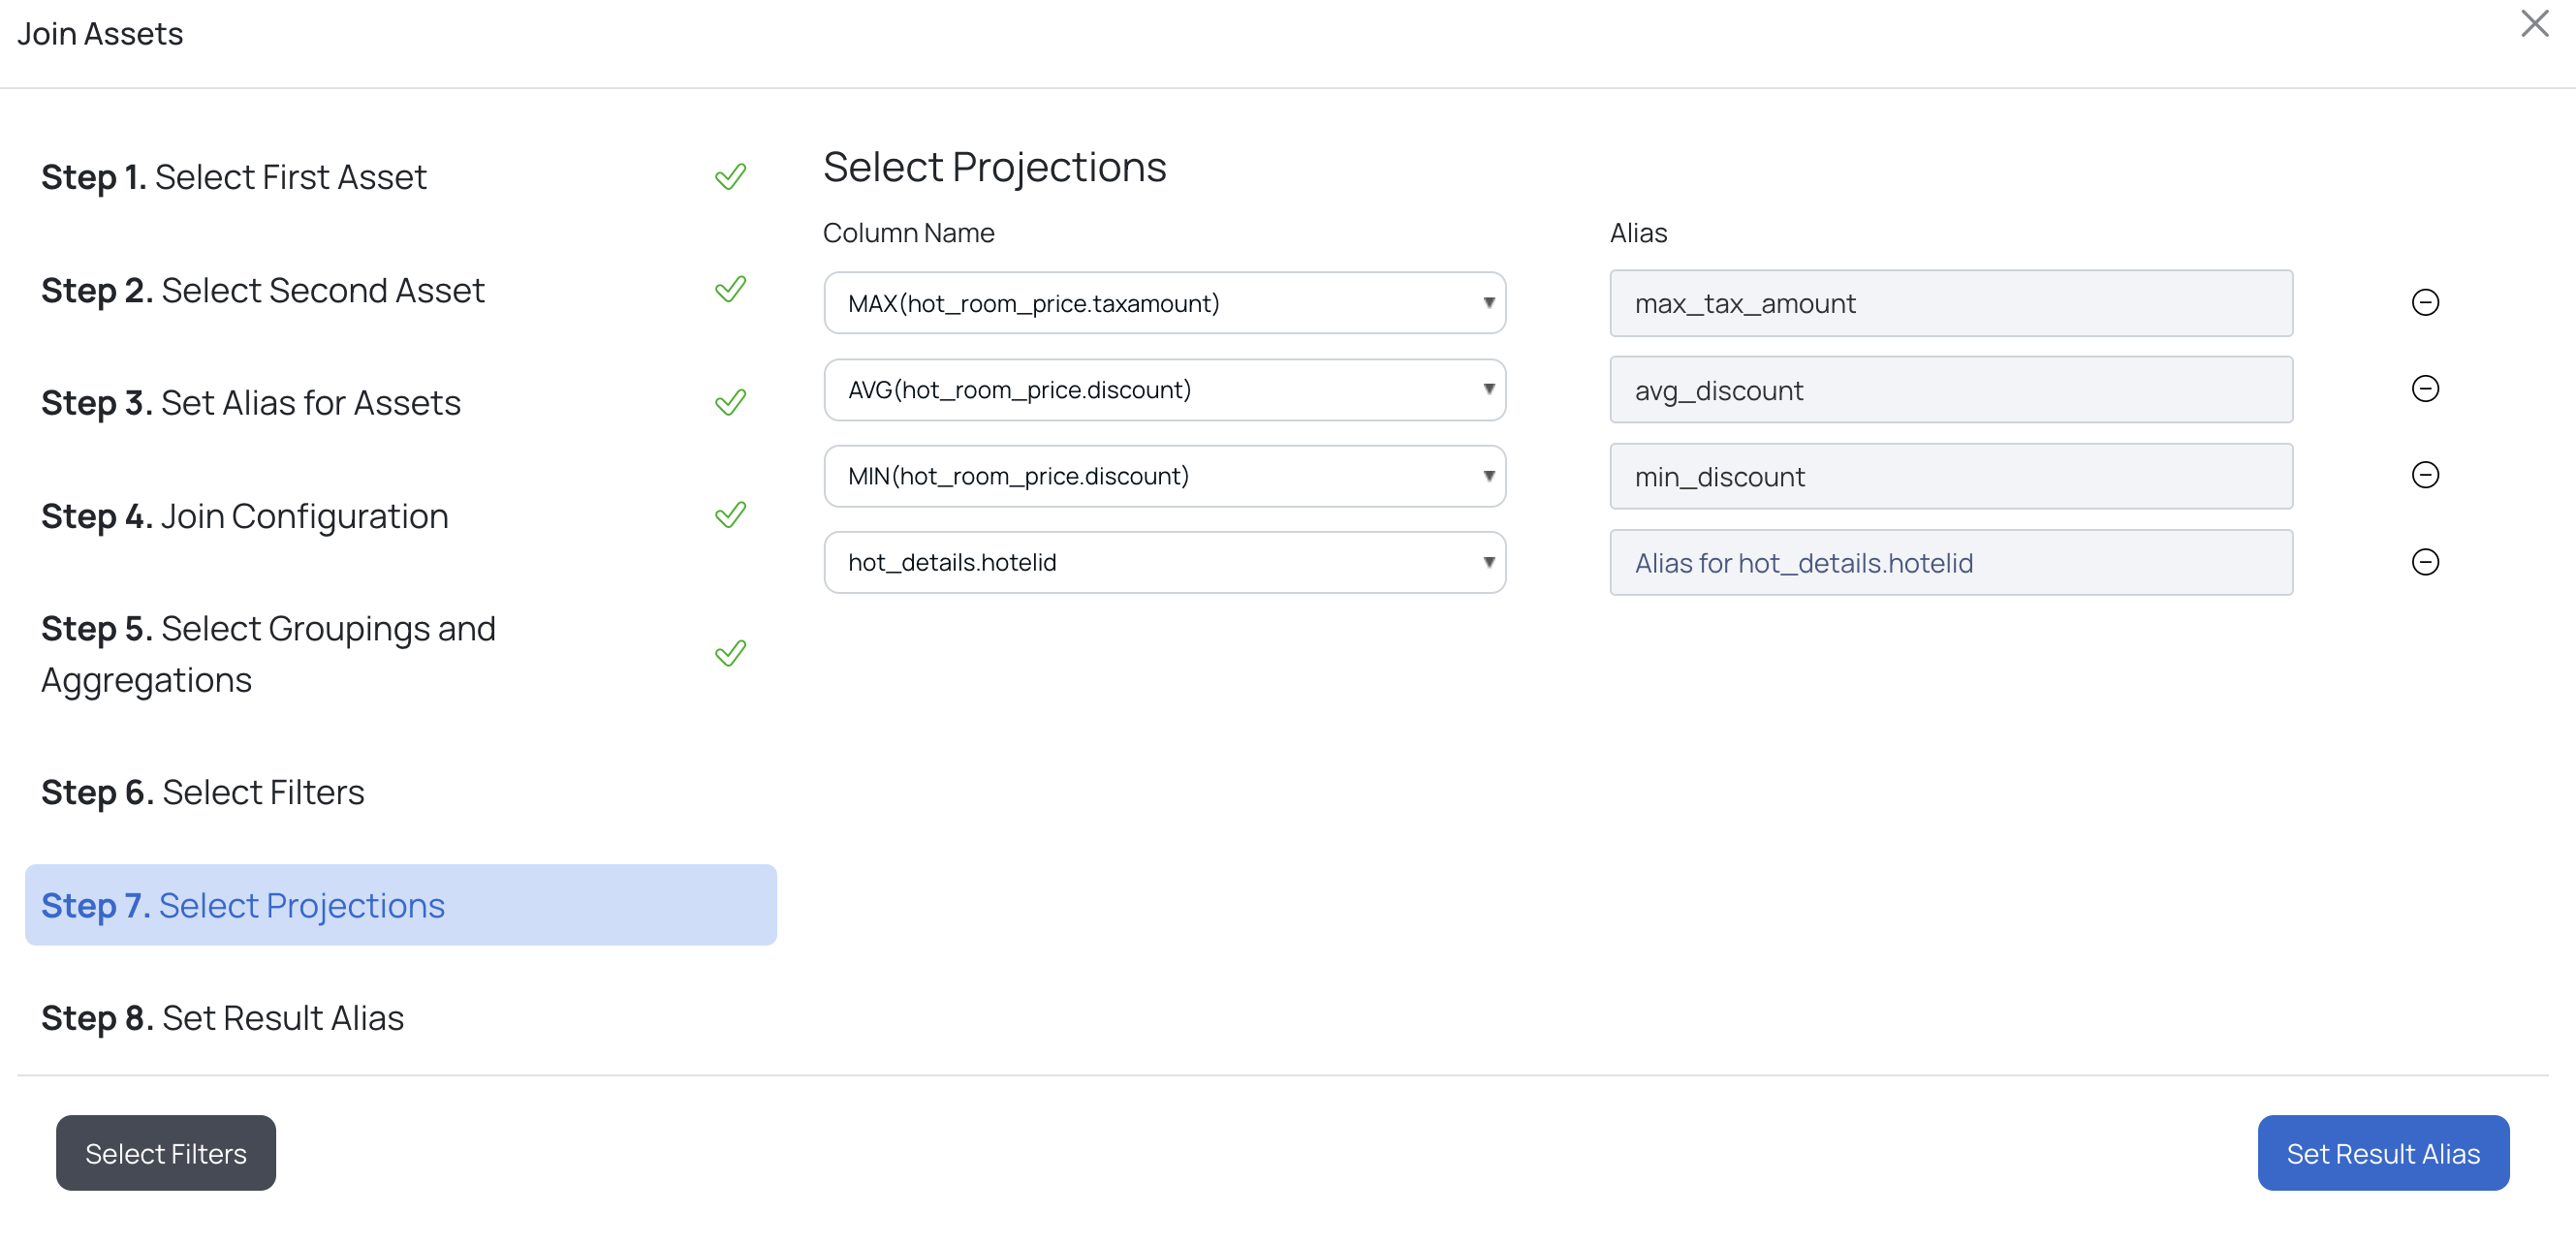
h. Finally, provide an alias for the resultant table and click Link Asset. The visual view for the input provided in the above steps is displayed.
This will create a stage by joining 2 tables, with other appropriate SQL clauses. This stage can further be used to create another stage. To add another stage click
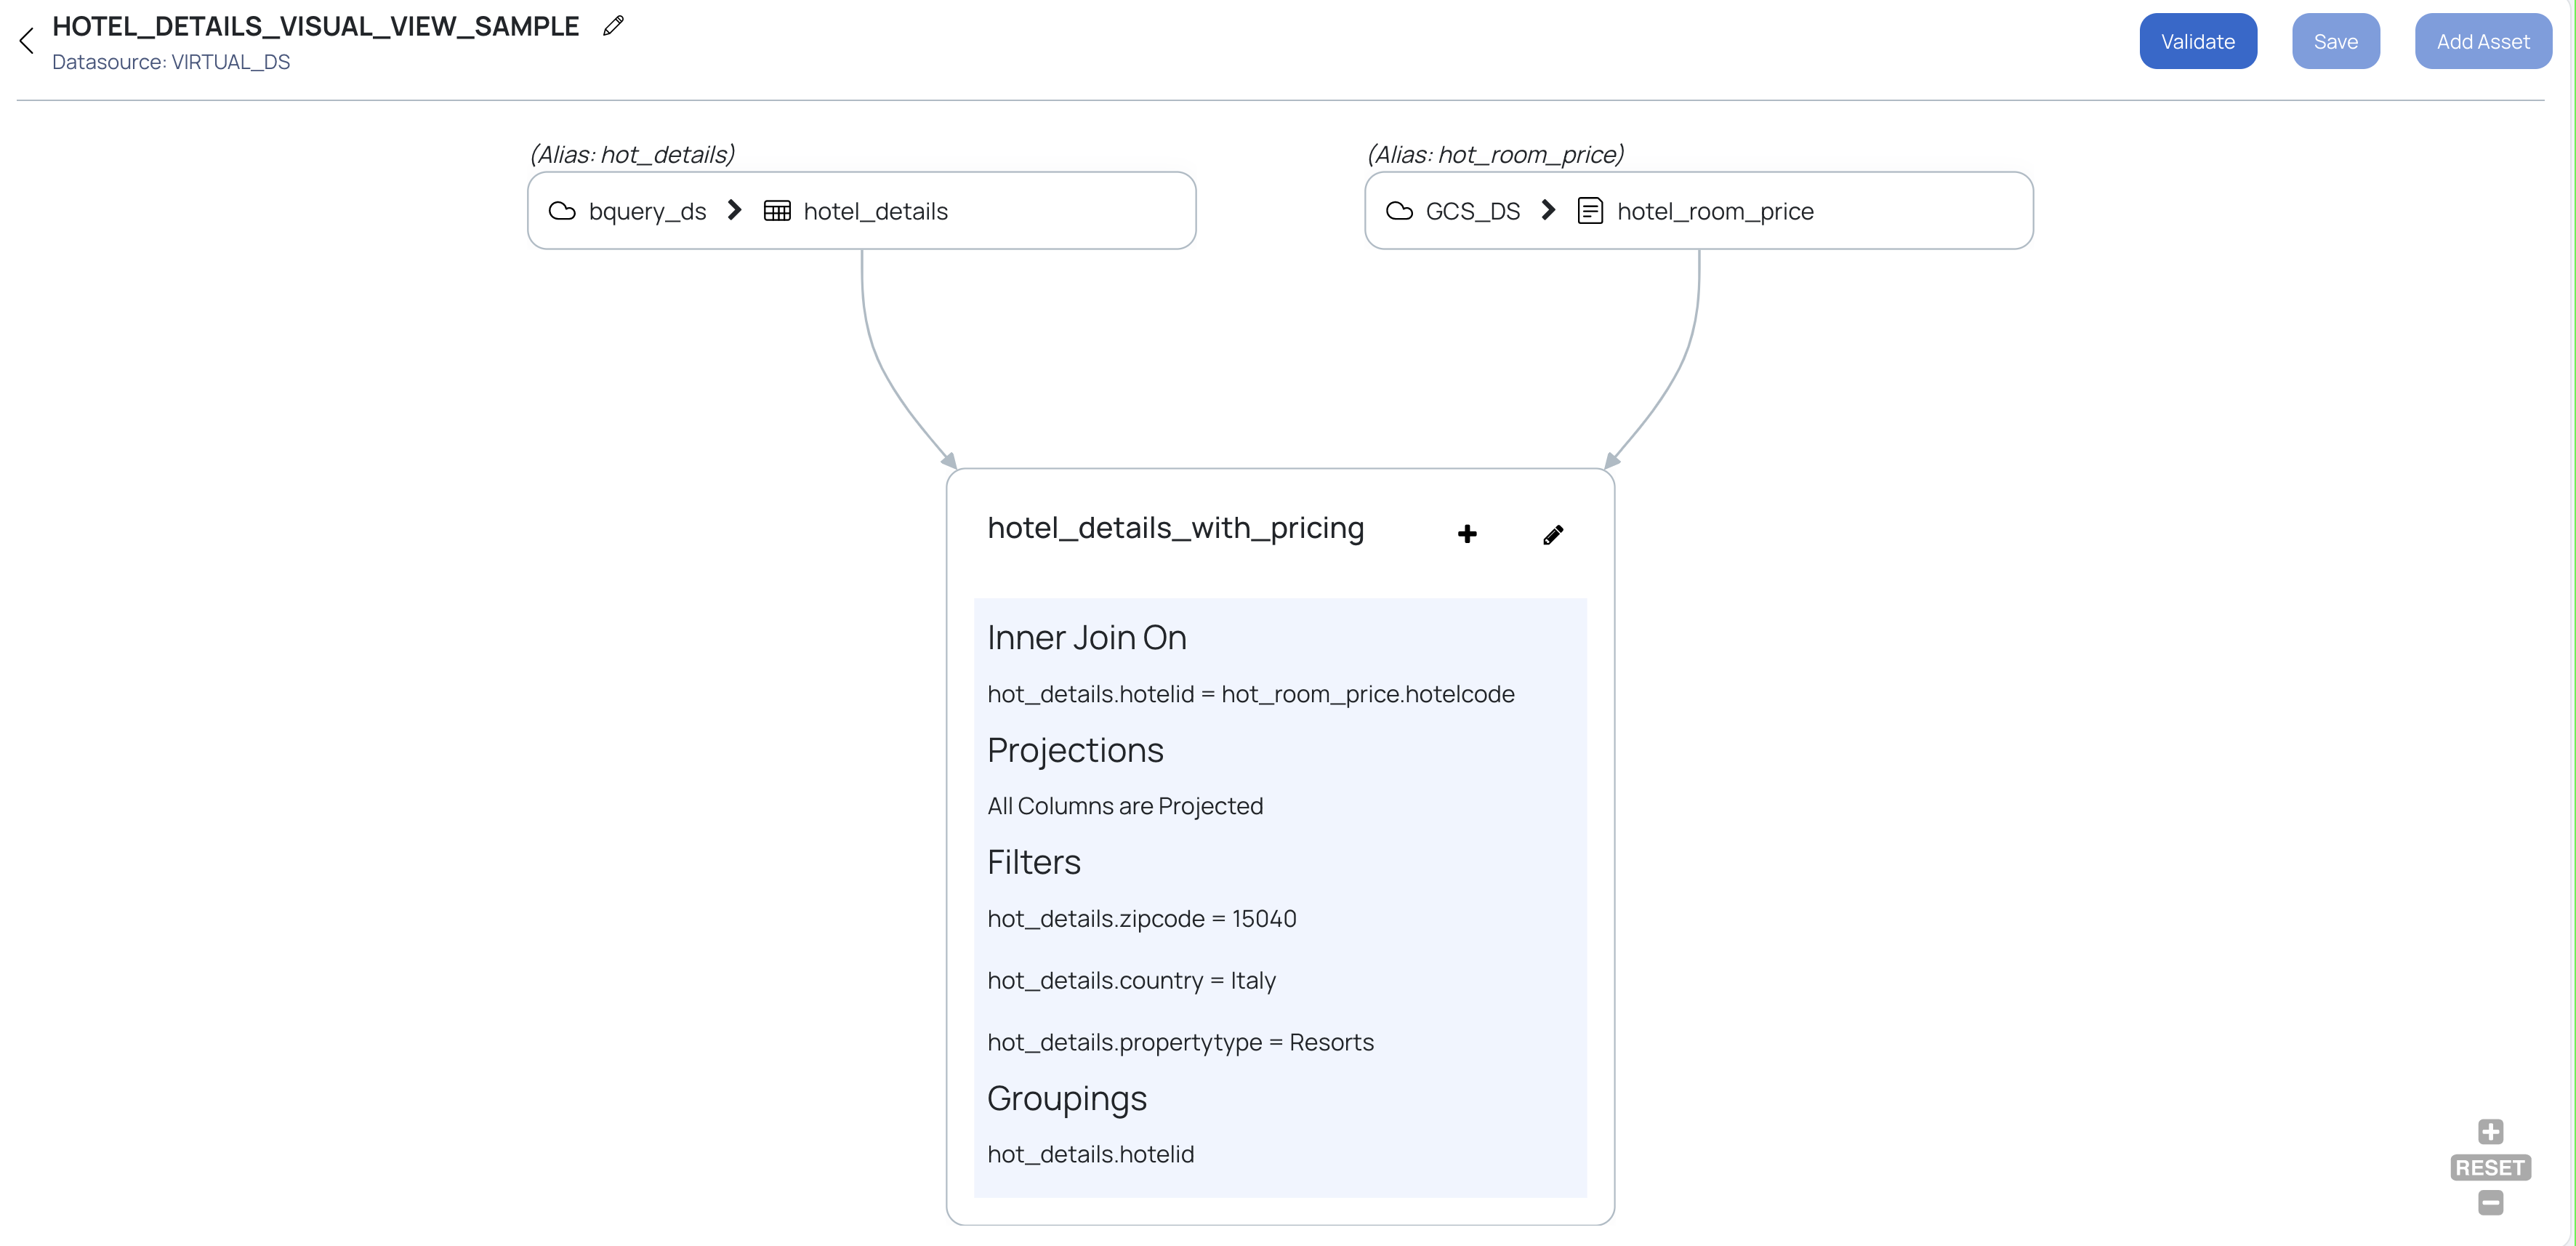
Once the Visual View is created, we need to validate the Visual View for any syntax errors. If there are no errors, the Visual View can be saved.
Click the Validate button to validate the Visual View for any syntax errors and also to fetch the sample result data set. On successful validation, a table with the resultant data is displayed below the visual representation, and you can save the visual view.
Once a visual view is saved, it becomes an asset on your dashboard. Hence, allowing you to perform different actions on it, like profiling, data quality policies etc.
Search for a visual view
To search for a visual view, perform the following steps:
- Click the Discover tab from the top menu bar. The Discover page is displayed.
- Click the Visual View tab to display the list of visual views created or use the Search bar.

Search or View Existing Visual Views
Edit a Visual View
To edit a visual view, perform the following steps:
- Navigate to the Discover page.
- Click the Visual View tab. The list of visual view assets are displayed.
- Click the name of the visual view that you would like to edit. The asset details page for it is displayed.
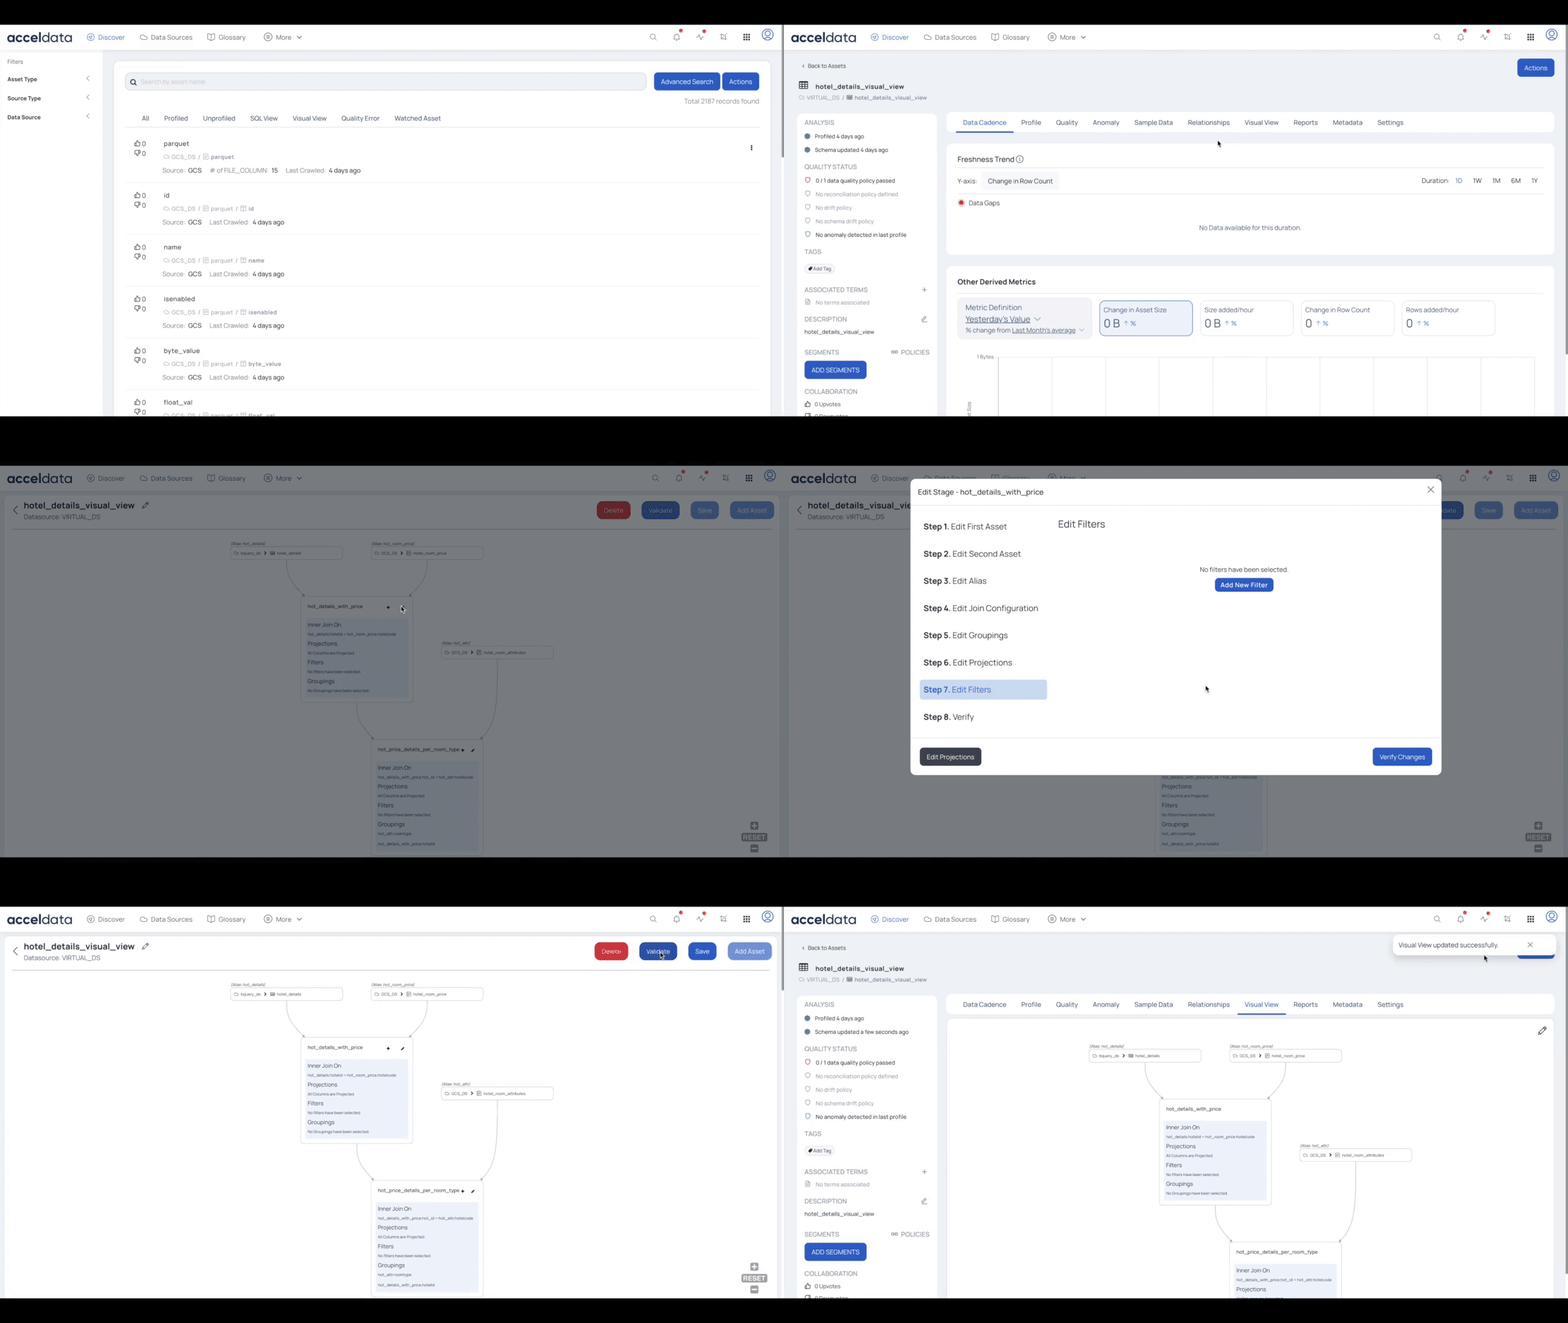
- Navigate to the Visual View tab and click the edit icon. The Visual View is displayed in editing mode.
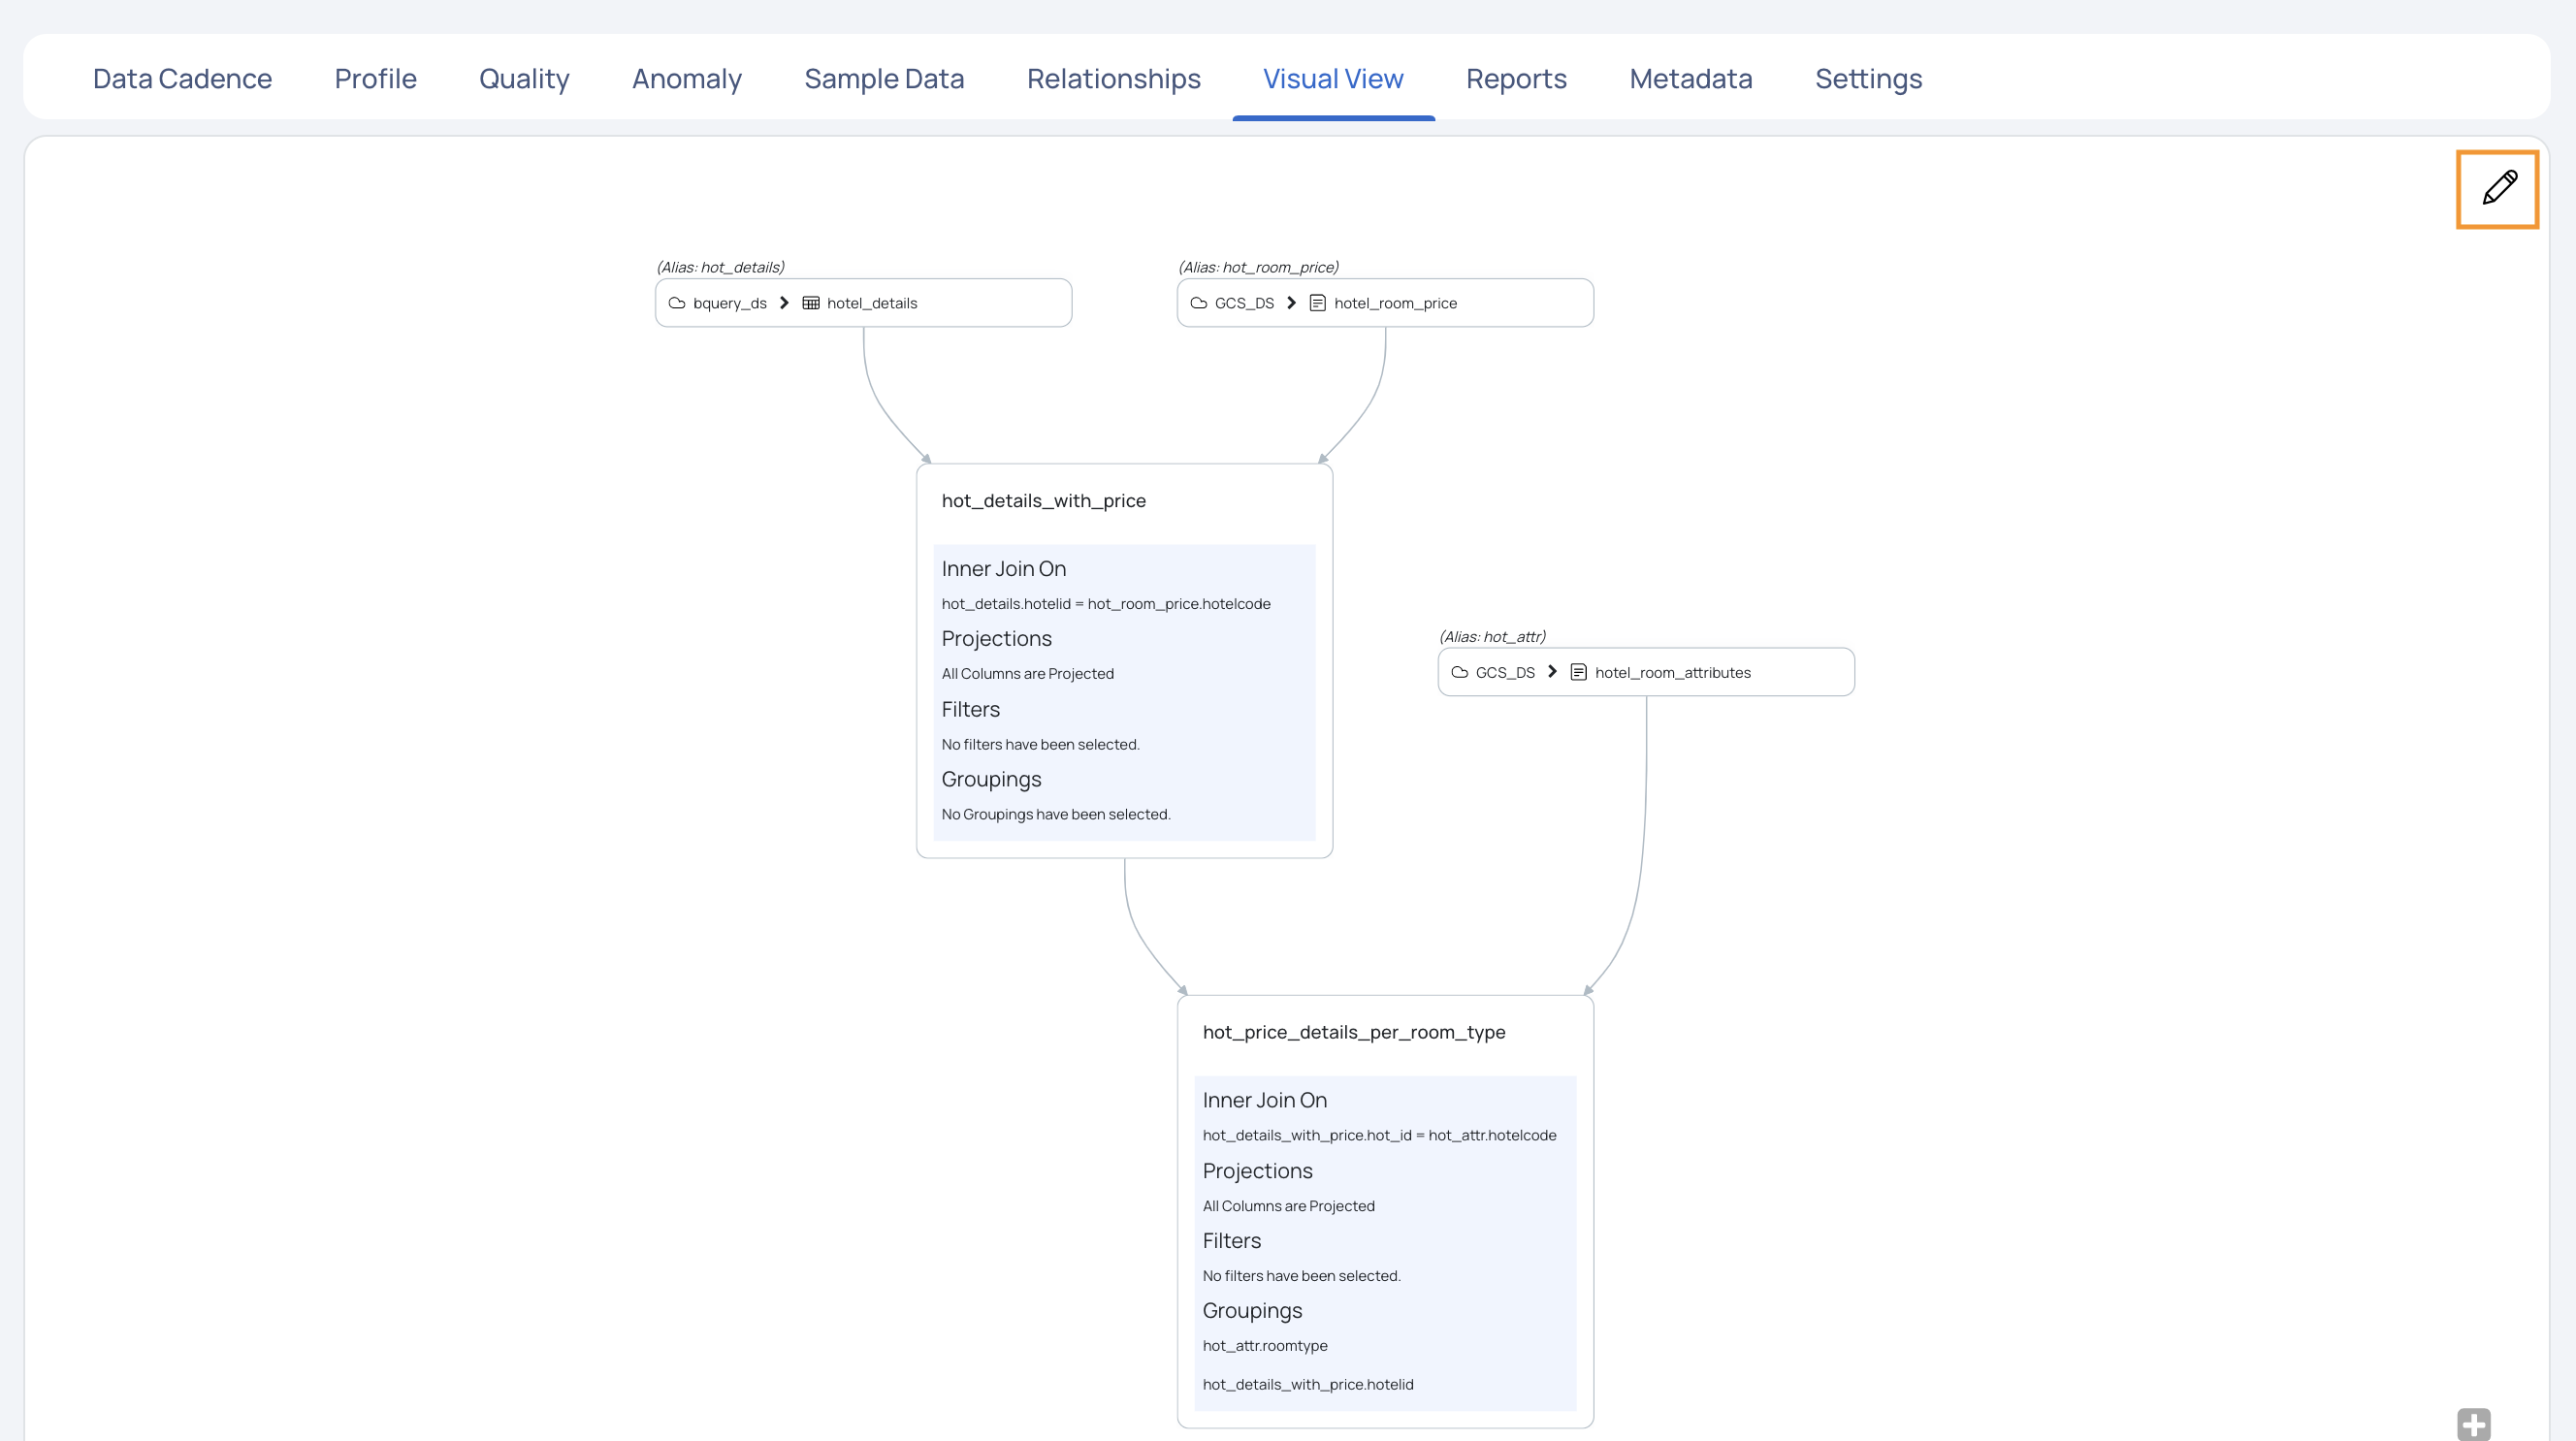
- Click the edit icon for a particular asset in the visual view. The Join Assets pop-up is displayed in editing mode.
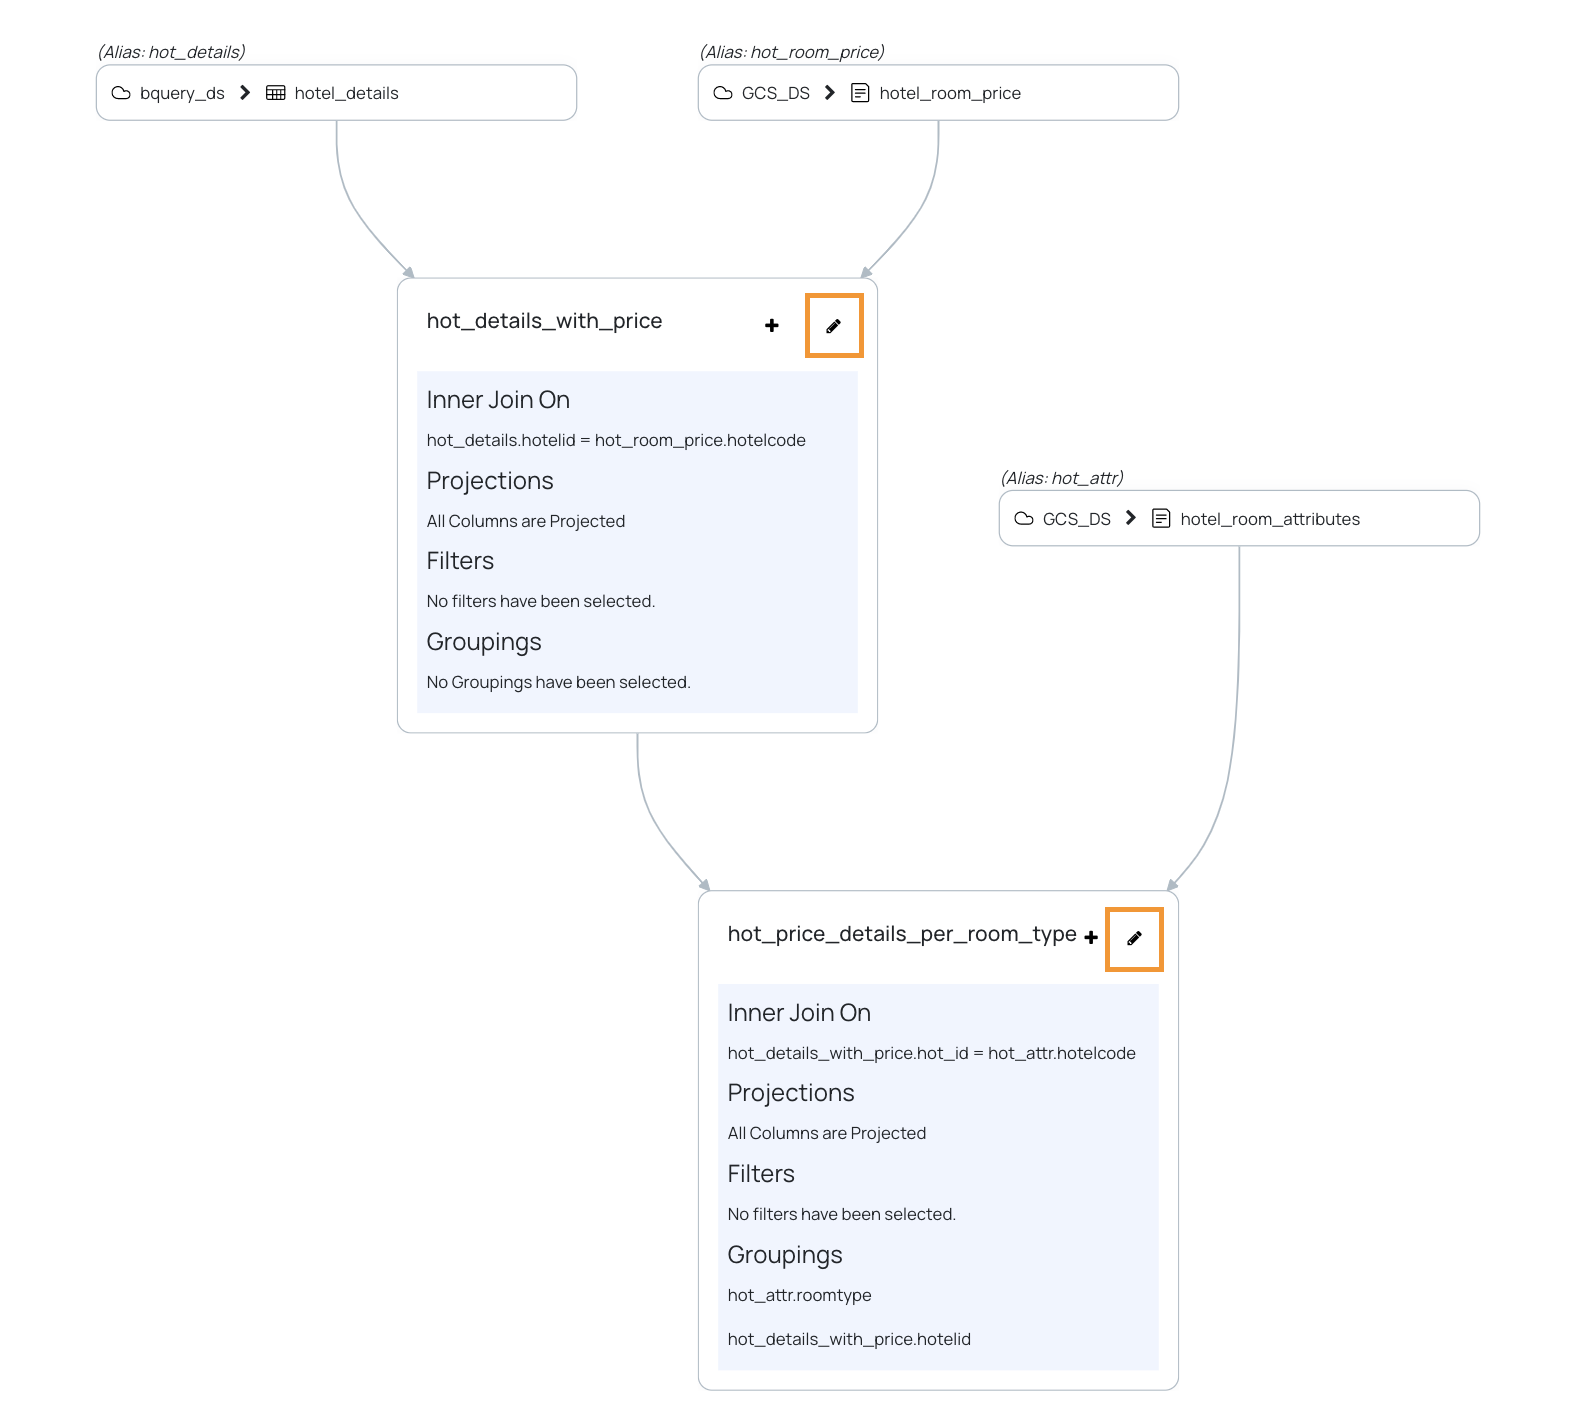
- Make changes to the current step and then navigate to the next or previous step with the help of the edit buttons provided. You can directly navigate to a particular step by clicking the step number.
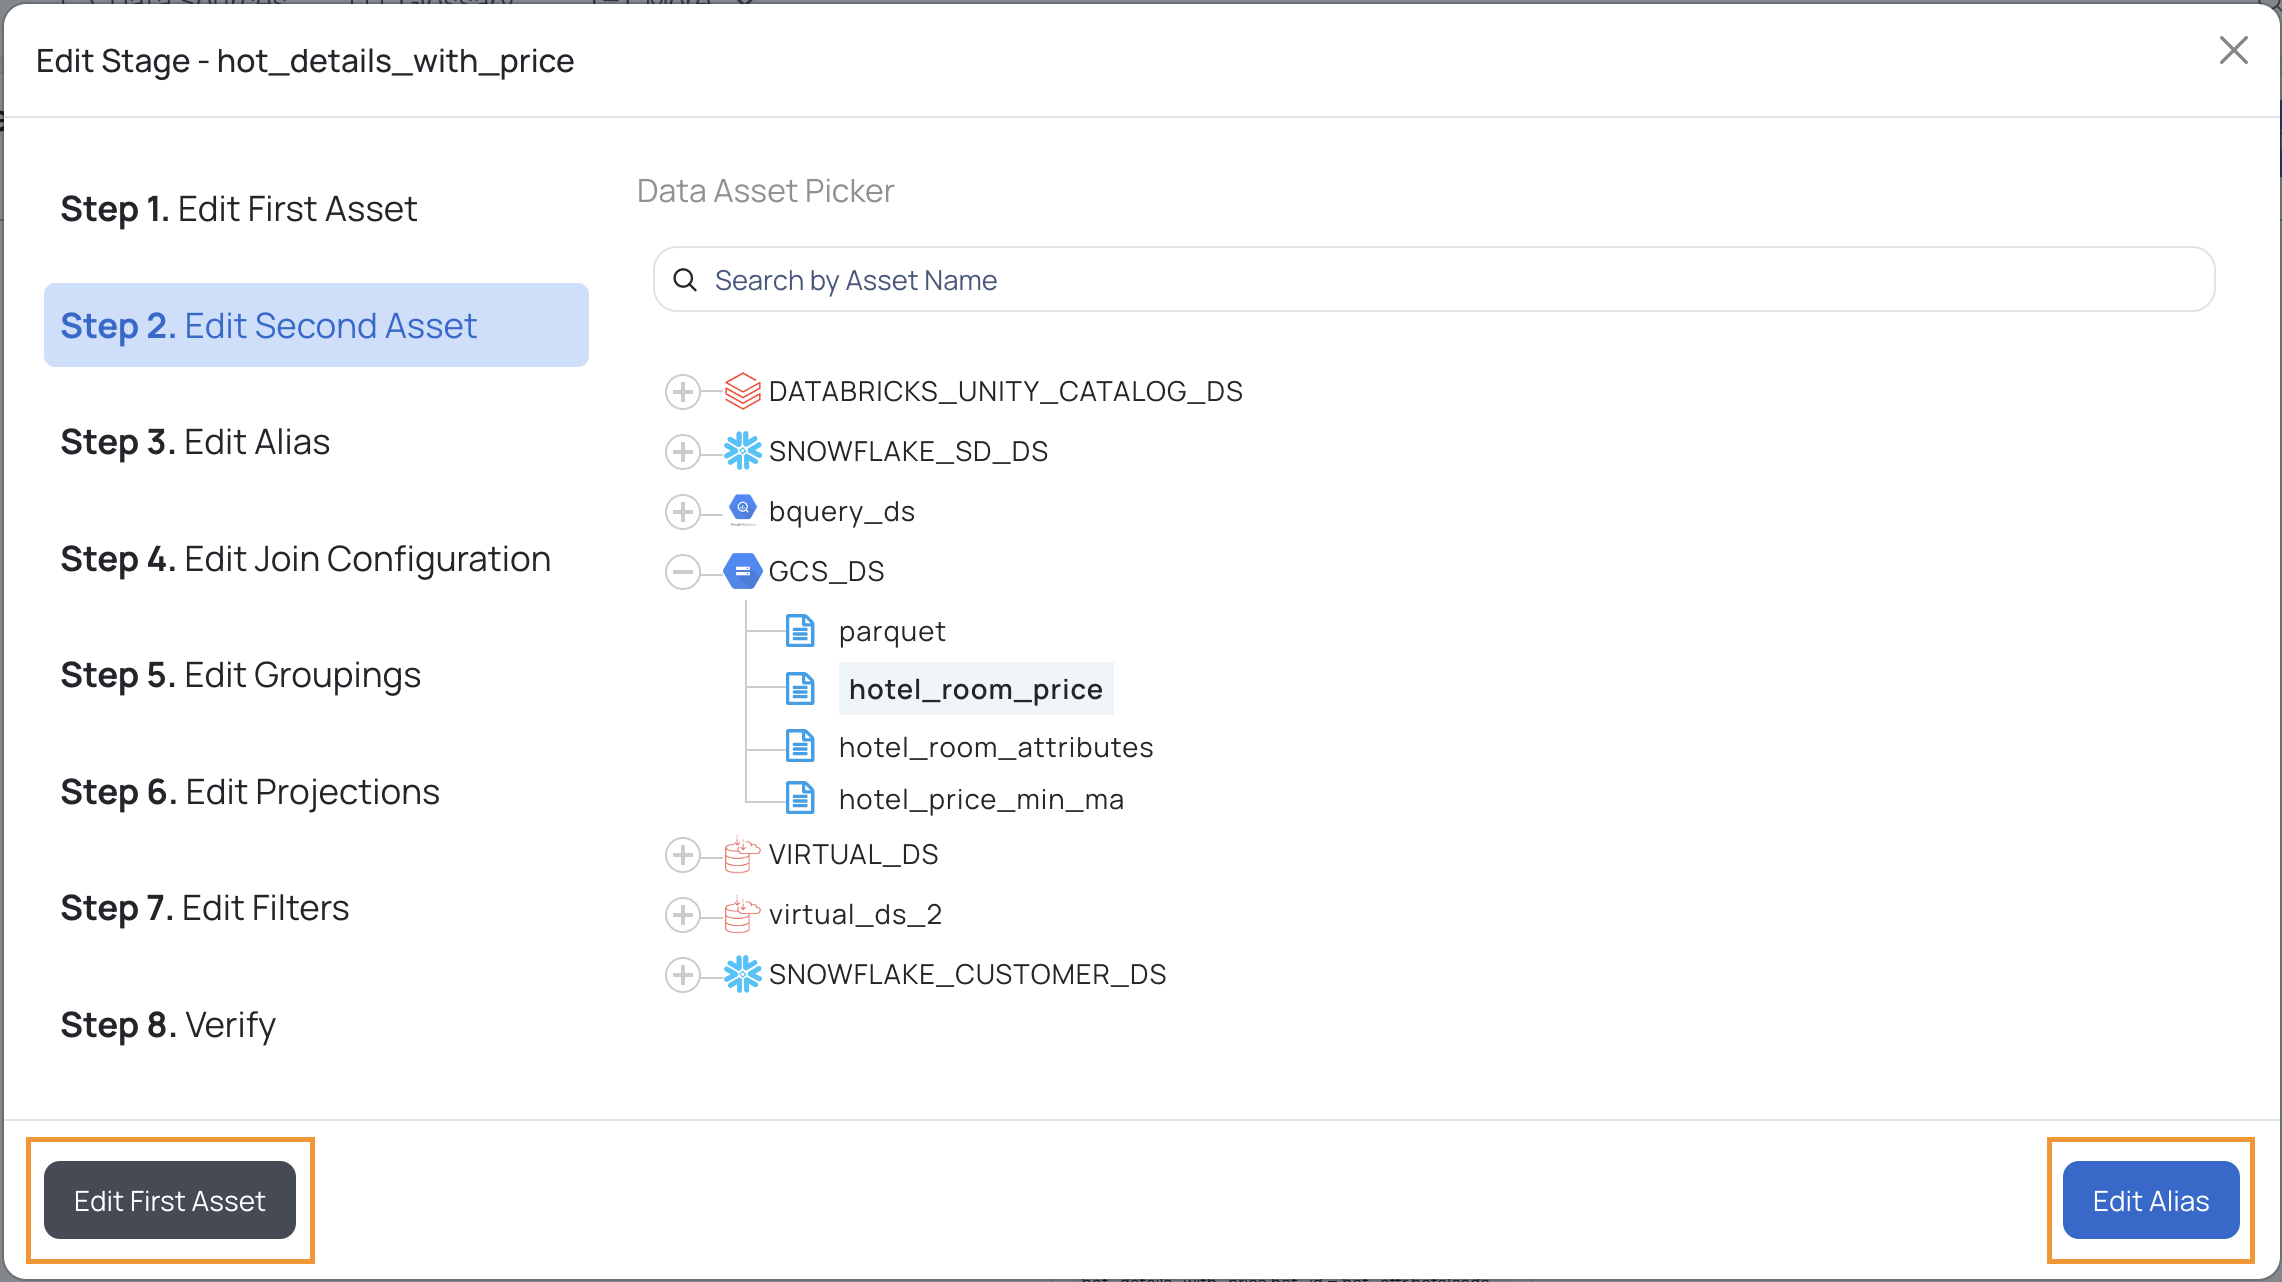
- Click the Verify Changes button on Step 7. Edit Filters page.
- Click the Save Changes button to update your changes for the visual view.
- Click the Validate button to validate the Visual View for any syntax errors and also to fetch the sample result data set.
- On successful validation, you can save the visual view by clicking the Save button.
Mini Profiling Support for SQL View
Torch supports Mini profiling of business assets for the following data sources only:
- Snowflake
- PostgreSQL
- MySQL
- Athena
- BigQuery
- Amazon Redshift
Query Lineage
Structured Query Language (SQL) lineage is a data lineage that is derived from SQL. It is a data lineage which uses the SQL query which is used to build, maintain, and manage data sources, and database tables.
The lineage information of an asset is extracted by the Query Analyzer Service. You can upload custom queries, that may hold key information regarding the lineage of an asset. To add a query, perform the following:
From the Actions menu, click on Query Lineage. The Query Lineage window is displayed.
Fill in the following information in the Query Lineage window:
- Select Data Source: Select a data source from the list.
- Select Database: Select a database.
- Select Schema:
- SQL Query Statements: Enter the SQL query.
Click the Save button.
This saved query is used to infer lineage details of the asset. To view the lineage of an asset, see here.
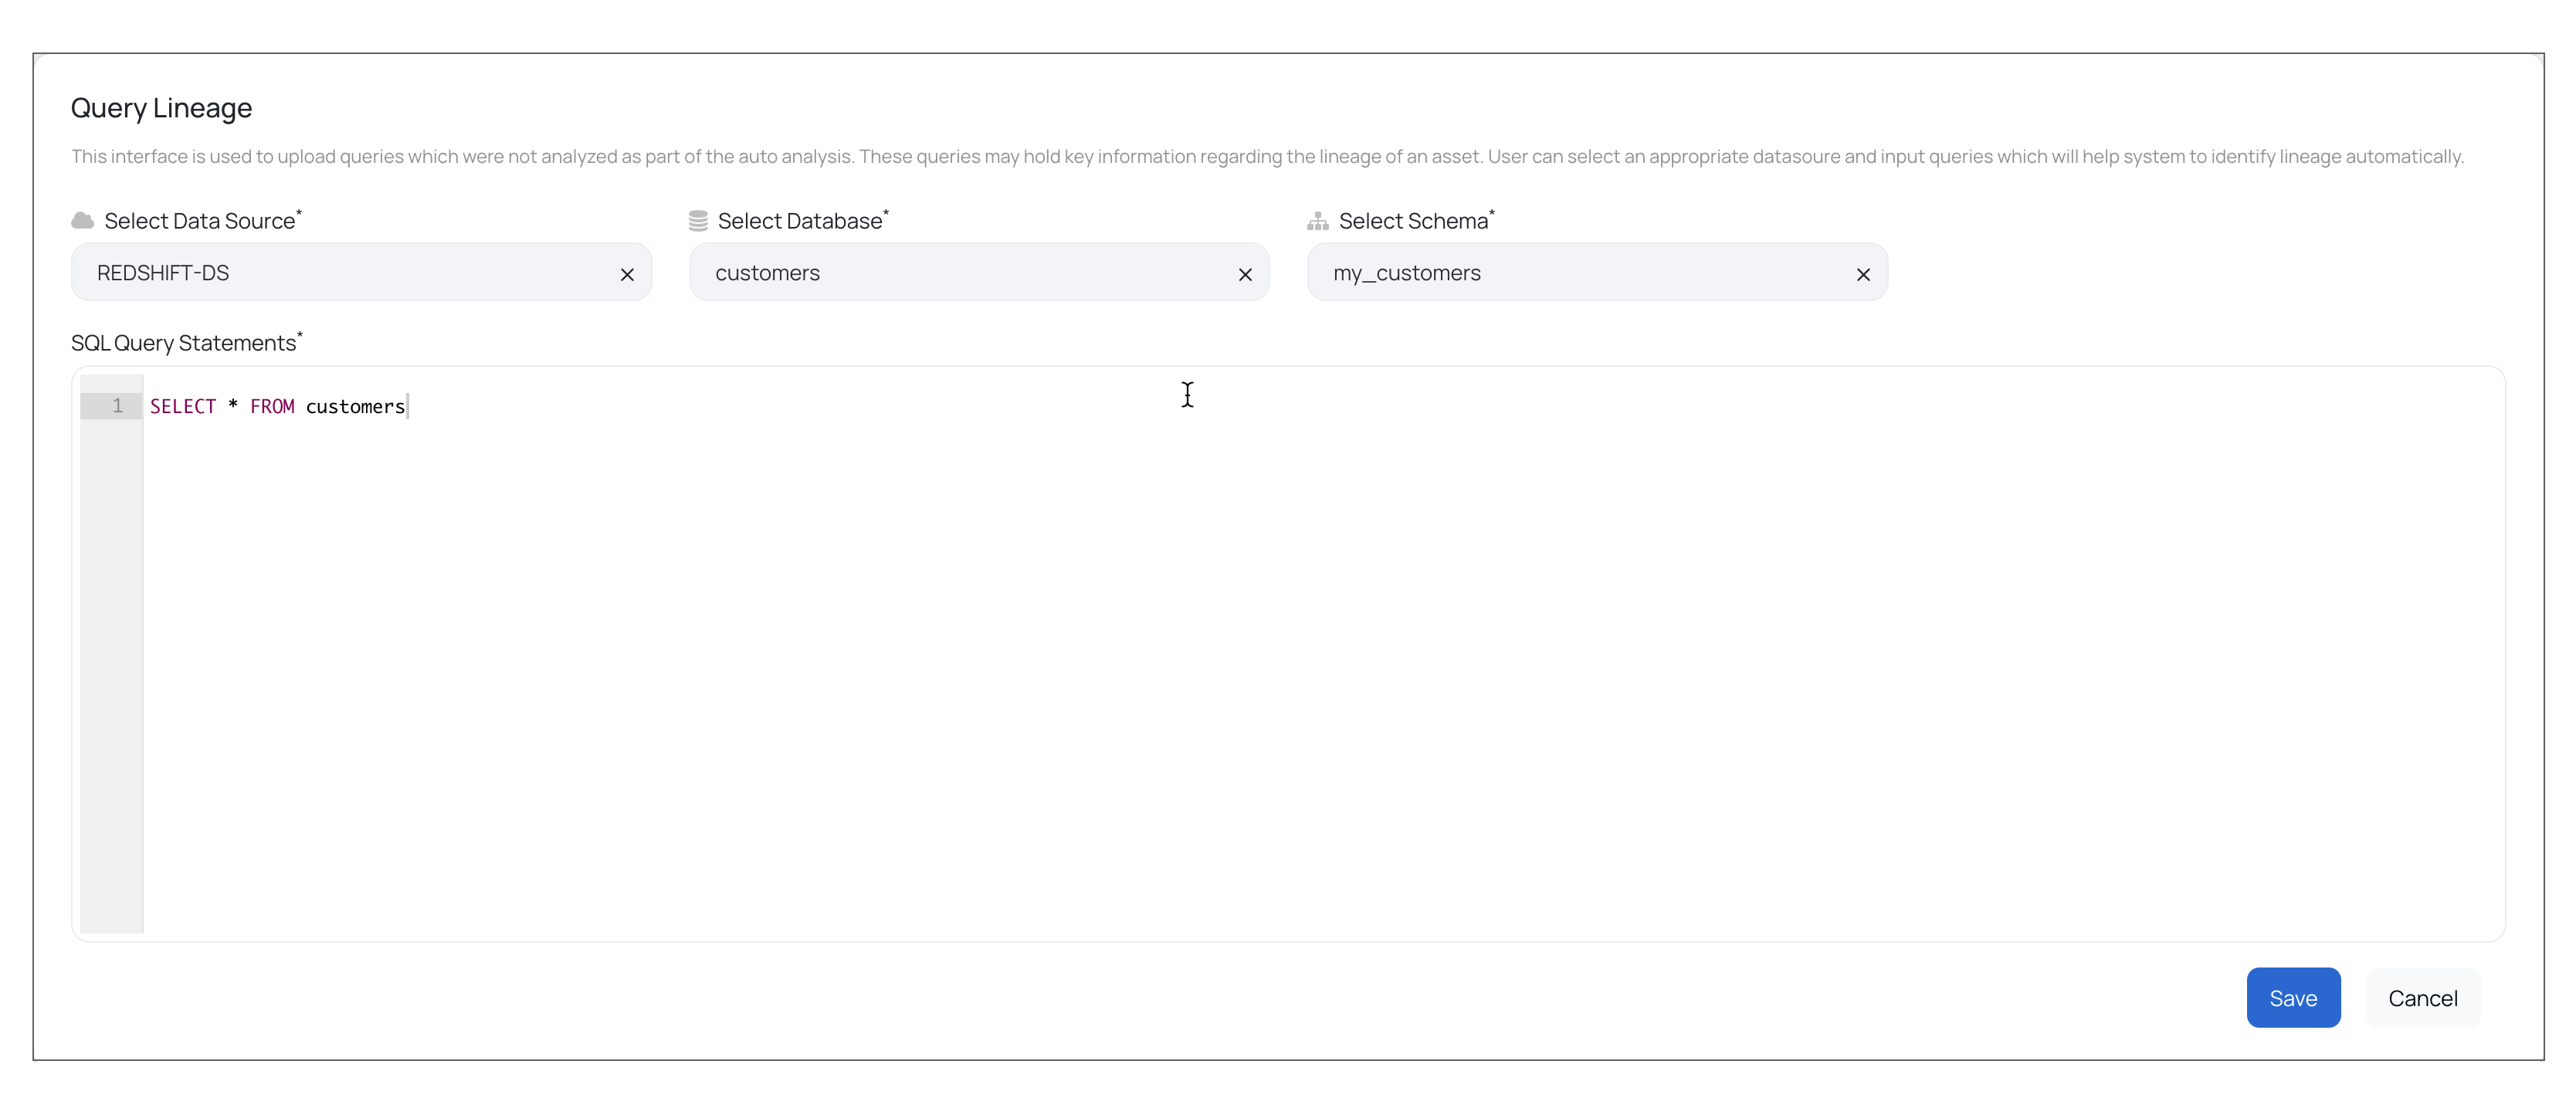
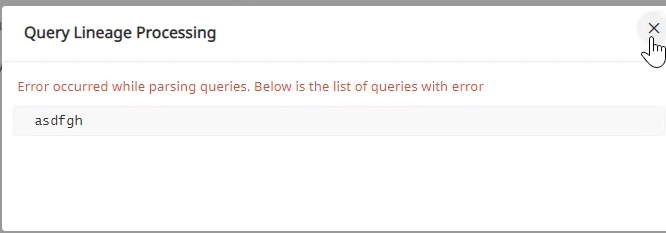
You can add multiple SQL Query Statements in the dialog box. Make sure that each of the statements are correct. If there is an error in the SQL Query Statements, then the following error is displayed:
