
Resume and Finalize the ODP Stack Upgrade
This page explains how to resume and finalize the ODP stack upgrade.
Resume Upgrade
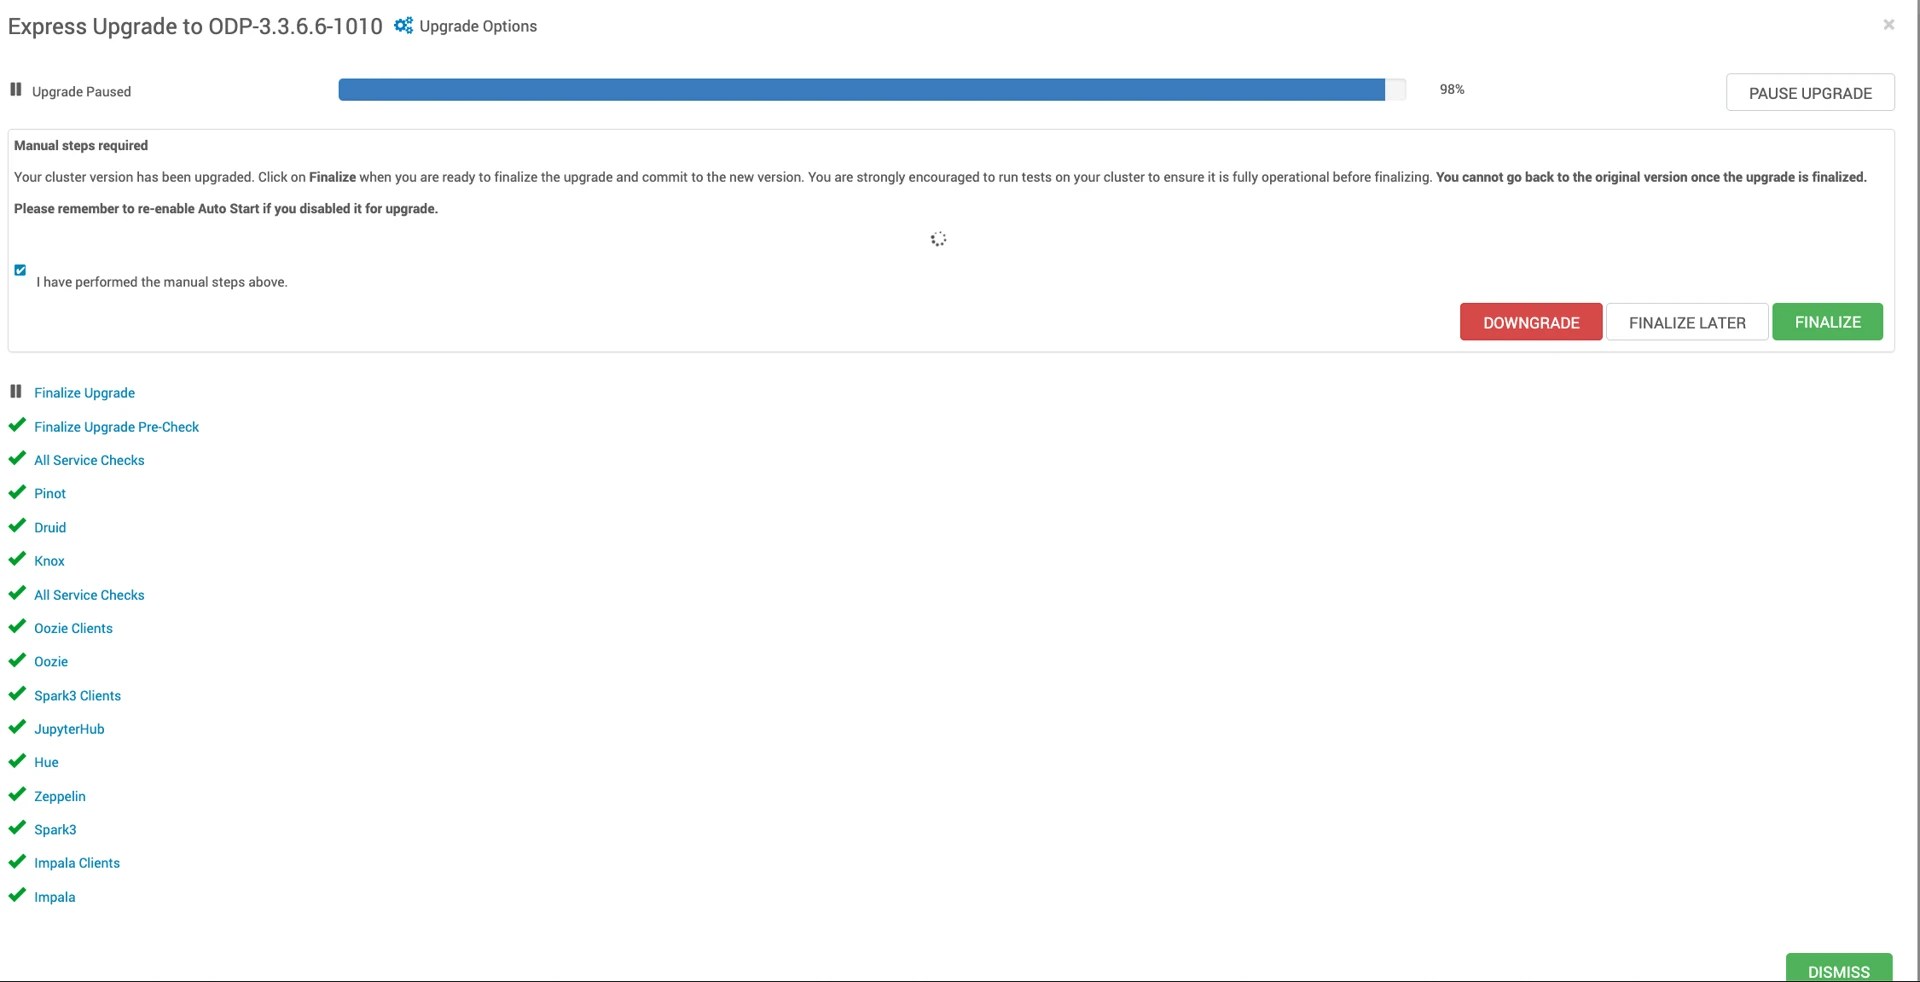
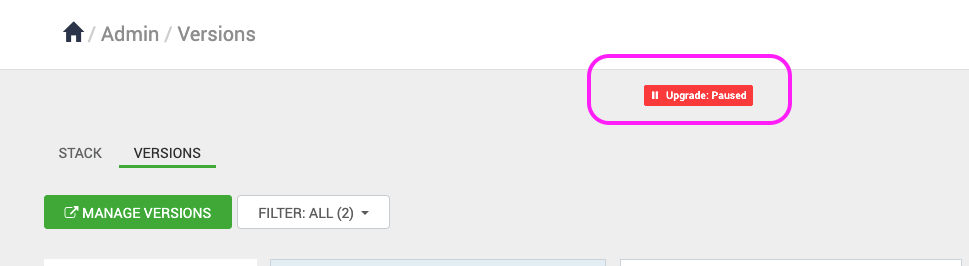
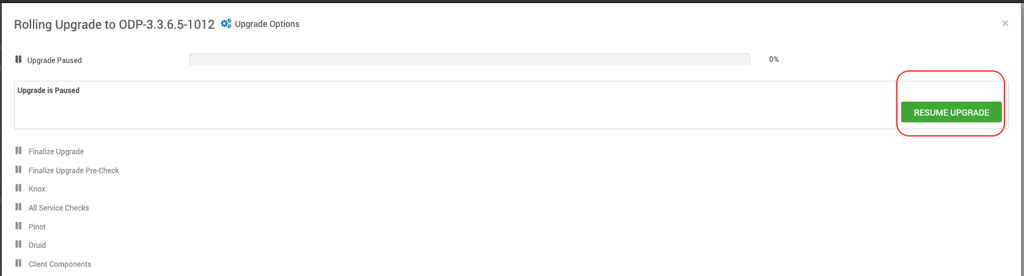
Resume the ODP Stack Upgrade from its Paused state. Upon upgrade completion, you can see the two options.
- Finalize Later—Choosing this option preserves the ability to downgrade or roll back to the previous version.
- Finalize—Once selected, version 3.3.6.6 becomes permanent, and rollback is no longer possible.
Express Upgrade
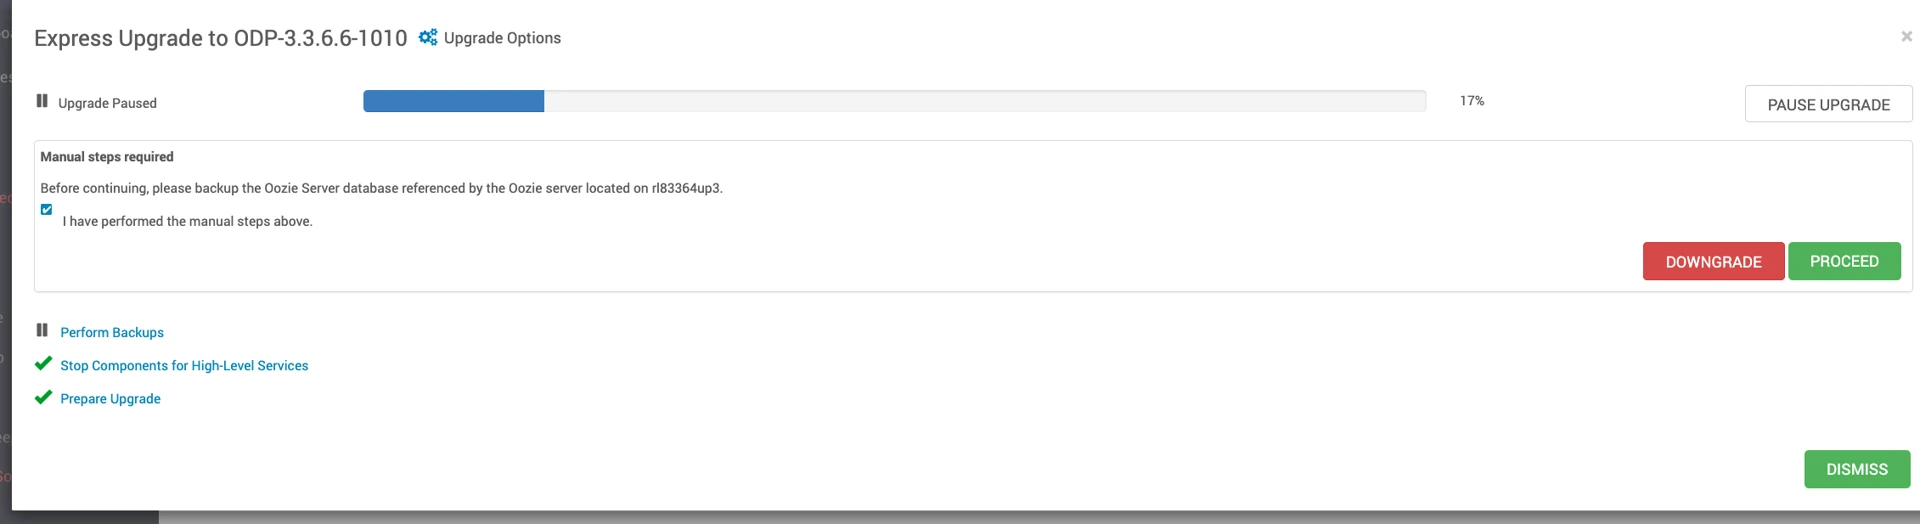
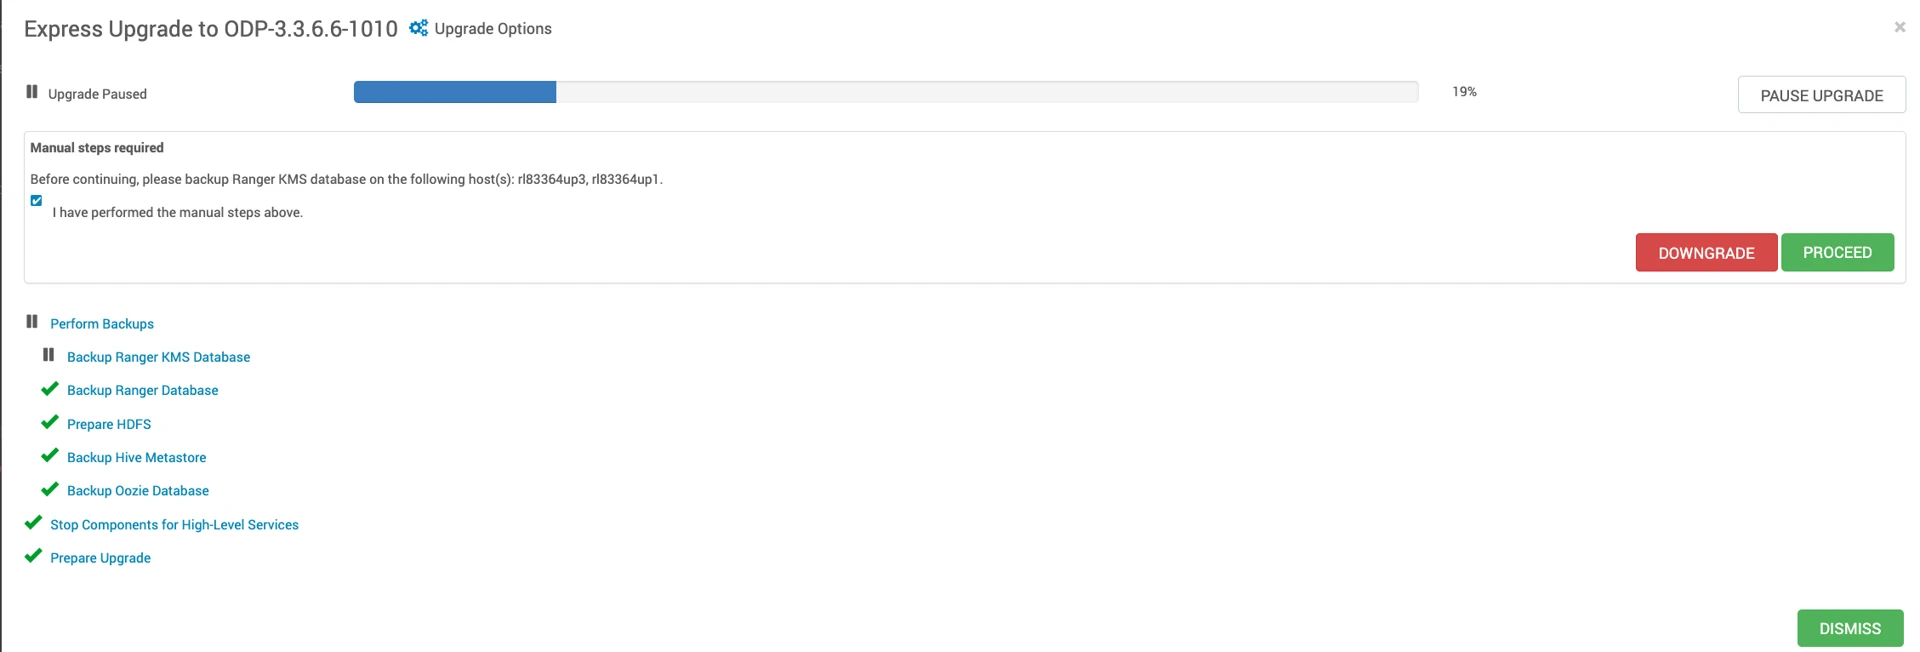
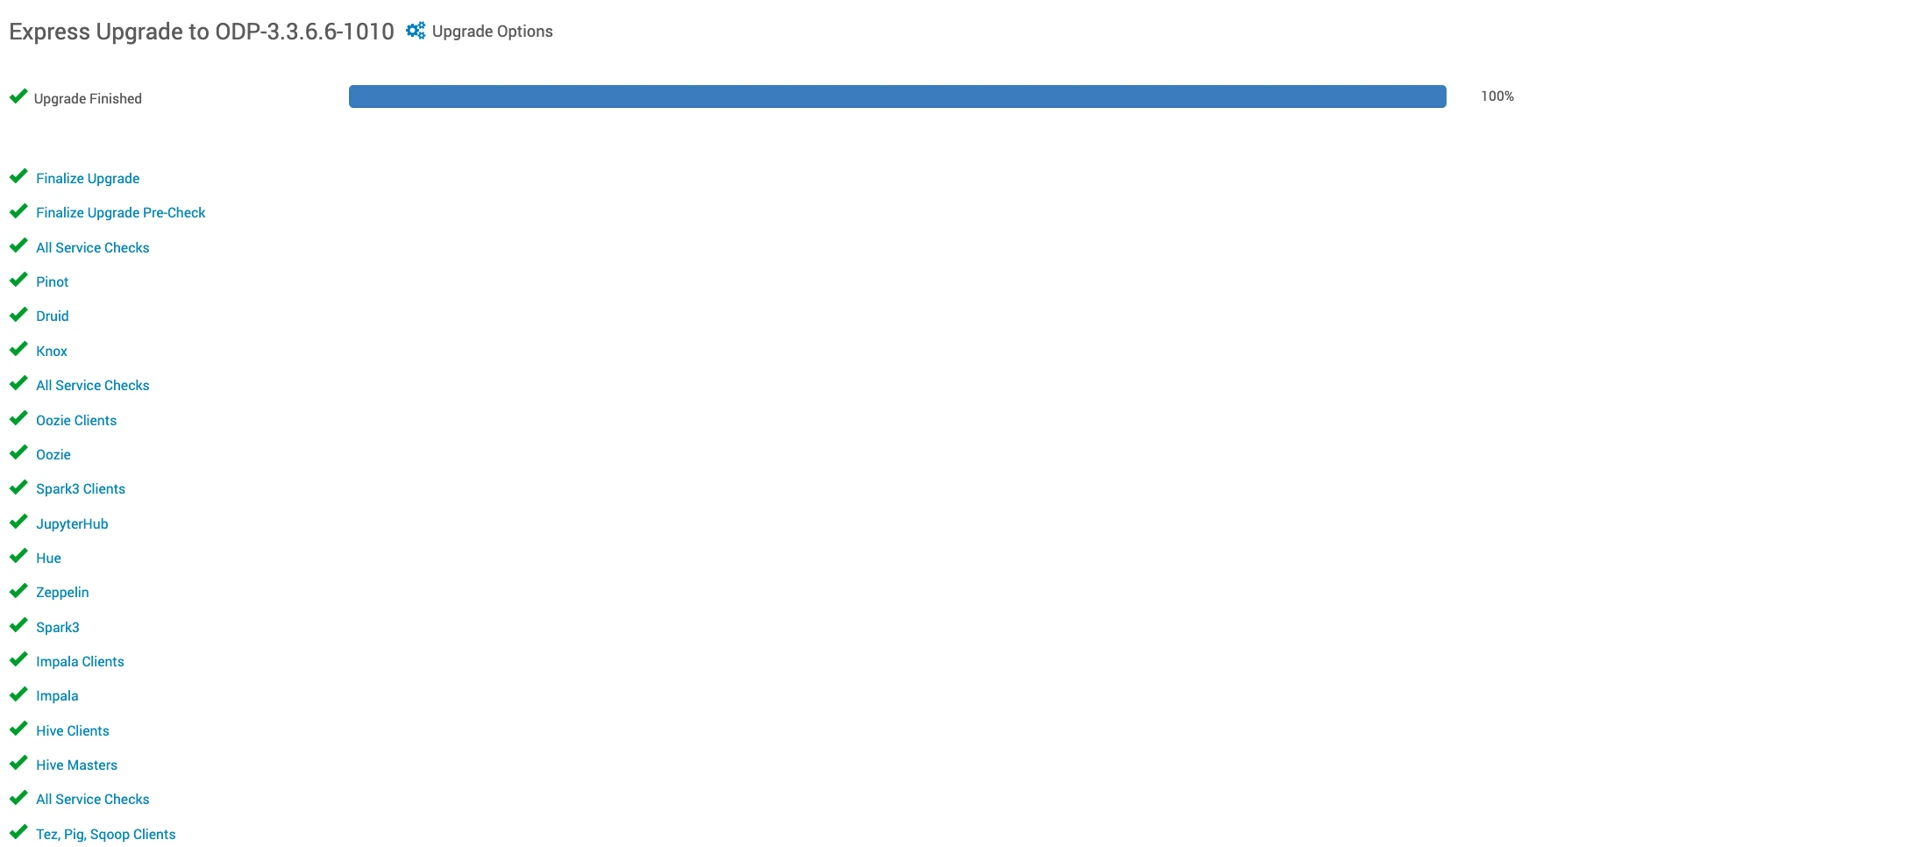
Verify the Upgrade
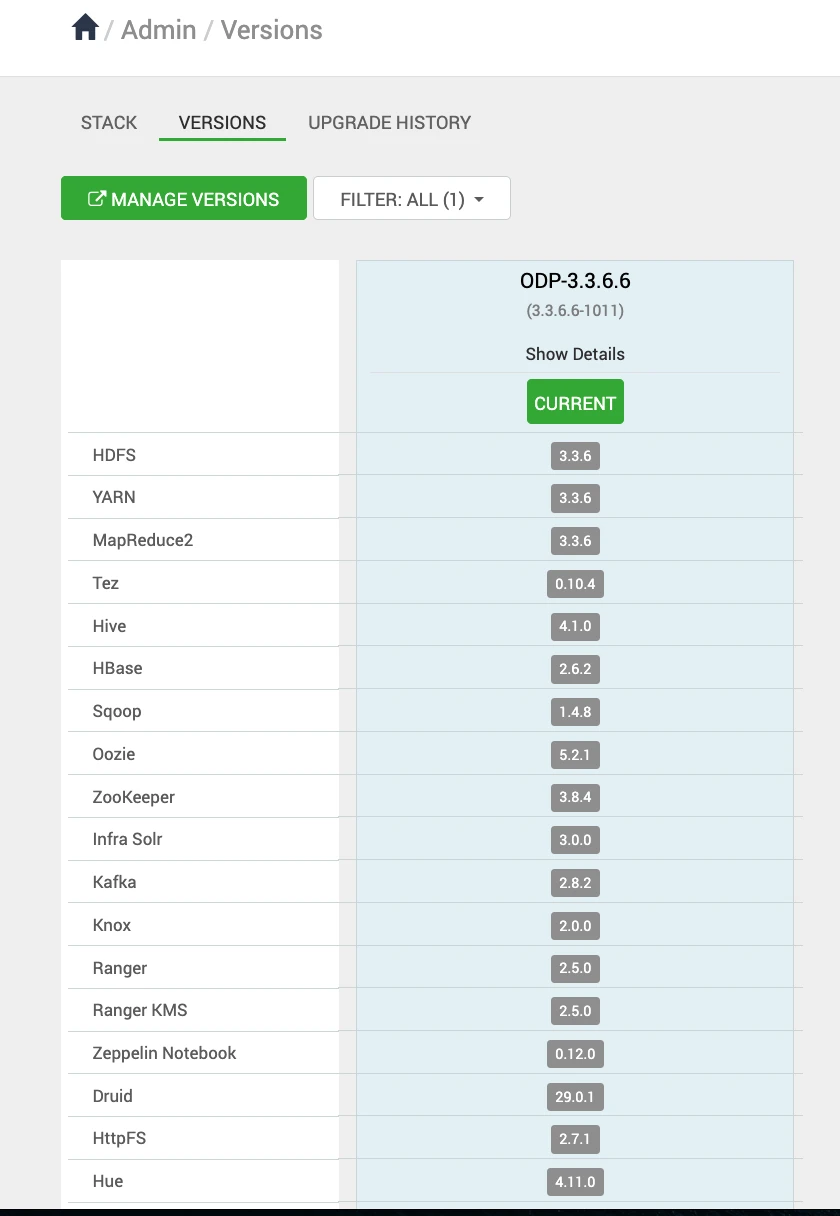
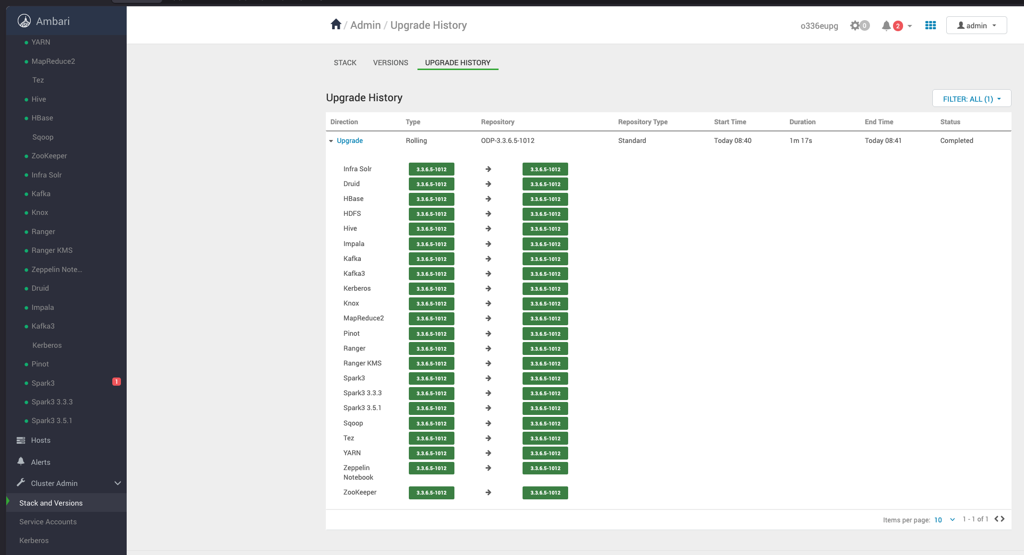
Upgrade History
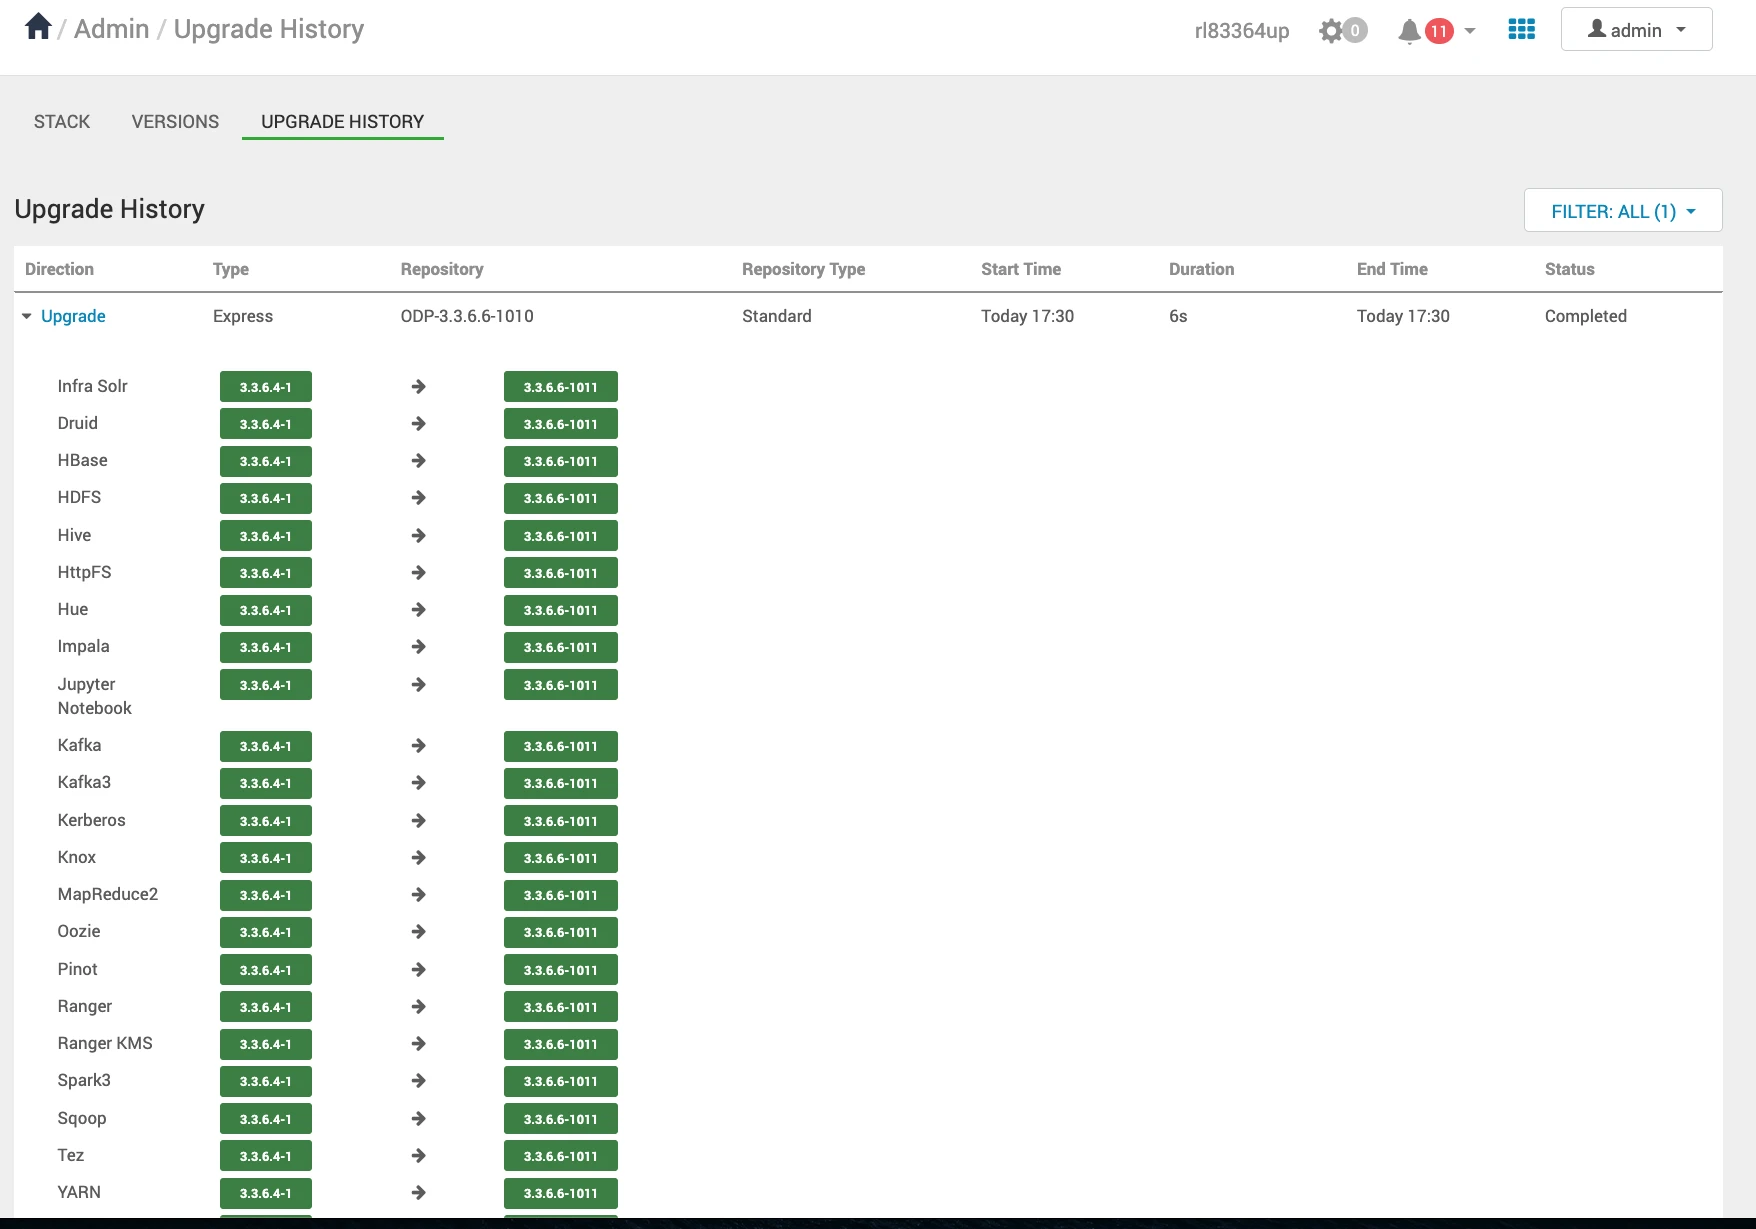
Rolling Upgrade
Prepare for Backups
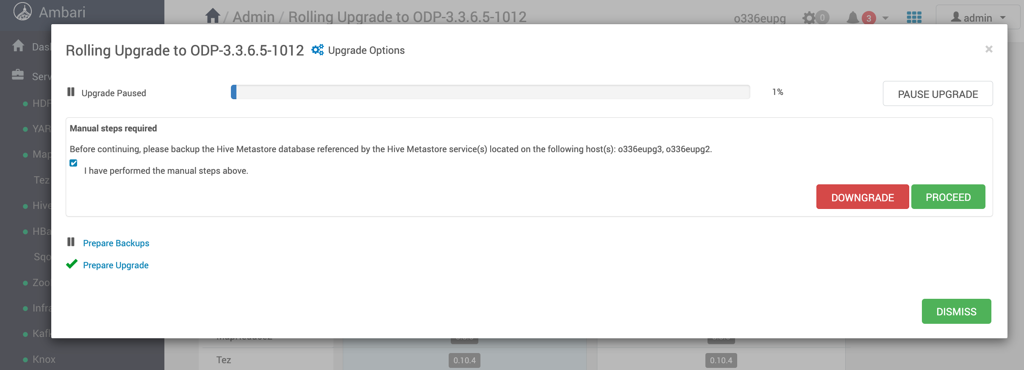
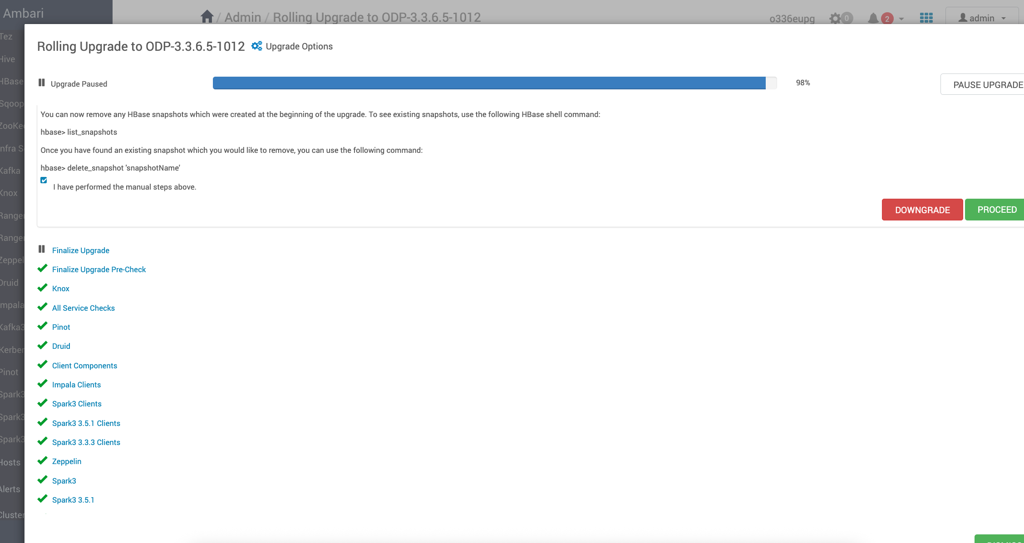
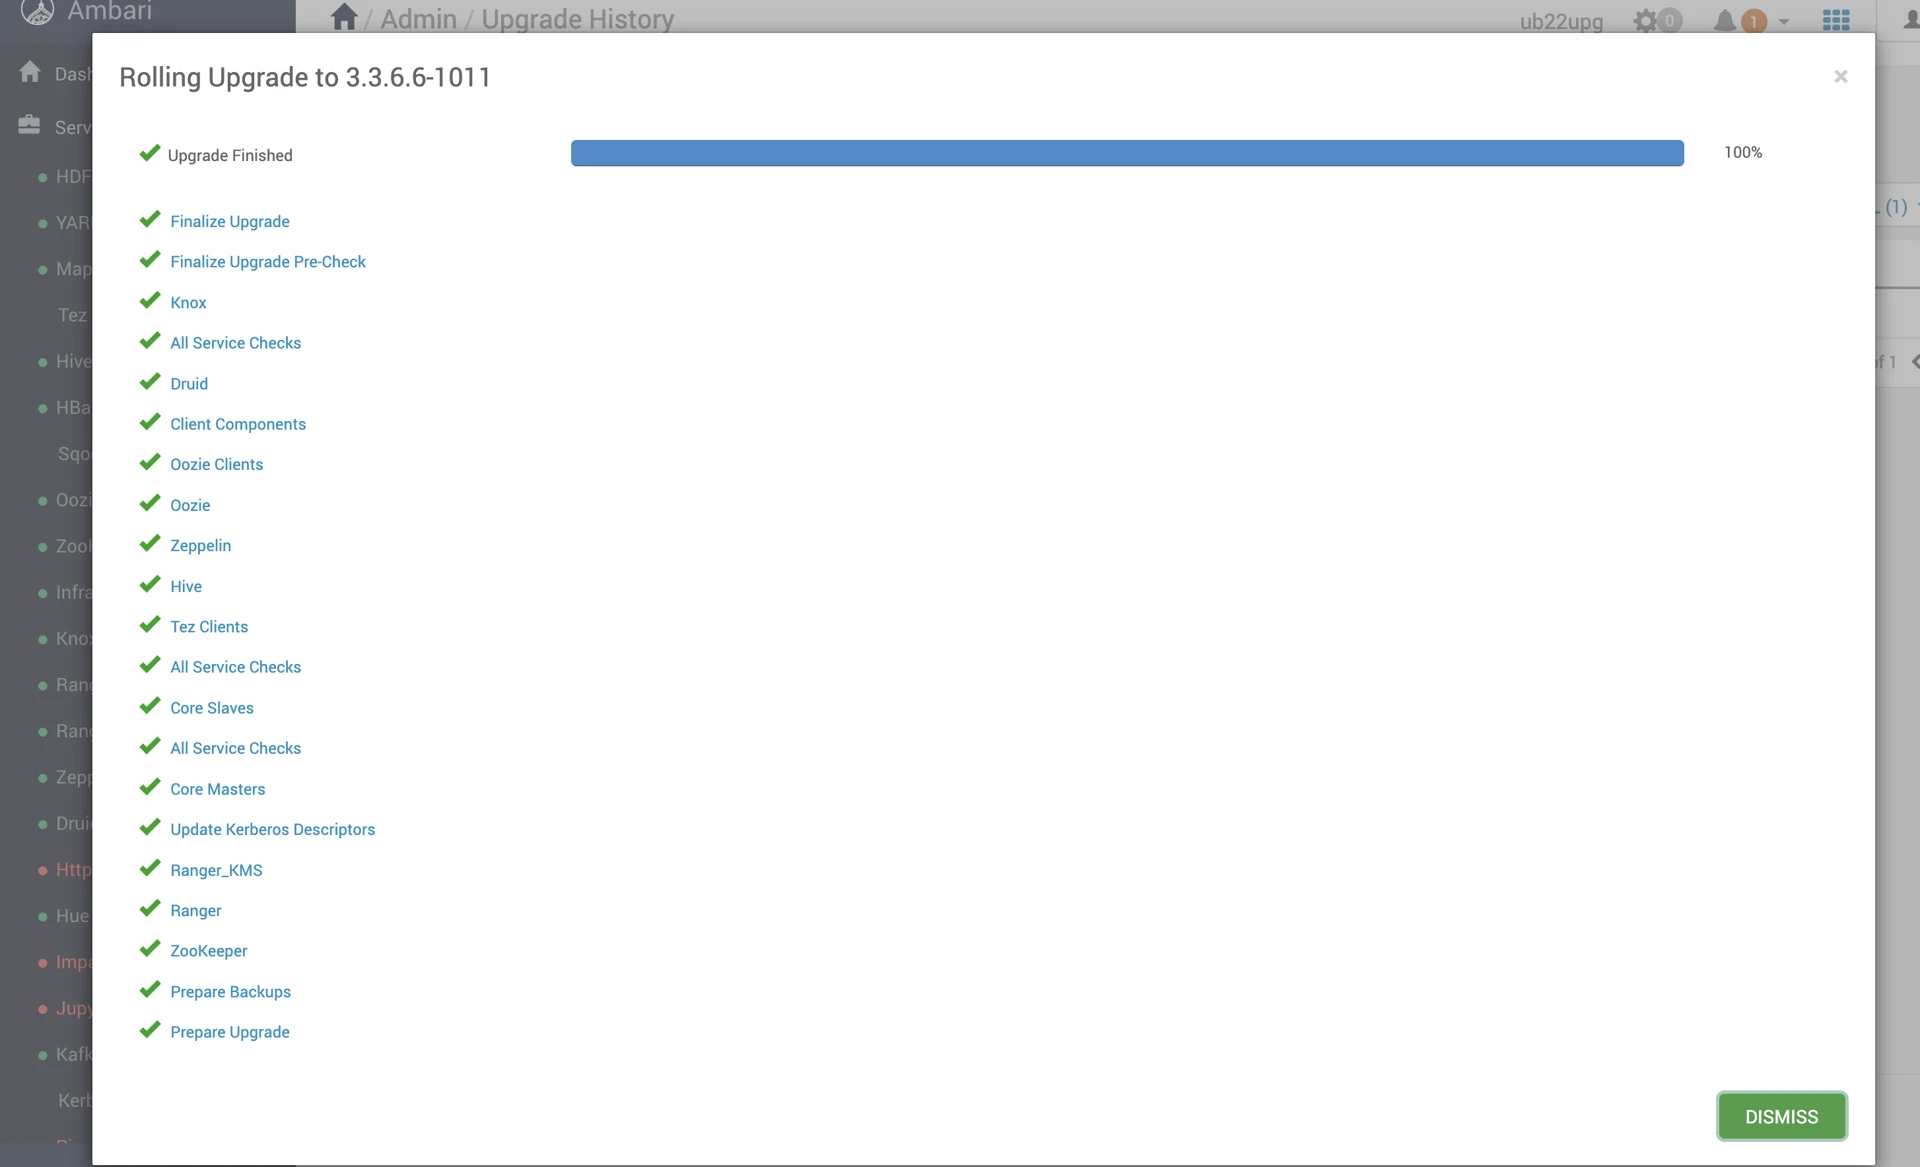
Navigate to the Ambari UI Home page and perform the Start All services from Actions.
Verify the Upgrade
Verify the Upgrade History
Mpacks Restore
Perform the following steps to restore Mpacks.
- Install Mpacks on the Ambari Server node.
##Airflow mpack Installation
ambari-server install-mpack --mpack=https://mirror.odp.acceldata.dev/v2/odp/python3/jdk17/3.3.6.6/mpacks/ambari-mpacks-airflow-2.8.3.3.3.6.6.tar.gz

##Impala mpack Installation
ambari-server install-mpack --mpack=https://mirror.odp.acceldata.dev/v2/odp/python3/jdk17/3.3.6.6/mpacks/ambari-mpacks-impala-4.4.1.3.3.6.6.tar.gz

##Ozone mpack Installation
ambari-server install-mpack --mpack=https://mirror.odp.acceldata.dev/v2/odp/python3/jdk17/3.3.6.6/mpacks/ambari-mpacks-ozone-1.4.1.3.3.6.6.tar.gz

##Spark3 mpack Installation
ambari-server install-mpack --mpack=https://mirror.odp.acceldata.dev/v2/odp/python3/jdk17/3.3.6.6/mpacks/ambari-mpacks-spark3-3.3.6.6.tar.gz
- Install the services from Ambari.
- Stop the Mpack services from ambari UI.
- Restore the config at mysql DB.
Now restore the configuration backups for the mpacks that were taken during the upgrade prerequisites phase. For details, see Backup Ambari Configuration (Mpacks).
mysql> use ambari
Reading table information for completion of table and column names
You can turn off this feature to get a quicker startup with -A
Database changed
Restore Airflow Config
Run the following script.
mysql>
update clusterconfig a set config_data = (select config_data from service_conf_bck.configs_prior_patch b where a.type_name = b.type_name and version = (SELECT MAX(version) FROM service_conf_bck.configs_prior_patch WHERE service_name = 'AIRFLOW') and service_name = 'AIRFLOW'),
        config_attributes = (select config_attributes from service_conf_bck.configs_prior_patch b where a.type_name = b.type_name and version = (SELECT MAX(version) FROM serviceconfig WHERE service_name = 'AIRFLOW') and service_name = 'AIRFLOW')
         where config_id in (select config_id from serviceconfigmapping where service_config_id in (select service_config_id from serviceconfig where service_name = 'AIRFLOW' and version =
         (select max(version) from serviceconfig where service_name = 'AIRFLOW')) );
Response:
Query OK, 3 rows affected (0.06 sec)
Rows matched: 27  Changed: 3  Warnings: 0
Restore Spark3 Configs
Run the following script.
update clusterconfig a set config_data = (select config_data from service_conf_bck.configs_prior_patch b where a.type_name = b.type_name and version = (SELECT MAX(version) FROM service_conf_bck.configs_prior_patch WHERE service_name = 'SPARK3') and service_name = 'SPARK3'),
    config_attributes = (select config_attributes from service_conf_bck.configs_prior_patch b where a.type_name = b.type_name and version = (SELECT MAX(version) FROM serviceconfig WHERE service_name = 'SPARK3') and service_name = 'SPARK3')
    where config_id in (select config_id from serviceconfigmapping where service_config_id in (select service_config_id from serviceconfig where service_name = 'SPARK3' and version =
    (select max(version) from serviceconfig where service_name = 'SPARK3')) );
Response:
Query OK, 1 row affected (0.03 sec)
Rows matched: 12  Changed: 1  Warnings: 0
Restore Ozone
This section provides instructions for restoring the Ozone service from OZONE2 to OZONE on the upgraded ODP cluster. The procedure includes installing the Ozone MPack, restoring configurations and metadata directory settings, finalizing the upgrade, and verifying the service.
1. Verify Service Auto-Start Settings
Before restoring Ozone, verify that Service Auto-Start is disabled in the Ambari UI.
2. Install the Ozone MPack
Install the Ozone 2.x.x MPack on the upgraded cluster.
- Log in to the Ambari Server host.
- Navigate to the /root directory:
cd /root/
- Download the Ozone MPack from the Acceldata Repositories page.
- Install the Ozone MPack:
ambari-server install-mpack --mpack=ambari-mpacks-ozone-<version>.tar.gz --verbose
- Restart the Ambari Server:
ambari-server restart
- Log in to the Ambari UI.
- Install the OZONE service.
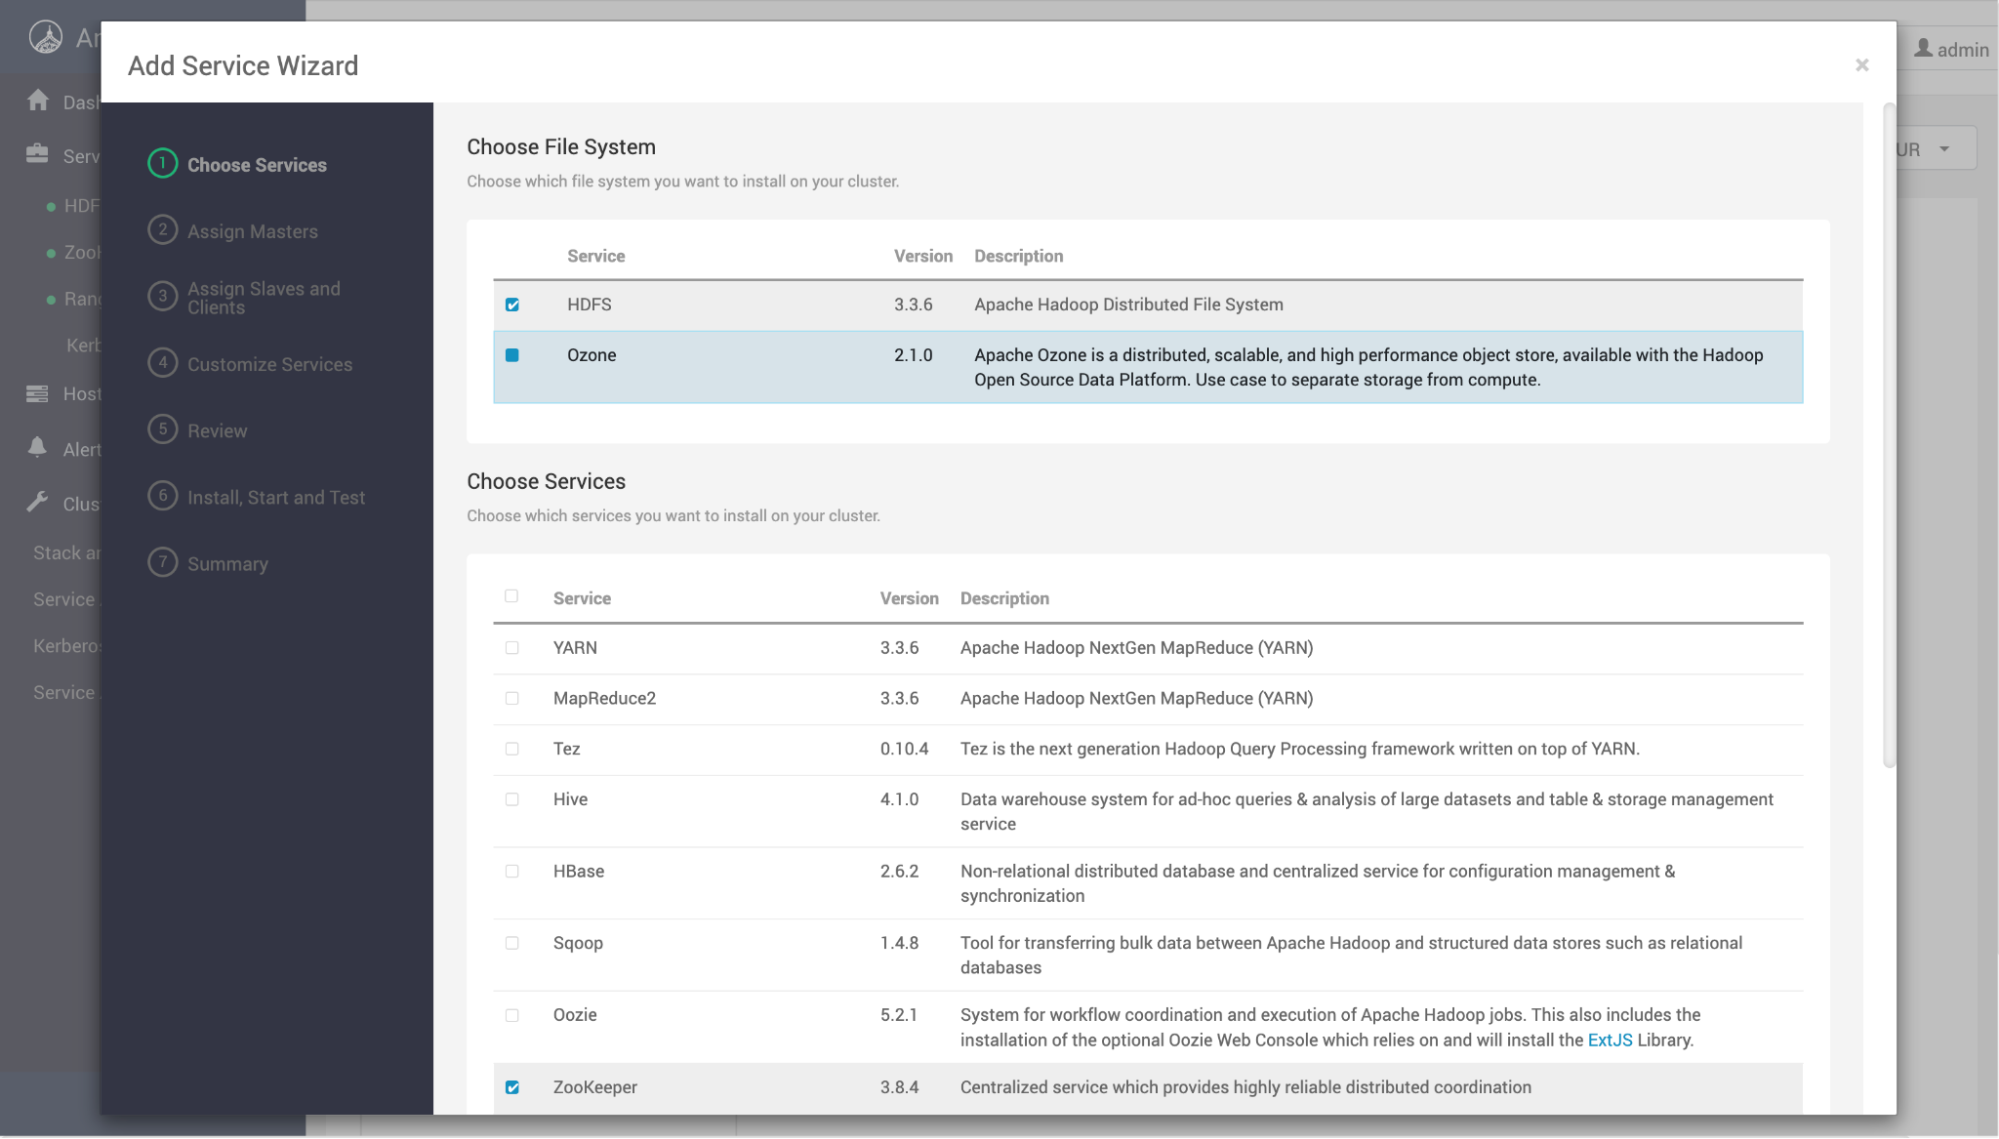
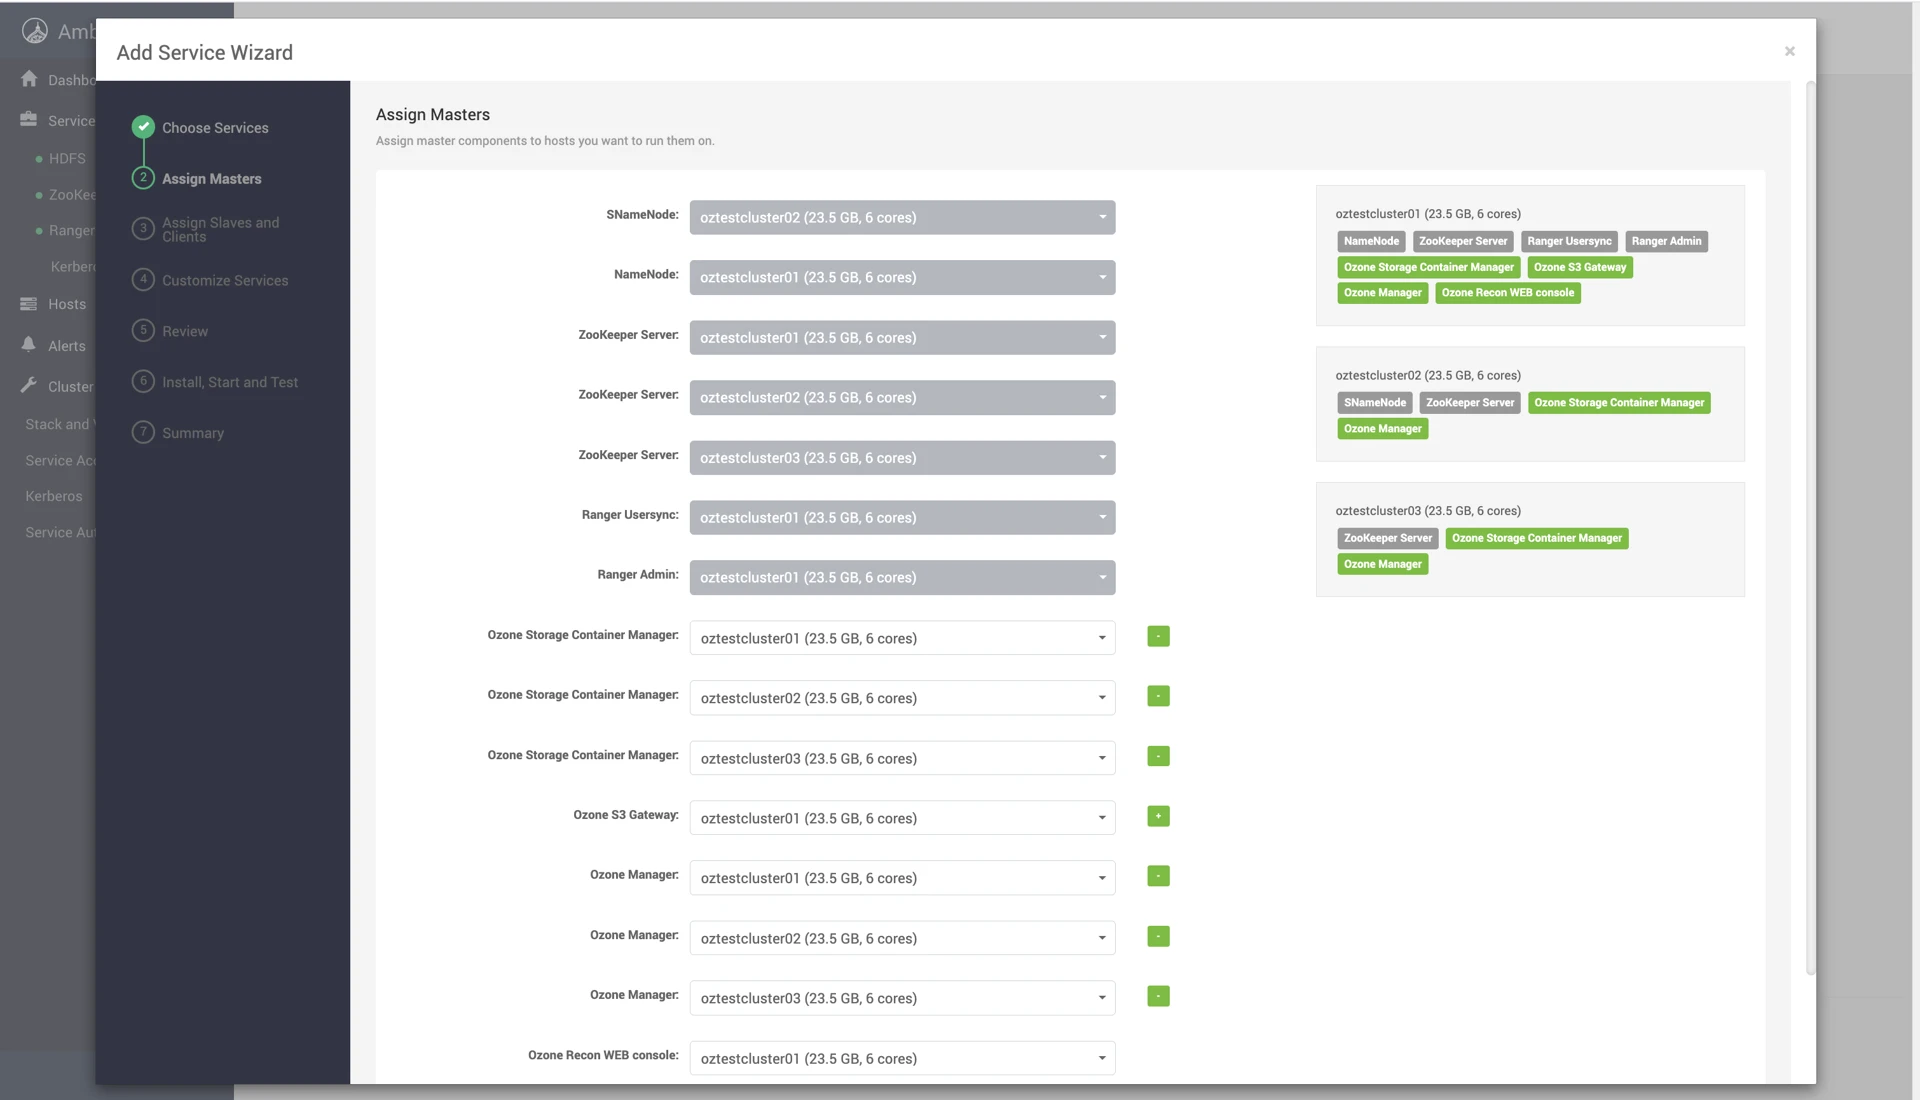
- Assign the following Ozone components to the same nodes where their corresponding OZONE2 components were installed:
- Storage Container Manager (SCM)
- Ozone Manager (OM)
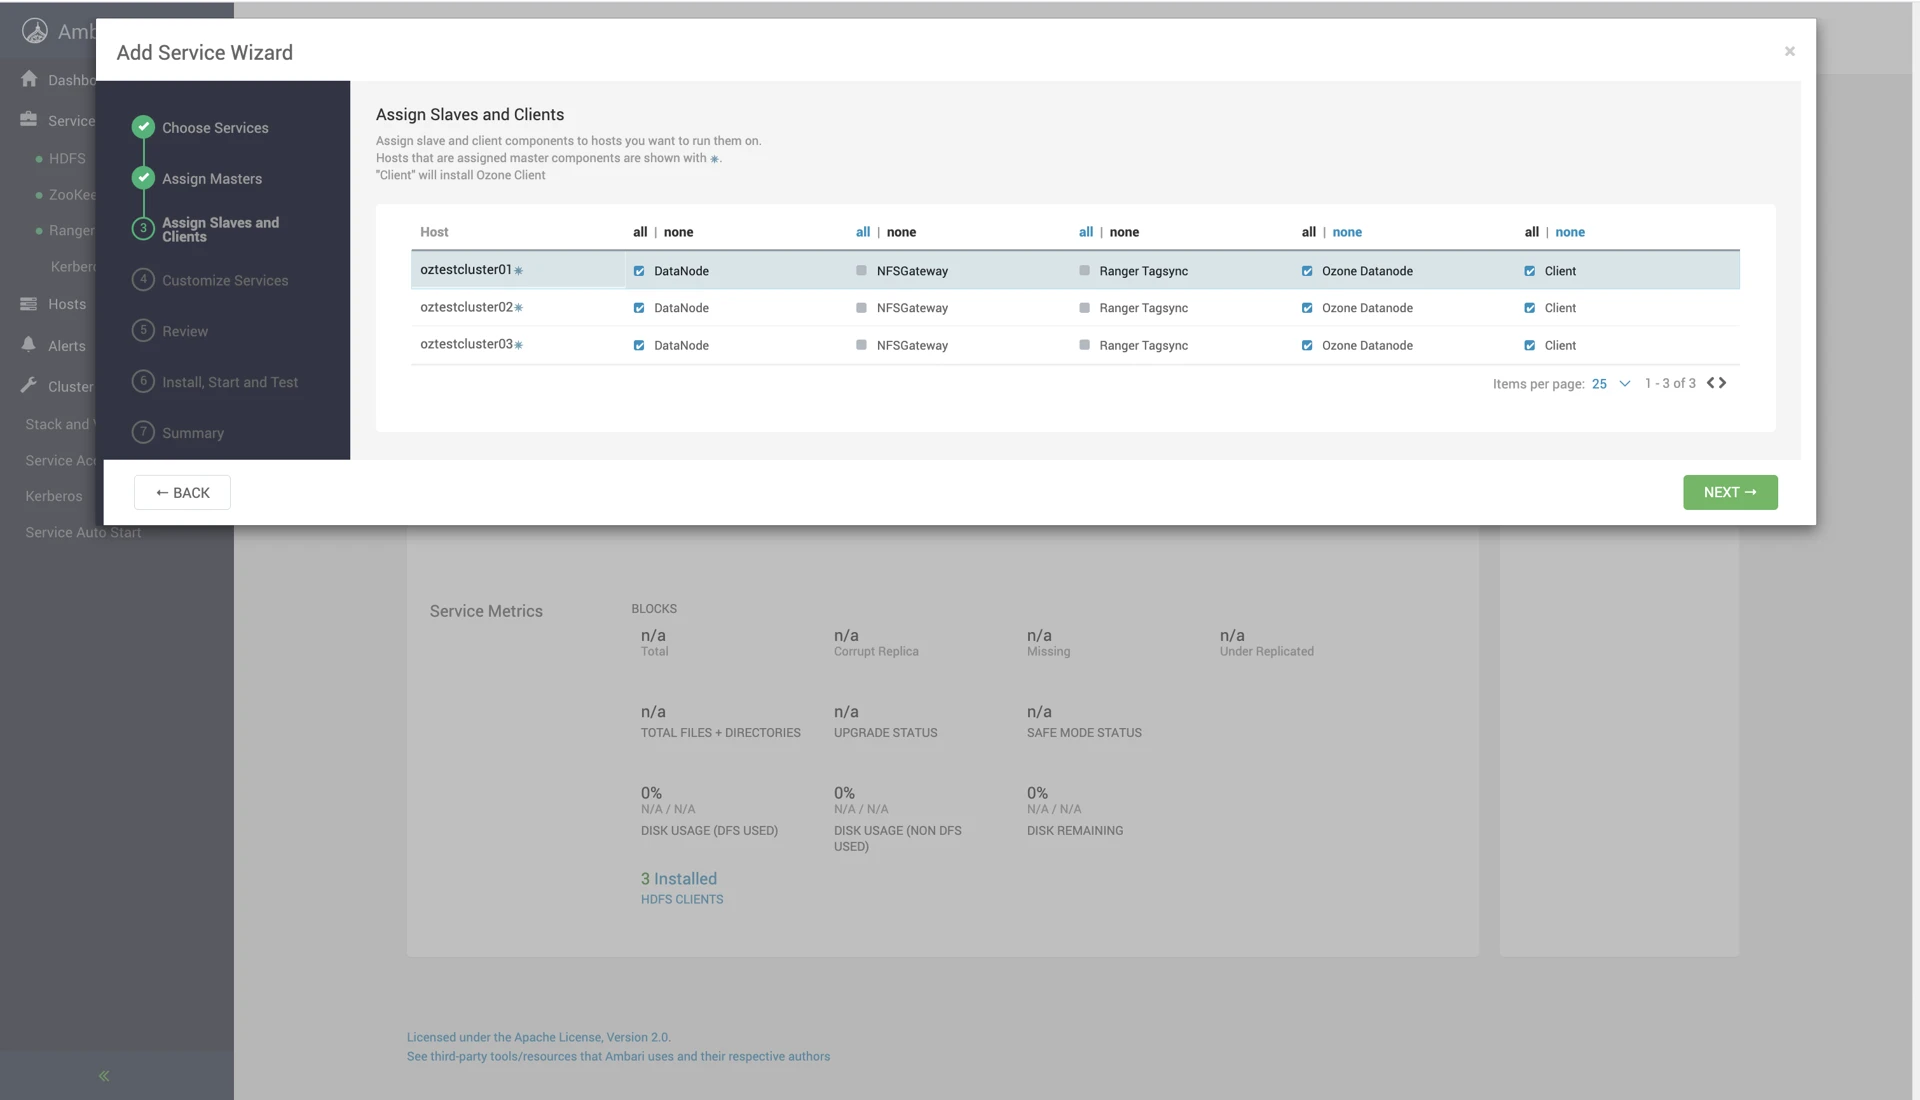
- DataNodes
- Recon UI
- S3 Gateway (S3G)
4. Update Ozone Configuration Settings
Update the OZONE configuration settings to use the existing OZONE2 metadata directories.
- Navigate to OZONE > Configs > Settings and update all metadata directory paths to match the corresponding OZONE2 values.
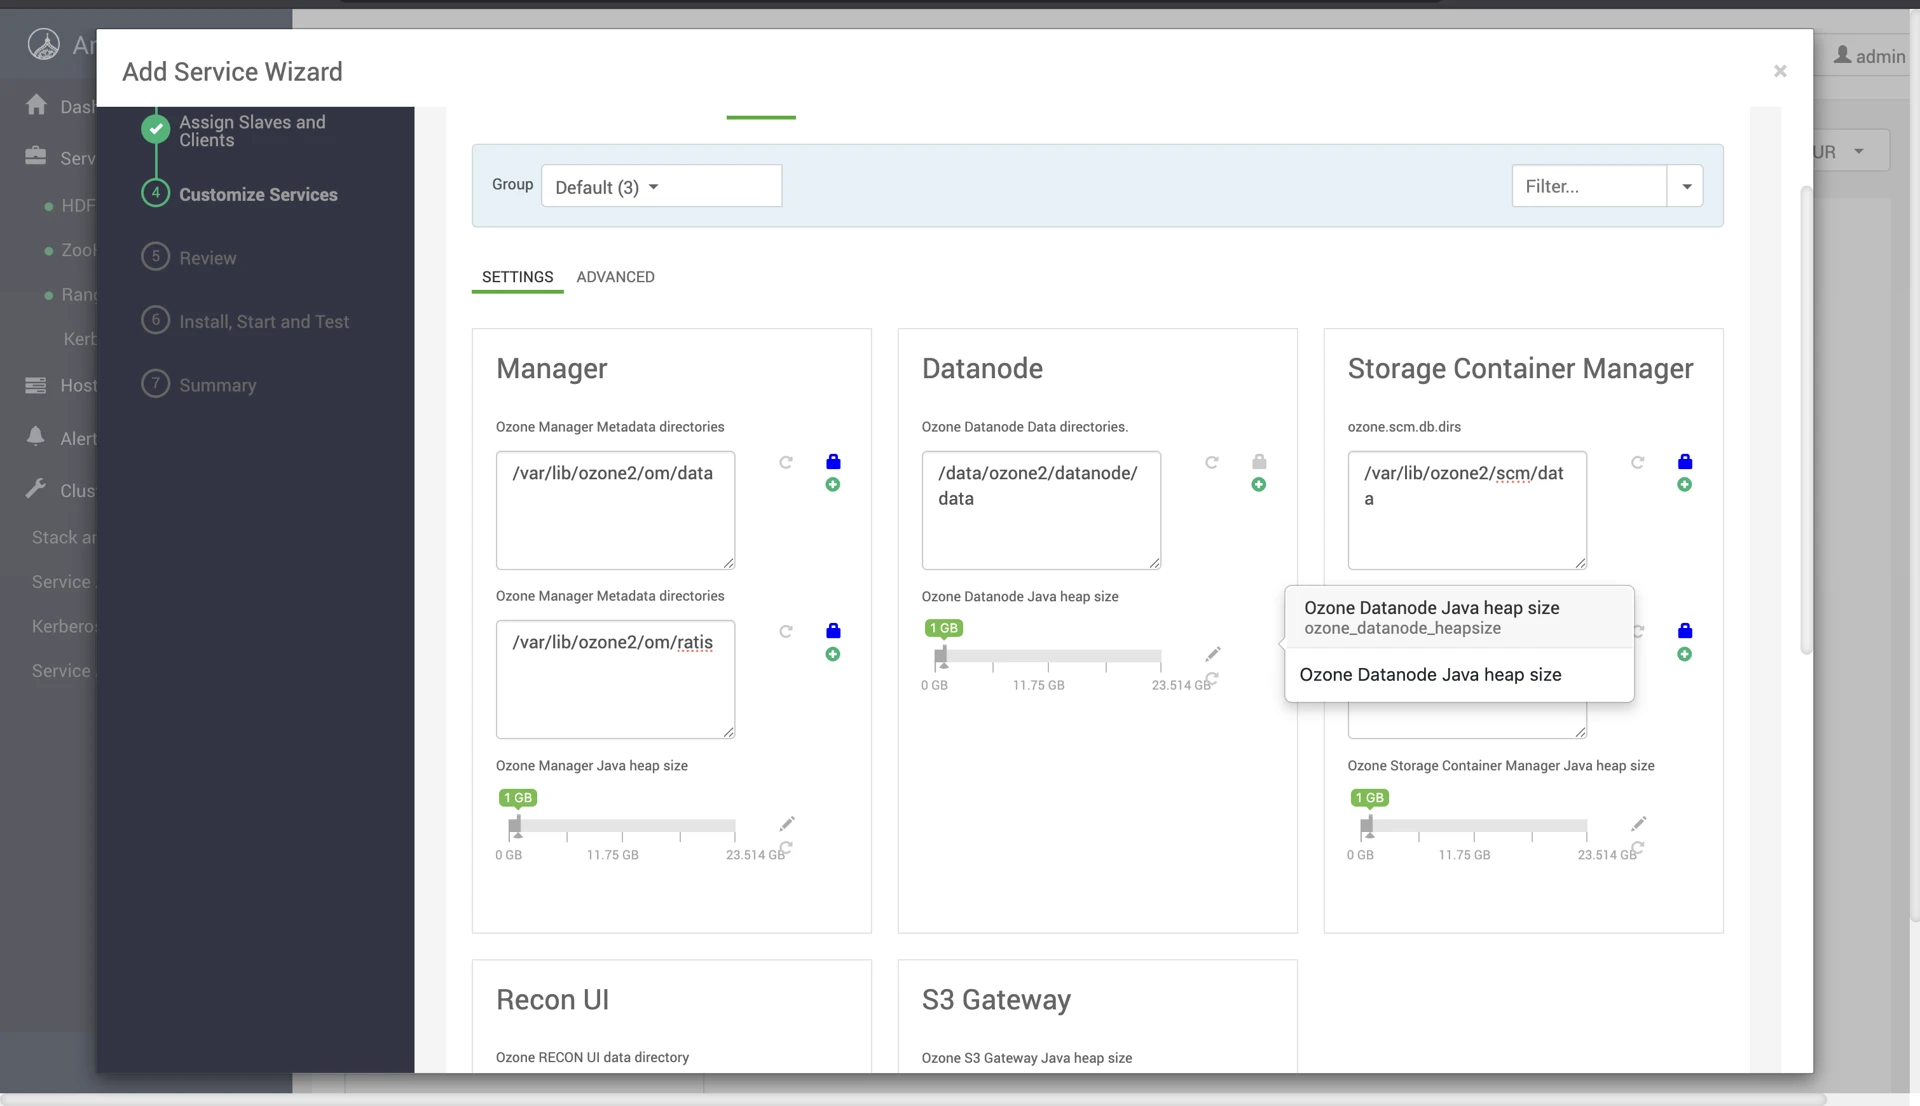
- Navigate to OZONE > Configs > Advanced and update the metadata directory paths to match the corresponding OZONE2 values.
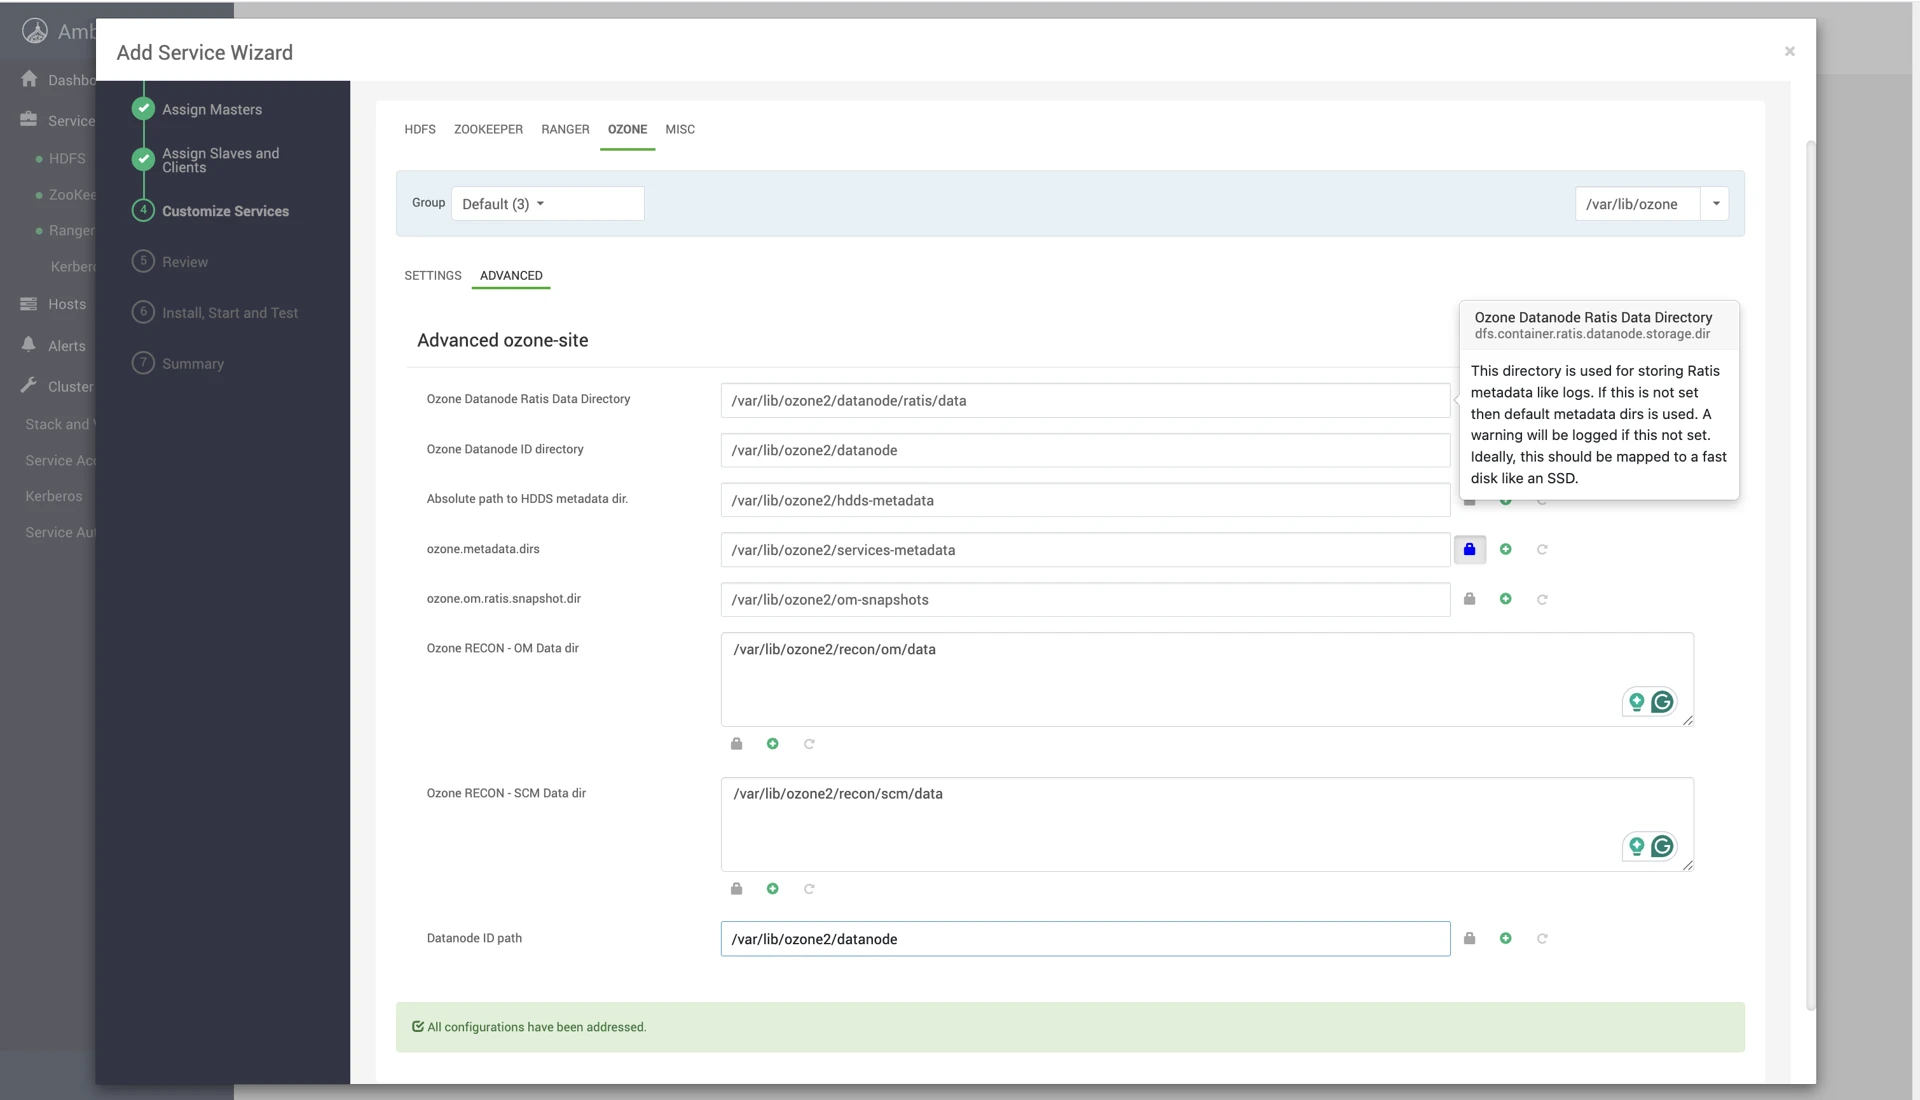
- Navigate to OZONE > Configs > Advanced > Advanced ozone-env and update Ozone Log Dir Prefix to the value used by OZONE2.
- Click Next, and then click Deploy.
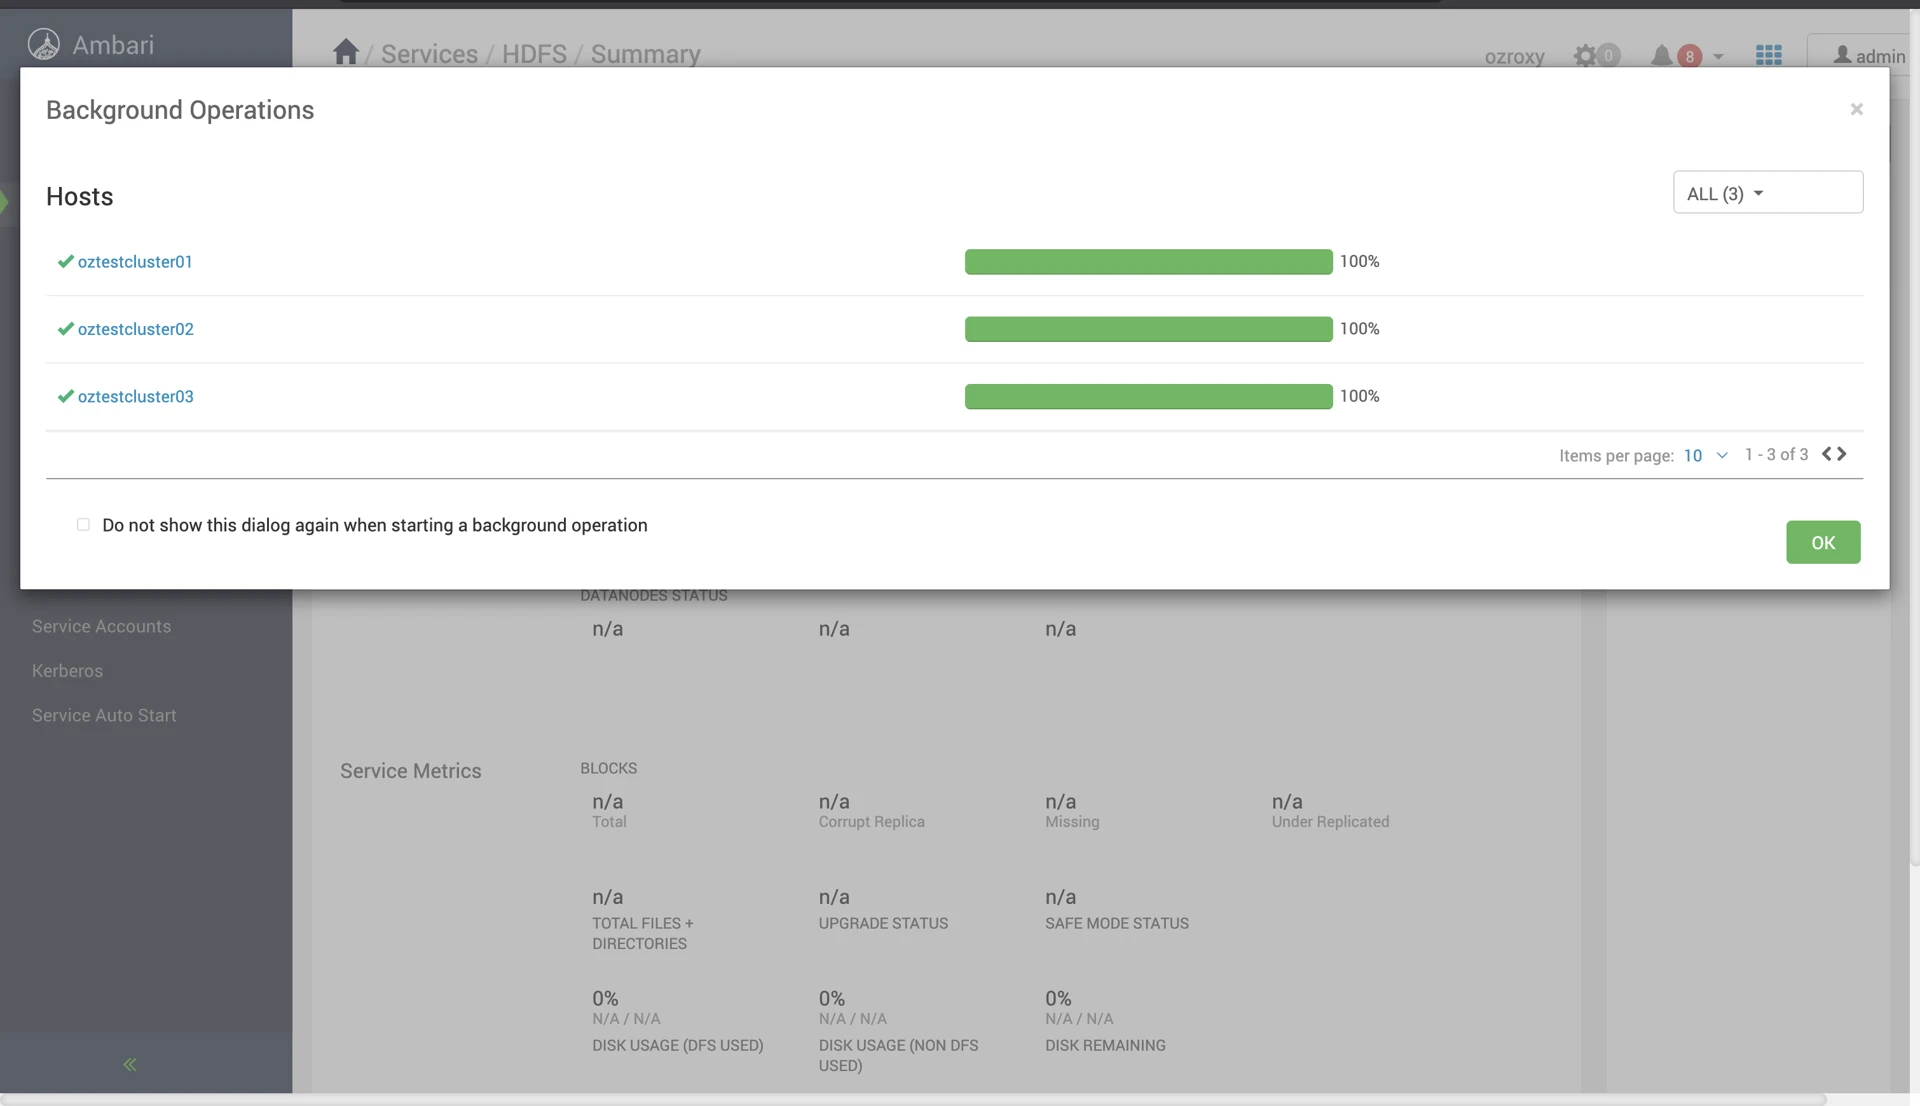
- When the installation progress window appears, click the X icon in the upper-right corner to close it.
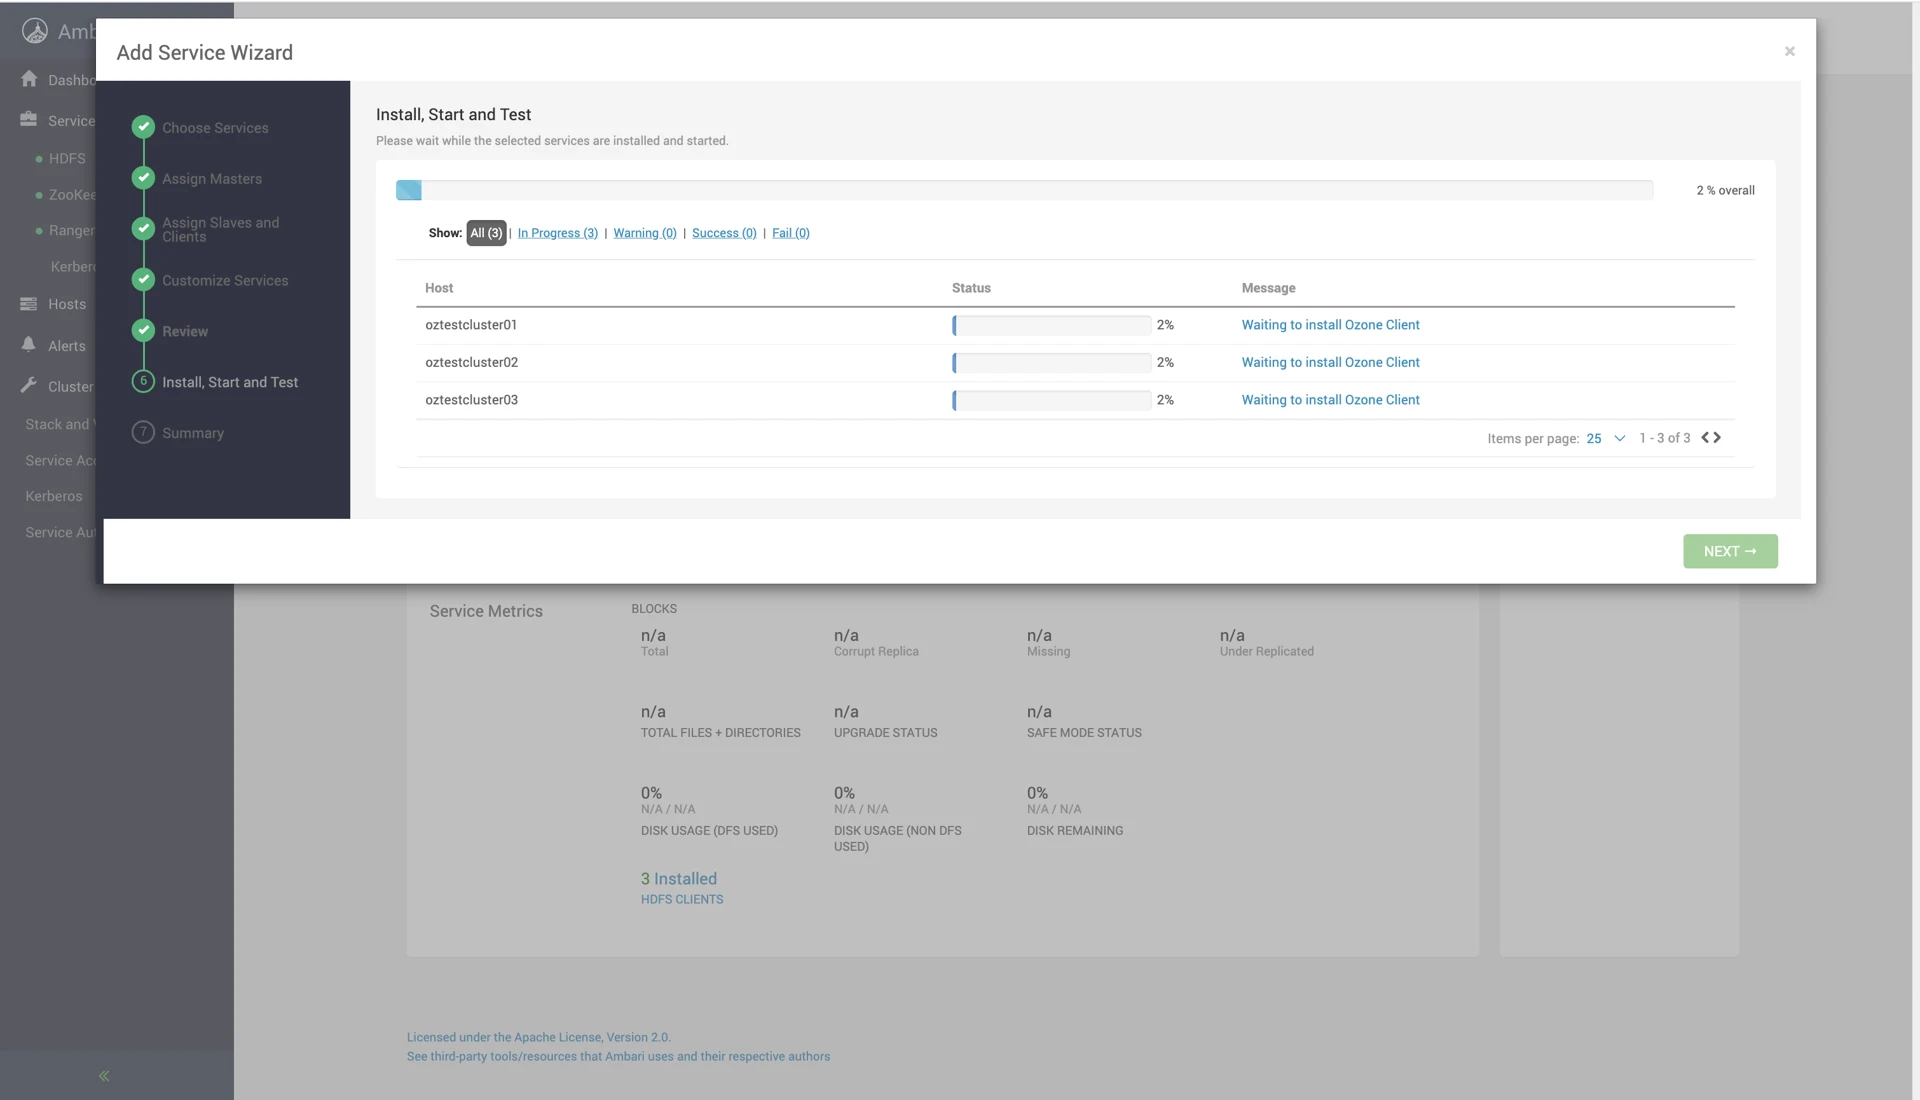
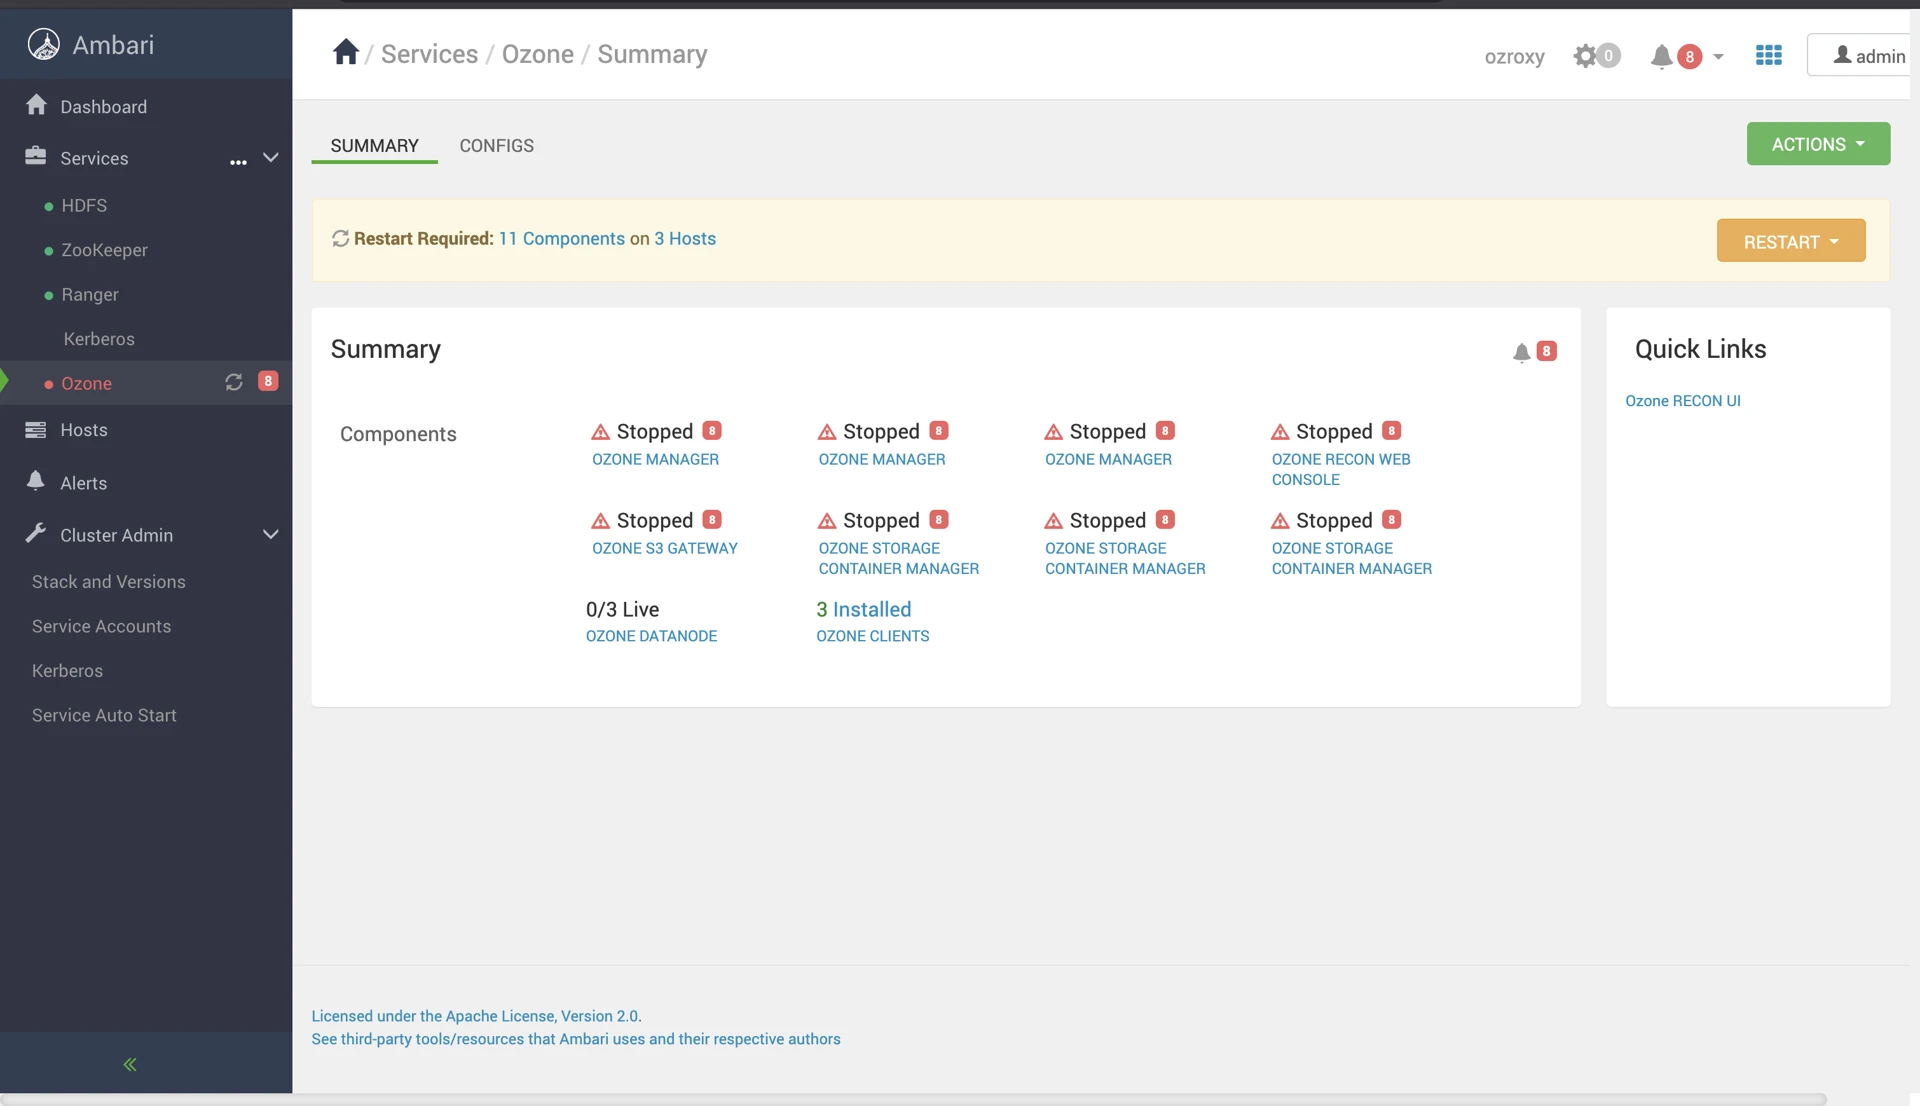
The OZONE service is installed but remains stopped.
5. Restore OZONE2 Configurations to OZONE
Restore the existing OZONE2 configurations to the OZONE service in the Ambari database.
- Connect to the Ambari database.
- Run the following SQL statements:
USE ambari;
UPDATE clusterconfig a
SET
  config_data = COALESCE(
      (
          SELECT b.config_data
          FROM service_conf_bck.configs_prior_patch b
          WHERE b.type_name = REPLACE(a.type_name, 'ozone', 'ozone2')
            AND b.service_name = 'OZONE2'
            AND b.version = (
                SELECT MAX(version)
                FROM service_conf_bck.configs_prior_patch
                WHERE service_name = 'OZONE2'
            )
      ),
      a.config_data
  ),
  config_attributes = COALESCE(
      (
          SELECT b.config_attributes
          FROM service_conf_bck.configs_prior_patch b
          WHERE b.type_name = REPLACE(a.type_name, 'ozone', 'ozone2')
            AND b.service_name = 'OZONE2'
            AND b.version = (
                SELECT MAX(version)
                FROM service_conf_bck.configs_prior_patch
                WHERE service_name = 'OZONE2'
            )
      ),
      a.config_attributes
  )
WHERE a.config_id IN (
    SELECT scm.config_id
    FROM serviceconfigmapping scm
    WHERE scm.service_config_id IN (
        SELECT sc.service_config_id
        FROM serviceconfig sc
        WHERE sc.service_name = 'OZONE'
          AND sc.version = (
              SELECT MAX(version)
              FROM serviceconfig
              WHERE service_name = 'OZONE'
          )
    )
);
- Restart the Ambari Server:
ambari-server restart
Restore the OZONE2 configuration files to the OZONE configuration directory.
Run the following command:
cp -r /tmp/ozone2/conf-bkp/* /etc/ozone/conf/
- Log in to the Ambari UI.
- Navigate to the OZONE service.
- Start the service.
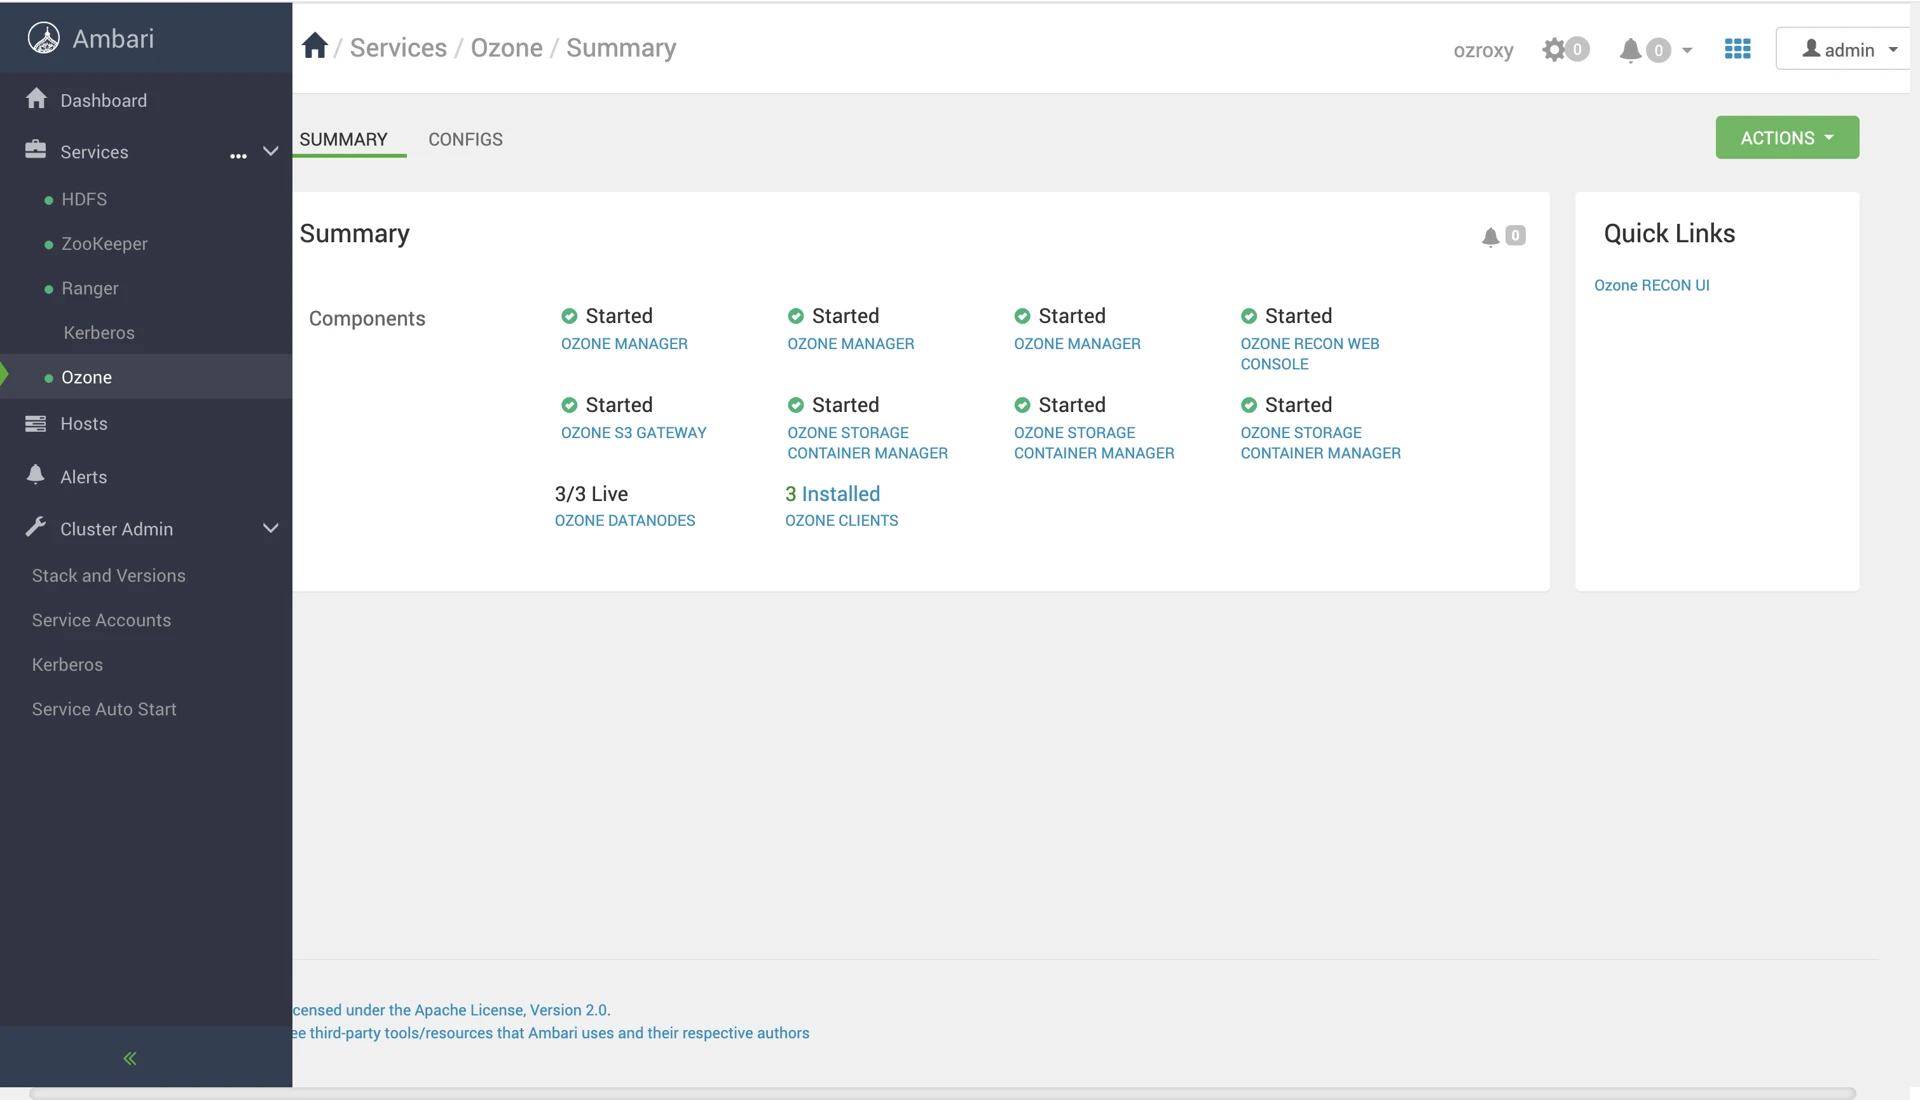
8. Finalize the Ozone Upgrade
Run the following commands to finalize the Ozone upgrade.
8.1 Finalize the SCM Upgrade
- Switch to the hdfs user and run the following command:
su hdfs
/usr/odp/current/ozone-client/bin/ozone --config /etc/ozone/conf/ozone.scm admin scm finalizeupgrade
8.2 Finalize the OM Upgrade
- Switch to the hdfs user and run the following command:
su hdfs
/usr/odp/current/ozone-client/bin/ozone --config /etc/ozone/conf/ozone.om admin om finalizeupgrade -id=omservice
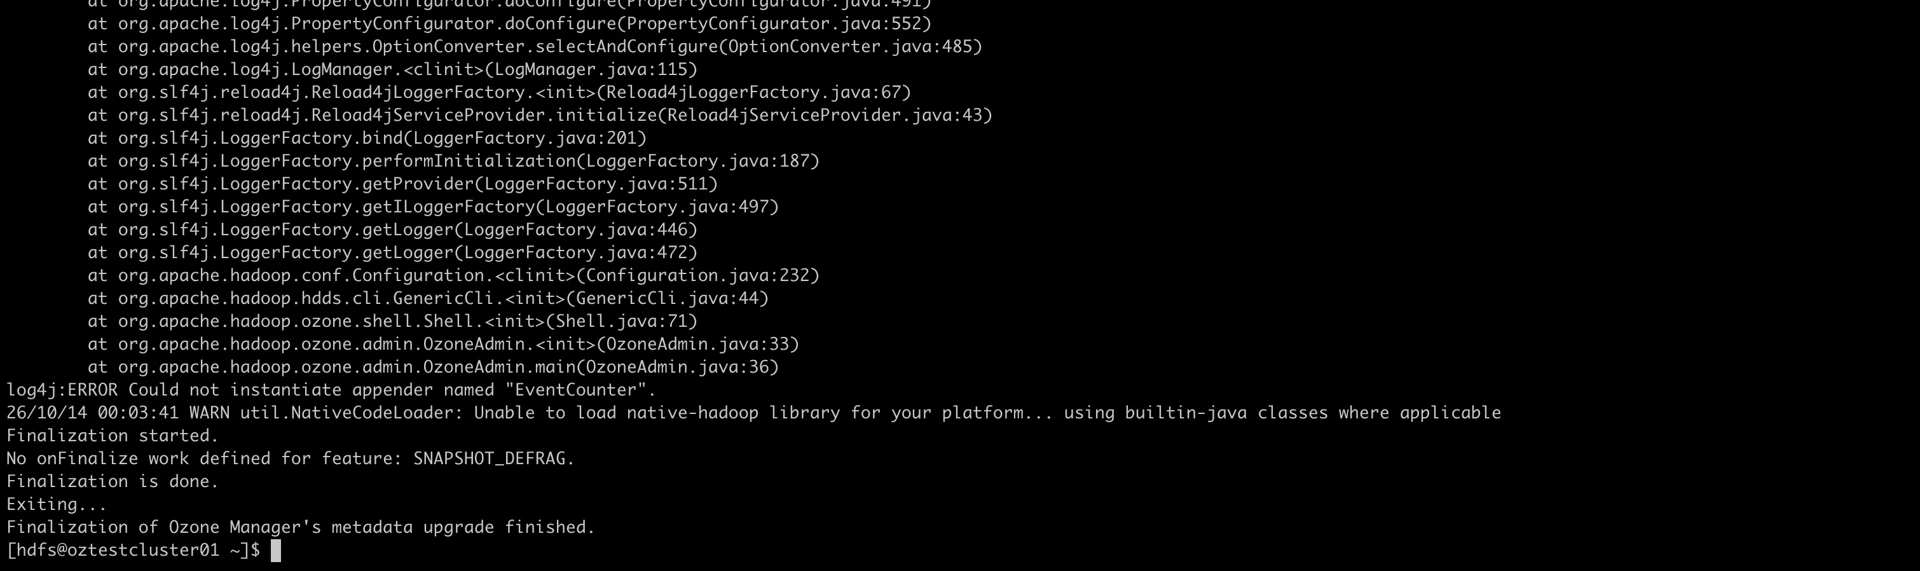
9. Restore Ranger Policies
- Log in to the Ranger UI.
- Download the existing OZONE2 Ranger policies.
- Upload the policies to the new OZONE service definition named <clustername>_ozone.
Replace <clustername> with the name of your cluster.
10. Verify the Ozone Service
After completing the restoration, verify the Ranger configuration and OZONE service status.
10.1 Verify Ranger Service Configuration
- Log in to the Ranger UI.
- Verify that the <clustername>_ozone Ranger service is created.
- Run Test Connection for the service.
- Verify that the connection test completes successfully.
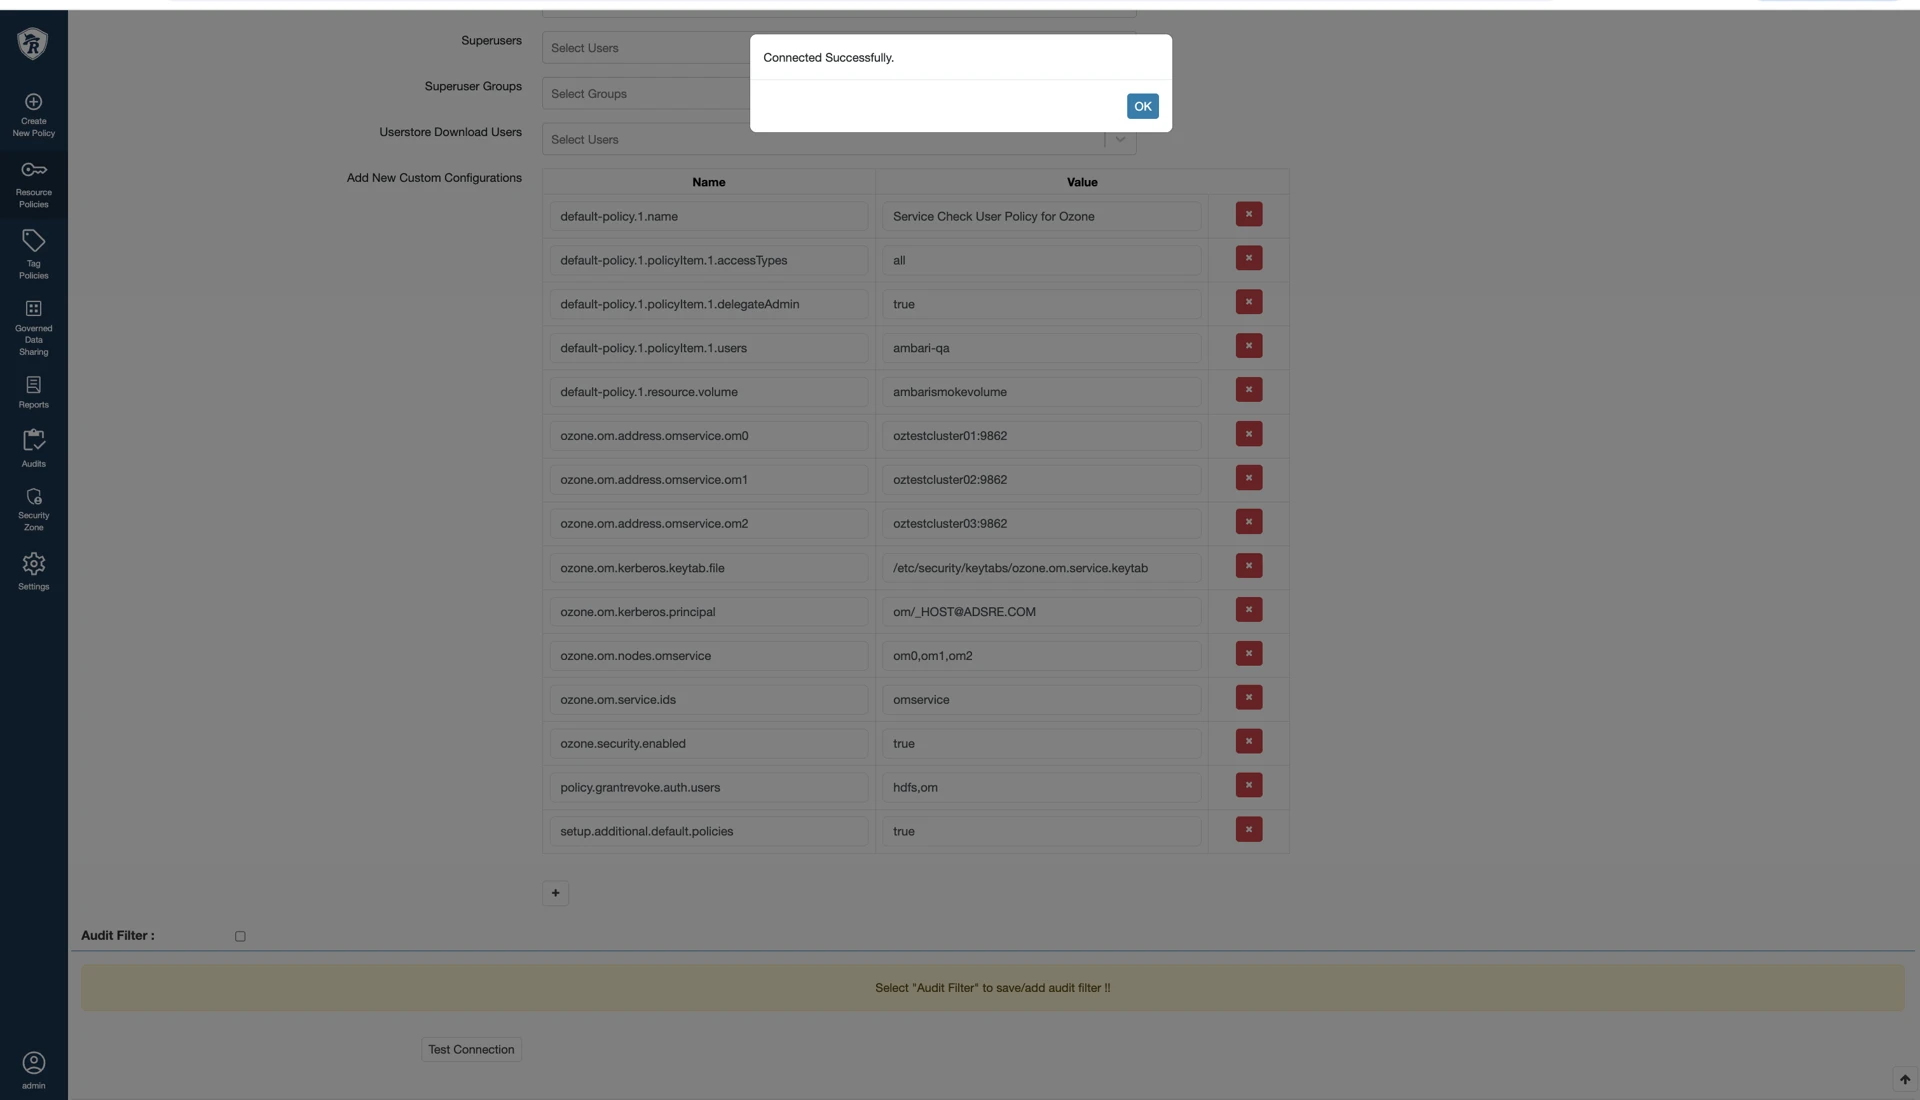
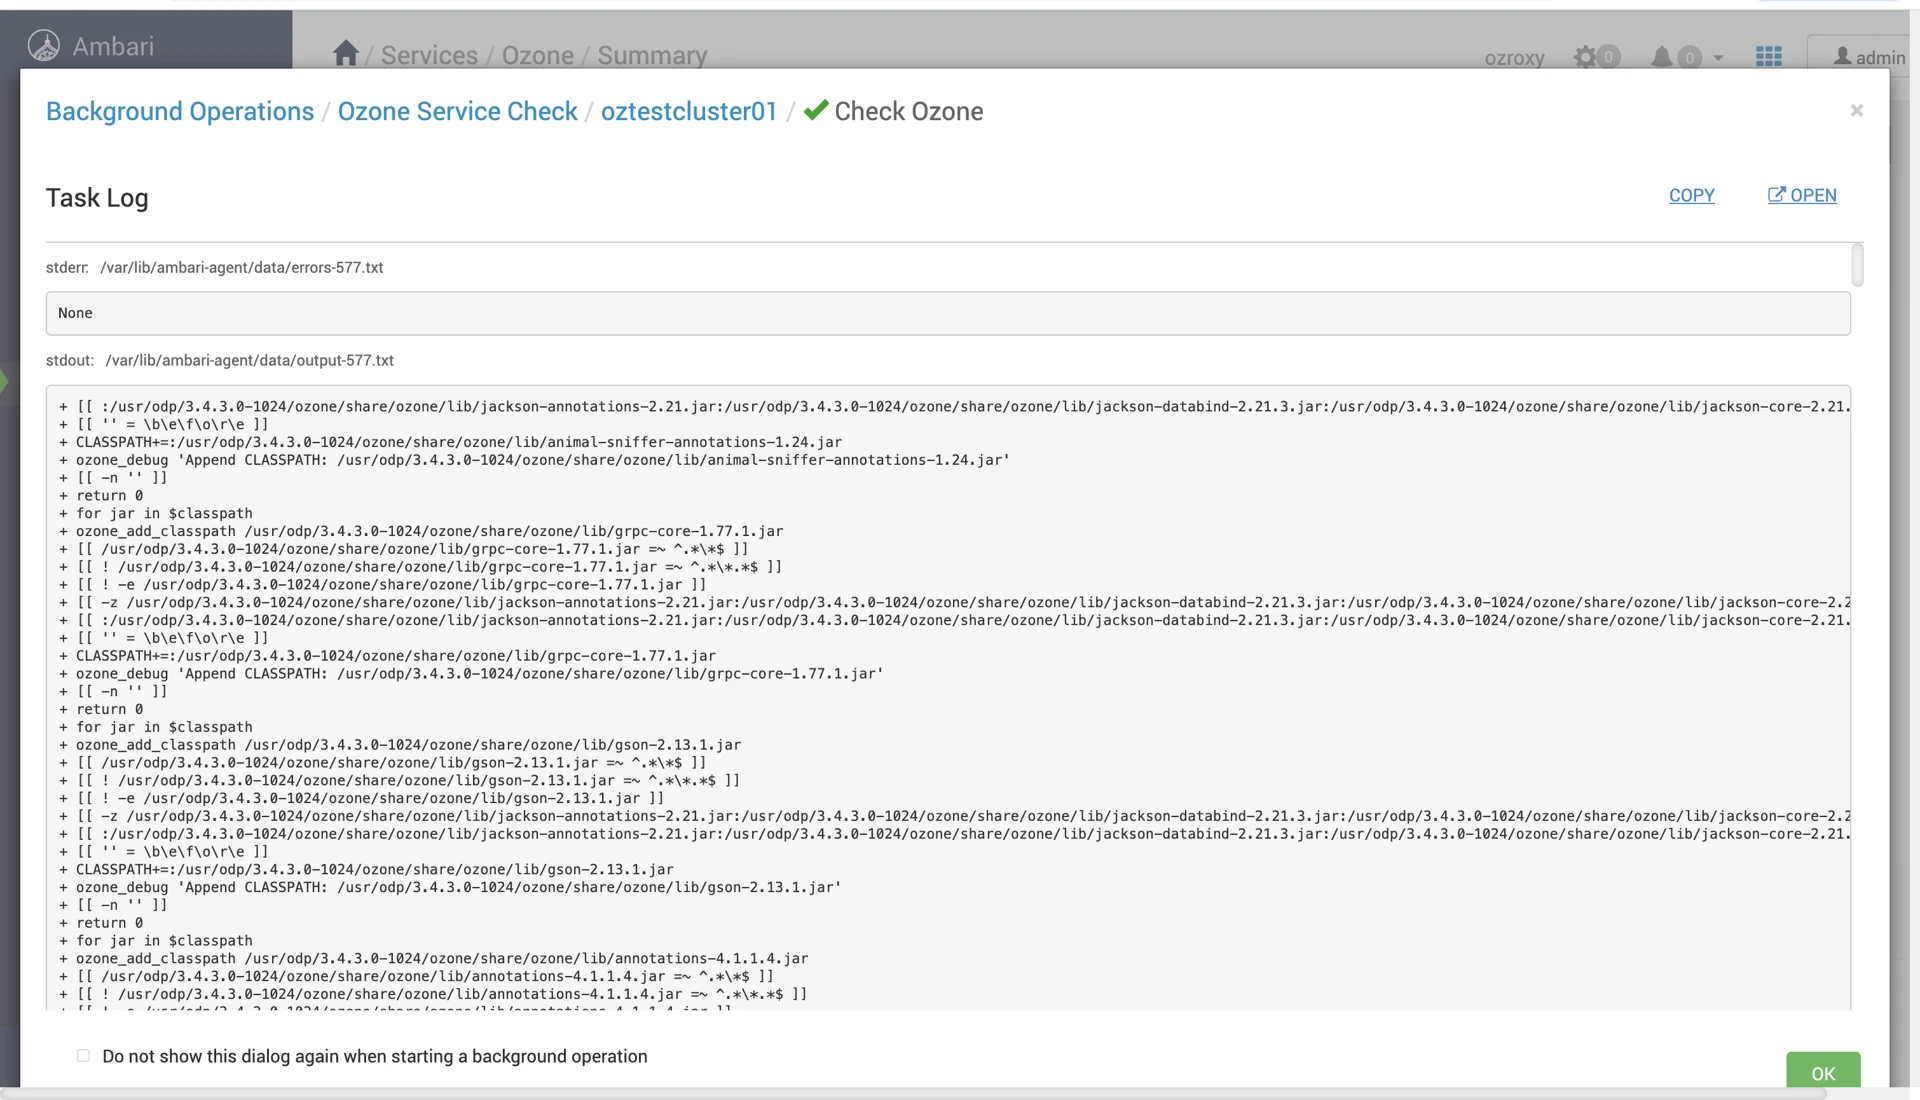
10.2 Run the Ozone Service Check
- Log in to the Ambari UI.
- Navigate to the OZONE service.
- Select Service Actions > Run Service Check.
- Verify that the service check completes successfully.
Have a suggestion?