App Spark
Explanation (Core Concepts)
What is App Spark?
App Spark is the one-click way to deploy and operate Apache Spark on an xDP compute cluster. Instead of hand-assembling a Spark Operator, a scheduler, an event-log store, and a history UI, you install a single, pre-integrated Spark application from the xDP Application Catalog and xDP manages its full lifecycle — install, configure, upgrade, and uninstall. The result is a production-ready, observable, and governed Spark runtime that your jobs can target immediately.
Under the hood, App Spark deploys a Kubernetes-native Spark stack onto your compute cluster's namespace: a Spark Operator that turns each job into a SparkApplication custom resource, a YuniKorn scheduler for resource queuing, a Spark UI proxy for live driver UIs, and an optional Spark History Server for completed-run inspection. The application is packaged as a Helm chart whose values you can review and tune as YAML before they are applied, so every deployment is reproducible and auditable.

Key Concepts
Application Catalog — The registry of installable xDP applications (Spark, Trino, JupyterHub, Airflow, NiFi, AI Studio, Build Pipeline) that deploy onto a compute cluster with managed lifecycle.
Compute Cluster — The target Kubernetes environment (an xCompute dataplane) where Spark is installed and where its jobs run.
Spark Operator — The controller that watches
SparkApplicationresources and launches the driver and executor pods for each submitted job.Spark History Server — An optional plugin that serves a web UI of completed and running Spark applications from event logs, giving you a queryable operational history (Data Lineage) for debugging and tuning.
Shuffle Strategy — A plugin that pre-configures one or more shuffle storage backends at install time, so each job can select how its intermediate shuffle data is stored during execution.
Gluten-Velox Accelerator — An optional native execution engine that offloads Spark SQL operators to a vectorized Velox C++ runtime for faster analytical and ETL workloads.
xObserve Connector — An optional sidecar (
xo-spark-connector) that streams Spark runtime metrics and events into xObserve for centralized observability.Helm Chart Version — The packaged version of the Spark deployment you install; it is selected per install/upgrade against your cluster's release version.
Capabilities
App Spark is organized as a guided five-step install wizard, where each step maps to a distinct operational concern.
Automated provisioning (provisioning) — Deploy a fully configured Spark stack (operator, scheduler, UI proxy) to any compute cluster without manual Helm work or configuration drift.
History & event logging (troubleshooting) — Enable the Spark History Server against an S3, GCS, ADLS, or HDFS data store, with event-log rolling to keep long-running jobs inspectable.
Shuffle storage management (configuration) — Pre-enable Kubernetes-native shuffle backends (emptyDir, hostPath, PVC, NFS, Vast, CSI) or an external Apache Celeborn service. You may enable several backends and mark one as the default; jobs pick from the enabled set at submission time.
SQL acceleration (configuration) — Optionally route Spark SQL execution through the Gluten-Velox native engine for vectorized, columnar throughput. The Gluten-Velox bundle JAR must be present in the Spark image or jars path before the accelerator does anything.
Integrated observability (monitoring) — Attach the
xo-spark-connectorso job metrics and events flow into xObserve. xObserve must already be installed on the linked xCentral cluster, otherwise the toggle stays disabled.Configuration as code (configuration) — Review and edit the generated Helm values as YAML (or via the Form view), validate before applying, and version-control the result.
Tutorial (Getting Started)
This tutorial walks you through installing — or editing — the Apache Spark application on a compute cluster using the five-step wizard.
Prerequisites
You hold an xDP role with privileges to install and configure applications.
A compute cluster is selected in the cluster switcher and its BASE platform is running, so the Application Catalog is populated.
For the Spark History Server: a data store of type S3, GCS, ADLS, or HADOOP/HDFS is already registered on the cluster, and you know the event-log path (for example
s3a://my-bucket/spark-events/orabfss://container@account.dfs.core.windows.net/spark-history).For xObserve integration: xObserve is installed on the linked xCentral cluster.
For Gluten-Velox: the Gluten-Velox bundle JAR is baked into the Spark container image or its jars path.
Supported Spark versions:
3.0.xthrough4.0.x(any>= 3.0.0). Jobs run against a bundled base image — a pre-built container packaging a specific Spark version. Acceldata ships tested images (for example3.3.xdefaults); other>= 3.0.0versions can be used with a custom image.
Note: If the Apps page shows "No Clusters Available," create or select a compute cluster first — applications can only be installed onto an existing cluster.
Your First Installation
Follow these steps to stand up Spark with the History Server enabled.
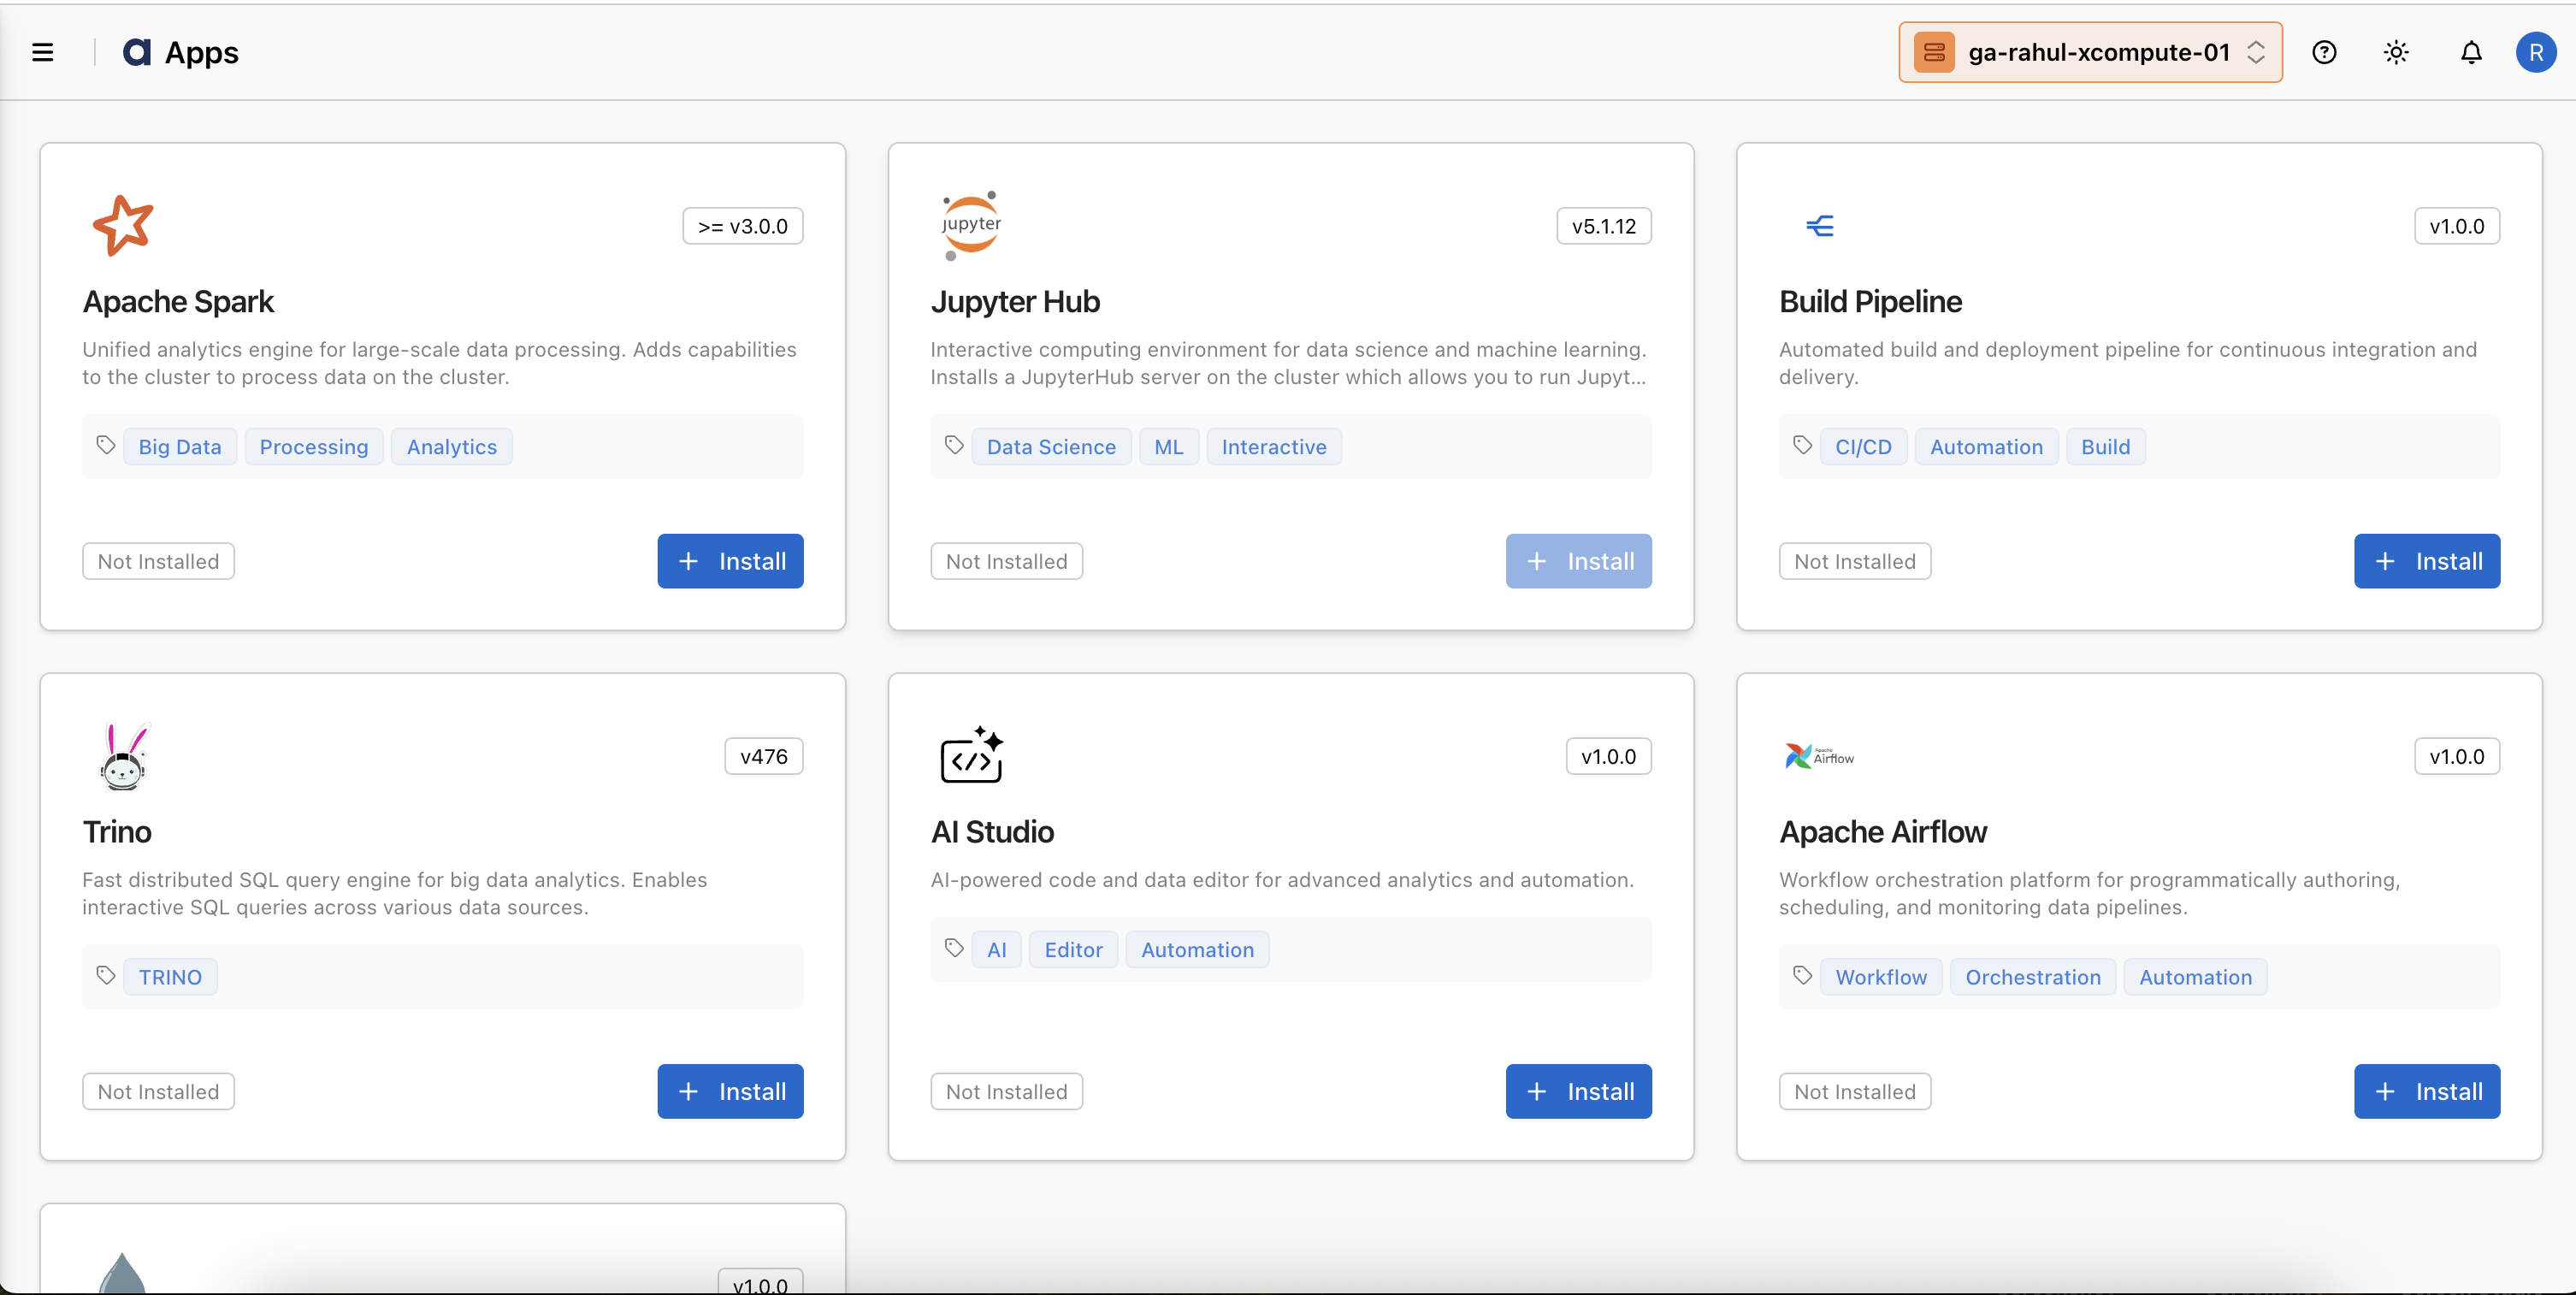
From the sidebar, open Apps to view the Application Catalog for your selected cluster. Locate the Apache Spark card. If Spark is not yet installed, click Install; if it is already installed, click Edit to change its configuration.
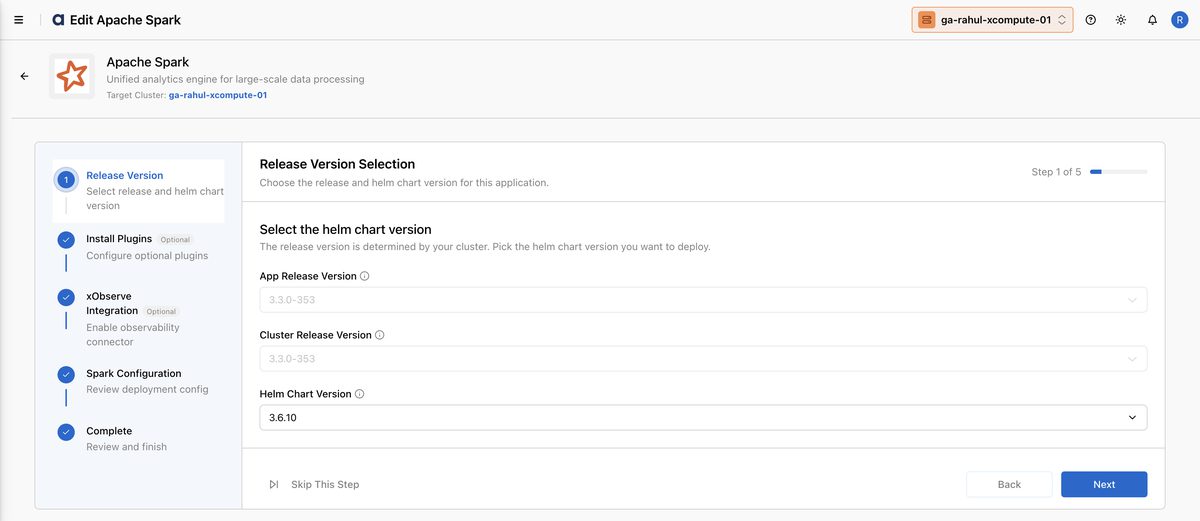
On the Release Version step, confirm the App Release Version and Cluster Release Version (both fixed by your cluster), then choose a Helm Chart Version to deploy. Click Next.
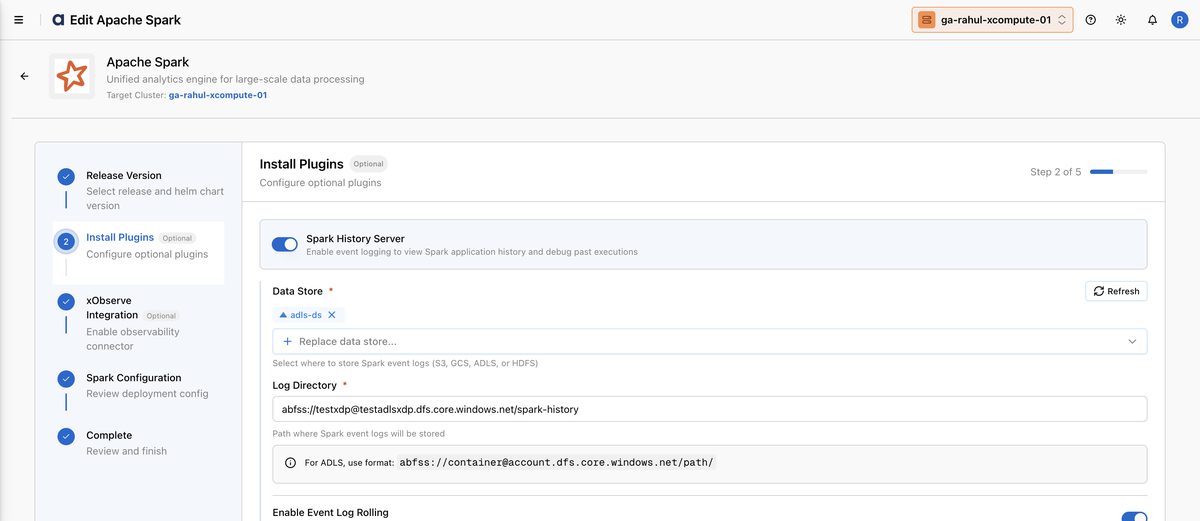
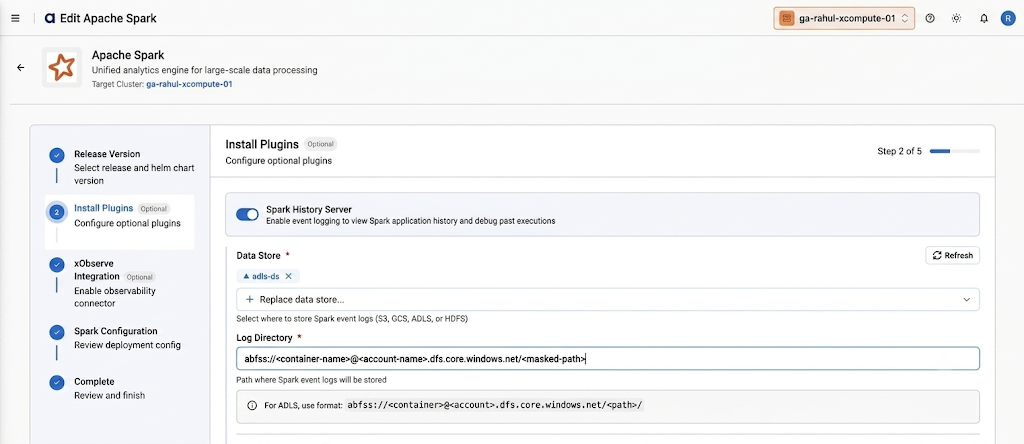
On the Install Plugins step, turn on Spark History Server. Select a Data Store (S3, GCS, ADLS, or HDFS), set the Log Directory to your event-log path, and leave Enable Event Log Rolling on with a Max File Size per Roll (default
128m). Click Next.
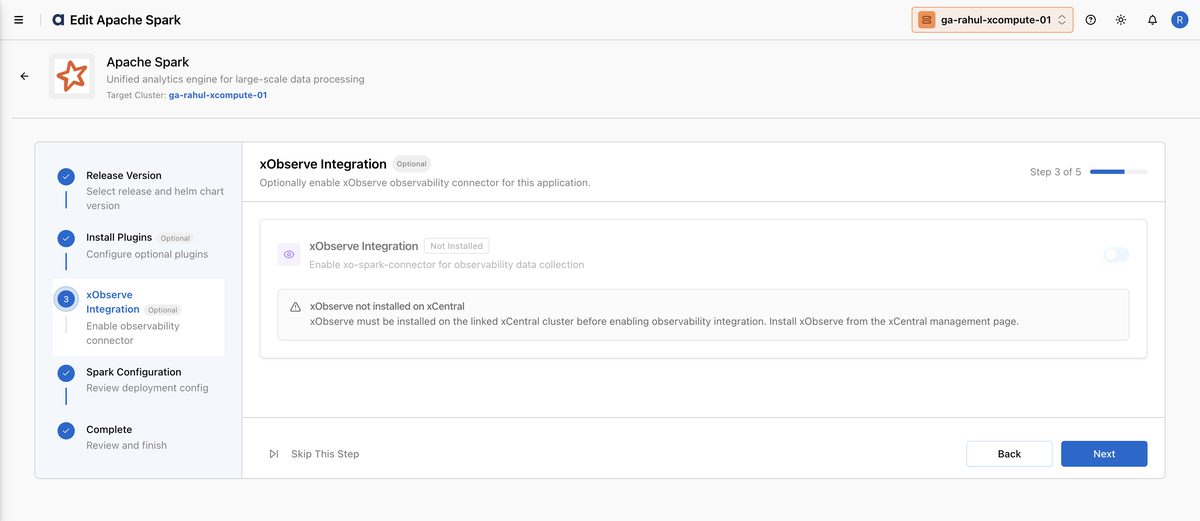
On the xObserve Integration step, enable the observability connector if xObserve is available on your xCentral cluster, then click Next. If xObserve is not installed, the toggle is disabled and you can simply continue.
On the Spark Configuration step, review the generated Helm values in the YAML editor (or switch to the Form view). Click Validate to check the syntax — validation must pass before you can proceed. Click Next.
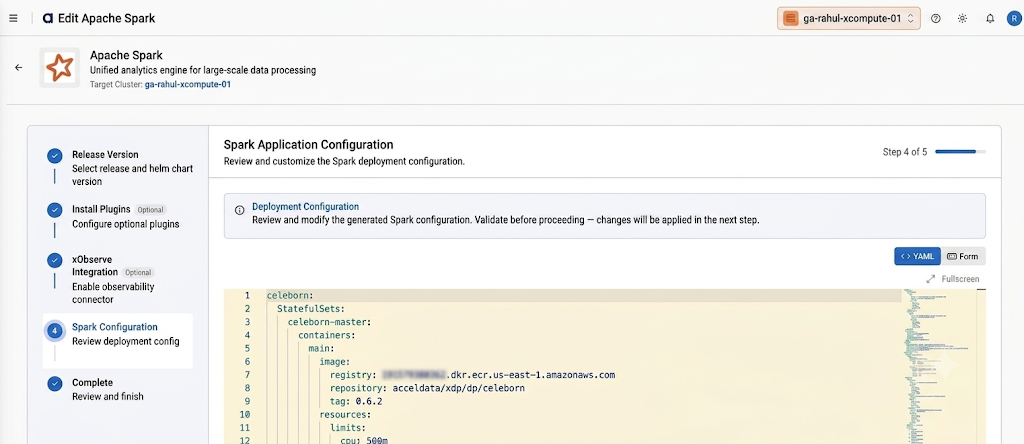
On the Complete step, xDP applies your configuration and starts the Helm install or upgrade. When it finishes, return to Apps, where the Apache Spark card shows the updated status.
Example: Your team needs to debug a failed nightly ETL job. Because you enabled the Spark History Server against your ADLS data store during install, the completed run's logs and execution plan are available in the History UI — letting you pinpoint the failing stage without re-running the job.
How-to Guides
These procedures assume Spark is already installed on your cluster.
Enable the Spark History Server after installation
If you installed Spark without the History Server, add it at any time.
Open Apps, find the Apache Spark card, and click Edit.
Click Next to reach the Install Plugins step.
Toggle Spark History Server on, select a Data Store, and enter the Log Directory in that store's URI scheme (
s3a://…,gs://…,abfss://…, orhdfs:///…).Optionally adjust Enable Event Log Rolling and Max File Size per Roll.
Continue through xObserve Integration and Spark Configuration, then Complete to apply.
Verification: After the upgrade settles, the History Server service reports healthy and its UI lists Spark applications.
Tip: Match the log directory scheme to the data store type — s3a:// for S3, gs:// for GCS, abfss:// for ADLS, and hdfs:/// or / for HDFS/ODP. The wizard validates the prefix and rejects mismatches.
Configure a shuffle strategy
Pre-stage one or more shuffle backends so jobs can choose how shuffle data is handled.
In Edit, go to the Install Plugins step and toggle Shuffle Strategy on.
Under Local Disk Shuffle (Kubernetes Native), enable any of: emptyDir, hostPath, PVC, NFS, Vast Storage, or CSI Volume, filling in the required fields (host path, PVC name, NFS server/path, etc.).
For an external service, enable Apache Celeborn under External Shuffle Service; optionally attach a Local/Hadoop/S3 data store, or leave it empty for worker-local storage.
Mark one enabled backend as the default using the check icon.
Continue to Complete to apply.
Warning: CSI volume shuffle requires ODP Spark 3.5+ or Apache Spark 4.2+ (SPARK-47010). Enabling at least one backend is required once Shuffle Strategy is on.
Accelerate Spark SQL with Gluten-Velox
Offload SQL execution to the native Velox engine for analytical workloads.
Confirm the Gluten-Velox bundle JAR is present in your Spark image or jars path.
In Edit → Install Plugins, toggle Gluten-Velox on.
Continue to Complete to apply.
Verification: New Spark SQL jobs run through the vectorized engine; compare stage times against a non-accelerated run to confirm the gain.
Note: Gluten-Velox is governed by a feature flag and may not appear in every environment. If you don't see the toggle, the accelerator is not enabled for your tenant.
Customize Spark properties via YAML
Override default Helm values for advanced control.
In Edit, advance to the Spark Configuration step.
Edit the YAML directly — adjust resource requests/limits, node selectors, replicas, or Spark default properties.
Replace any
TO_BE_UPDATEDplaceholders; the validator flags them as warnings you can fill in or skip.Click Validate, then Next and Complete to apply.
Verification: The configuration applies and subsequent deployments reflect your values. Use Reset to revert to the generated config or Copy to save it externally.
Upgrade the Spark application
Move Spark to a newer packaged version.
From the Apache Spark card, open Edit (an upgrade is available when a newer chart version exists for your cluster's release).
On the Release Version step, select a newer Helm Chart Version.
Step through the remaining screens — your existing plugins and configuration are preserved — and Complete to run the Helm upgrade.
Verification: The card shows the new version and the Spark services return to healthy.
Reference
Configuration options
Optional plugins configured during the Spark Install Plugins step.
Parameter | Description | Default |
|---|---|---|
| Serves a web UI for completed/running Spark applications from event logs stored in a selected data store. Requires a data store and log directory. | Disabled |
| Splits event logs into multiple files (sized by Max File Size per Roll) for better History Server performance on long-running jobs. | Enabled ( |
| Pre-enables one or more shuffle storage backends; jobs select one at submission time. At least one backend must be enabled. | Disabled |
| Routes Spark SQL execution through the Velox native C++ engine for vectorized performance. Requires the bundle JAR in the image. | Disabled (feature-flagged) |
| Adds the | Auto (on when xObserve is available) |
Shuffle strategy backends
Backend | Type | Key inputs | Notes |
|---|---|---|---|
| Local disk | — | Temporary pod-local storage at |
| Local disk | Host path | Requires write permissions on the node path. |
| Local disk | PVC name | Durable storage via a PersistentVolumeClaim. |
| Local disk | NFS server, NFS path | Shared network file system. |
| Local disk | Vast storage path | High-performance Vast Data storage. |
| Local disk | CSI driver name, share name, secret name | Requires ODP Spark 3.5+ / Apache Spark 4.2+ (SPARK-47010). |
| External service | Optional Local/Hadoop/S3 data store | Installs Celeborn master + worker for autoscaling and resilience. |
Supported Spark versions
Item | Value |
|---|---|
Supported range |
|
Base image | Pre-built container packaging a specific Spark version; Acceldata ships tested images and supports custom images |
Version selection | Helm chart version chosen per install/upgrade against the cluster's release version |
Installed components
The Spark application deploys these services into the cluster namespace.
Service | Role |
|---|---|
| Watches |
| Resource queuing and gang scheduling. |
| Web access to live Spark driver UIs. |
| (Optional) UI for completed/running applications from event logs. |
| (Optional) Streams metrics/events to xObserve. |
Best Practices
Tip: Enable the Spark History Server in every environment. The debugging and tuning insight from completed-run event logs almost always outweighs the modest storage and compute cost.
Pin the data store scheme to the store type. Use
s3a://,gs://,abfss://, orhdfs:///to match S3, GCS, ADLS, and HDFS respectively — the wizard rejects mismatched prefixes.Pre-stage shuffle backends deliberately. Enable only the backends your jobs need and set a sensible default, since each job picks from the enabled set at submission time.
Validate YAML before applying. Always run Validate on the Spark Configuration step and resolve
TO_BE_UPDATEDplaceholders so the Helm apply doesn't deploy incomplete values.Manage production config as code. Use the YAML view, save the values in version control, and reuse them to reproduce environments and track drift.
Confirm accelerator prerequisites first. Only enable Gluten-Velox after the bundle JAR is in the Spark image, and verify CSI shuffle against the required Spark version (3.5+/4.2+).
Right-size before and after. Check that the cluster has adequate CPU, memory, and storage before installing, then monitor utilization to tune resource requests and avoid contention.