The GCS Data Store connects xDP to a Google Cloud Storage bucket, giving Spark jobs, pipelines, and other workloads a governed, reusable path to your GCS data—without hardcoding credentials in each job configuration.
Key Concepts
GCS Data Store — A registered GCS connection in xDP, scoped to a specific Compute Cluster so development and production workloads stay isolated.
Bucket Name — The GCS bucket your data store points to. xDP uses this as the root of all read and write operations for workloads referencing this data store.
GCP Project ID — The Google Cloud project that owns the bucket. Required when using HMAC Key authentication.
Authentication Type — xDP supports two authentication methods:
Service Account Key — A JSON key file downloaded from a GCP service account. Recommended for most production use cases; supports fine-grained IAM permissions.
HMAC Key — An access key and secret key pair generated in GCP, functionally similar to AWS Access Keys. Suitable when the other methods are not available.
Capabilities
Centralized Connection Management — Register GCS buckets once and reuse them across Spark jobs, pipelines, and applications running on the Compute Cluster.
Flexible Authentication — Choose from two GCP authentication methods — Service Account Key or HMAC Key — to match your infrastructure and security posture.
Cluster-Scoped Access — Data stores are bound to a specific Compute Cluster, enforcing workload isolation between environments.
Lifecycle Management — Edit credentials, update the bucket, or delete the data store at any time without modifying downstream jobs.
Tutorial: Create Your First GCS Data Store
This tutorial walks through the Create Data Store wizard to register a GCS bucket.
Prerequisites
Before you begin, ensure you have:
A running Compute Cluster in xDP with Running status.
A GCS bucket accessible from the Compute Cluster.
Credentials appropriate for your chosen authentication method
A user account with permissions to create Data Stores in xDP.
Step 1 — Select the Compute Cluster
From the left sidebar, click Data Store under Platform.
Click + Create Data Store in the upper-right corner.
On the Select Cluster step, choose the Compute Cluster where this data store will be available.
Click Next.
Note: A data store is scoped to a single Compute Cluster. To use the same GCS bucket in multiple clusters, create a data store in each one.
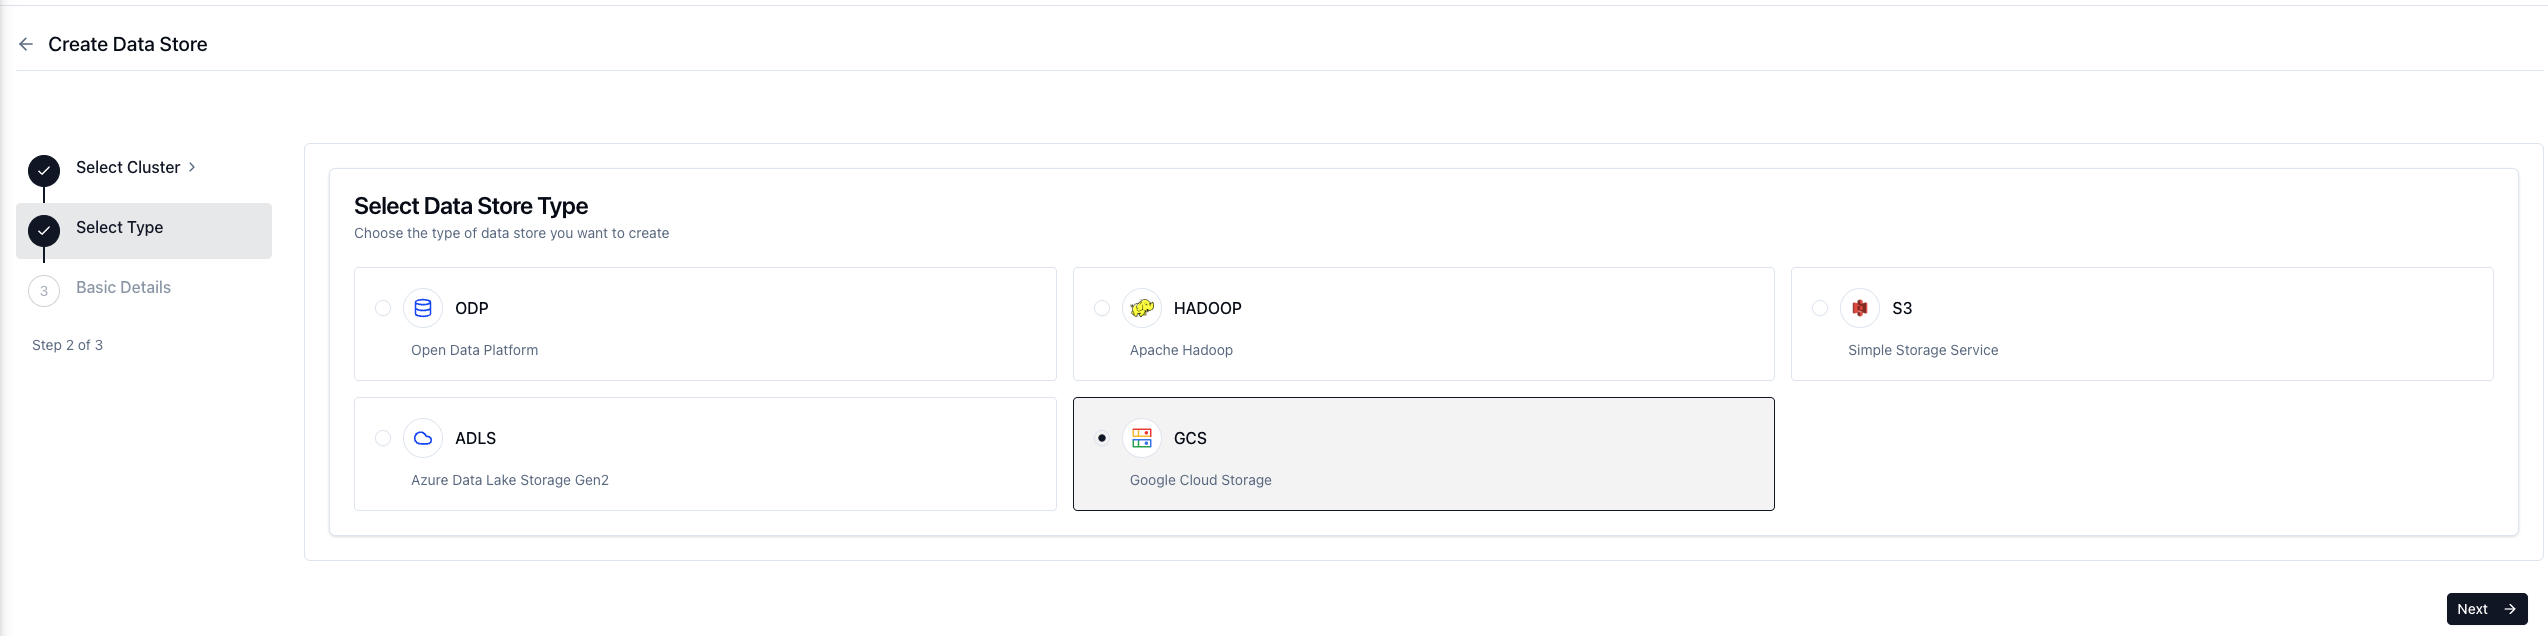
Step 2 — Select the Data Store Type
On the Select Data Store Type screen, choose GCS (Google Cloud Storage).
Click Next.
Step 3 — Enter Connection Details
On the GCS Connection Details screen, fill in the required fields:
Data Store Name — Enter a unique, descriptive name (e.g.,
prod-gcs-events). Use a convention like<env>-gcs-<purpose>for easy discovery.Bucket Name — Enter the name of your GCS bucket (e.g.,
xdpqateam).GCP Project ID — Enter your Google Cloud project ID (e.g.,
acceldata-acm).Authentication Type — Select the method that matches your environment.
Option A: Service Account Key
Select Service Account Key from the Authentication Type dropdown.
Service Account Key JSON — Paste the contents of your service account JSON key file directly into the text area, or click Upload JSON to upload the file.
Tip: The service account email is displayed below the JSON input field for verification once a valid key is entered.
Option B: HMAC Key
Select HMAC Key from the Authentication Type dropdown.
HMAC Access Key — Enter the HMAC public key for your GCP service account.
HMAC Secret Key — Enter the corresponding HMAC secret key.
Warning: Treat HMAC keys as sensitive credentials. Use a service account with only the permissions required for this bucket.
Click Next.
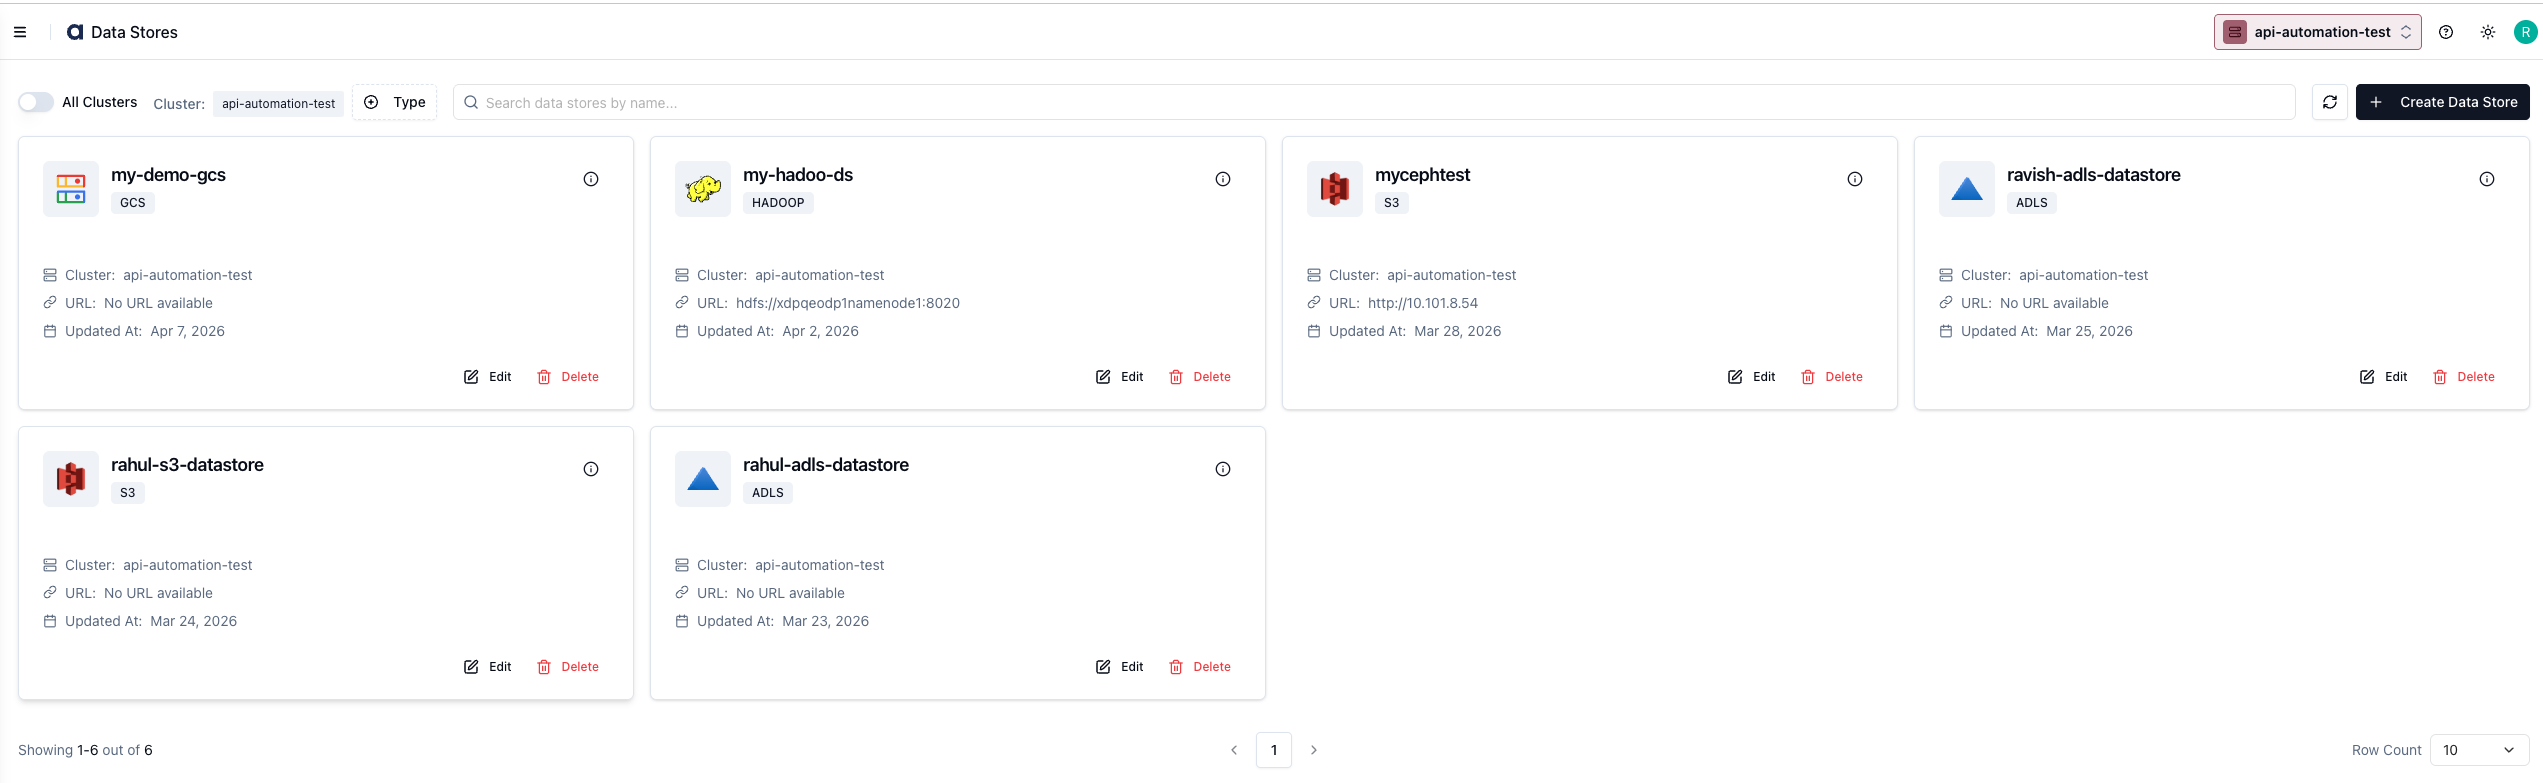
After a successful save, the new data store appears on the Data Stores page with the GCS type label and your Compute Cluster name.
How-to Guides
Edit an Existing GCS Data Store
Use this guide to update the bucket name, rotate credentials, or switch authentication types.
Navigate to Data Store.
Locate the GCS data store card and click Edit.
The wizard reopens with existing values pre-filled.
Navigate to the field you want to change and update it — for example, paste a new Service Account Key JSON after a key rotation.
Click Next.
Verification: Confirm the Updated At timestamp on the card reflects the current time.
Delete a GCS Data Store
Warning: Deleting a data store is irreversible. Any Spark jobs or pipelines referencing this data store will fail. Pause or update dependent workloads before proceeding.
Navigate to Data Store.
On the data store card, click Delete.
Confirm the deletion in the dialog.
Verification: The card is removed from the list and the data store no longer appears in job configuration dropdowns.
Best Practices
Use Service Account Key for portability — When running outside GCP or when explicit credentials are needed (e.g., cross-project access), Service Account Key JSON provides the most control with IAM-managed permissions.
Avoid HMAC Key in production — HMAC keys are long-lived and cannot be scoped to individual buckets. Prefer them only when integrating with tools that require S3-compatible auth and cannot use the other methods.
Apply the principle of least privilege — Grant the authenticating identity only the GCS permissions required:
roles/storage.objectViewerfor read-only workloads;roles/storage.objectAdminfor read/write. Avoidroles/storage.adminat the project level.Rotate credentials proactively — For Service Account Keys and HMAC Keys, establish a rotation policy. Generate a new key, update the data store, then deactivate the old key in GCP IAM to avoid downtime.
Use descriptive names — Follow a naming convention like
<env>-gcs-<purpose>(e.g.,prod-gcs-raw-events,dev-gcs-models). This makes data stores easy to identify in job configuration dropdowns as your platform grows.