Create a Hadoop Data Store
A Hadoop Data Store connects a Compute Cluster to an on-premises or cloud-hosted Hadoop (HDFS/Hive) cluster. Once registered, the data store is available to Spark jobs, Trino queries, and pipelines as a governed, reusable data source—without needing to hardcode HDFS connection details in each job configuration.

Key Concepts
Hadoop Data Store — A registered HDFS connection in xDP, identified by an
hdfs://URL pointing to the NameNode. It scopes access to a specific Compute Cluster so development and production workloads stay isolated.HDFS URL — The connection endpoint for your Hadoop NameNode, in the format
hdfs://<namenode-host>:<port>(default port8020). This must be reachable from the Compute Cluster's Kubernetes nodes.Hadoop Configuration Files — XML files (
core-site.xml,hdfs-site.xml,hive-site.xml) that define cluster-level settings such as replication factors, block sizes, and Hive metastore endpoints. xDP uses these to configure Spark and Trino connectors automatically.Kerberos Authentication — The security protocol used by enterprise Hadoop clusters to authenticate service accounts. When Kerberos is enabled, xDP requires a principal (
user@REALM), akrb5.conffile, and a keytab file to authenticate against the cluster.KeyTab File — A binary credential file containing a Kerberos principal and its encrypted key. xDP stores the keytab as a Kubernetes Secret in the Compute Cluster so it is never exposed to end users.
Capabilities
Governed Connection Registry — Register a single Hadoop connection that all jobs and applications in a Compute Cluster share. This eliminates duplicated credentials and ensures consistent access control.
Kerberos-Secured Access — Connect to Kerberized Hadoop clusters by uploading your
krb5.confand keytab files directly through the UI. xDP stores them as Kubernetes Secrets and injects them into job pods automatically.Configuration File Upload — Provide
core-site.xml,hdfs-site.xml, andhive-site.xmlfiles so Spark and Trino pick up your cluster's exact settings without any manual configuration.Lifecycle Management — Edit, update, or delete data store registrations as your Hadoop cluster evolves, without redeploying jobs or applications.
Tutorial: Create Your First Hadoop Data Store
Prerequisites
Before you begin, ensure you have:
A running Compute Cluster in xDP with Running status.
A Hadoop cluster with an accessible NameNode (
hdfs://<host>:<port>).The Hadoop configuration files:
core-site.xml,hdfs-site.xml, and optionallyhive-site.xml.If Kerberos is enabled: the
krb5.conffile, a Kerberos principal (e.g.,smoketest@ADSRE.COM), and the.keytabfile for that principal.A user account with permissions to create Data Stores.
Step 1 — Select the Compute Cluster
From the left sidebar, click Data Store under Platform.
Click + Create Data Store in the upper-right corner.
On the Select Cluster step, choose the Compute Cluster where this data store will be available (e.g.,
democluster).
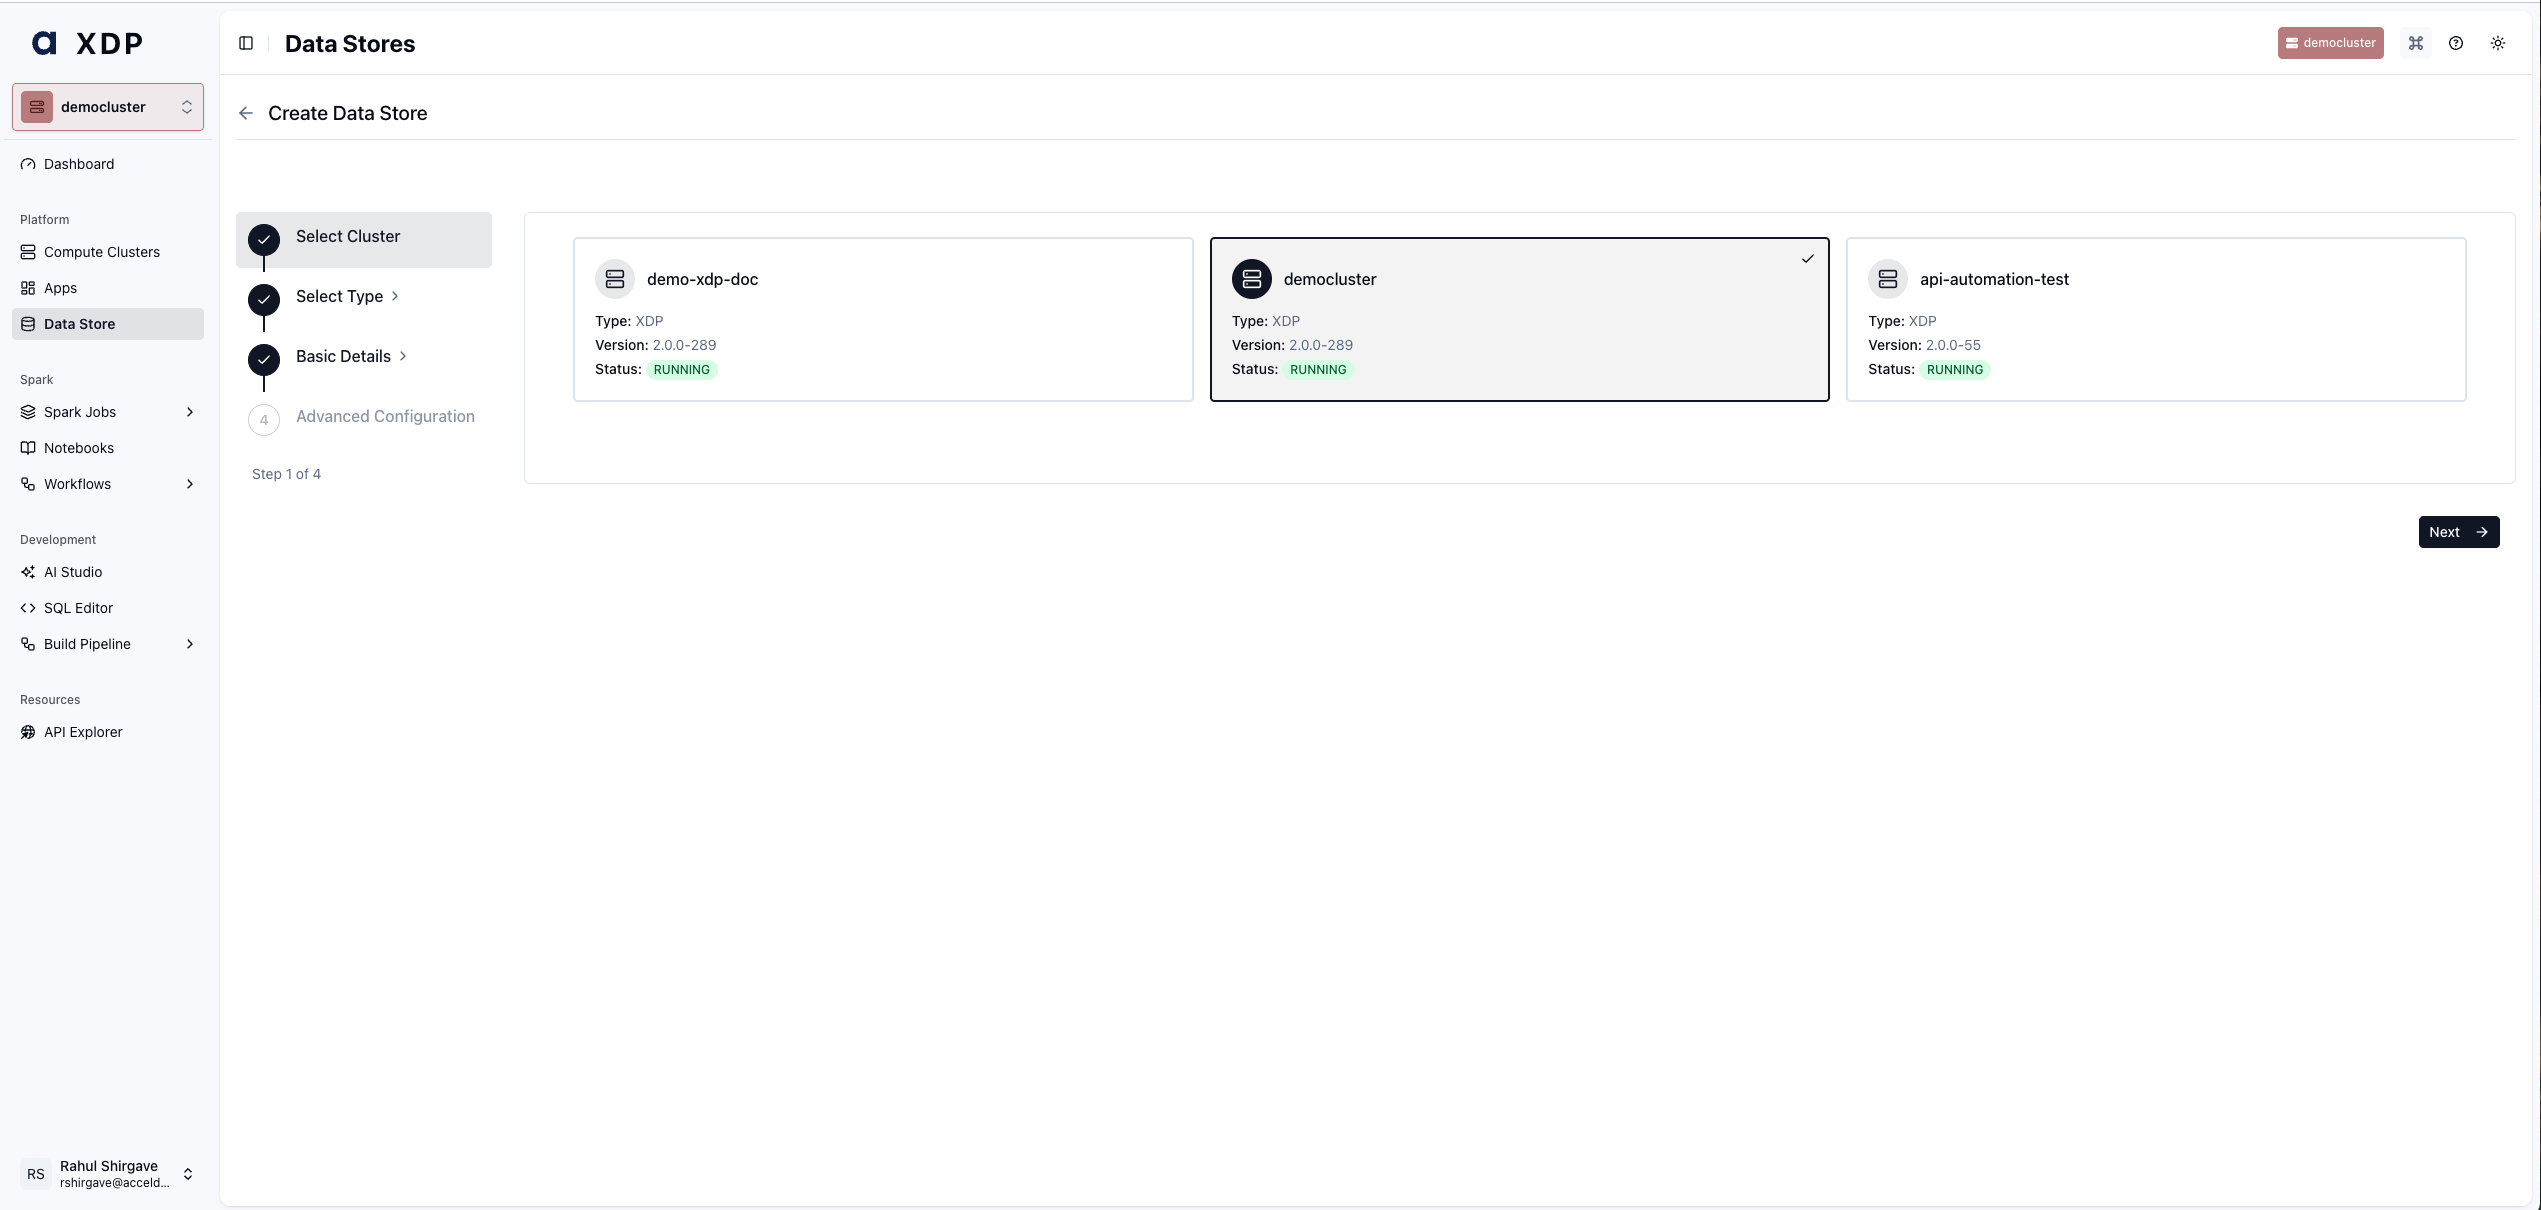
Click Next.
A data store is scoped to a single Compute Cluster. If you need the same Hadoop connection available in multiple clusters, create a data store in each one.
Step 2 — Select the Data Store Type
On the Select Data Store Type screen, choose Hadoop.
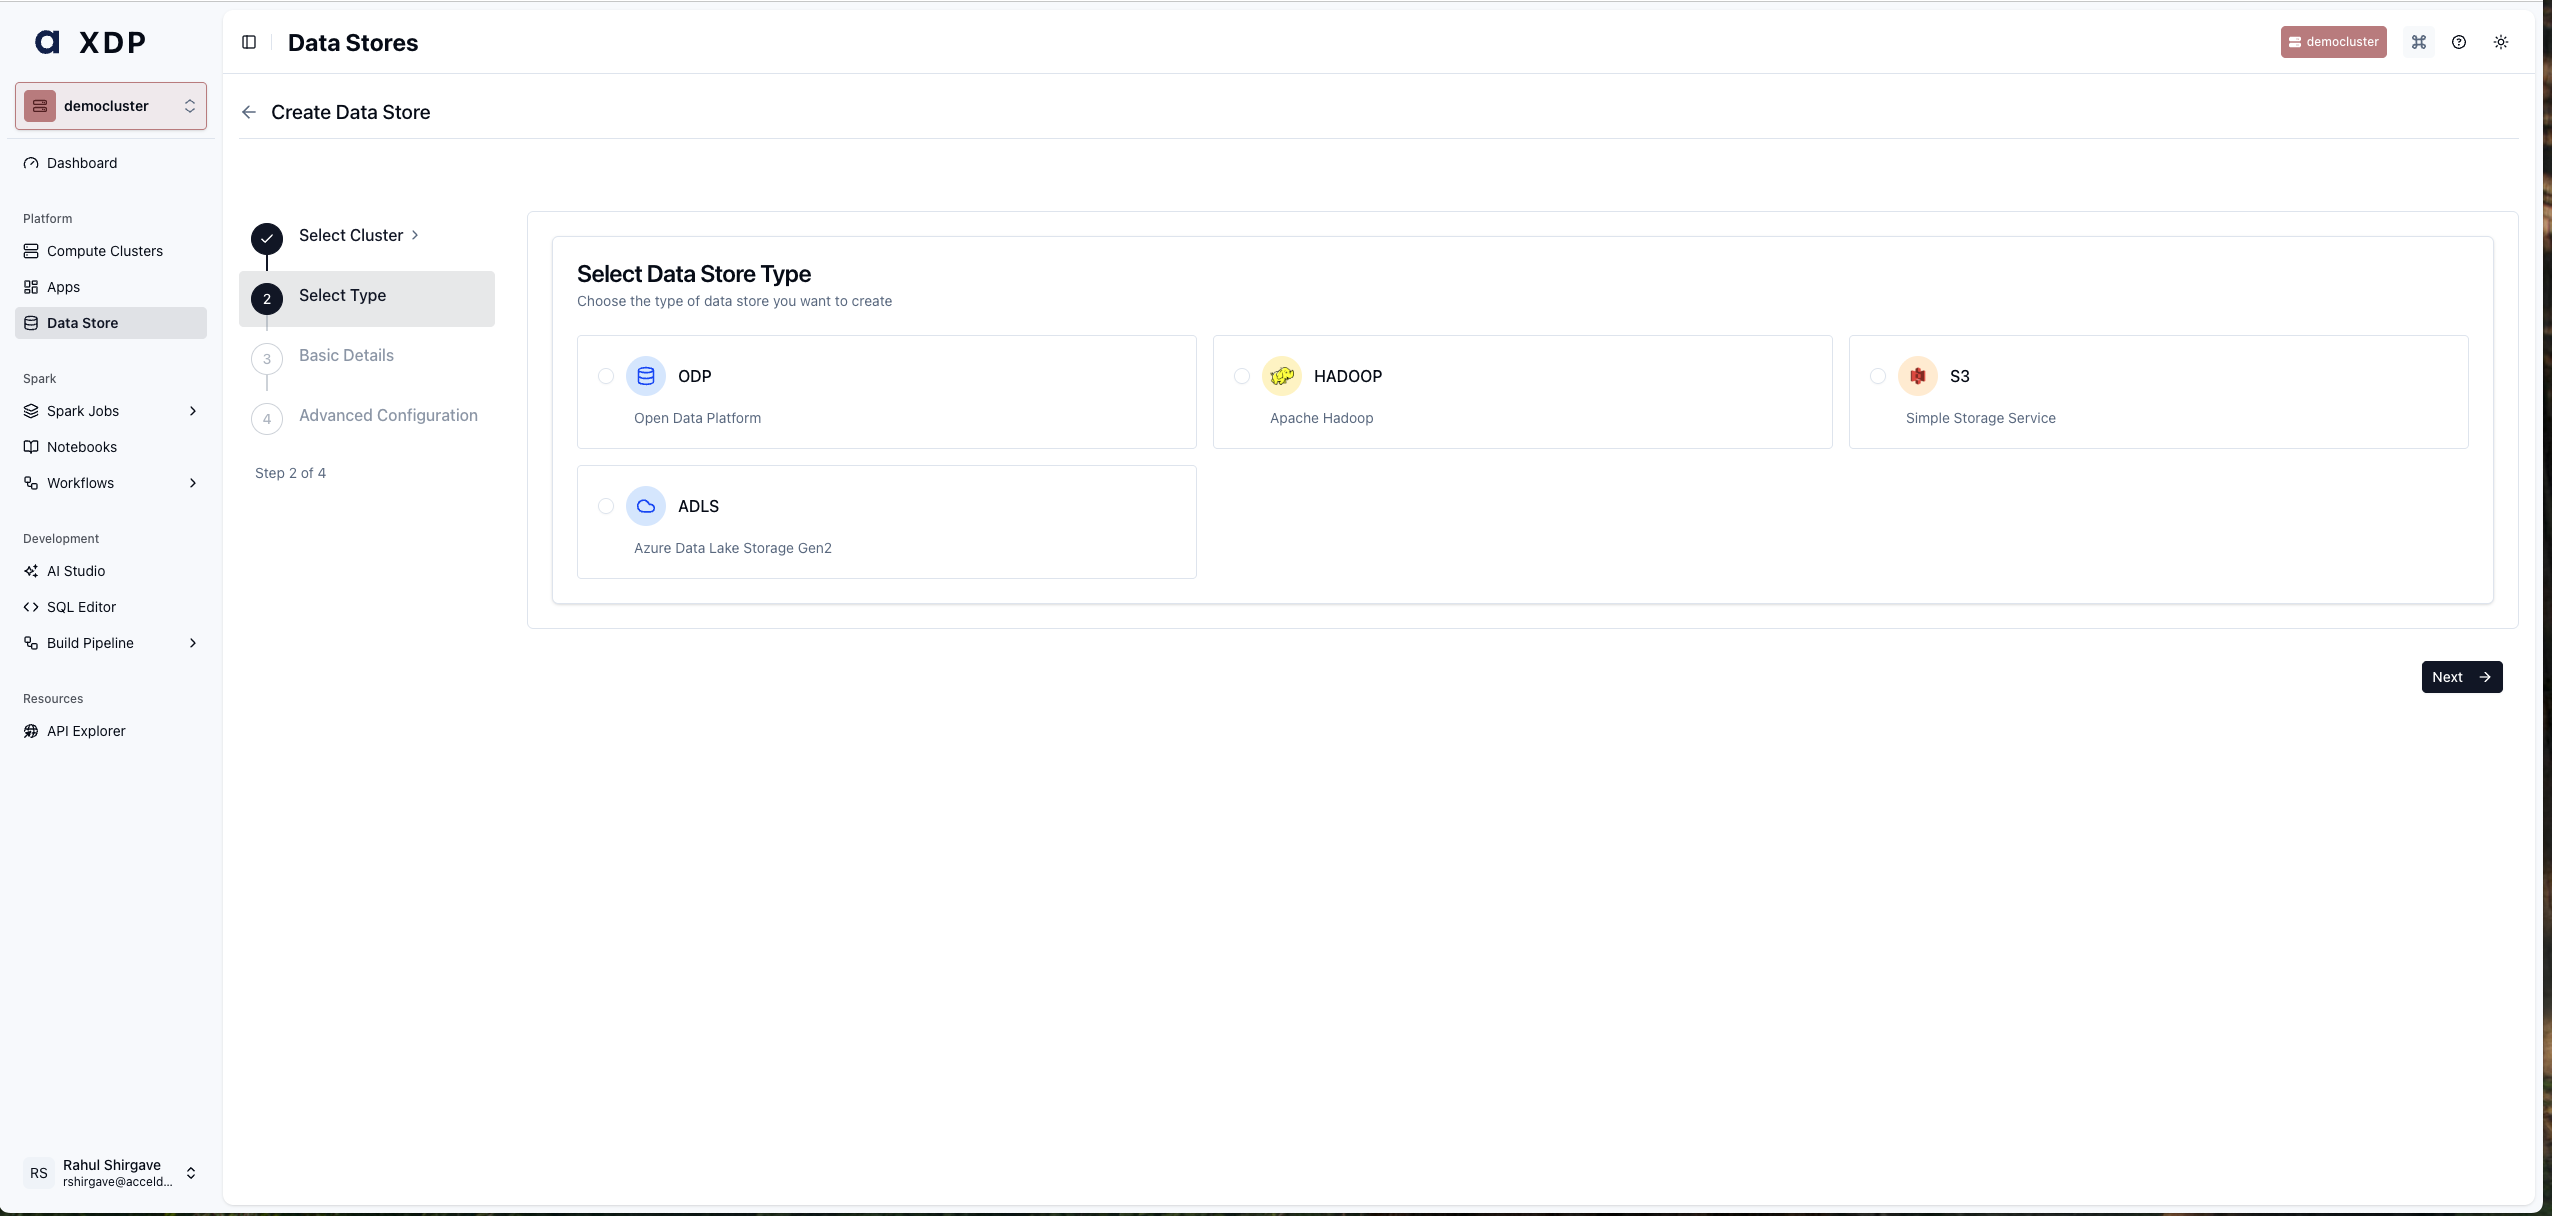
Click Next.
xDP also supports HADOOP, S3, ADLS, and other data store types from this same wizard. Hadoop is the correct type for any HDFS-based connection (including HDP, CDH, and HADOOP clusters).
Step 3 — Enter Basic Details
In the Name field, enter a unique, descriptive identifier for the data store (e.g.,
hadoop-doc-demo). Use a naming convention like<env>-hadoop-<purpose>for easy discovery.In the URL field, enter the HDFS NameNode address in the format
hdfs://<namenode-host>:<port>(e.g.,hdfs:namenode1:8020).Click Next.
The Name must be unique within the Compute Cluster. The URL must be network-reachable from the cluster's Kubernetes nodes at the time of job execution.
Step 4 — Advanced Configuration
The Advanced Configuration step is where you provide Hadoop configuration files and optional Kerberos credentials.
Upload Hadoop configuration files:
Click the upload area next to Core Site XML Path and select your
core-site.xmlfile.Click the upload area next to HDFS Site XML Path and select your
hdfs-site.xmlfile.Click the upload area next to Hive Site XML Path and select your
hive-site.xmlfile (required if you use Hive Metastore with Trino or Spark).
Configure Kerberos (if your cluster is secured):
Toggle Enable Kerberos to the on position.
In the Kerberos Principal field, enter the service account principal (e.g.,
smoketest@ADSRE.COM).In the Kerberos Configuration Path upload area, drag and drop or click to upload your
krb5.conffile.In the KeyTab Path upload area, drag and drop or click to upload the
.keytabfile for your principal (e.g.,smokeuser.headless.keytab).Click Save Data Store.
If Kerberos is enabled on your Hadoop cluster but you leave the Kerberos fields empty, all job submissions using this data store will fail with authentication errors. Ensure the principal format matches your realm exactly (e.g., user@REALM.COM — uppercase realm is required).
After a successful save, the new data store appears on the Data Stores page with your Compute Cluster name and the HDFS URL.
Your analytics team needs to run a nightly Spark job that reads raw logs from HDFS at hdfs://namenode1:8020/data/logs. Register a data store named prod-hadoop-logs against the analytics-prod-cluster. All Spark jobs in that cluster can then reference this data store by name, and xDP injects the Kerberos credentials automatically.
How-to Guides
Edit an Existing Hadoop Data Store
Use this guide to update the HDFS URL, refresh configuration files, or rotate Kerberos credentials.
Navigate to Data Store.
Locate the data store you want to update and click Edit.
The four-step wizard reopens with your existing values pre-filled.
Navigate to the step containing the field you want to change.
Update the value — for example, upload a new
krb5.confafter a Kerberos configuration change, or update the URL if the NameNode IP address changed.Click Save Data Store.
Verification: Confirm the Updated At timestamp on the card reflects the current time.
Delete a Hadoop Data Store
Warning: Deleting a data store is irreversible. Any Spark jobs, Trino catalogs, or pipelines referencing this data store will fail. Pause or update dependent workloads before proceeding.
Navigate to Data Store.
On the data store card, click Delete.
Confirm the deletion in the dialog.
Verification: The card is removed from the list and the data store no longer appears in job configuration drop-down.
Best Practices
Version-control your Hadoop configuration files. Store core-site.xml, hdfs-site.xml, and hive-site.xml in a Git repository. When Hadoop cluster settings change, update the data store by uploading the new files from the same repository — ensuring reproducibility and auditability.
One data store per cluster per environment — Create separate data stores for
dev,staging, andprodHadoop clusters, even if they share the same Compute Cluster. This prevents accidental writes to production HDFS.Use descriptive names — Follow a naming convention like
<env>-hadoop-<purpose>(e.g.,prod-hadoop-datalake,dev-hadoop-events). This makes data stores easy to identify in job configuration dropdowns.Rotate keytabs proactively — Kerberos keytabs have expiry dates set by your KDC policy. Renew and upload updated keytabs before expiry to avoid job failures. Set a calendar reminder for 2 weeks before the keytab expiration.
Verify network reachability first — Before creating the data store, confirm that the NameNode hostname and port are accessible from the Compute Cluster's Kubernetes nodes (
nc -zv <namenode-host> 8020). An unreachable NameNode causes silent failures at job execution time.