This page shows how to configure and use MLflow to log experiments and store artifacts on HDFS, using both local Python scripts and JupyterHub notebooks.
Requirements
To run MLflow with HDFS artifact storage, ensure the following:
Hadoop and HDFS are installed and accessible from the machine running MLflow.
Environment variables are set correctly:
HADOOP_HOMEHADOOP_CONF_DIRCLASSPATH(should include HDFS client libraries)
MLflow tracking server is running with HDFS configured as the default artifact root.
Python environment includes the required packages:
xxxxxxxxxxpip install mlflow scikit-learn pyarrowPart 1: Run MLflow Using a Local Python Script with HDFS Artifact Storage
This example shows how to run the MLflow tracking server and log experiment artifacts directly to HDFS using a local Python script.
- Set the required environment variables: Before starting the MLflow server, configure your environment to work with HDFS.
xxxxxxxxxxexport HADOOP_HOME=/usr/odp/3.3.6.3-1/hadoopexport HADOOP_CONF_DIR=$HADOOP_HOME/etc/hadoopexport LD_LIBRARY_PATH=$HADOOP_HOME/lib/native:$LD_LIBRARY_PATHexport CLASSPATH=$($HADOOP_HOME/bin/hadoop classpath --glob)- Start the MLflow Tracking server: Launch the MLflow server with MySQL as the backend store and HDFS as the artifact root.
xxxxxxxxxxmlflow server \ --backend-store-uri mysql+pymysql://<username>:<password>@<mysql-host>:<port>/<database-name> \ --default-artifact-root hdfs://<hdfs-host>:<port>/<artifact-path> \ --host <IP Address> \ --port 5000- Run a sample Python script (hdfstest.py): Create and run a script that logs an MLflow experiment to the HDFS artifact store.
xxxxxxxxxxcat hdfstest.py # 1. Setupimport mlflowimport mlflow.sklearnfrom sklearn.linear_model import LinearRegressionfrom sklearn.metrics import mean_squared_error, r2_scorefrom sklearn.model_selection import train_test_splitfrom sklearn.datasets import make_regressionimport pandas as pdimport numpy as npimport osimport matplotlib.pyplot as plt # 2. Configure MLflow Tracking URI (point to your MLflow server)mlflow.set_tracking_uri("http://10.100.11.39:5000")mlflow.set_experiment("HDFS_LR_Experiment") # 3. Generate dummy regression dataX, y = make_regression(n_samples=1000, n_features=2, noise=15, random_state=42)X_train, X_test, y_train, y_test = train_test_split(X, y, test_size=0.2, random_state=42) # 4. Start MLflow Runwith mlflow.start_run(): # Log parameters mlflow.log_param("fit_intercept", True) # Train model model = LinearRegression(fit_intercept=True) model.fit(X_train, y_train) # Predict and evaluate predictions = model.predict(X_test) mse = mean_squared_error(y_test, predictions) r2 = r2_score(y_test, predictions) # Log metrics mlflow.log_metric("mse", mse) mlflow.log_metric("r2", r2) # Log model mlflow.sklearn.log_model(model, "model") # Save and log a plot plt.figure(figsize=(6, 6)) plt.scatter(y_test, predictions, alpha=0.7) plt.xlabel("Actual") plt.ylabel("Predicted") plt.title("Actual vs Predicted") plot_path = "actual_vs_predicted.png" plt.savefig(plot_path) mlflow.log_artifact(plot_path) print("Run complete. Artifacts saved to HDFS.")- Run the script: Execute the Python script to log the experiment to MLflow and store artifacts in HDFS.
xxxxxxxxxxpython /usr/odp/3.3.6.3-1/mlflow/hdfstest.py- Validate artifacts in HDFS: After the script runs successfully, verify that the artifacts were written to HDFS.
xxxxxxxxxxhdfs dfs -ls /tmp/4You can see the logged model and metadata files in the specified directory (e.g., /tmp/4/<run_id>/artifacts).
Run MLflow with Kerberos-Enabled HDFS Using a Local Python File
To log experiments to HDFS in a secure (Kerberos-enabled) Hadoop environment, follow these steps:
- Set the ticket cache location for MLflow to use.
xxxxxxxxxxexport MLFLOW_KERBEROS_TICKET_CACHE=/tmp/krb5cc_1025Alternatively, if you know the UID:
xxxxxxxxxxexport MLFLOW_KERBEROS_TICKET_CACHE=/tmp/krb5cc_$(id -u)- Authenticate with Kerberos using keytab.
Run the following command to get a Kerberos ticket.
kinit -kt /etc/security/keytabs/hdfs.headless.keytab kinit: Cannot determine realm for host (principal host/kafkaingestion2.acceldata.ce@)(mlflow) [root@kafkaingestion2 mlflow]# klist -kt /etc/security/keytabs/hdfs.headless.keytab Keytab name: FILE:/etc/security/keytabs/hdfs.headless.keytabKVNO Timestamp Principal---- ------------------- ------------------------------------------------------ 2 2025-06-25T16:23:58 hdfs-kafkaingestion@ADSRE.COM 2 2025-06-25T16:23:58 hdfs-kafkaingestion@ADSRE.COM(mlflow) [root@kafkaingestion2 mlflow]# (mlflow) [root@kafkaingestion2 mlflow]# kinit -kt /etc/security/keytabs/hdfs.headless.keytab hdfs-kafkaingestion@ADSRE.COMAuthenticates as the HDFS user using a keytab file. Make sure the principal name matches the one in klist -kt.
- Start MLflow Tracking server.
mlflow server --backend-store-uri mysql+pymysql://mlflow:mlflow@10.100.11.70:3306/mlflow --default-artifact-root hdfs://kafkaingestion.acceldata.ce:8020/tmp --host 10.100.11.72 --port 50002025/07/04 18:07:59 INFO mlflow.store.db.utils: Creating initial MLflow database tables...2025/07/04 18:07:59 INFO mlflow.store.db.utils: Updating database tablesINFO [alembic.runtime.migration] Context impl MySQLImpl.INFO [alembic.runtime.migration] Will assume non-transactional DDL.Launches MLflow server with MySQL backend and HDFS as the default artifact store.
xxxxxxxxxxlsbin include lib lib64 pyvenv.cfg share[root@kafkaingestion2 mlflow]# [root@kafkaingestion2 mlflow]# [root@kafkaingestion2 mlflow]# source bin/activate- Set Hadoop and Java environment variables.
xxxxxxxxxxexport HADOOP_HOME=/usr/odp/3.3.6.3-1/hadoopexport HADOOP_CONF_DIR=$HADOOP_HOME/etc/hadoopexport LD_LIBRARY_PATH=$HADOOP_HOME/lib/native:$LD_LIBRARY_PATHexport CLASSPATH=$($HADOOP_HOME/bin/hadoop classpath --glob)This prepares the environment to allow Python (and MLflow) to interact with HDFS.
- Sample MLflow script: hdfs.py
xxxxxxxxxxcat hdfs.py import mlflowimport mlflow.sklearnfrom sklearn.linear_model import LinearRegressionfrom sklearn.metrics import mean_squared_error, r2_scorefrom sklearn.model_selection import train_test_splitfrom sklearn.datasets import make_regressionimport matplotlib.pyplot as pltimport osimport time def log(msg): print(f"[{time.strftime('%Y-%m-%d %H:%M:%S')}] {msg}", flush=True) # 1. Setup MLflow trackinglog("Setting MLflow tracking URI...")mlflow.set_tracking_uri("http://10.100.11.72:5000") experiment_name = "HDFS_LR_Experiment_test"artifact_location = "hdfs://kafkaingestion.acceldata.ce:8020/tmp/mlflow-jupyter" # 2. Create experiment (safe creation)log(f"Trying to create experiment '{experiment_name}' with artifact location '{artifact_location}'...")try: mlflow.create_experiment(name=experiment_name, artifact_location=artifact_location) log("Experiment created successfully.")except mlflow.exceptions.MlflowException as e: log(f"Experiment already exists or failed to create: {str(e)}") log(f"Setting experiment to '{experiment_name}'...")mlflow.set_experiment(experiment_name) # 3. Generate datalog("Generating regression dataset...")X, y = make_regression(n_samples=1000, n_features=2, noise=15, random_state=42)X_train, X_test, y_train, y_test = train_test_split(X, y, test_size=0.2, random_state=42) # 4. Start MLflow runlog("Starting MLflow run...")with mlflow.start_run() as run: log("Logging parameters...") mlflow.log_param("fit_intercept", True) log("Training LinearRegression model...") model = LinearRegression(fit_intercept=True) model.fit(X_train, y_train) log("Generating predictions and calculating metrics...") predictions = model.predict(X_test) mse = mean_squared_error(y_test, predictions) r2 = r2_score(y_test, predictions) log(f"Logging metrics: mse={mse}, r2={r2}...") mlflow.log_metric("mse", mse) mlflow.log_metric("r2", r2) log("Logging model...") mlflow.sklearn.log_model(model, "model") log("Generating and logging plot...") plt.figure(figsize=(6, 6)) plt.scatter(y_test, predictions, alpha=0.7) plt.xlabel("Actual") plt.ylabel("Predicted") plt.title("Actual vs Predicted") plot_path = "actual_vs_predicted.png" plt.savefig(plot_path) mlflow.log_artifact(plot_path) log("MLflow run complete. Artifacts should be saved to HDFS.")- Run the script.
python hdfs.py [2025-07-04 18:08:54] Setting MLflow tracking URI...[2025-07-04 18:08:54] Trying to create experiment 'HDFS_LR_Experiment_test' with artifact location 'hdfs://kafkaingestion.acceldata.ce:8020/tmp/mlflow-jupyter'...[2025-07-04 18:08:54] Experiment already exists or failed to create: BAD_REQUEST: (pymysql.err.IntegrityError) (1062, "Duplicate entry 'HDFS_LR_Experiment_test' for key 'experiments.name'")[SQL: INSERT INTO experiments (name, artifact_location, lifecycle_stage, creation_time, last_update_time) VALUES (%(name)s, %(artifact_location)s, %(lifecycle_stage)s, %(creation_time)s, %(last_update_time)s)][parameters: {'name': 'HDFS_LR_Experiment_test', 'artifact_location': 'hdfs://kafkaingestion.acceldata.ce:8020/tmp/mlflow-jupyter', 'lifecycle_stage': 'active', 'creation_time': 1751632734954, 'last_update_time': 1751632734954}](Background on this error at: https://sqlalche.me/e/20/gkpj)[2025-07-04 18:08:54] Setting experiment to 'HDFS_LR_Experiment_test'...[2025-07-04 18:08:54] Generating regression dataset...[2025-07-04 18:08:54] Starting MLflow run...2025/07/04 18:08:54 WARNING mlflow.utils.git_utils: Failed to import Git (the Git executable is probably not on your PATH), so Git SHA is not available. Error: Failed to initialize: Bad git executable.The git executable must be specified in one of the following ways: - be included in your $PATH - be set via $GIT_PYTHON_GIT_EXECUTABLE - explicitly set via git.refresh(<full-path-to-git-executable>) All git commands will error until this is rectified. This initial message can be silenced or aggravated in the future by setting the$GIT_PYTHON_REFRESH environment variable. Use one of the following values: - quiet|q|silence|s|silent|none|n|0: for no message or exception - warn|w|warning|log|l|1: for a warning message (logging level CRITICAL, displayed by default) - error|e|exception|raise|r|2: for a raised exception Example: export GIT_PYTHON_REFRESH=quiet [2025-07-04 18:08:55] Logging parameters...[2025-07-04 18:08:55] Training LinearRegression model...[2025-07-04 18:08:55] Generating predictions and calculating metrics...[2025-07-04 18:08:55] Logging metrics: mse=232.1568349470603, r2=0.8647466802824137...[2025-07-04 18:08:55] Logging model...2025/07/04 18:08:55 WARNING mlflow.models.model: `artifact_path` is deprecated. Please use `name` instead.2025/07/04 18:08:57 WARNING mlflow.models.model: Model logged without a signature and input example. Please set `input_example` parameter when logging the model to auto infer the model signature.[2025-07-04 18:08:59] Generating and logging plot...[2025-07-04 18:08:59] MLflow run complete. Artifacts should be saved to HDFS.🏃 View run useful-dolphin-949 at: http://10.100.11.72:5000/#/experiments/8/runs/438bfcb87a0c4a749c92b4612fb44bb0🧪 View experiment at: http://10.100.11.72:5000/#/experiments/8- Verify artifacts in HDFS.
(mlflow) [root@kafkaingestion2 mlflow]# hdfs dfs -ls -R /tmp/mlflow-jupyter drwxrwxrwx - hdfs hdfs 0 2025-07-04 18:08 /tmp/mlflow-jupyter/438bfcb87a0c4a749c92b4612fb44bb0drwxrwxrwx - hdfs hdfs 0 2025-07-04 18:08 /tmp/mlflow-jupyter/438bfcb87a0c4a749c92b4612fb44bb0/artifacts-rw-r--r-- 3 hdfs hdfs 37398 2025-07-04 18:08 /tmp/mlflow-jupyter/438bfcb87a0c4a749c92b4612fb44bb0/artifacts/actual_vs_predicted.png-rw-r--r-- 3 root hdfs 34 2025-07-04 17:56 /tmp/mlflow-jupyter/kerberos_test.txtdrwxr-xr-x - hdfs hdfs 0 2025-07-04 18:08 /tmp/mlflow-jupyter/modelsdrwxr-xr-x - hdfs hdfs 0 2025-07-04 18:08 /tmp/mlflow-jupyter/models/m-67c7035173a74e418a45aa33d548e87edrwxr-xr-x - hdfs hdfs 0 2025-07-04 18:08 /tmp/mlflow-jupyter/models/m-67c7035173a74e418a45aa33d548e87e/artifacts-rw-r--r-- 3 hdfs hdfs 691 2025-07-04 18:08 /tmp/mlflow-jupyter/models/m-67c7035173a74e418a45aa33d548e87e/artifacts/MLmodel-rw-r--r-- 3 hdfs hdfs 211 2025-07-04 18:08 /tmp/mlflow-jupyter/models/m-67c7035173a74e418a45aa33d548e87e/artifacts/conda.yaml-rw-r--r-- 3 hdfs hdfs 451 2025-07-04 18:08 /tmp/mlflow-jupyter/models/m-67c7035173a74e418a45aa33d548e87e/artifacts/model.pkl-rw-r--r-- 3 hdfs hdfs 115 2025-07-04 18:08 /tmp/mlflow-jupyter/models/m-67c7035173a74e418a45aa33d548e87e/artifacts/python_env.yaml-rw-r--r-- 3 hdfs hdfs 93 2025-07-04 18:08 /tmp/mlflow-jupyter/models/m-67c7035173a74e418a45aa33d548e87e/artifacts/requirements.txt(mlflow) [root@kafkaingestion2 mlflow]# (mlflow) [root@kafkaingestion2 mlflow]#This checks that the model and artifacts (e.g., plot image, model files) were successfully logged to HDFS.
Part 2: Use MLflow with Kerberos-Enabled HDFS from JupyterHub or Python
- Authenticate with Kerberos: Use a valid Kerberos principal and keytab to authenticate your session.
(mlflow) [root@kafkaingestion2 mlflow]# export MLFLOW_KERBEROS_TICKET_CACHE=/tmp/krb5cc_1025(mlflow) [root@kafkaingestion2 mlflow]# export MLFLOW_KERBEROS_TICKET_CACHE=/tmp/krb5cc_$(id -u)(mlflow) [root@kafkaingestion2 mlflow]# (mlflow) [root@kafkaingestion2 mlflow]# kinit -kt /etc/security/keytabs/jupyterhub.keytab jupyterhub@ADSRE.COMkinit: Client 'jupyterhub@ADSRE.COM' not found in Kerberos database while getting initial credentials(mlflow) [root@kafkaingestion2 mlflow]# (mlflow) [root@kafkaingestion2 mlflow]# kinit -kt /etc/security/keytabs/hdfs.headless.keytab kinit: Cannot determine realm for host (principal host/kafkaingestion2.acceldata.ce@)(mlflow) [root@kafkaingestion2 mlflow]# klist -kt /etc/security/keytabs/hdfs.headless.keytab Keytab name: FILE:/etc/security/keytabs/hdfs.headless.keytabKVNO Timestamp Principal---- ------------------- ------------------------------------------------------ 2 2025-06-25T16:23:58 hdfs-kafkaingestion@ADSRE.COM 2 2025-06-25T16:23:58 hdfs-kafkaingestion@ADSRE.COM(mlflow) [root@kafkaingestion2 mlflow]# (mlflow) [root@kafkaingestion2 mlflow]# kinit -kt /etc/security/keytabs/hdfs.headless.keytab hdfs-kafkaingestion@ADSRE.COM(mlflow) [root@kafkaingestion2 mlflow]# (mlflow) [root@kafkaingestion2 mlflow]# (mlflow) [root@kafkaingestion2 mlflow]# (mlflow) [root@kafkaingestion2 mlflow]# (mlflow) [root@kafkaingestion2 mlflow]# (mlflow) [root@kafkaingestion2 mlflow]# (mlflow) [root@kafkaingestion2 mlflow]# (mlflow) [root@kafkaingestion2 mlflow]# (mlflow) [root@kafkaingestion2 mlflow]# mlflow server --backend-store-uri mysql+pymysql://mlflow:mlflow@10.100.11.70:3306/mlflow --default-artifact-root hdfs://kafkaingestion.acceldata.ce:8020/tmp --host 10.100.11.72 --port 50002025/07/04 18:07:59 INFO mlflow.store.db.utils: Creating initial MLflow database tables...2025/07/04 18:07:59 INFO mlflow.store.db.utils: Updating database tablesINFO [alembic.runtime.migration] Context impl MySQLImpl.INFO [alembic.runtime.migration] Will assume non-transactional DDL.INFO [alembic.runtime.migration] Context impl MySQLImpl.INFO [alembic.runtime.migration] Will assume non-transactional DDL.This step ensures MLflow and HDFS access is Kerberos-authenticated.
- Set up Hadoop environment for Python: Configure Hadoop and Java-related environment variables in Python.
xxxxxxxxxximport osimport subprocess # Set environment variablesos.environ['HADOOP_HOME'] = '/usr/odp/3.3.6.3-1/hadoop'os.environ['HADOOP_CONF_DIR'] = '/usr/odp/3.3.6.3-1/hadoop/etc/hadoop'os.environ['LD_LIBRARY_PATH'] = '/usr/odp/3.3.6.3-1/hadoop/lib/native:/usr/lib:/usr/lib64' # Get evaluated CLASSPATH via subprocess and assign itclasspath = subprocess.check_output( ['/usr/odp/3.3.6.3-1/hadoop/bin/hadoop', 'classpath', '--glob'], text=True).strip()os.environ['CLASSPATH'] = classpath # Confirmprint("CLASSPATH:", os.environ['CLASSPATH'])This is required for Python to interact with HDFS for storing MLflow artifacts.
- Log MLflow experiment with HDFS artifacts: Track and log a scikit-learn model run with MLflow, saving artifacts to HDFS.
xxxxxxxxxximport mlflowimport mlflow.sklearnfrom sklearn.linear_model import LinearRegressionfrom sklearn.metrics import mean_squared_error, r2_scorefrom sklearn.model_selection import train_test_splitfrom sklearn.datasets import make_regressionimport matplotlib.pyplot as pltimport osimport time def log(msg): print(f"[{time.strftime('%Y-%m-%d %H:%M:%S')}] {msg}", flush=True) # 1. Setup MLflow trackinglog("Setting MLflow tracking URI...")mlflow.set_tracking_uri("http://10.100.11.72:5000") experiment_name = "HDFS_LR_Experiment_test"artifact_location = "hdfs://kafkaingestion.acceldata.ce:8020/tmp/mlflow-jupyter" # 2. Create experiment (safe creation)log(f"Trying to create experiment '{experiment_name}' with artifact location '{artifact_location}'...")try: mlflow.create_experiment(name=experiment_name, artifact_location=artifact_location) log("Experiment created successfully.")except mlflow.exceptions.MlflowException as e: log(f"Experiment already exists or failed to create: {str(e)}") log(f"Setting experiment to '{experiment_name}'...")mlflow.set_experiment(experiment_name) # 3. Generate datalog("Generating regression dataset...")X, y = make_regression(n_samples=1000, n_features=2, noise=15, random_state=42)X_train, X_test, y_train, y_test = train_test_split(X, y, test_size=0.2, random_state=42) # 4. Start MLflow runlog("Starting MLflow run...")with mlflow.start_run() as run: log("Logging parameters...") mlflow.log_param("fit_intercept", True) log("Training LinearRegression model...") model = LinearRegression(fit_intercept=True) model.fit(X_train, y_train) log("Generating predictions and calculating metrics...") predictions = model.predict(X_test) mse = mean_squared_error(y_test, predictions) r2 = r2_score(y_test, predictions) log(f"Logging metrics: mse={mse}, r2={r2}...") mlflow.log_metric("mse", mse) mlflow.log_metric("r2", r2) log("Logging model...") mlflow.sklearn.log_model(model, "model") log("Generating and logging plot...") plt.figure(figsize=(6, 6)) plt.scatter(y_test, predictions, alpha=0.7) plt.xlabel("Actual") plt.ylabel("Predicted") plt.title("Actual vs Predicted") plot_path = "actual_vs_predicted.png" plt.savefig(plot_path) mlflow.log_artifact(plot_path) log("MLflow run complete. Artifacts should be saved to HDFS.")This automates model training, logging, and stores everything in HDFS for traceability and collaboration.
Part 2: Run MLflow in JupyterHub Using HDFS
- Set the Hadoop environment in the Notebook.
xxxxxxxxxximport osimport subprocess # Set environment variablesos.environ['HADOOP_HOME'] = '/usr/odp/3.3.6.3-1/hadoop'os.environ['HADOOP_CONF_DIR'] = '/usr/odp/3.3.6.3-1/hadoop/etc/hadoop'os.environ['LD_LIBRARY_PATH'] = '/usr/odp/3.3.6.3-1/hadoop/lib/native:/usr/lib:/usr/lib64' # Get evaluated CLASSPATH via subprocess and assign itclasspath = subprocess.check_output( ['/usr/odp/3.3.6.3-1/hadoop/bin/hadoop', 'classpath', '--glob'], text=True).strip()os.environ['CLASSPATH'] = classpath # Confirmprint("CLASSPATH:", os.environ['CLASSPATH'])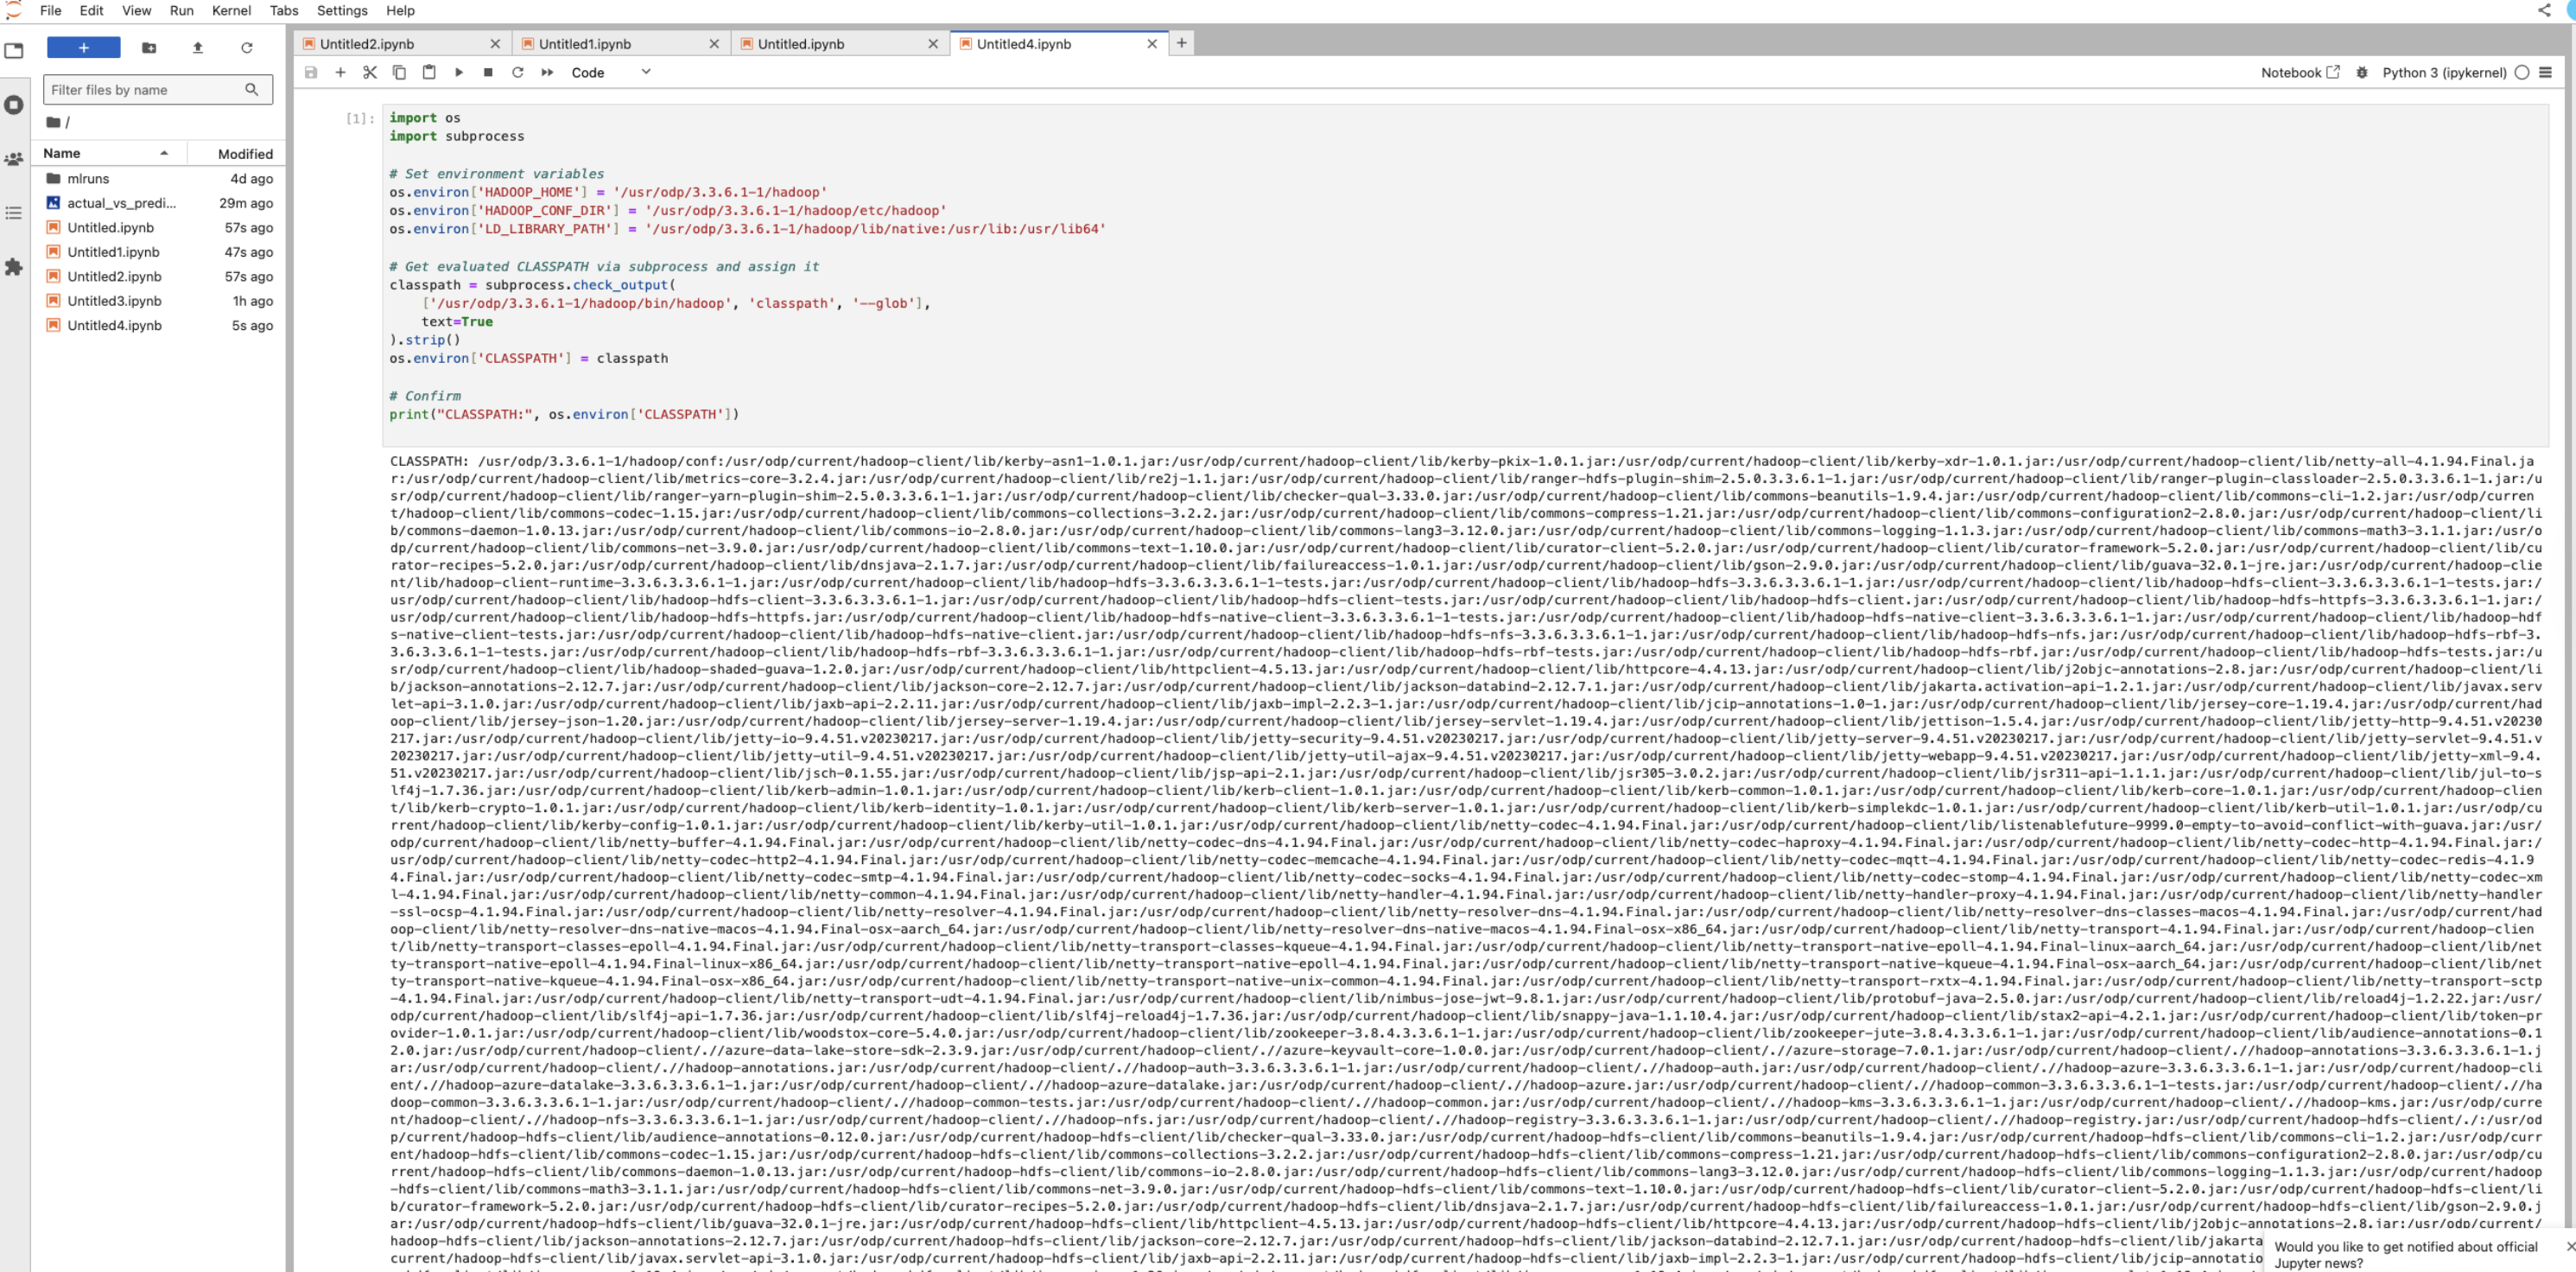
- Adjust HDFS permissions.
xxxxxxxxxxhdfs dfs -mkdir -p /tmp/mlflow-jupyterhdfs dfs -chown -R jupyterhub:hdfs /tmp/mlflow-jupyterhdfs dfs -chmod -R 777 /tmp- MLflow Experiment Code in Jupyter.
xxxxxxxxxximport mlflowimport mlflow.sklearnfrom sklearn.linear_model import LinearRegressionfrom sklearn.metrics import mean_squared_error, r2_scorefrom sklearn.model_selection import train_test_splitfrom sklearn.datasets import make_regressionimport matplotlib.pyplot as pltimport os # Set MLflow tracking servermlflow.set_tracking_uri("http://10.100.11.39:5000") # Ensure experiment writes to HDFS under /tmpexperiment_name = "HDFS_LR_Experiment"artifact_location = "hdfs://airflowdb.acceldata.ce:8020/tmp/mlflow-jupyter" # Create experimenttry: mlflow.create_experiment(name="HDFS_LR_Experiment", artifact_location=artifact_location)except mlflow.exceptions.MlflowException: pass # Already exists mlflow.set_experiment("HDFS_LR_Experiment") # Create experiment if not existstry: mlflow.create_experiment(name=experiment_name, artifact_location=artifact_location)except mlflow.exceptions.MlflowException: pass # Already exists mlflow.set_experiment(experiment_name) # Generate dummy dataX, y = make_regression(n_samples=1000, n_features=2, noise=15, random_state=42)X_train, X_test, y_train, y_test = train_test_split(X, y, test_size=0.2, random_state=42) # Start MLflow runwith mlflow.start_run(): mlflow.log_param("fit_intercept", True) model = LinearRegression(fit_intercept=True) model.fit(X_train, y_train) predictions = model.predict(X_test) mse = mean_squared_error(y_test, predictions) r2 = r2_score(y_test, predictions) mlflow.log_metric("mse", mse) mlflow.log_metric("r2", r2) # Log model mlflow.sklearn.log_model(model, "model") # Plot and log artifact plt.figure(figsize=(6, 6)) plt.scatter(y_test, predictions, alpha=0.7) plt.xlabel("Actual") plt.ylabel("Predicted") plt.title("Actual vs Predicted") plot_path = "actual_vs_predicted.png" plt.savefig(plot_path) mlflow.log_artifact(plot_path) print("Run complete. Artifacts saved to HDFS at /tmp/mlflow-artifacts.")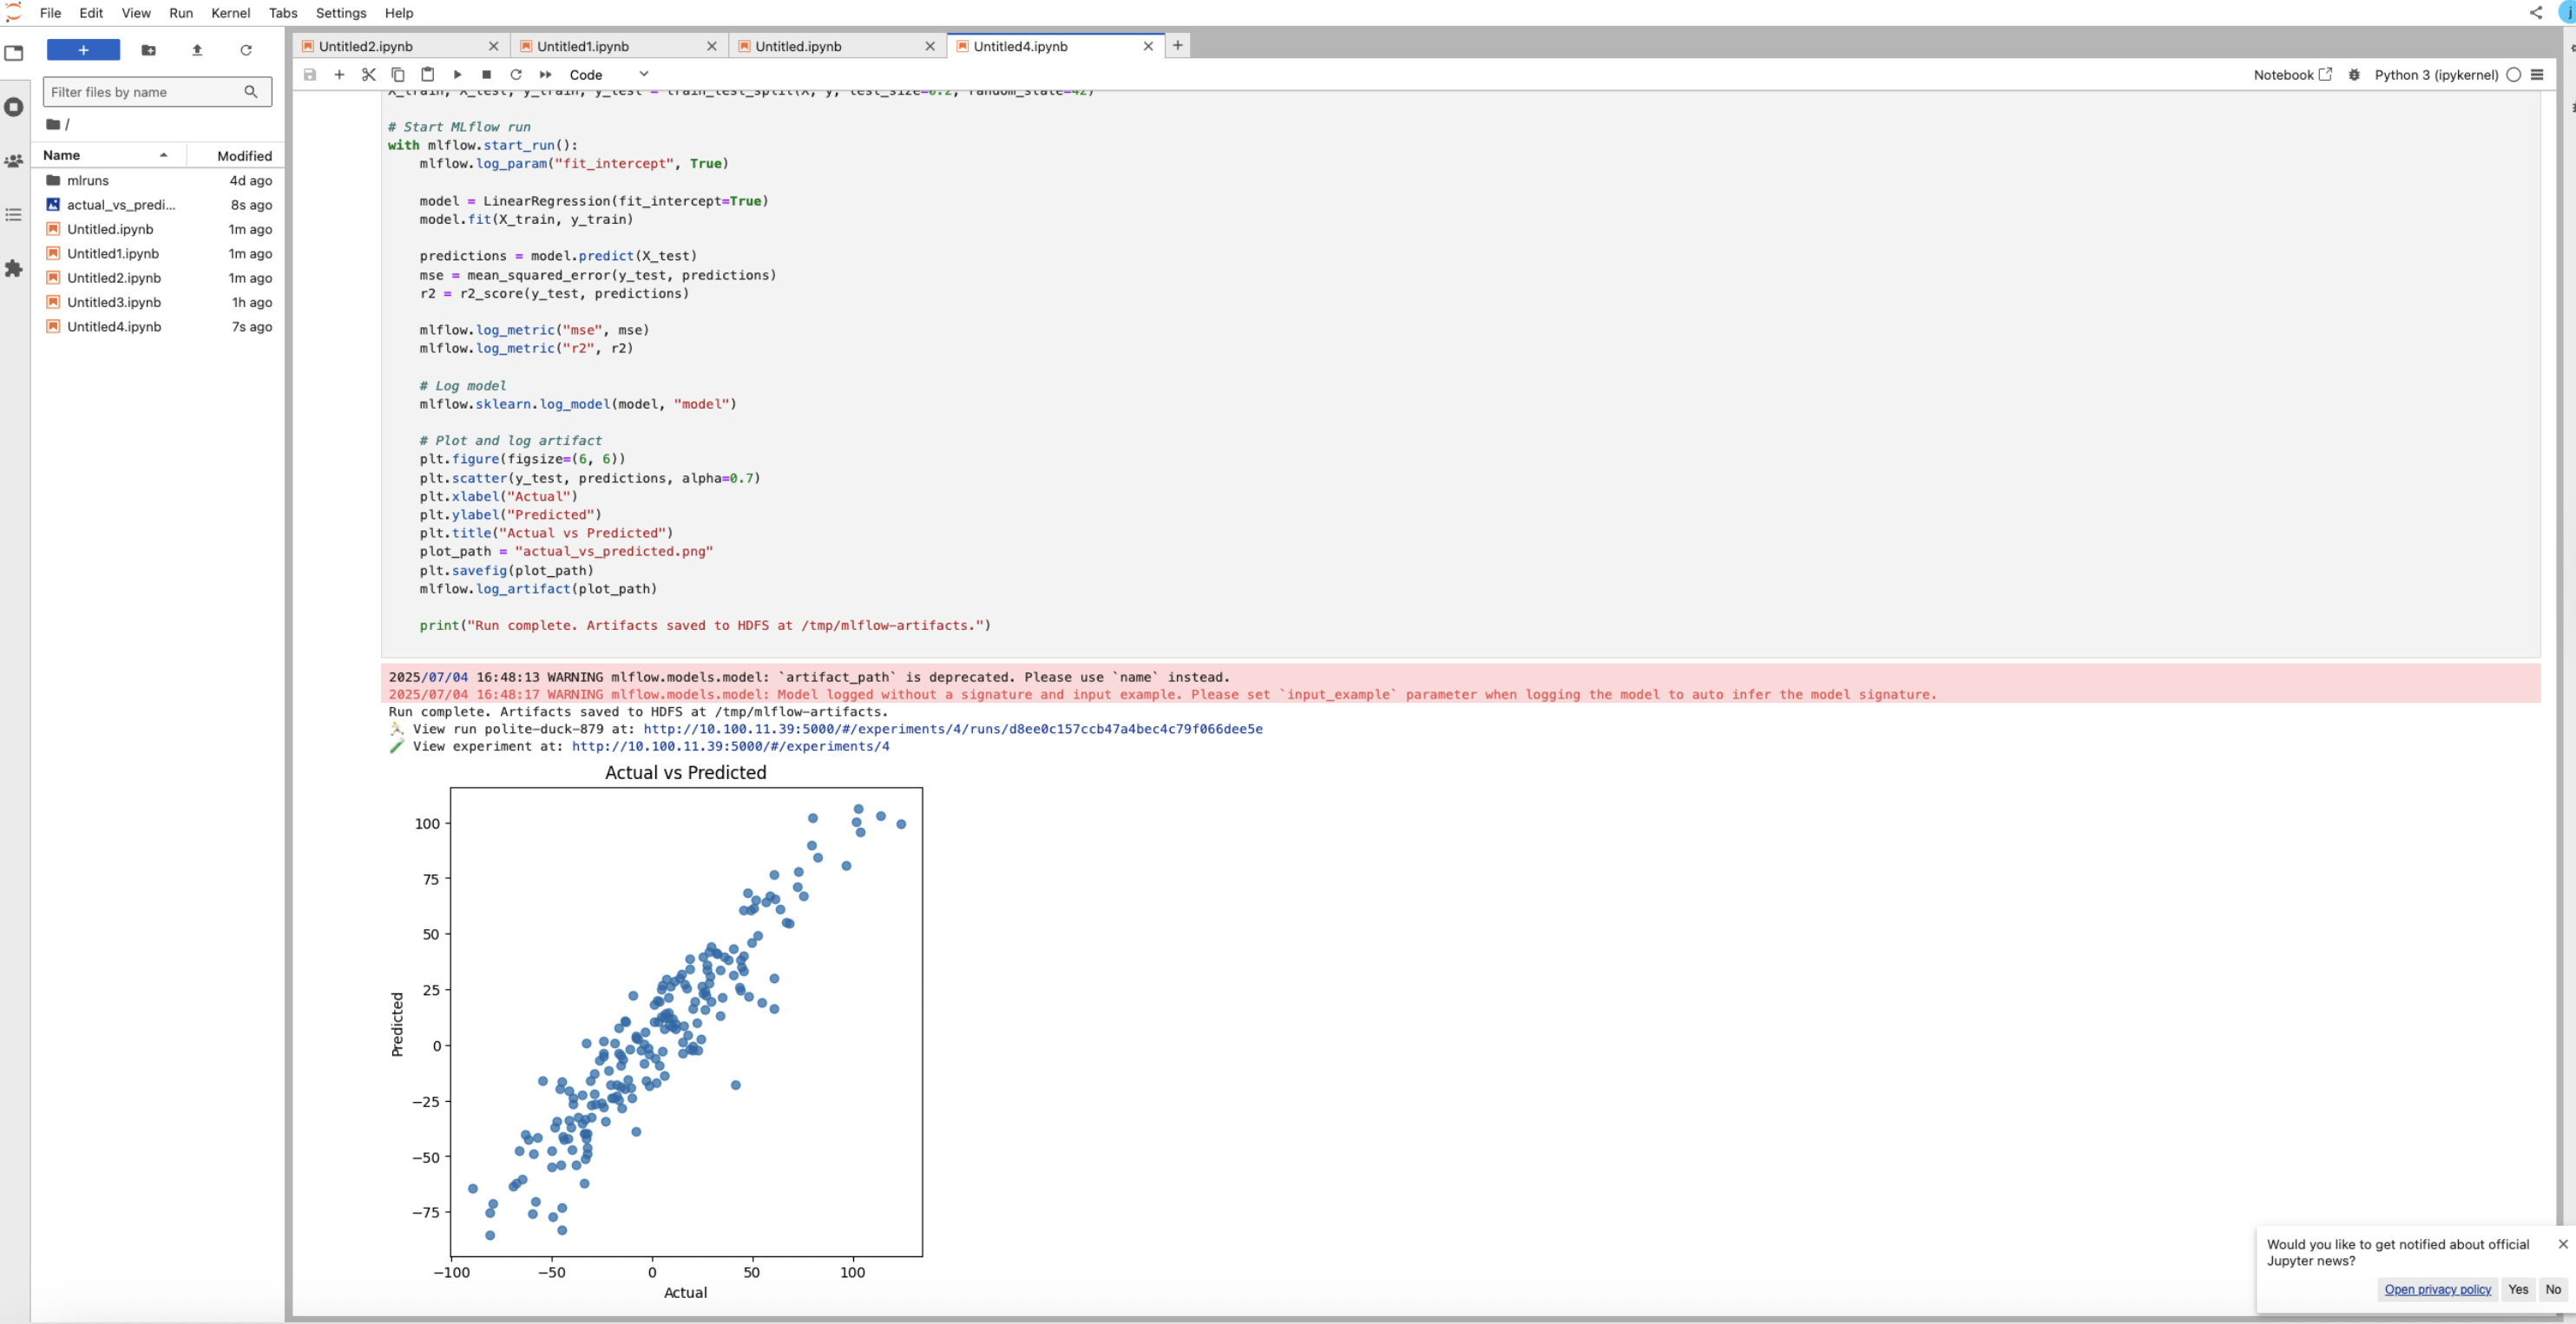
- Final HDFS validation.
xxxxxxxxxxhdfs dfs -ls /tmp/4hdfs dfs -ls /tmp/mlflow-jupyterYou can see the artifacts as below:
xxxxxxxxxx/tmp/4/<run-id>/artifacts/model//tmp/mlflow-jupyter/<experiment-name>/