What is the Catalog Browser?
The Catalog Browser is xStore's unified interface for registering and exploring all your data sources. Instead of logging into individual databases, object stores, or data warehouses separately, you register each one as a catalog in xStore and browse everything from one place.
Data is organized as a four-level hierarchy:
Metalake → Catalog → Schema → Tables (for databases and lakehouses) Metalake → Catalog → Schema → Filesets (for object stores and file systems)
Navigate to the Catalog Browser from the left sidebar: Data Catalog → Browse → Catalog.
Metalakes
A Metalake is the top-level namespace in the Catalog Browser. Every catalog must belong to a metalake. Think of a metalake as a project boundary — it groups all related catalogs together.
A typical organization creates one metalake per environment (dev, staging, prod) or per business domain (finance, engineering, marketing).
Catalogs
A Catalog is a registered connection to a specific data system. When you create a catalog, you provide the connection details for that system — endpoint, credentials, and any storage configuration. xStore uses those details to discover schemas and tables automatically.
Each catalog has a type that determines what you can browse within it:
Relational — databases and lakehouses with schemas and tables (Apache Hive, PostgreSQL, MySQL, Apache Iceberg, Snowflake, and more)
Fileset — object stores and distributed file systems with schemas and named file paths (AWS S3, Google Cloud Storage, Azure Data Lake, Hadoop HDFS)
Messaging — streaming systems with topics (Apache Kafka)
Sync to Compute Clusters
After registering a catalog, you can sync it to one or more linked xCompute Compute Clusters. Syncing pushes the catalog configuration to the compute cluster so that Trino and Spark can query it immediately — no manual reconfiguration needed.
Supported Catalog Types
Provider | Category | When to use |
|---|---|---|
Apache Hive | Relational | Hive-compatible tables managed through a Hive Metastore |
PostgreSQL | Relational | Existing PostgreSQL databases |
MySQL | Relational | Existing MySQL databases |
Apache Iceberg | Relational | Open table format for data lakes — supports Hive, JDBC, or REST metadata backends |
Apache Hudi | Relational | Incremental data pipelines with upsert capability |
Apache Paimon | Relational | Unified streaming and batch lakehouse tables |
Snowflake | Relational | Snowflake data warehouse databases |
Unity Catalog | Relational | Databricks Unity Catalog federation |
AWS S3 | Fileset | Files on Amazon S3 or S3-compatible storage (MinIO) |
Google Cloud Storage | Fileset | Files on GCS buckets |
Azure Data Lake | Fileset | Files on Azure Data Lake Storage Gen2 |
Hadoop (HDFS) | Fileset | Files on Hadoop Distributed File System |
Apache Kafka | Messaging | Kafka topics as queryable tables |
Get Started
This tutorial walks you through creating your first metalake, adding multiple catalogs to it, browsing schemas and tables, and working with fileset catalogs.
Prerequisites
A running xStore cluster.
Access to the data systems you want to register (database credentials, storage access keys, or service account credentials).
Step 1 — Navigate to the Catalog Browser
In the left sidebar, expand Data Catalog → Browse.
Click Catalog.
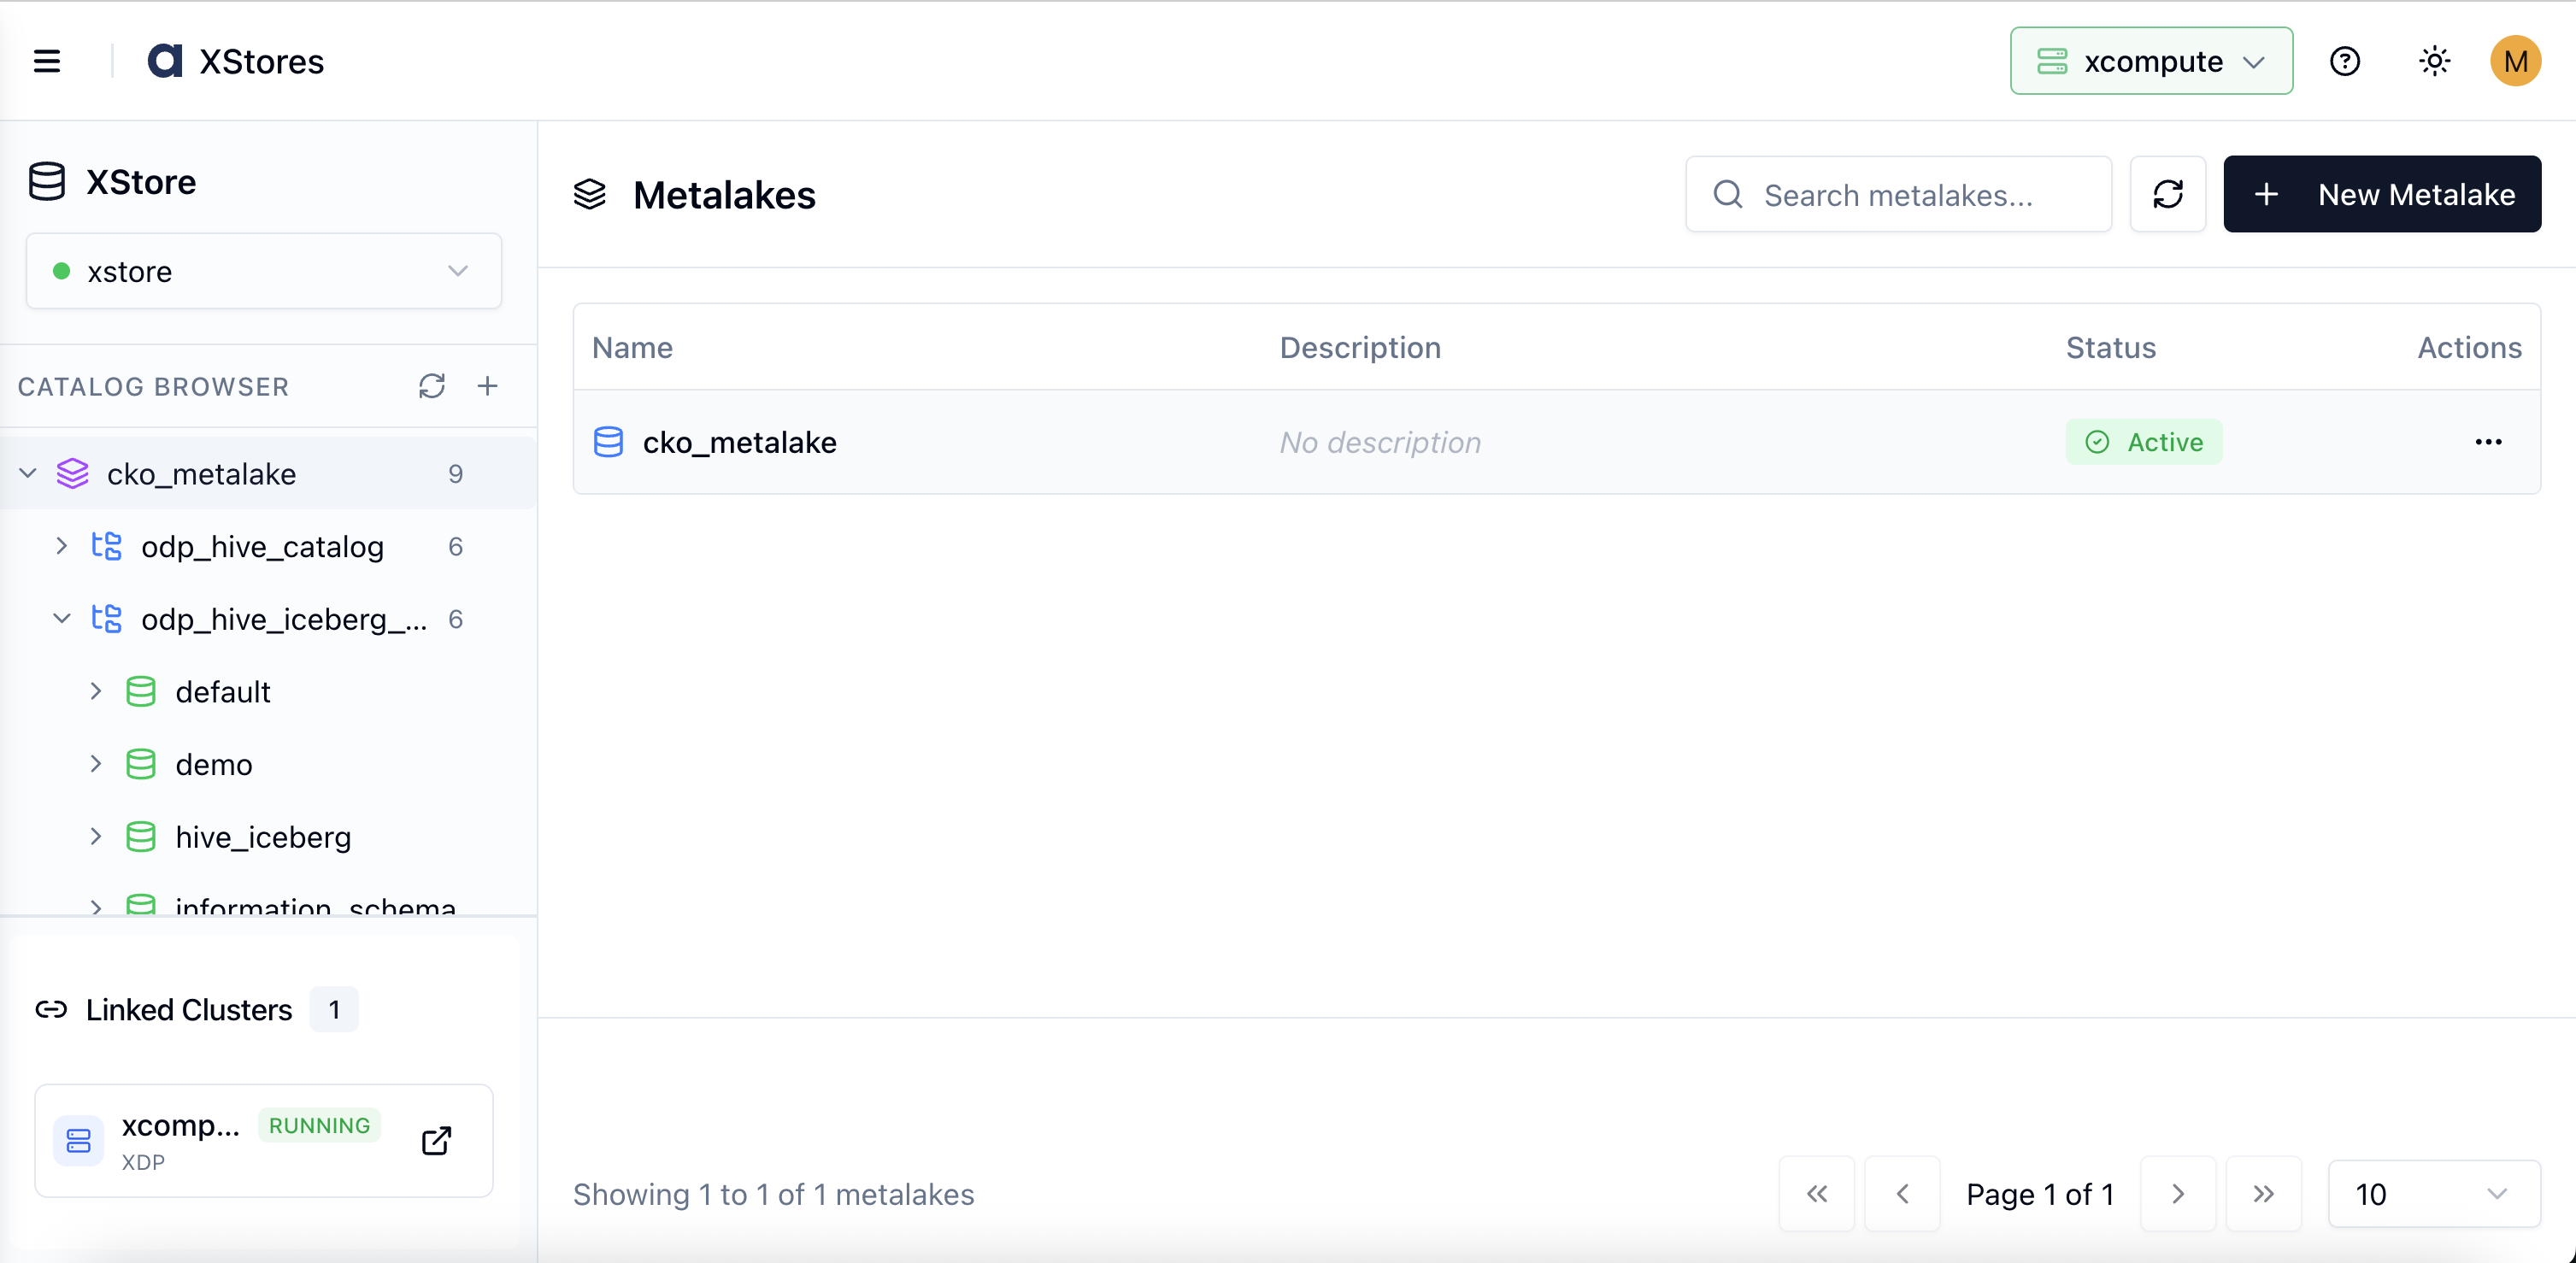
The Catalog Browser opens. The main panel lists all existing metalakes with their name, description, tags, policies, and status. The left-hand tree shows each metalake and its catalogs.
To create your first metalake, click + New Metalake in the top-right corner of the main panel.
Step 2 — Create a Metalake
Clicking + New Metalake opens the Create Metalake form:
Fill in the details:
Metalake Name (required) — must start with a letter; only letters, numbers, underscores, and hyphens are allowed (for example,
data_platform). This name appears in all fully qualified table identifiers.Description (optional) — a short description of what this metalake represents.
Click + Create Metalake. The new metalake appears in the left-hand Catalog Browser tree and in the metalakes list.
Step 3 — Add a Catalog
In the Catalog Browser tree, click the + icon next to your metalake name, or click New Catalog.
In the Create Catalog panel:
Catalog Name — a lowercase name that will also become the catalog identifier in Trino and Spark after sync (for example,
analytics_pg).Provider — select the type of data system you are connecting (for example, PostgreSQL, Apache Hive, AWS S3).
Comment (optional).
Fill in the provider-specific connection fields that appear below the provider selector. For detailed field references by provider, see:
PostgreSQL, MySQL, Snowflake
Apache Hive
Apache Iceberg
AWS S3, Google Cloud Storage, Azure Data Lake, Hadoop (HDFS)
Click Create Catalog.
The catalog appears in the tree under the metalake.
Step 4 — Add More Catalogs to the Same Metalake
A metalake can hold as many catalogs as you need. To add a second (or third, fourth…) catalog:
Click the + icon next to the same metalake in the tree.
Repeat the catalog creation steps above with a different provider or connection.
All catalogs belonging to the same metalake are shown as siblings in the tree. You can have, for example, a PostgreSQL catalog, an Apache Iceberg catalog, and an AWS S3 fileset catalog all under one metalake.
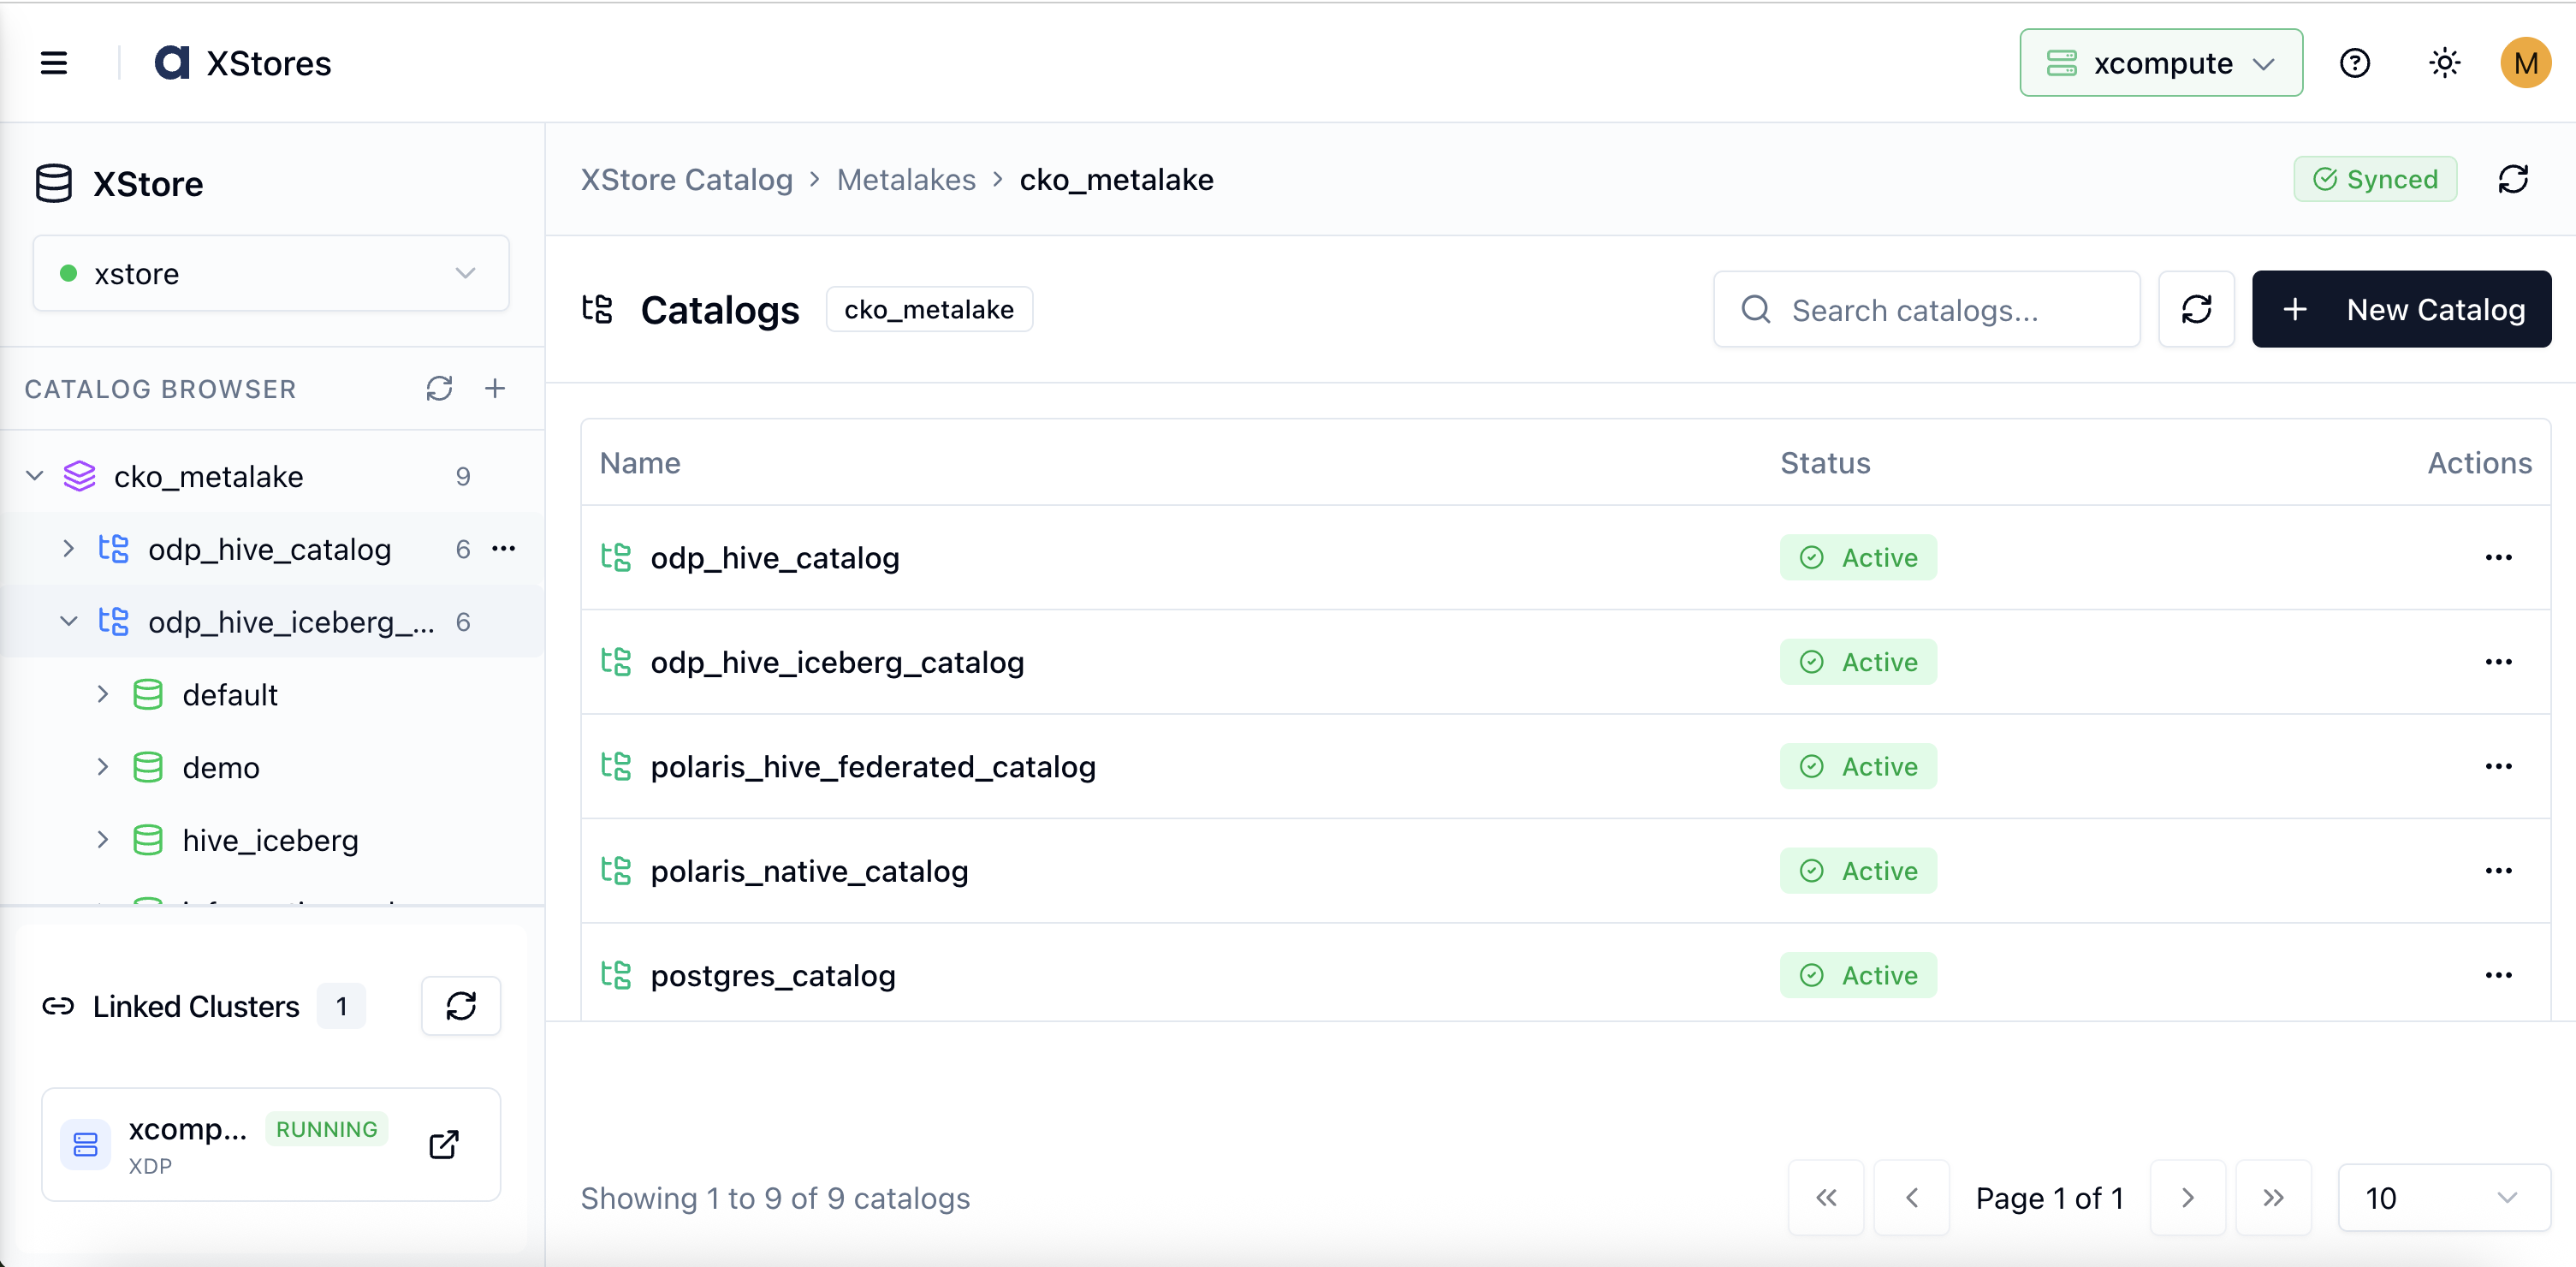
Step 5 — Browse Catalogs and Create a Schema
Click a catalog name in the tree to expand it.
The Schemas tab appears in the main panel, listing all schemas discovered in that catalog.
To add a schema, click New Schema and fill in:
Schema Name (required)
Description (optional)
Properties (optional key-value pairs)
Click Create. The schema appears in the tree under the catalog.
Step 6 — View the Table Listing
Click a schema name to expand it.
The Tables tab shows all tables within that schema — name, and any available metadata.
Click any table name to open the Table Detail Panel on the right. The panel shows column names, data types, partition columns, and table properties.
Step 7 — Sync to a Compute Cluster
After registering a catalog, sync it to your xCompute cluster so Trino and Spark can query it:
Select the catalog in the tree.
In the right-hand detail panel, click the Linked Clusters tab.
Click Sync next to the cluster you want to update.
Once the sync completes, verify:
Fileset Catalogs
Fileset catalogs connect xStore to object stores and file systems — AWS S3, Google Cloud Storage, Azure Data Lake, and Hadoop HDFS. Rather than browsing individual files, a fileset catalog organizes access through named Filesets: registered storage paths that your compute engines can read and write.
The hierarchy for fileset catalogs is: Metalake → Catalog → Schema → Filesets
For the full setup guide — including provider-specific configuration for HDFS, S3, GCS, and ADLS, authentication options, and fileset management — see Fileset Catalogs.
How-to Guides
How to Edit a Catalog
In the Catalog Browser tree, hover over the catalog name to reveal the action icons.
Click the Edit (pencil) icon.
Update the connection details — credentials, endpoint, or additional properties.
Click Save.
Trigger a sync to apply the updated configuration to any linked Compute Clusters.
How to Delete a Catalog
Hover over the catalog name and click the Delete icon, or right-click and select Delete.
Confirm in the dialog.
Deleting a catalog removes the connection registration from xStore. It does not delete the underlying data in the database or storage system. Linked Compute Clusters will no longer see the catalog after their next sync.
How to Manage Metalakes
Edit a metalake: Hover over the metalake name and click the Edit icon. Update the name, comment, or properties, then click Save.
Toggle a metalake active or inactive: Use the Active toggle in the edit form. Inactive metalakes are hidden from compute engines.
Delete a metalake: Hover over the metalake name and click Delete. All catalogs within the metalake must be deleted first.
How to Sync a Catalog to a Compute Cluster
Select the catalog in the tree.
In the right-hand panel, click the Linked Clusters tab.
The tab shows each linked xCompute Compute Cluster and the last sync status and timestamp.
Click Sync next to the cluster to push the latest catalog configuration.
How to Search and Filter Catalogs
Use the Search field at the top of the Catalog Browser tree to filter by name. The tree filters in real time, showing only metalakes, catalogs, schemas, or tables that match your query.
Best Practices
One metalake per environment: Use separate metalakes for
dev,staging, andprod. This keeps catalog names consistent across environments so you can run the same queries without changes.Use consistent catalog names: Name catalogs the same way across metalakes (for example,
lakehousein bothdevandprod). After syncing, Trino uses the catalog name directly in SQL, so consistent naming prevents query changes when switching environments.Sync after every change: xStore catalog changes are not automatically reflected in Trino or Spark. Always sync after creating, editing, or deleting a catalog.
Test connectivity before registering: Before creating a catalog, verify that the xStore cluster can reach the target system. A catalog that cannot connect will show errors on first use.
Use External filesets for existing data: When registering a storage path that already contains data, use the External fileset type so xStore does not attempt to manage the path lifecycle.