What is xStore Iceberg REST?
xStore includes a built-in Iceberg REST catalog service that lets you create and manage Apache Iceberg namespaces and tables directly from the xDP portal — no external metadata store required. The service conforms to the Apache Iceberg REST Catalog Specification, so any Iceberg-native client (Spark, Trino, PyIceberg) can connect to it using a standard REST URL.
Key Concepts
Namespace — A logical grouping of Iceberg tables, equivalent to a schema or database. Namespaces can have a storage location that acts as the default warehouse path for all tables inside them.
Table — An Apache Iceberg table with a defined schema, optional partitioning, optional sort order, and table properties. Iceberg manages snapshot history and schema evolution independently from the underlying data files.
Schema Evolution — Add, rename, drop, or reorder columns without rewriting existing data. Changes are recorded as a new schema version in the table metadata.
Partitioning — Define how data is physically organized on storage. Iceberg uses hidden partitioning — queries don't need to filter on partition columns explicitly.
Table Properties — Key-value settings that control file format, compression, snapshot retention, and more (for example,
write.format.default = parquet).
Navigating to Iceberg REST
In the left sidebar, expand Data Catalog → Browse and click Iceberg REST.
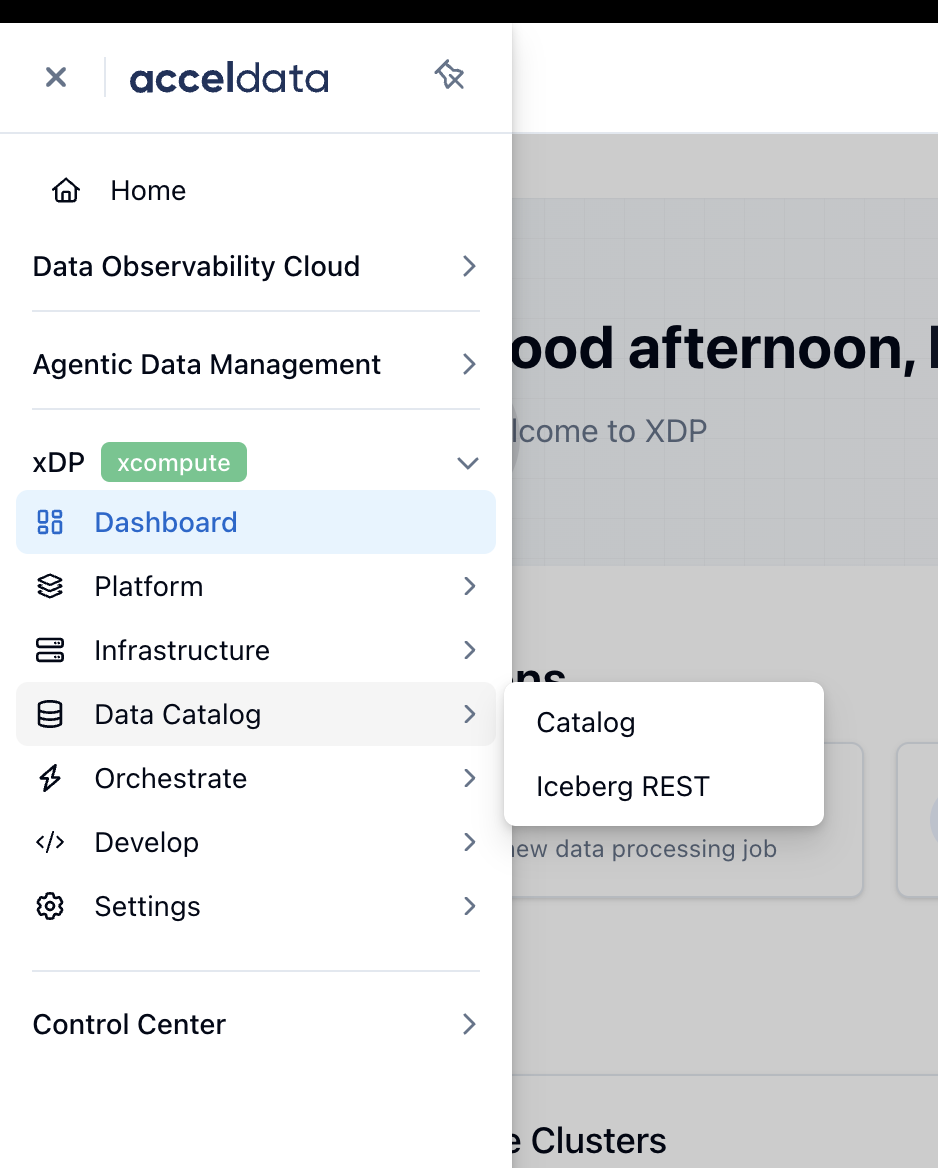
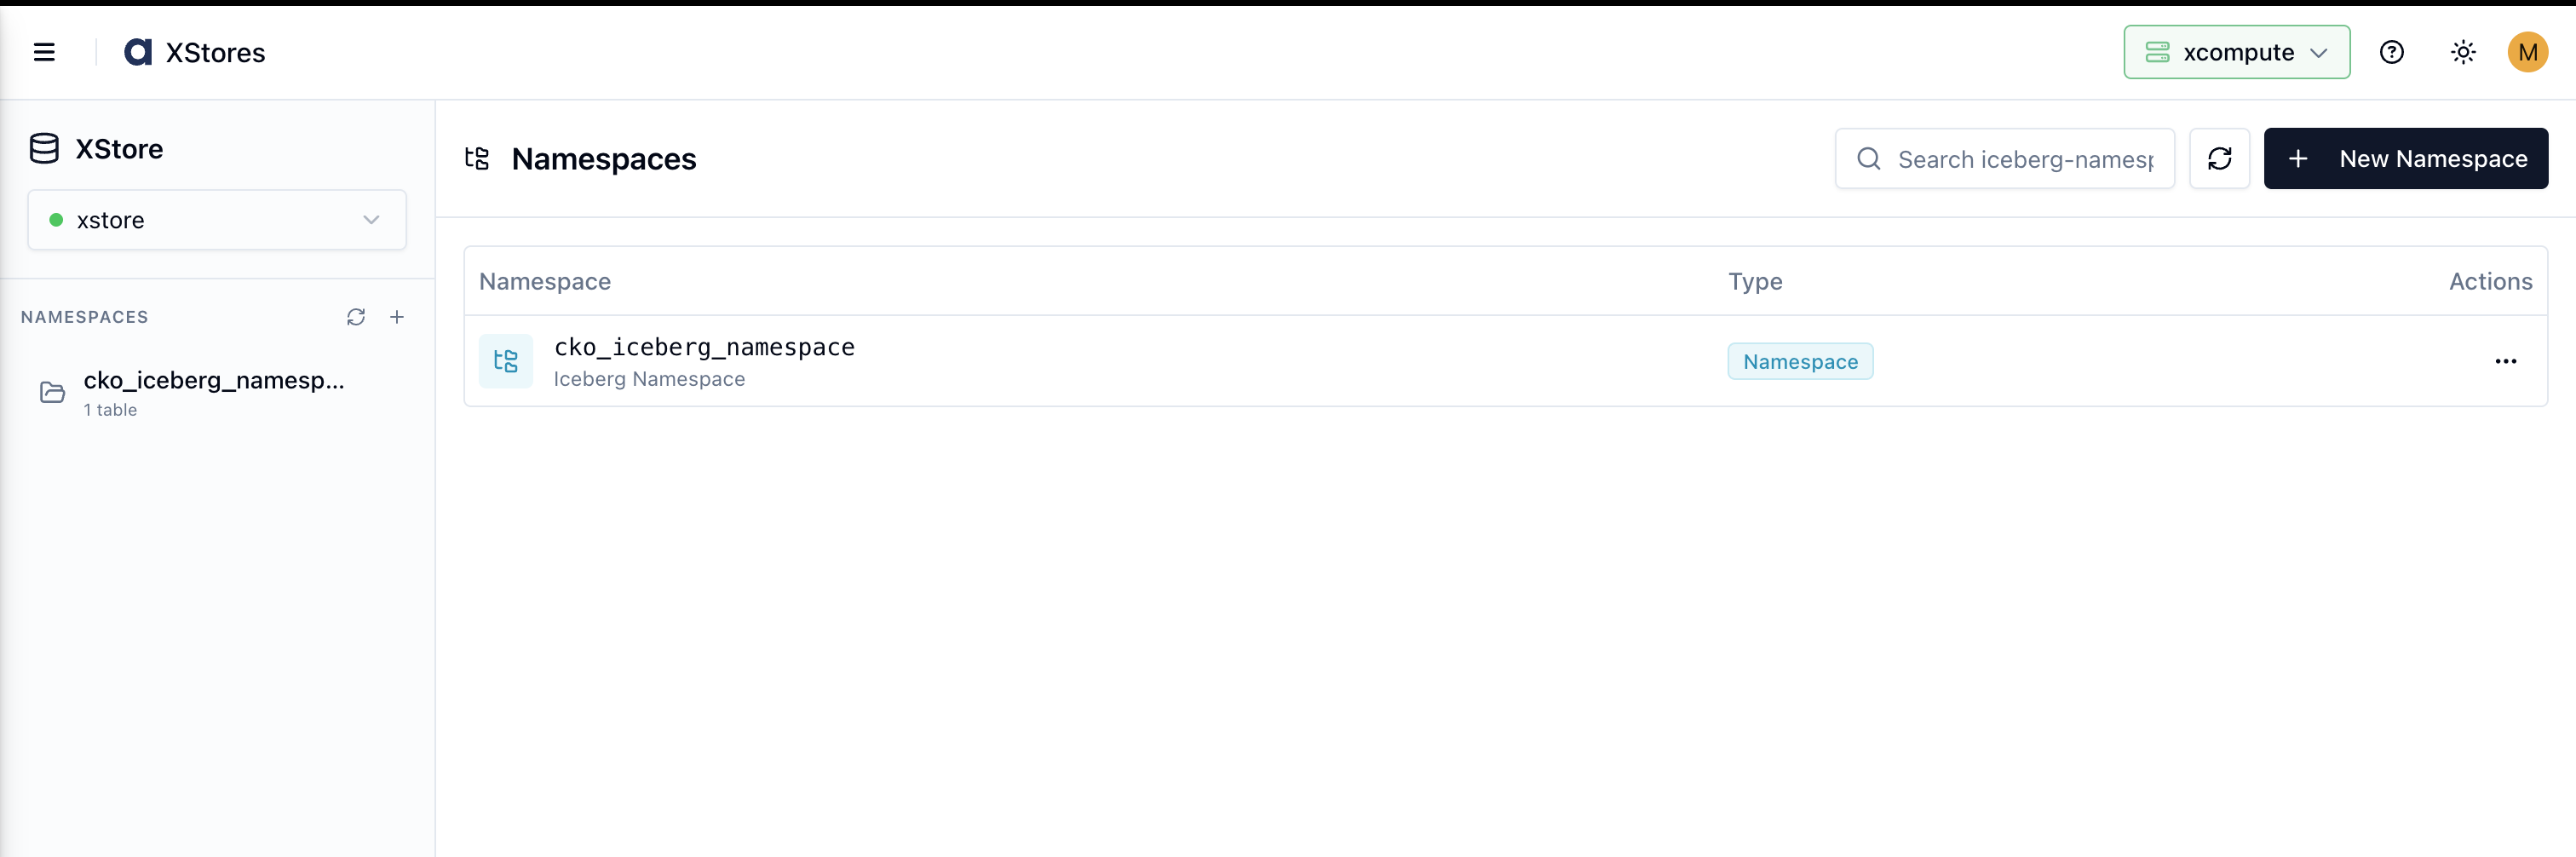
Select your xStore cluster from the cluster selector at the top. The Iceberg REST interface opens, showing the Namespaces list.
Managing Namespaces
Viewing Namespaces
The main panel lists all existing Iceberg namespaces. Each row shows the Namespace name and its Type badge. The left sidebar mirrors the same list for quick navigation.
Creating a Namespace
Click + New Namespace in the top-right corner.
The Create Iceberg Namespace form opens:
Fill in the fields:
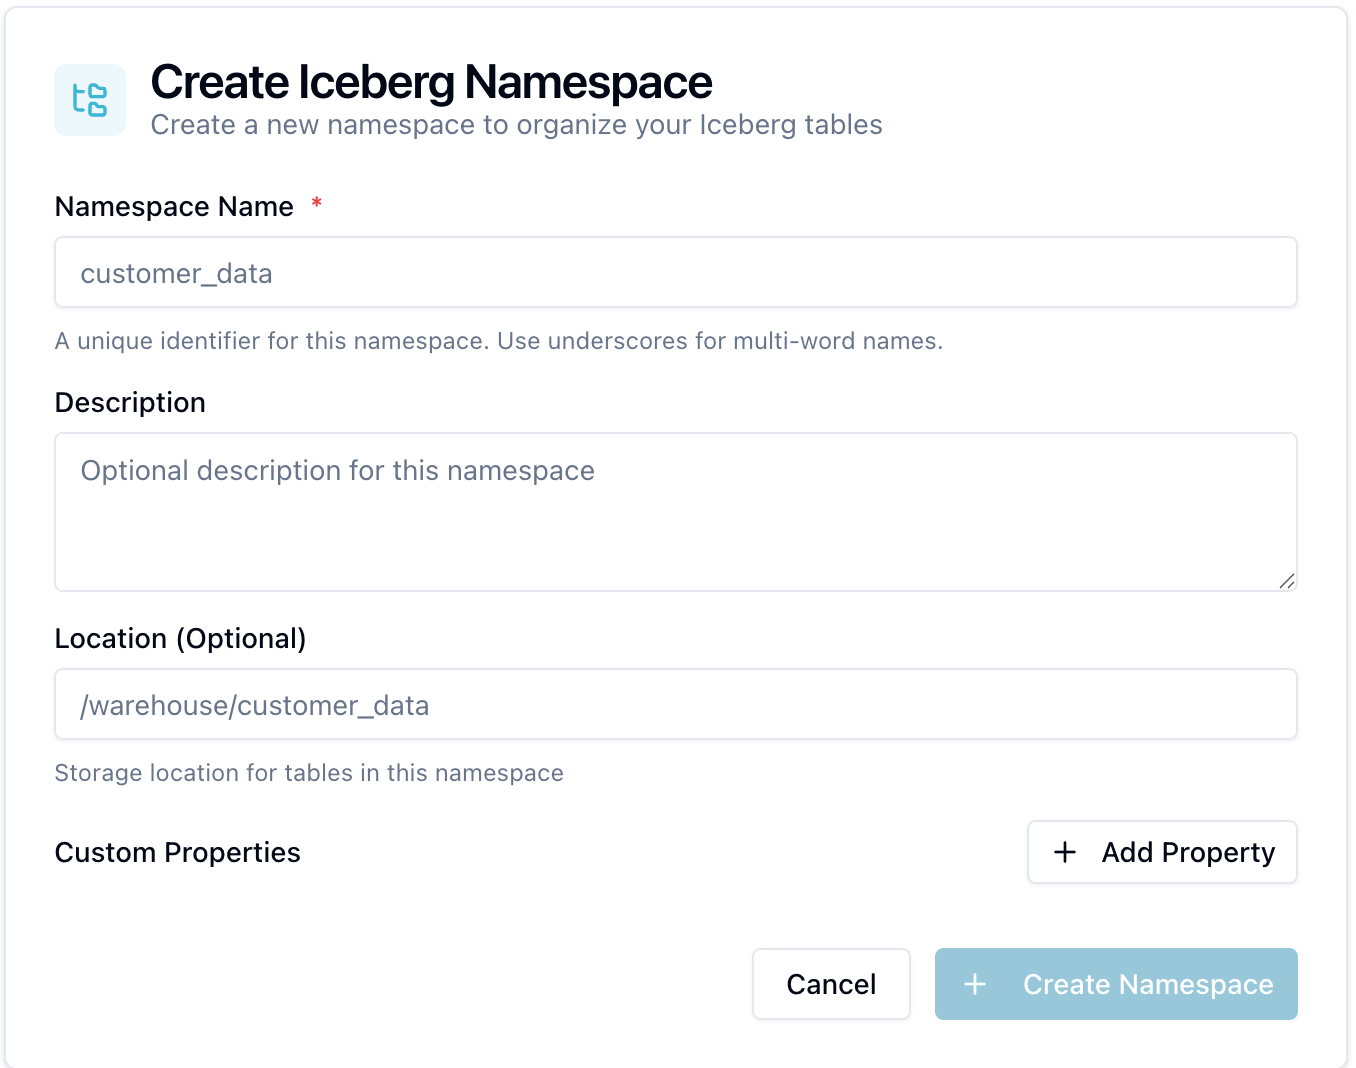
Field | Required | Description |
|---|---|---|
Namespace Name | Yes | A unique identifier for this namespace. Use underscores for multi-word names (e.g. |
Description | No | Optional description of what this namespace contains. |
Location | No | Default storage path for tables in this namespace (e.g. |
Custom Properties | No | Key-value metadata. Click + Add Property to add rows. |
Click + Create Namespace.
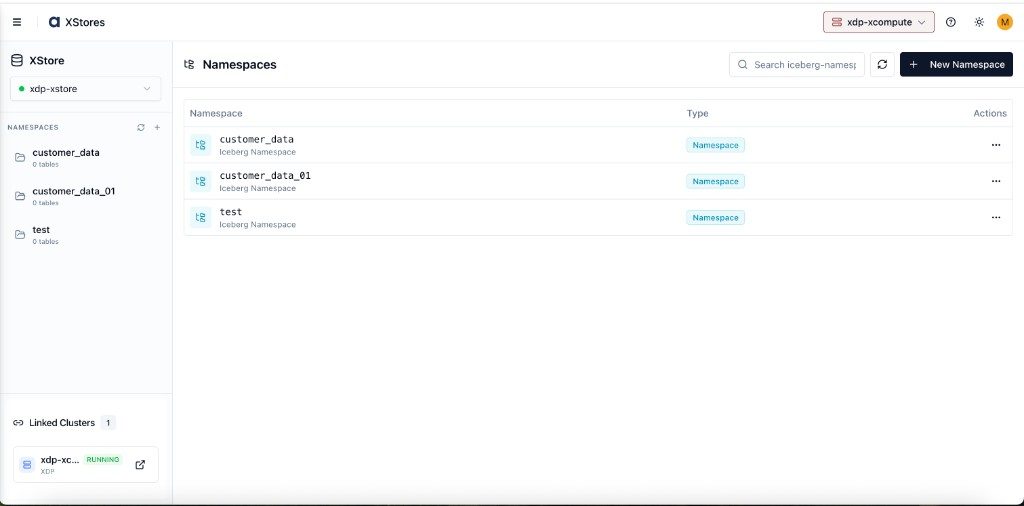
The new namespace appears immediately in the Namespaces list and the left sidebar.
Editing a Namespace
In the Namespaces list, click the ⋯ actions menu on a namespace row.
Select Edit Properties.
Update the description or custom properties. The namespace name cannot be changed after creation.
Click Save.
Deleting a Namespace
Click the ⋯ actions menu on the namespace row.
Select Delete.
Confirm in the dialog. The namespace must be empty — all tables inside it must be deleted first.
Managing Tables
Viewing Tables in a Namespace
Click a namespace name in the list or in the left sidebar. The main panel switches to the Tables view, showing all tables within that namespace.
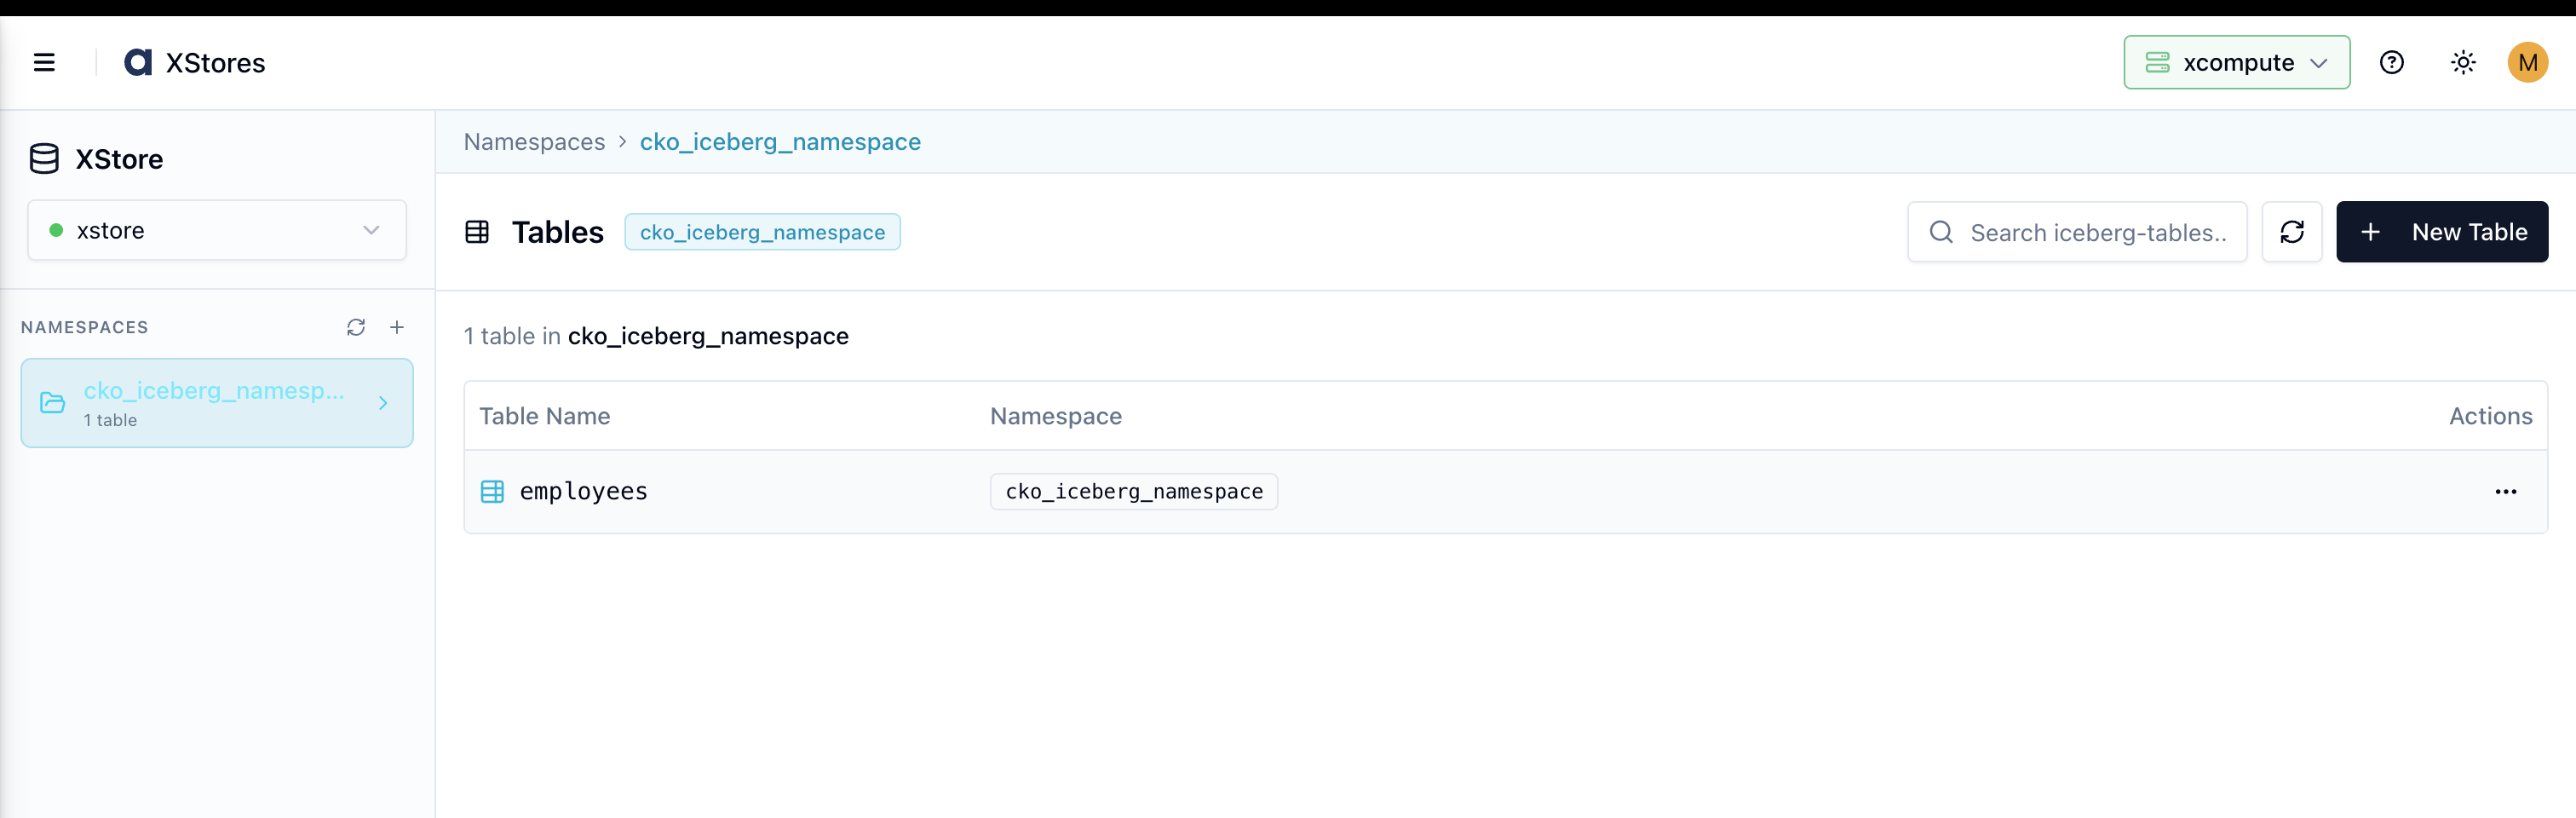
If the namespace has no tables yet, click + Create Table or + New Table to add the first table.
Creating a Table
With a namespace selected, click + New Table.
The Create Iceberg Table form opens:
Fill in the top fields:
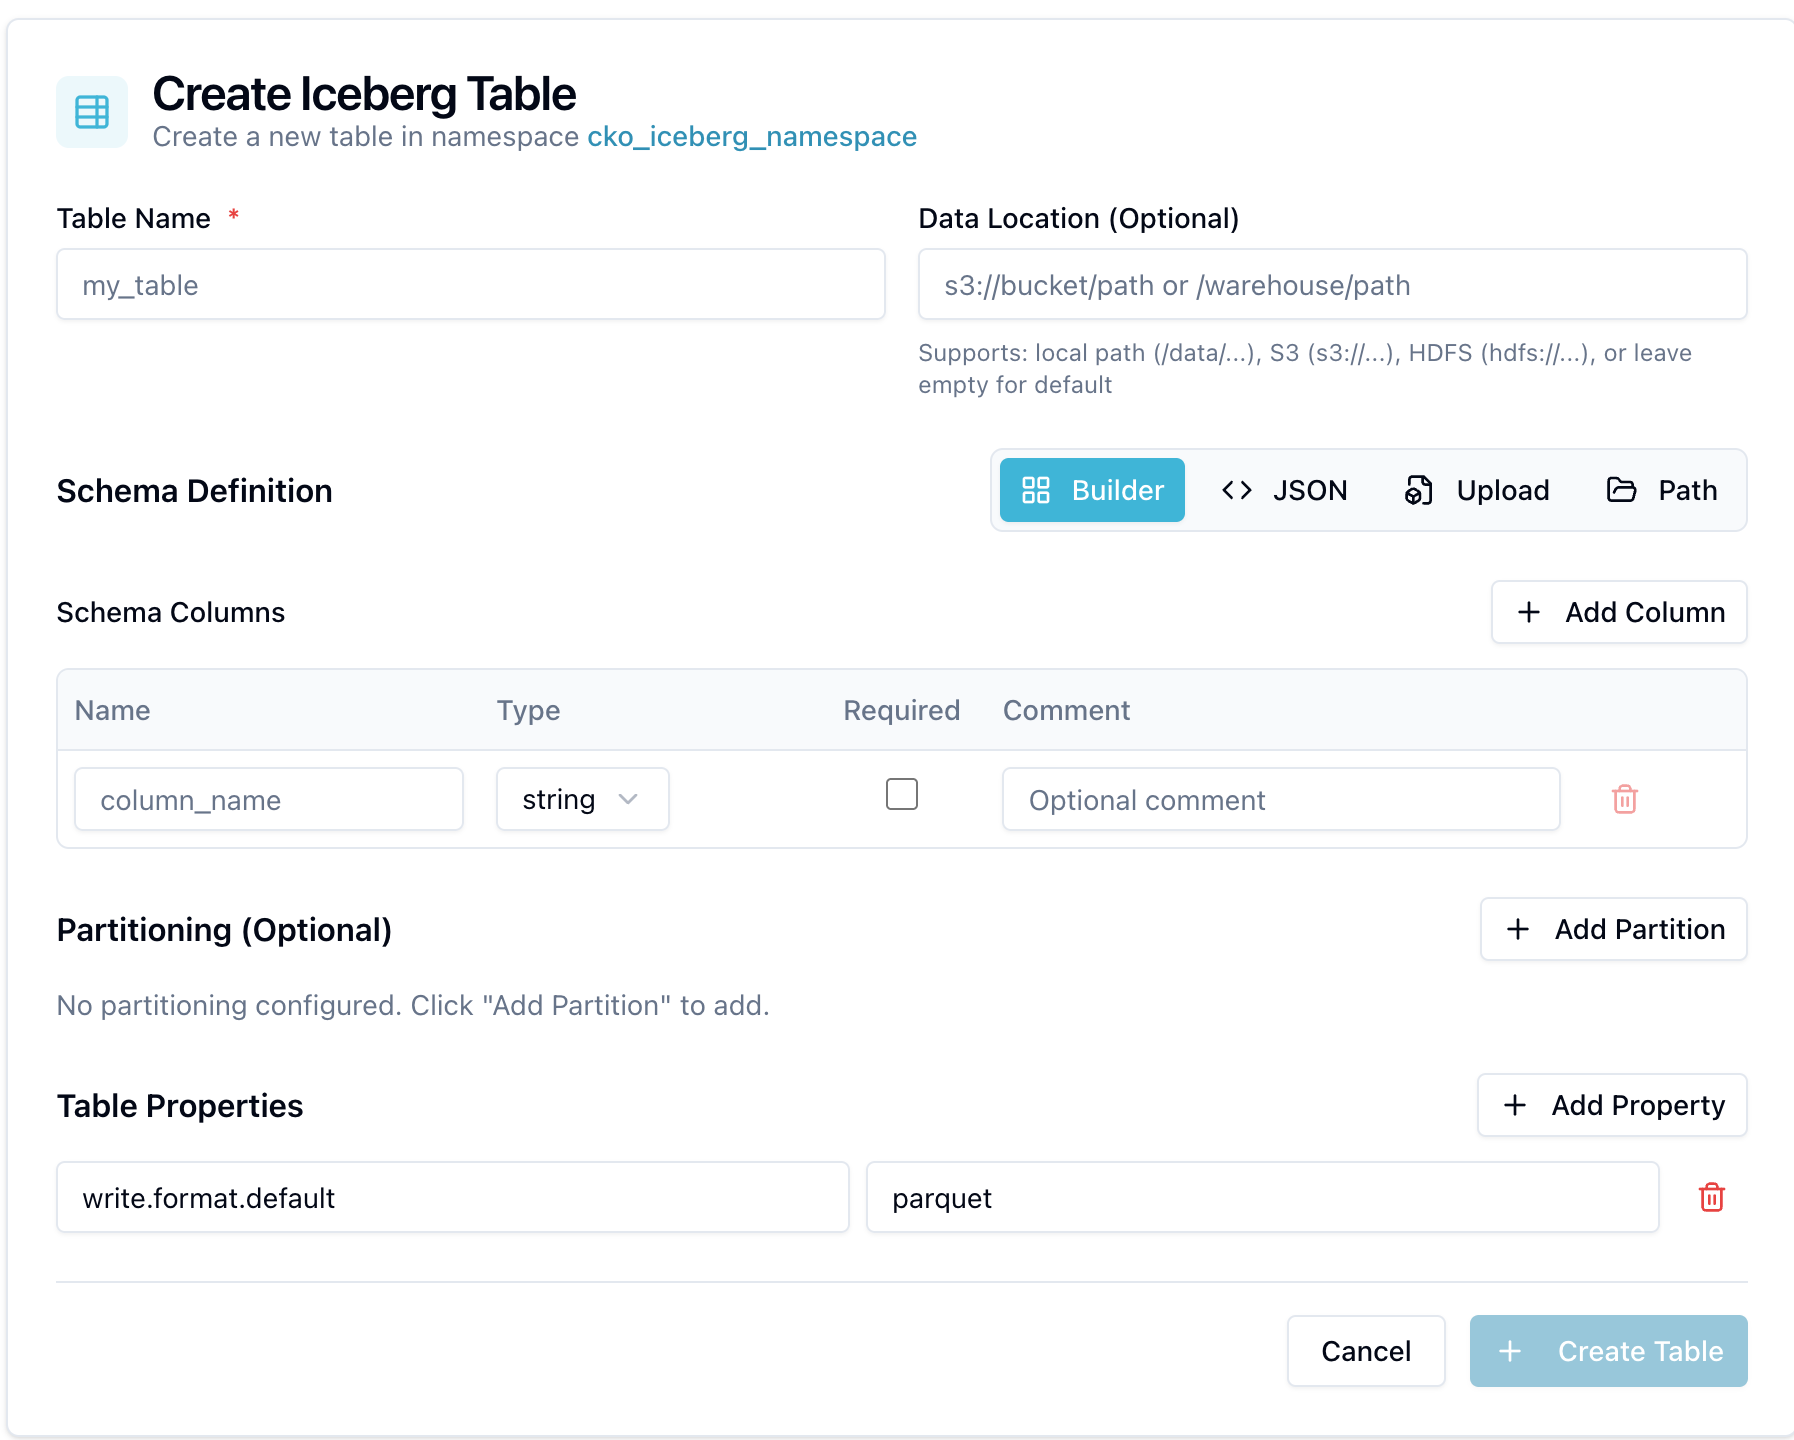
Field | Required | Description |
|---|---|---|
Table Name | Yes | Lowercase name for the table (e.g. |
Data Location | No | Override the storage path for this table's data files (e.g. |
Define the Schema Definition using one of four modes:
Mode | When to use |
|---|---|
Builder | Define columns interactively. Add each column with a name, type, Required toggle, and optional comment. |
JSON | Paste or type a raw Iceberg schema in JSON format. |
Upload | Upload a schema file. A preview of the loaded schema is shown before submitting. |
Path | Provide an existing Iceberg metadata location to register a table that already exists in storage. |
In Builder mode, click + Add Column for each column and specify:
Name — column name
Type — data type (
int,string,long,double,boolean,date,timestamp,decimal,list,map,struct, and more)Required — toggle on to make the column non-nullable
(Builder mode only) Under Partitioning (Optional), click + Add Partition to define how data is partitioned. Select a source column and a transform:
Transform | Description |
|---|---|
| Partition by the exact column value |
| Time-based partitioning from a timestamp or date column |
| Hash the value into N buckets |
| Truncate strings or integers to width W |
Under Table Properties, add key-value pairs to control table behavior. Common properties:
Property | Example Value | Effect |
|---|---|---|
|
| Sets the default file format for writes |
|
| Sets Parquet compression |
|
| Minimum snapshots to keep on expiry |
Click + Create Table.
Best Practices
Define your schema before writing data. Creating the table in xStore Iceberg REST before writing from Spark or Trino ensures the table is registered with the correct metadata and is immediately discoverable by all compute engines.
Use the namespace Location field. Set a storage location on each namespace to keep data organized by namespace under a predictable path in your object store.
Choose Parquet with Snappy or Zstd. Set
write.format.default = parquetandwrite.parquet.compression-codec = snappy(orzstd) for the best balance of read performance and storage efficiency.Partition by time for event data. For event tables, partition by
day(event_timestamp)ormonth(event_timestamp). Iceberg hidden partitioning means your SQL queries never need to filter on the partition column directly.Configure snapshot expiration for high-write tables. Add
history.expire.min-snapshots-to-keepandhistory.expire.max-snapshot-age-msas table properties to prevent unbounded metadata growth.Test schema changes in a dev namespace first. Schema evolution (especially column drops and renames) should be validated in a non-production namespace before applying to production tables.