Microsoft | Azure Blob Storage
Azure Blob (Binary Large Object) Storage is a storage solution available through the Azure Cloud Platform. Azure Blob Storage is a cloud-based object storage service that can store large amounts of unstructured data like text and binary data. In Azure Blob Storage, files, known as blobs, are stored in containers that behave similarly to directories and are linked to a storage account.
Azure Blob Storage Integration with ADOC
ADOC extends its data reliability capabilities to data visualized through Azure Blob Storage. Integrating Azure Blob Storage as a data source into ADOC allows users to monitor and ensure the dependability and integrity of their visualized data, facilitating real-time data processing and analytics.
Steps to Integrate Azure Blob Storage as a Data Source
To add Azure Blob Storage as a data source:
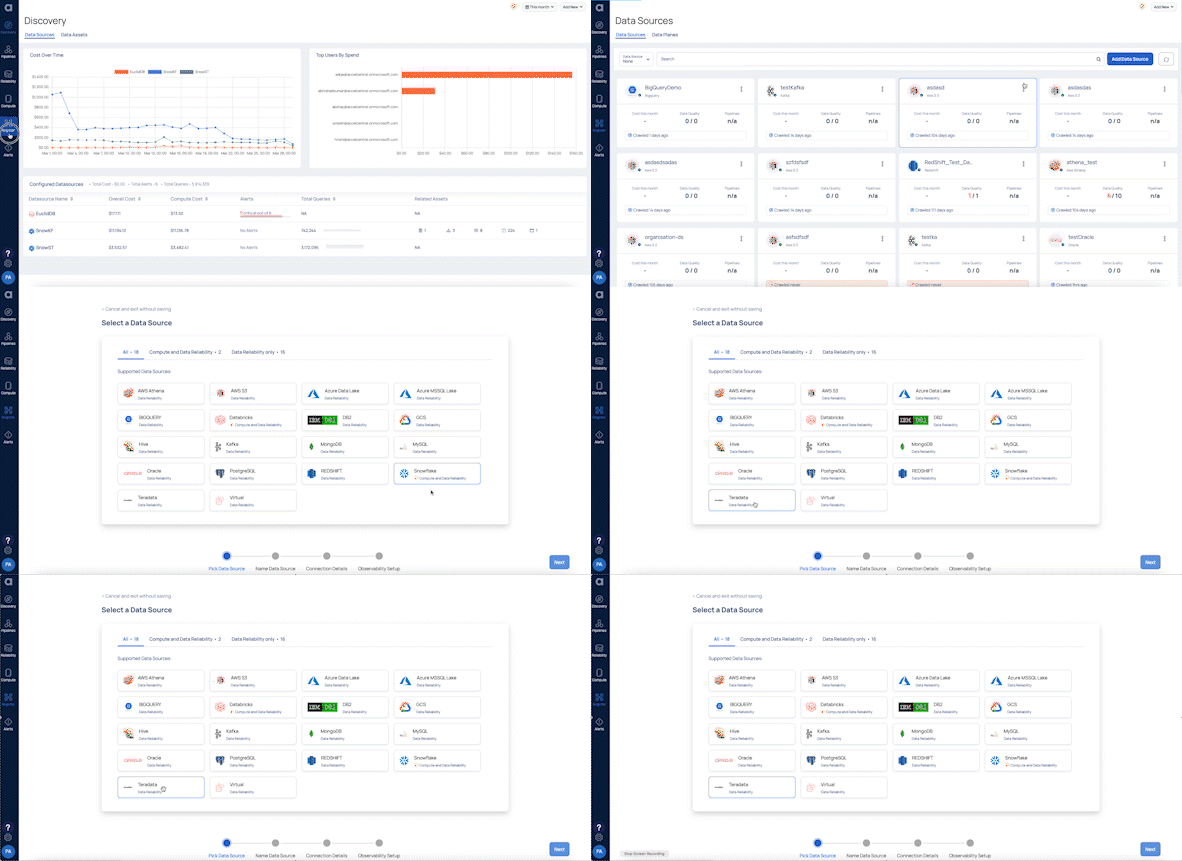
- Click the Register icon from the left pane.
- Click Add Data Source button.
- Select the Azure Blob Storage data source. The Data Source Details page is displayed.

- Enter a name for the data source in the Data Source name field.
- (Optional) Enter a description for the Data Source in the Description field.
- Enable the Data Reliability capability by switching on the toggle switch.
- Select a Data Plane from the Select Data Plane drop-down menu. To create a new Data Plane, click Setup Dataplane.
You must either create a Data Plane or use an existing Data Plane to enable the Data Reliability capability.

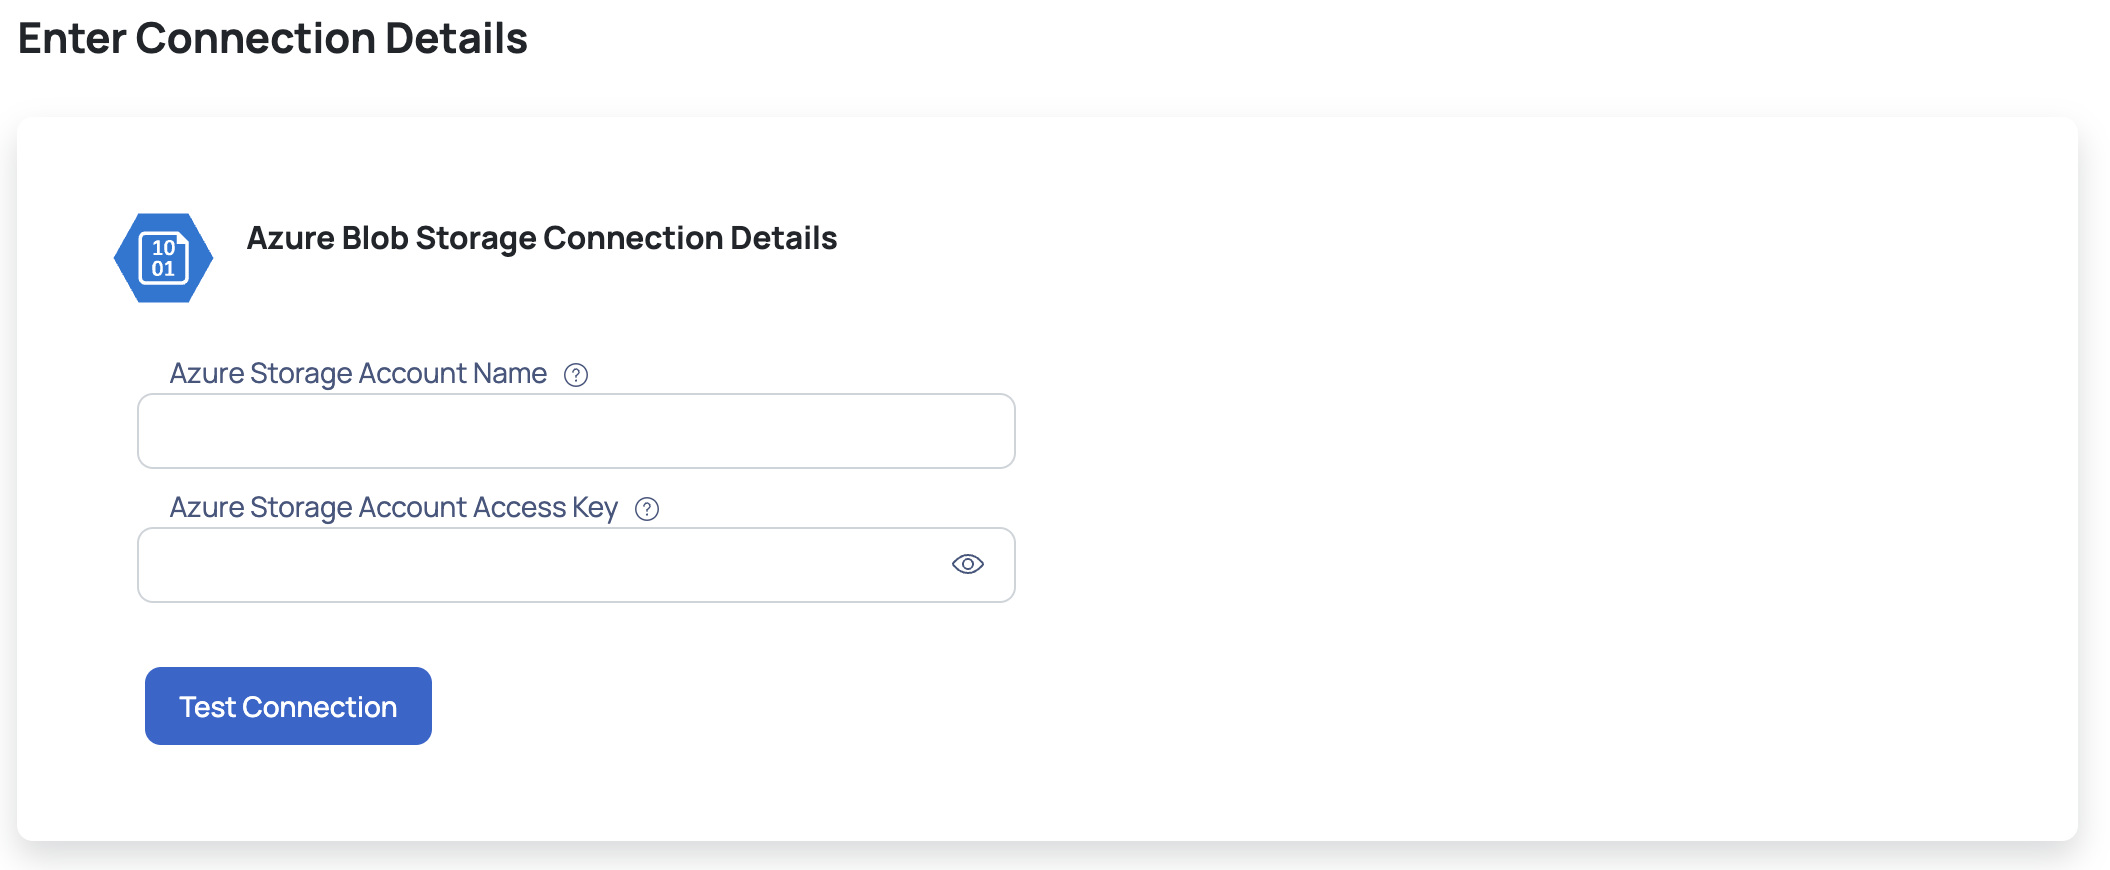
- Click Next. The Enter Connection Details page is displayed.
- Enter the Azure Storage Account Name and Azure Storage Account Access Key to establish a connection.
- Click Test Connection. If your credentials are valid, you receive a Connected message. If you get an error message, validate the credentials you entered.

- Click Next. The Observability Setup page is displayed.
- Enter the Asset Name and Path Expression, then choose one of the following file types: CSV, ORC, PARQUET, or JSON. (Optional) You can choose a file monitoring channel type, and depending on the kind, you will need to enter additional information such as the Azure Storage Queue URL and Azure Storage Queue Access Token.
- Enable the Crawler Execution Schedule: Turn on this toggle switch to select a time tag and time zone to schedule the execution of crawlers for Data Reliability.
- Click Submit.

ADOC V3.1.0's integration with Azure Blob Storage represents a significant advancement in data observability. By leveraging Azure Blob Storages powerful visualization tools within the ADOC platform, businesses can achieve deeper insights, improved data reliability, and more informed decision-making processes.
Configuring Service Principal Authentication for Azure Blob Storage
Step 1: Create a Service Principal in Azure
- Login to the Azure Portal
- Navigate to Microsoft Entra ID: Select Microsoft Entra ID from the portal's left-hand menu.
- Register an application:
- Click App registrations under Manage in the left-hand menu.
- Click New registration.
- Provide a name for the application, such as ADOC-Dataplane-Service Principal.
- Select a supported account type based on your preference.
- Click Register.

- Copy the necessary IDs:
- In the application overview page, copy the Application (client) ID.
- Copy the Directory (tenant) ID.


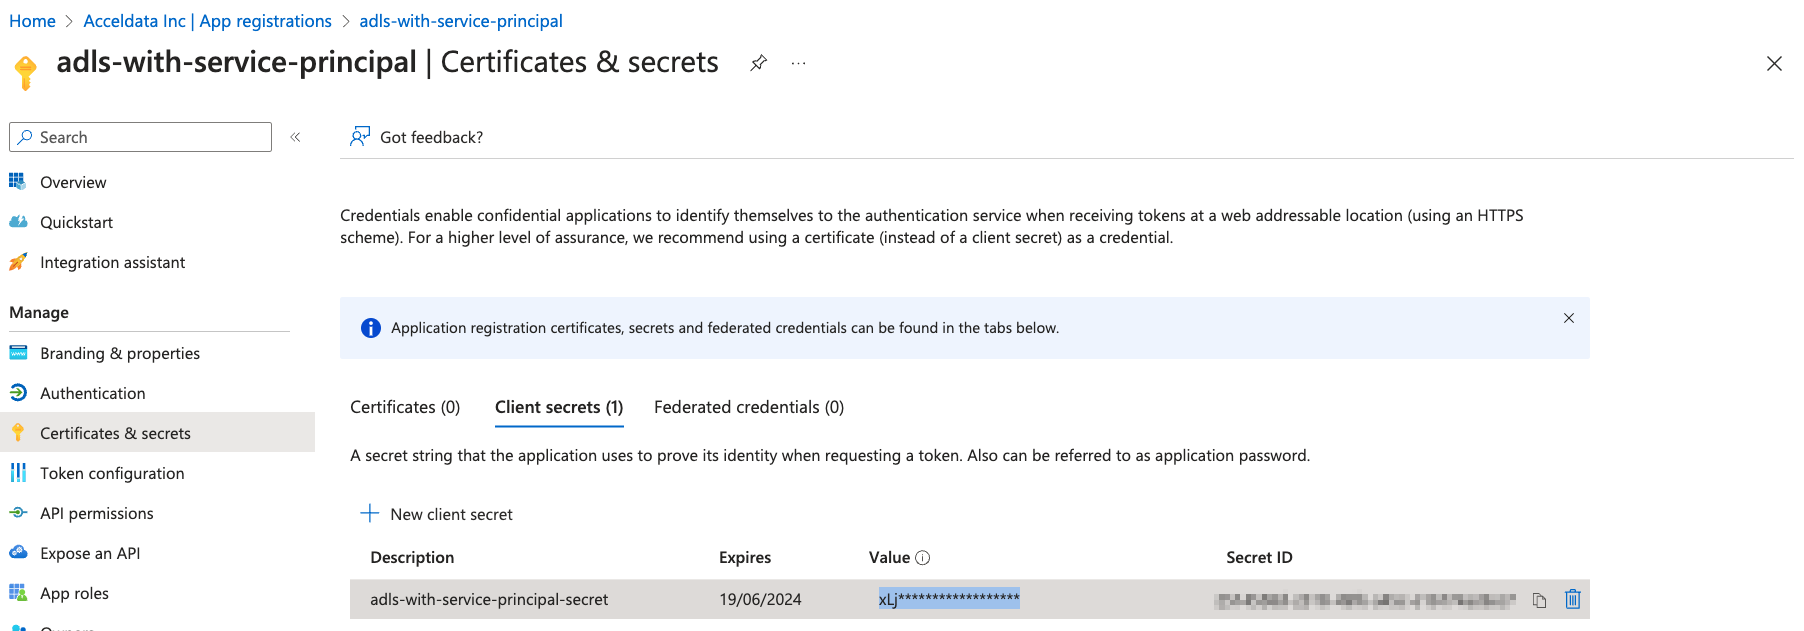
- Create a client secret
- Click Certificates & secrets under Manage.
- Click New client secret.
- Provide a description, such as DataplaneSecret.
- Choose an expiry period for the secret
- Click Add.
- Copy the secret value

Step 2: Assign Permissions to the Service Principal
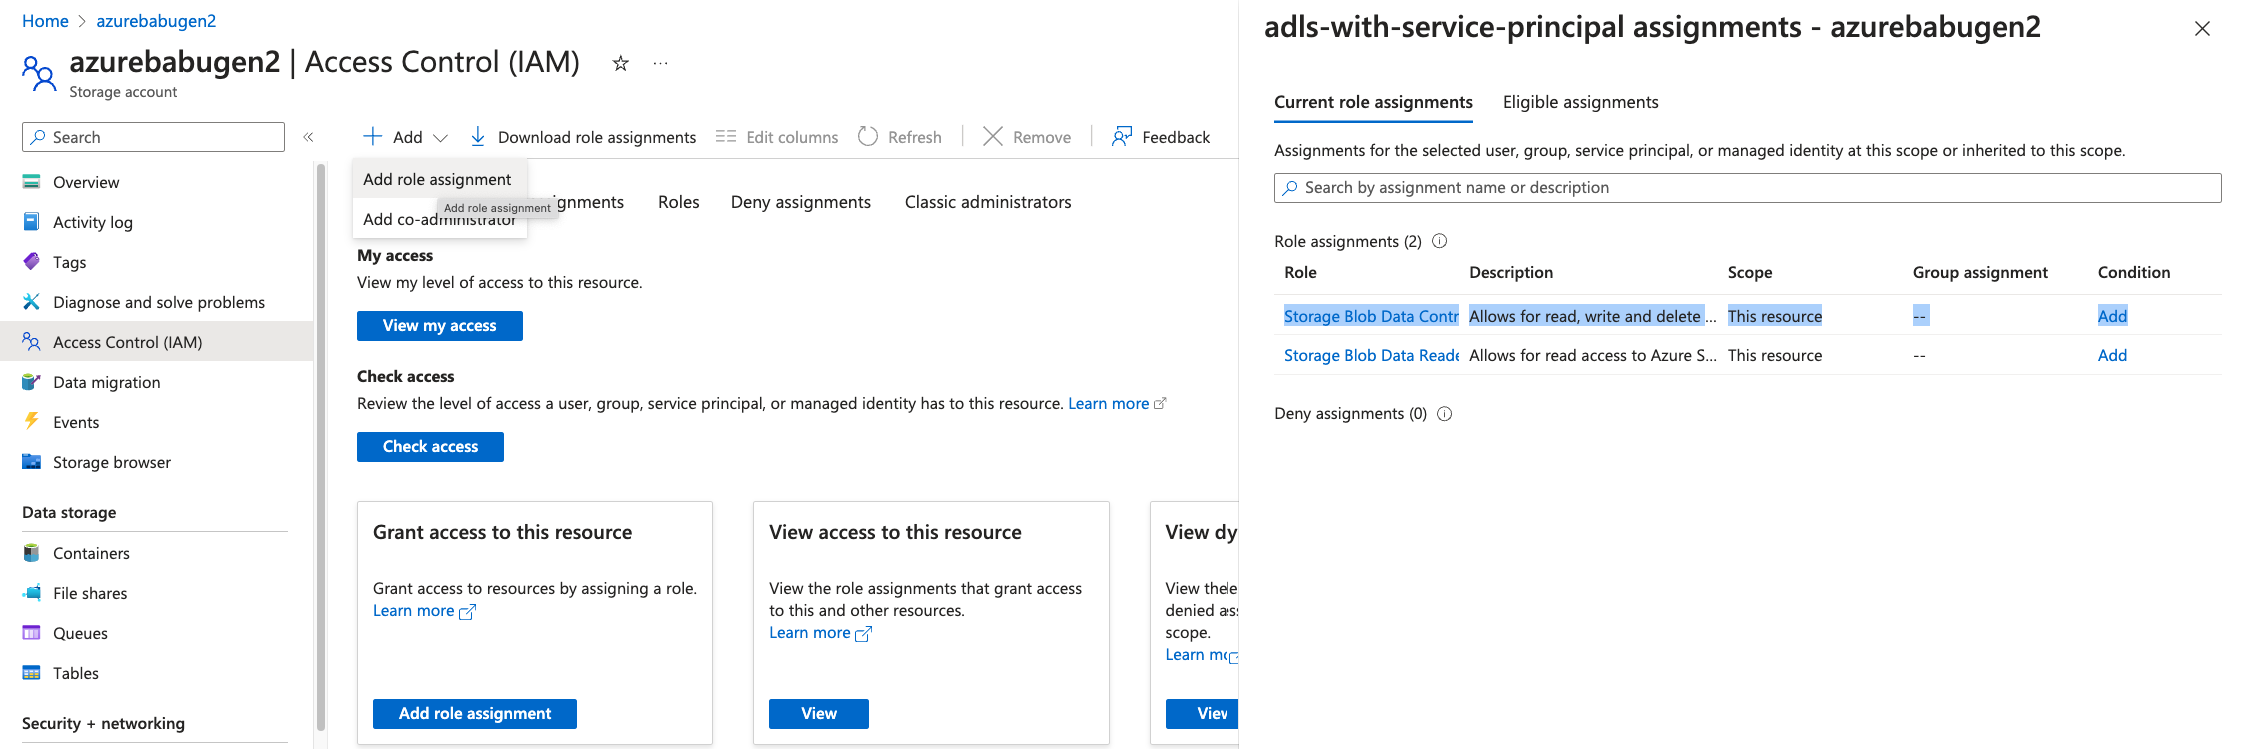
Assign Storage Blob Data Contributor Role:
- Go to the storage account where you want to grant access.
- Click on Access Control (IAM) from the left-hand menu.
- Click Add role assignment.
- Select the Storage Blob Data Contributor role.
- Select User, group, or service principal under Assign access to.
- Type in the name of the service principal (the application you created earlier).
- Click Save.

Step 3: Configure Dataplane Environment Variables
Set environment variables:
- Open the
values.yamlfile for the Dataplane installation. - Set the following environment variables with the appropriate values:
MEASURE_RESULT_FS_ADLS_STORAGE_CLIENT_ID:<CLIENT_ID>MEASURE_RESULT_FS_ADLS_STORAGE_CLIENT_SECRET:<CLIENT_SECRET>MEASURE_RESULT_FS_ADLS_STORAGE_TENANT_ID:<TENANT_ID>
- Open the
Set additional attributes:
- Configure the following attributes at the
ad-analysis-servicesection:MEASURE_RESULT_FS_ADLS_STORAGE_ACCOUNT_NAME:<STORAGE_ACCOUNT_NAME>MEASURE_RESULT_FS_ADLS_STORAGE_CONTAINER_NAME:<CONTAINER_NAME>MEASURE_RESULT_FS_ADLS_GENERATION:<GENERATION_NUMBER>
- Configure the following attributes at the
Step 4: Install or Reconfigure the Dataplane
Follow the standard procedures to either install the Dataplane for the first time or reconfigure it using the modified values.yaml file.
Step 5: Test the Configuration
After configuring the environment variables, it's important to test the connection. Use the ADOC platform to test if the storage account and service principal are functioning as expected.