Actions Service
Pulse provides the capability to create actions to automate tasks such as getting the top 10 HDFS directories, making an API request, performing operations such as Kerberos kinit and kdestroy, facilitating log rotation, executing commands, performing HDFS non-admin operations, copying files and directories, and executing the script.
Ensure that you have the Logsearch component already deployed. In case Logsearch is deployed on a standalone node:
- Run the command:
accelo admin makeconfig ad-axnserver. - Update the value of the environment variable
ELASTIC_URIreplacingad-elasticwith the hostname of the node where Logsearch has been deployed.
Deploy Actions Service
To deploy Actions Service, perform the following:
- Run
accelo deploy addons. - Select Actions Service from the list of components displayed. Use arrows to move and space to select.

- Run
accelo deploy hydrato deploy the agents on the cluster nodes.
- Create an ad-core.yml file if it is not already present in $AcceloHome/config/docker by running the
accelo admin makeconfig ad-corecommand. - Open the file, navigate to the Feature_Flags section, and add
'noSSHActions':true

- Restart the ad-graphql container using the
accelo restart ad-graphqlcommand once changes are made.
Once the deployment is done, you can log in to the Pulse UI and navigate to the left Menu > Actions. On the Actions page, click Create Action. On the Actions page, the following capabilities are listed. You can configure the details as needed and create an Action to automate tasks.
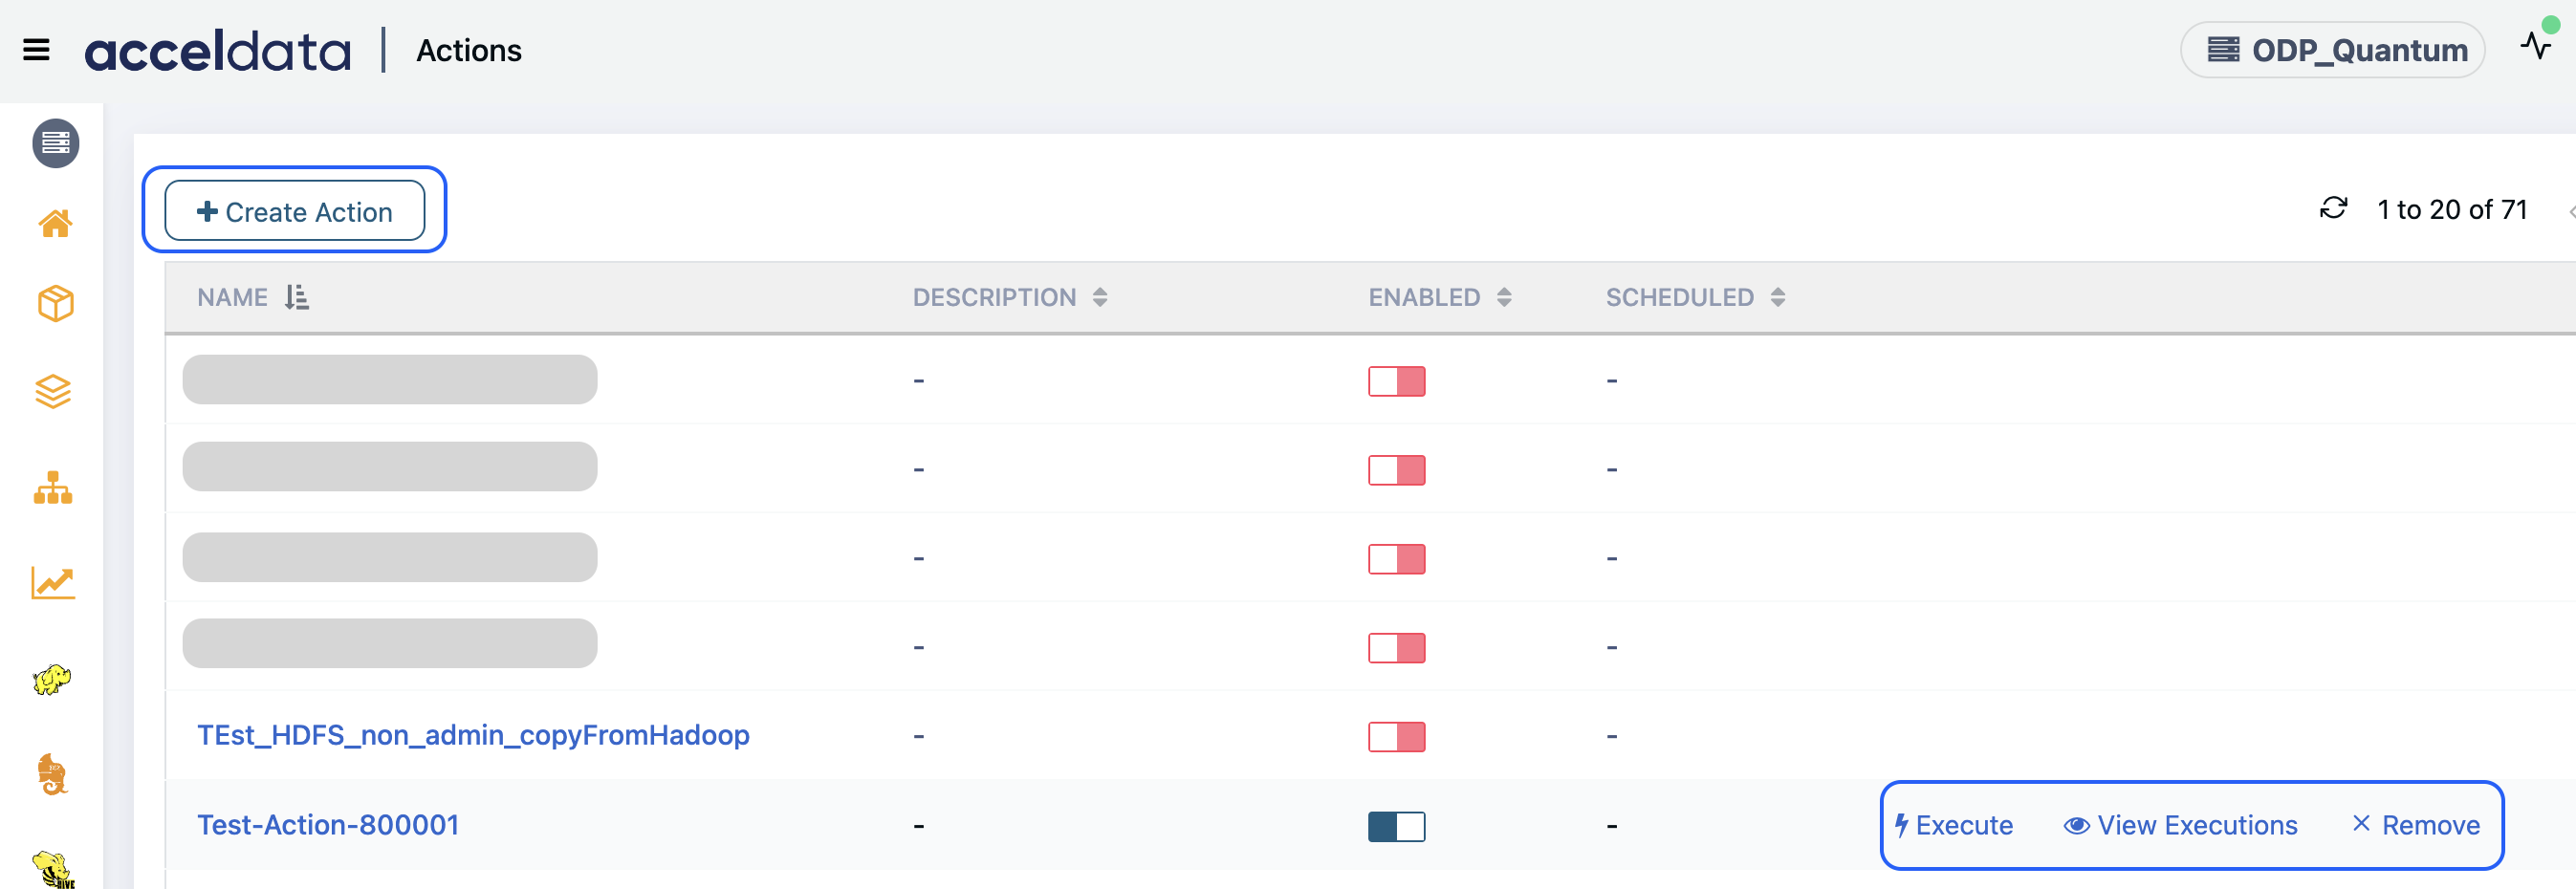
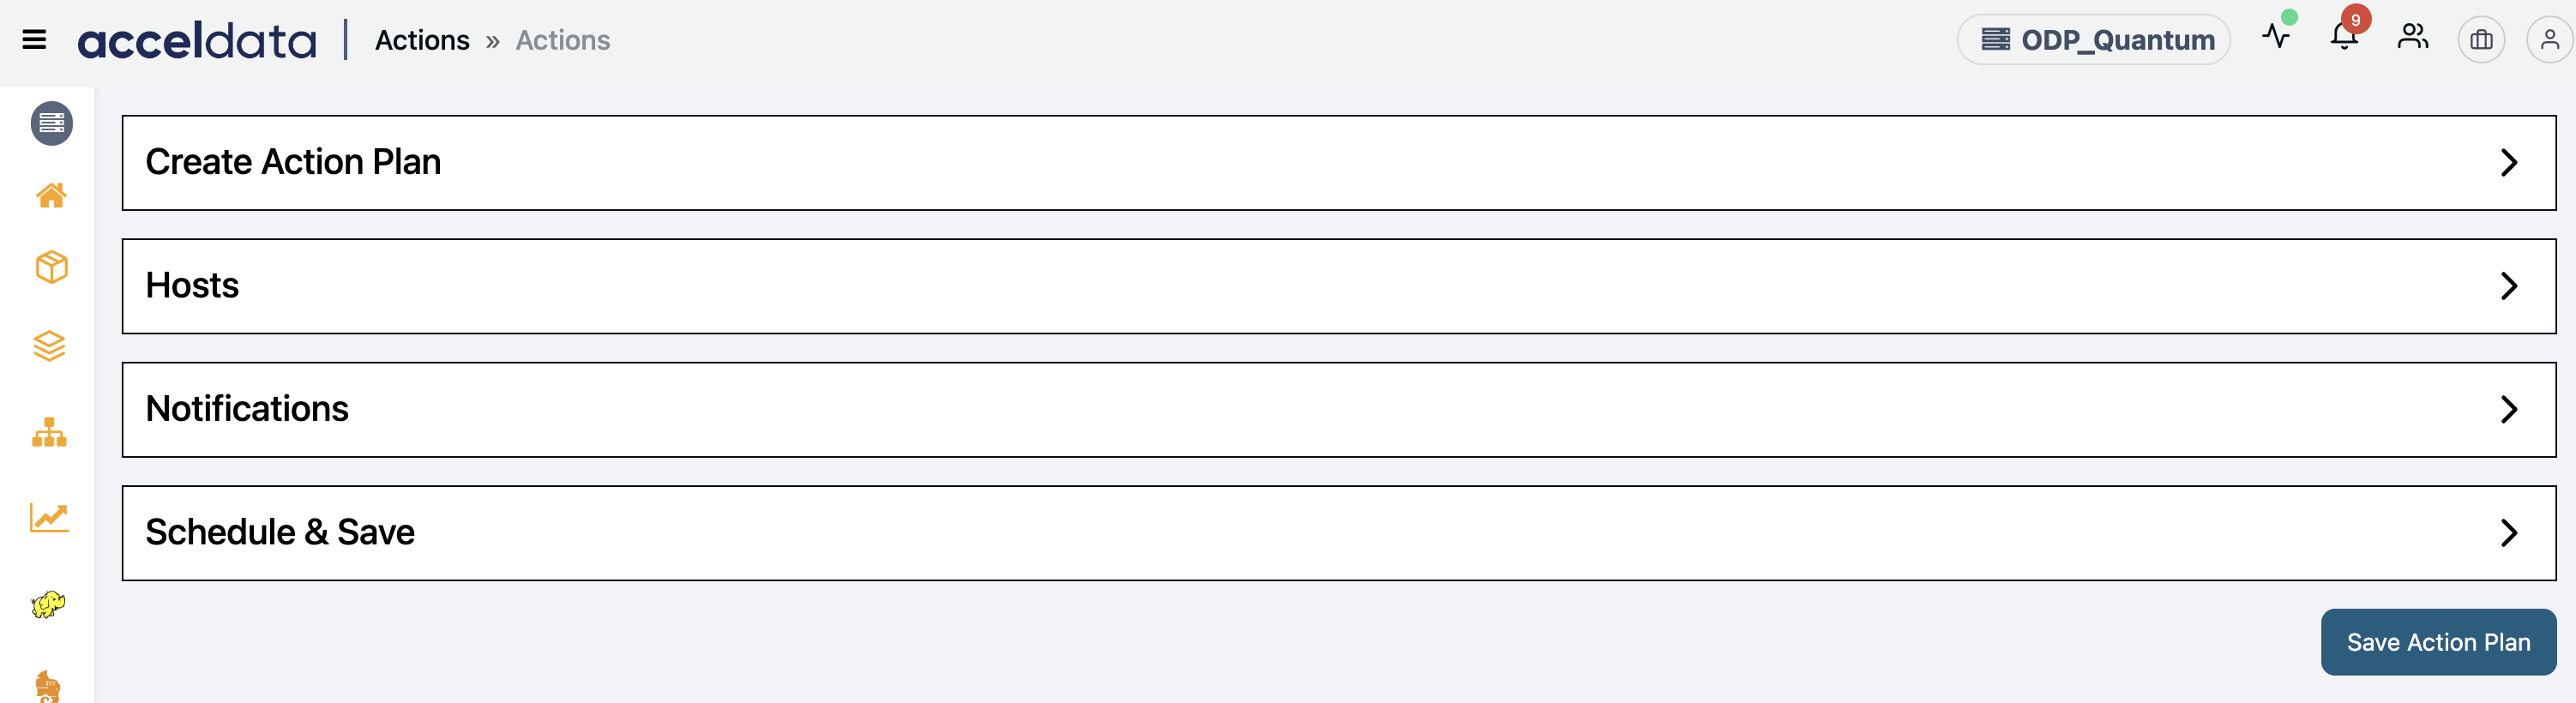
The Actions page provides the following options:
- Name: Displays the name of the action plan created.
- Description: Displays the description of the action plan.
- Enabled: Displays whether the action plan is enabled to execute.
- Scheduled: Displays whether the action plan is scheduled or not.
You can hover over any of the Action plan names and perform the following:
Enable: Enables the action plan to schedule or execute it.
Execute: Executes the action plan.
View Executions: Displays the list of executions. On this page, you can see the below details:
- Name: Displays the name of the action plan executed.
- Scheduled: Shows whether the action is scheduled or not.
- Status: Displays the status, such as Running or Completion of the action plan execution.
- Start Time: Displays the execution start time.
- End Time: Displays the execution end time.
Remove: Removes the action plan from the list.
To be able to view the above Actions on the Pulse UI, you must deploy the Actions Service add-on. For more information on deploying add-ons, see accelo deploy addons.
Create an Action Plan
To create an action, perform the following:
- Navigate to the left menu and click Actions. The actions window is displayed.
- Click the Create Action button and select one of the following runbooks to create an action:
You can create an action plan with a single or multiple action runbooks to automate tasks.

Steps:
You can create an action plan to automate tasks with a single action runbook available on the Create Action Plan page.
- Log in to the Pulse UI and navigate to the left Menu > Actions.
- On the Actions page, select Create Action. The list of action runbooks is displayed.
- On the Action Runbooks page, drag an action runbook and drop it in the Action Workflow box, set configuration, and click Submit.
You can create an action plan with one or more action runbooks.
For details about configuring the action runbooks, see Set Configuration for Action Runbooks.
An Action plan is created and listed on the Actions page successfully.
Set Configuration for Action Runbooks
To create an action plan, drag and drop an action runbook to the Action Workflow box to configure the details of each runbook.
Perform HDFS Non-Admin Operations
The HDFS NON-ADMIN OPERATIONS action lets you perform the most common HDFS operations:
- Copying files or directories from a local source to a destination in HDFS or vice-versa
- Moving files or directories from a local source to a destination in HDFS or vice-versa
- Copying files or directories within HDFS, i.e where the source and destination are both on HDFS
- Moving files or directories within HDFS, i.e. where the source and destination are both on HDFS.
This configuration allows non-admin users to perform specific HDFS operations (like copying or moving files) while using Kerberos for secure authentication.
Configure the action runbook details as below:
- Is Cluster Kerberized?: Enable this option if the cluster is Kerberized.
- krb5.conf File Path: Enter the
Krb5.conffile path. - Name Node Address: Enter the NameNode address. Refer to the value of
dfs.namenode.rpc-address/dfs_namenode_servicerpc_addressto ensure the address to be entered. - Destination File/Directory: Enter the path to the destination file or directory in HDFS where you want to copy or move the file.
- HDFS Operation Type: Enter the HDFS operation type from the drop-down list.
- Source File/Directory: Enter the path to the source file or directory, either from the local system or HDFS, depending on the operation type.
- Kerberos Principal: Enter the Kerberos principal for authentication.
- Kerberos Realm: Enter the Kerberos realm, which defines the administrative domain for Kerberos.
- Service Principal Name: The name of the service principal for the HDFS NameNode. This is required if the cluster is Kerberized. For example,
hdfs/node_hostnameon CDP andhdfs/node_hostnameon HDP.
HDFS Top 10 Directories
The HDFS top 10 Directories action runbook enables you to get the top 10 HDFS directories in your ecosystem.
Configure the action runbook details as below:
- Is Cluster Kerberized?: Enable this option if the cluster is Kerberized.
- Krb5.conf File Path: Enter the
Krb5.conffile path. - Name Node Address: Enter the NameNode address. Refer to the value of
dfs.namenode.rpc-address/dfs_namenode_servicerpc_addressto ensure the address to be entered. - Kerberos Principal: If Kerberos is enabled, enter the Kerberos principal in the format for secure authentication. If Kerberos is disabled, the value of this field must be simply the HDFS username.
- Kerberos Realm: Enter the name of the Kerberos realm your system will authenticate against.
- Service Principal Name: Enter the service principal name.
Kerberos
The Kerberos action lets you perform the most common Kerberos operations, you can use it to do kinit, kdestroy, etc., before and after performing actions in a Kerberized environment.
Configure the action runbook details as below:
- Keytab: Enter the Keytab file path.
- krb5.conf File Path: Enter the
Krb5.conffile path. - Logout (Delete Ticket): Toggle this setting based on whether you want the Kerberos ticket to be deleted after logout. Set to ON to delete the ticket or OFF to retain it.
- Output: Toggle this based on whether you want the Kerberos authentication process to display output logs. ON for logging or OFF for no logs.
- Kerberos Principal: Enter the Kerberos Principal used for
kinit.
Log Rotation
The Log Rotation action is a plugin for Hadoop services that facilitates log rotation. This action allows you to specify custom log patterns, log directory paths, and retention policies for their Hadoop service logs.
Configure the action runbook details as below:
- Custom Log Pattern: Enter the custom log patterns for the service logs, separated by commas. If not specified, the default log pattern for the service will be used.
- Log Directory Path: __The path of the log directory where the service logs are being stored, if not specified, the default log directory will be used for that service, which is
/var/log/hadoop. - Output: Click the checkbox if you want the log rotation output to be sent to the logs.
- Retention Days: Enter the number of days’ worth of logs to retain. If not specified, the default retention period of 30 days will be used.
- Service Name: Enter the name of the Hadoop service for which you want to rotate logs.
- Timeout (in seconds): Specify the timeout duration in seconds for the log rotation to complete.
Make API Request
The Make API Request action allows you to execute REST API calls with ease directly from our platform. By providing configurable parameters such as method, URL, and host tags, you can tailor your requests to fetch specific data. Optionally, you can log the API call output for further analysis.
Configure the action runbook details as below:
- Timeout (in seconds): Specify the timeout duration for the API request in seconds.
- Headers: Enter headers for the API call and specify it as a string. Each header must be separated and prefixed with -H. For example, -H "Content-Type: application/json" -H "Host: VM001".
- Skip SSL Certificate Verification: If you set it to
true, the API call ignores the SSL certificate verification. - Is Kerberized: Set this to
trueIf the API call needs Kerberos authentication. - krb5.conf File Path: Enter the path to the
krb5.conffile for Kerberos authentication. - Method: Enter the HTTP method (GET, POST, PUT, DELETE, etc.) for the API request.
- Output: Check this box to log the output of the API call to the platform's logs.
- Password For Basic Authentication: Provide the password for basic authentication if it applies to the API call.
- URL: Enter the endpoint URL of the REST API to be called in the format (http|https)://host.domain[]/path.
- Username For Basic Authentication: Enter the Username for basic authentication if it applies to the API call.
Copy Item
The Copy Item runbook in our product enables you to copy files and directories, functioning similarly to the cp command. You can specify various parameters such as the source and destination paths, whether to overwrite existing files and ownership details.
Configure the action runbook details as below:
- Destination File/Directory: Enter the path where the file or directory will be copied to. The destination can be a directory or a file.
- Force Copy: Indicate whether the copy should be overwritten if the destination file already exists.
- Group: Specify the group for the copied item.
- Owner: Specify the owner of the copied item.
- Permission: Enter the permissions for the copied item (e.g., 644).
- Source File/Directory: Enter the path from where the file or directory will be copied. The source can be a directory or file.
Execute Command
The Execute Command action is a test plugin for Axn that allows you to run shell commands on specified hosts. You can specify the command to be executed and choose to log the output.
Configure the action runbook details as below:
- Specify Command Parameters:
- Command: Enter the shell command to be executed (default is ls -al).
- Output: Check this box if you want the output of the provided command to be written to the logs.
Run Script
The Run Script action allows you to execute a script on specified hosts and optionally return the output. You can choose the script to run and decide whether to wait for the script to finish execution.
Important: The maximum script file size supported is 8 MB.
Configure the action runbook details as below:
- Specify Script Parameters:
- Output: Check this box if you want the output of the provided script to be written to the logs.
- Script File: Choose the file or enter the script to run.
- Wait to Finish: Check this box if you want to wait for the script to finish running before proceeding.
Configure Hosts
On the Actions > Hosts page, configure the details as below.
- Hosts to configure: Add comma-separated host tags such as All, Ambari Agents, Ambari Server, Kafka, etc., to specify where the action needs to be executed.
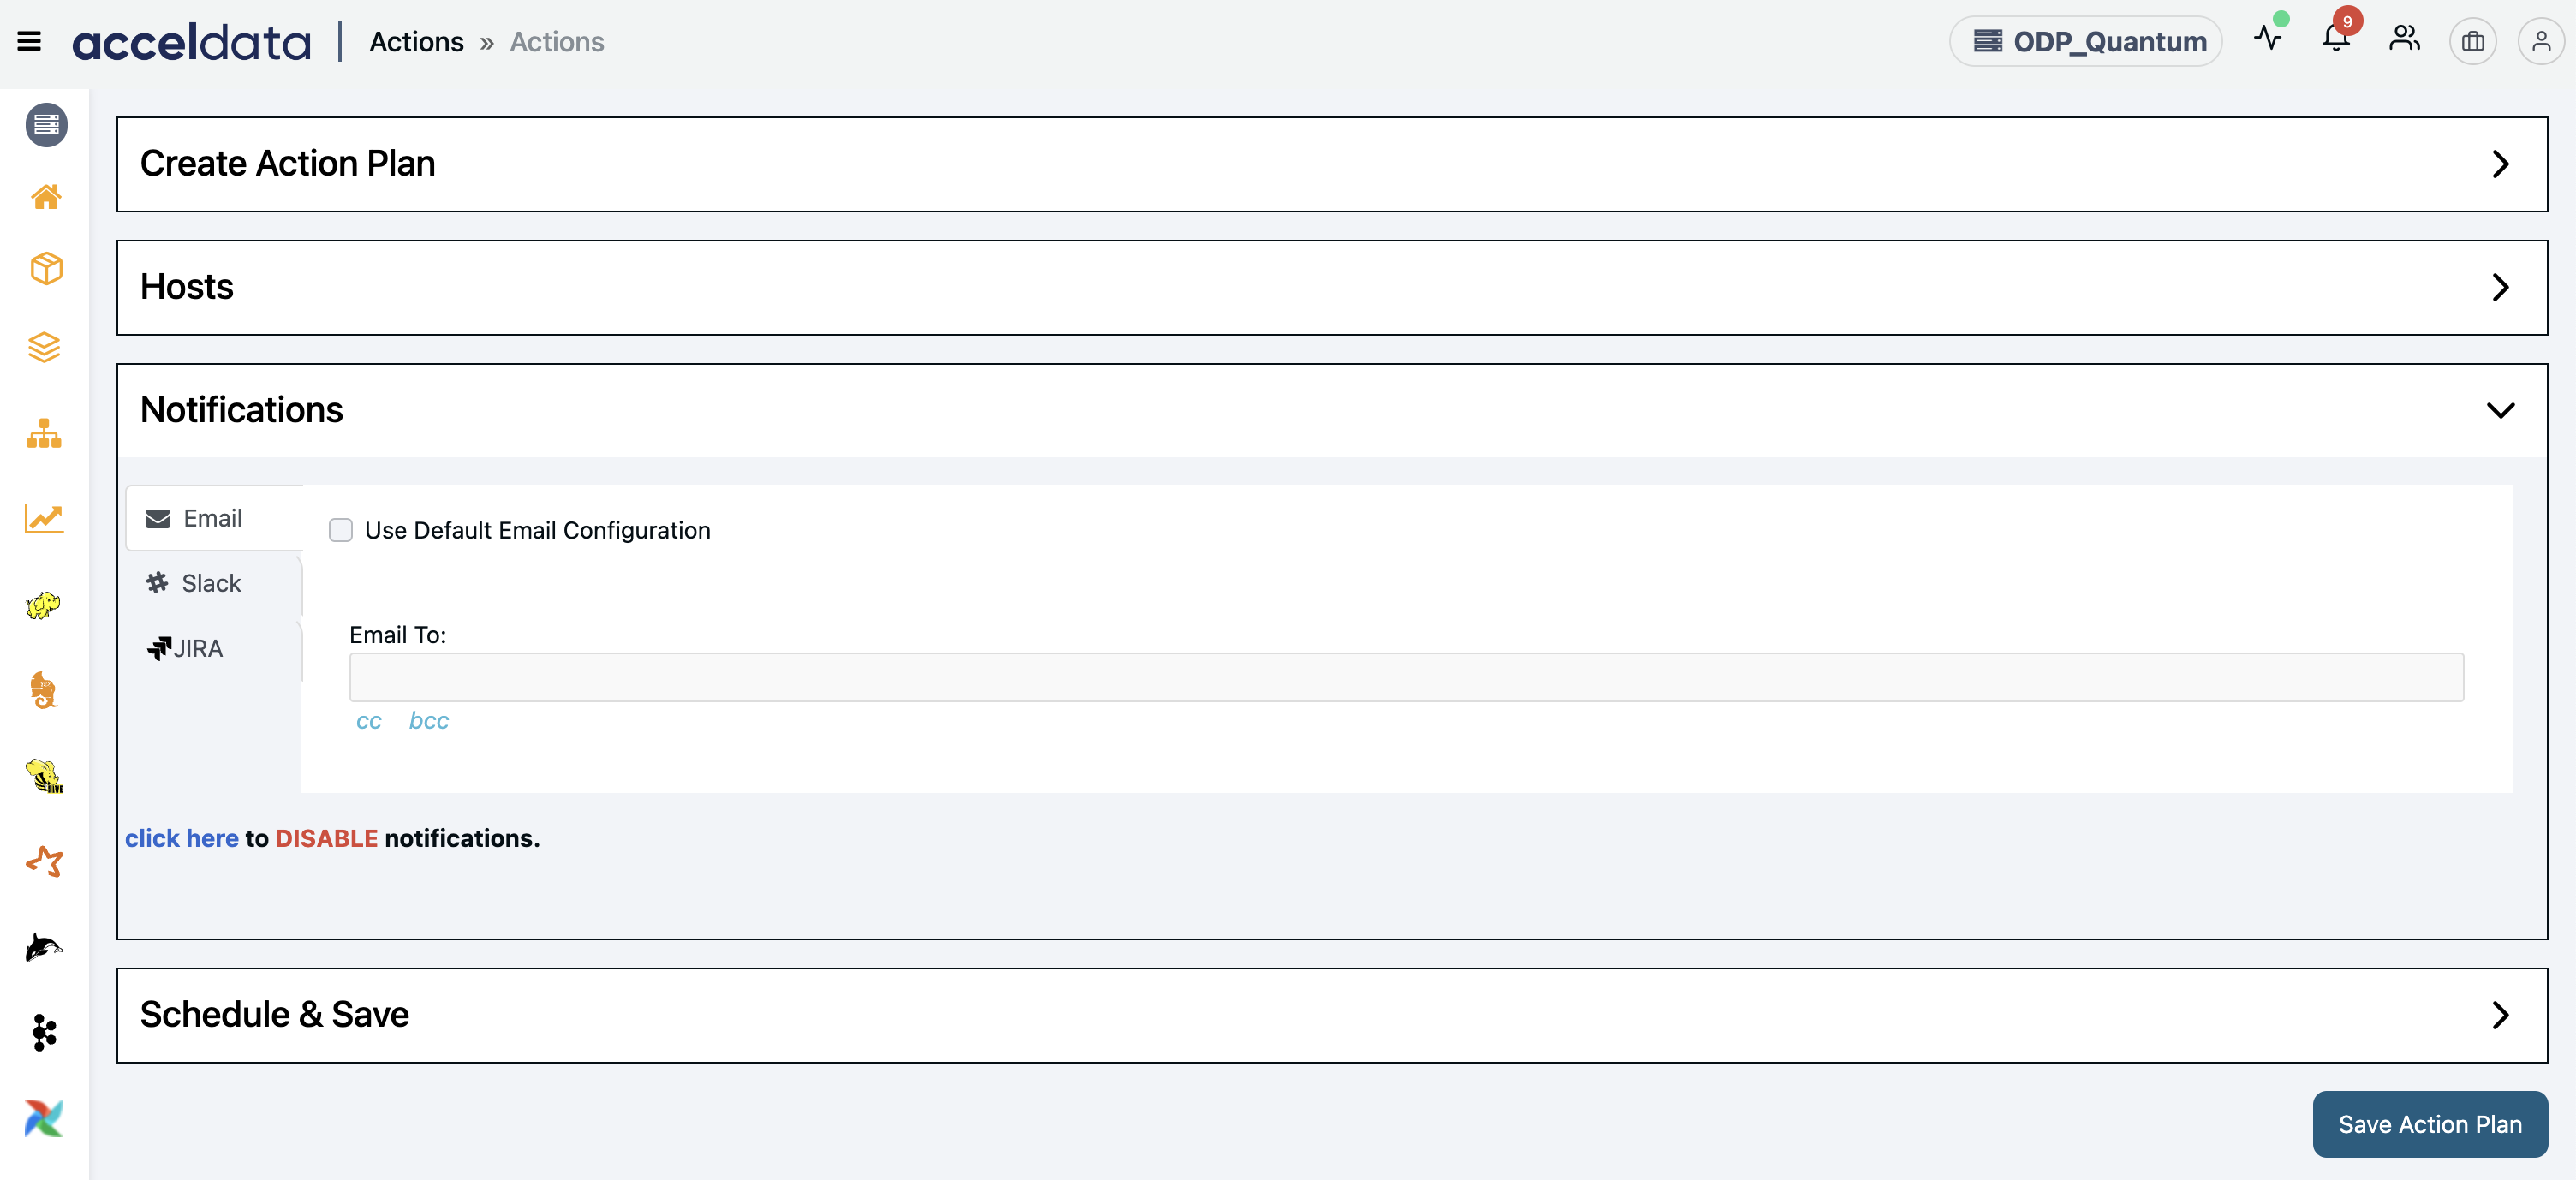
Configure Notifications
On the Actions > Notifications page, you can configure one of the following channels to send Notifications.
- Enable the Use Default Email Configuration option to use the default email configuration to send notifications.
- Type an Email address(es) in the Email To box.
- (Optional) You can CC and BCC the notifications to others as well.
Slack
- Enable the Use Default Slack Configuration option to use the default Slack configuration to send notifications.
- Enter the Slack Webhook URL to get notifications on a Slack channel. You can specify multiple Slack Webhook URLs for different groups or channels by adding commas to separate them.
JIRA
- Enable the Use Default Slack Configuration option to use the default JIRA configuration to send notifications.
- Project Key: Enter the project key in which you want to create the JIRA.
- Issue Type: Enter the issue type for the JIRA.
- Labels: Enter labels for the JIRA.
- Priority: Enter a priority for the JIRA.
When configuring the default notifications for JIRA, you need to mention the REST API JIRA URL.
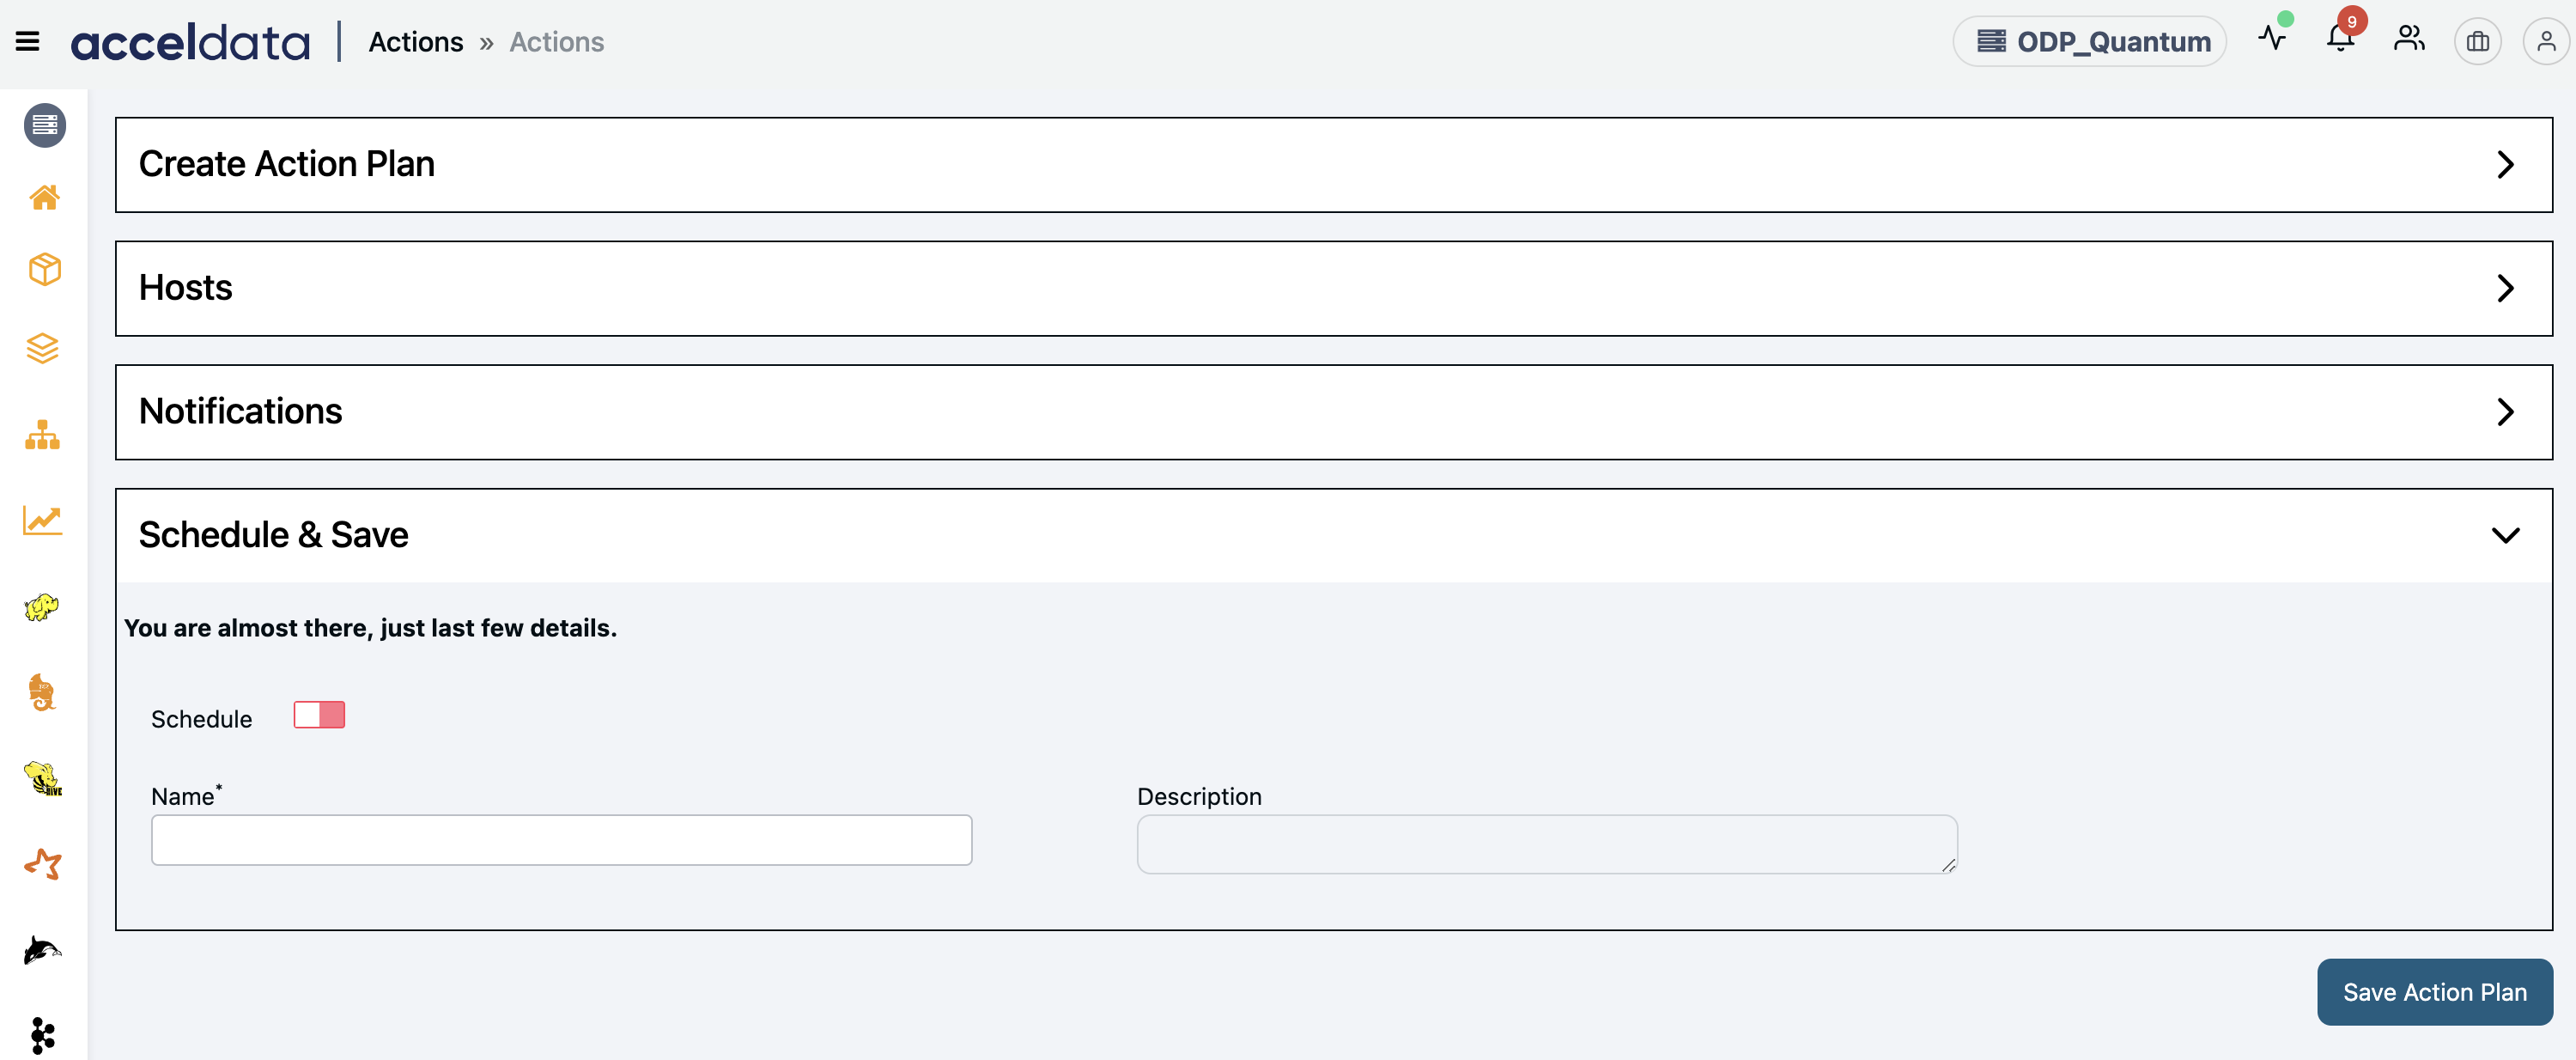
Schedule and Save an Action Plan
The Action Service supports the ability to schedule and execute action plans.
- Schedule: Enable this option to schedule an action plan. Once enabled, you can either manually enter a Cron Expression or use the Cron Generator to create one by specifying minutes, hours, days, and other parameters.
- Name: Enter the action plan name.
- Description: Enter the description of the action plan.
- Save Action Plan: Click Save Action Plan to save the action plan on the Actions page.